Cannabis: The Art Of Growing Organically
In recent history, and in several places around the world, cannabis has been a misrepresented and misunderstood plant. While news reports and stereotypes may have influenced its acceptability for a long time, its medicinal qualities have finally helped it gain the recognition it deserves.
 Cannabis has proven to be a highly effective treatment for a variety of serious illnesses
For those that know and love it, cannabis is treasured for its unmatched ability to provide relief from many illnesses and improve daily life. It's unique in the fact that it can be grown at home by anybody willing to put in the time and effort to learn. Before you grow your first plant, there are a few important factors to understand in order to make the process easier and increase your likelihood of success.
They include:
Cannabis has proven to be a highly effective treatment for a variety of serious illnesses
For those that know and love it, cannabis is treasured for its unmatched ability to provide relief from many illnesses and improve daily life. It's unique in the fact that it can be grown at home by anybody willing to put in the time and effort to learn. Before you grow your first plant, there are a few important factors to understand in order to make the process easier and increase your likelihood of success.
They include:
- Having an open mind. Listen to information, think for yourself, research, and apply that data based on your garden's requirements
- Understanding how a plant works and the components it requires to thrive
- Learning about your unique environment and how it will affect plant growth and quality
- Understanding that there are many ways to grow a cannabis plant
- Learning favorable or desired growing techniques
- Knowing that hard work, commitment, and patience are required
- Acknowledging that growing quality cannabis is not simply a hobby, but a lifestyle
While almost anybody can keep a cannabis plant alive, not everyone can grow quality cannabis. Quality is achieved through proven genetics, the right environment, refined growing techniques, a good food recipe, and experience. Learning how to grow quality cannabis means you help a plant develop proper cannabinoid content and terpene profiles. This is best achieved through organic cultivation practices.
For organic gardening, the most important factors of plant health are:
- Setting up a proper environment with optimum VPD
- Germinating a seed or cloning a plant
- Constructing a living soil
- Achieving balanced soil moisture
- Knowing the form of nutrients that is most helpful to a plant and its optimum pH
- Transplant timing
- Learning how to brew a tea or mix food
- Learning how to prevent and eliminate pests and disease
- Maintaining the ideal health of a plant from start to finish
Mistakes are unavoidable when learning anything new and learning how to grow cannabis is no different. Mistakes cost the most, but they are the best teachers. Not knowing how to fix mistakes often causes growers to give up and quit. To lower expenses and shorten the learning curve, research will need to be done, and products and tools will need to be purchased before you start a garden.
While taking care of an organic cannabis garden can be demanding and requires good genetics and a dedicated grower, you may be surprised at how manageable having a home garden can be.
Here’s what you need to know to get started:
How To Produce Top-Shelf Cannabis
In order to care for any plant, you need to understand their world: what kind of environment they like, how they make food, how they defend themselves, and what they need to grow. Compared to most other plants, cannabis is a bit more sensitive, and requires more care than simply transplanting and watering. Many gardening techniques that are practiced with other plant species do not apply to cannabis, and can actually lower the quality and health of a plant. For the best results, it is important to do your research, become familiar with your environment, and have a plan in place before you start to grow. There are several steps you can take before and during a plant’s lifetime to ensure you produce high-grade cannabis.
These steps include:
Chapter 1: Setting Up Your Garden
Chapter 2: Dialing In Your Environment
Chapter 3: Soil Building
Chapter 4: Starting From Seed or Clone
Chapter 5: Water & Nutrients
Chapter 6: Deficiencies & Excesses
Chapter 7: Training & Maintenance
Chapter 8: Vegging
Chapter 9: Transplanting
Chapter 10: Flowering
Chapter 11: Pests & Diseases
Chapter 12: Daily Inspections
Chapter 13: Harvesting
Chapter 14: Drying
Chapter 15: Trimming
Chapter 16: Curing
--
Bonus Material
Blog
Week-By-Week
Frequently Asked Questions (FAQ)
Glossary
Chapter 1: Setting Up Your Garden
Before you pop your first seed, or plan to bring in clones, it is essential to prepare an environment where plants can thrive. Preparing a gardening space will ensure optimal growing conditions, eliminate the likelihood of pests and diseases, and give you a better chance of controlling the health of your cannabis plants.
First, get to know your environment and your climate. If you have the patience and desire, growing other herbs or companion plants in the same location you will be growing cannabis in can provide you with beneficial insight and applicable knowledge about how well plants will do in a particular place and space, what kind of bugs are in the area, light choices, etc.. Second, be sure to clean and sanitize the location before exposing your cannabis plants to the space.
 The environment cannabis plants are exposed to will heavily influence quality
Back to top
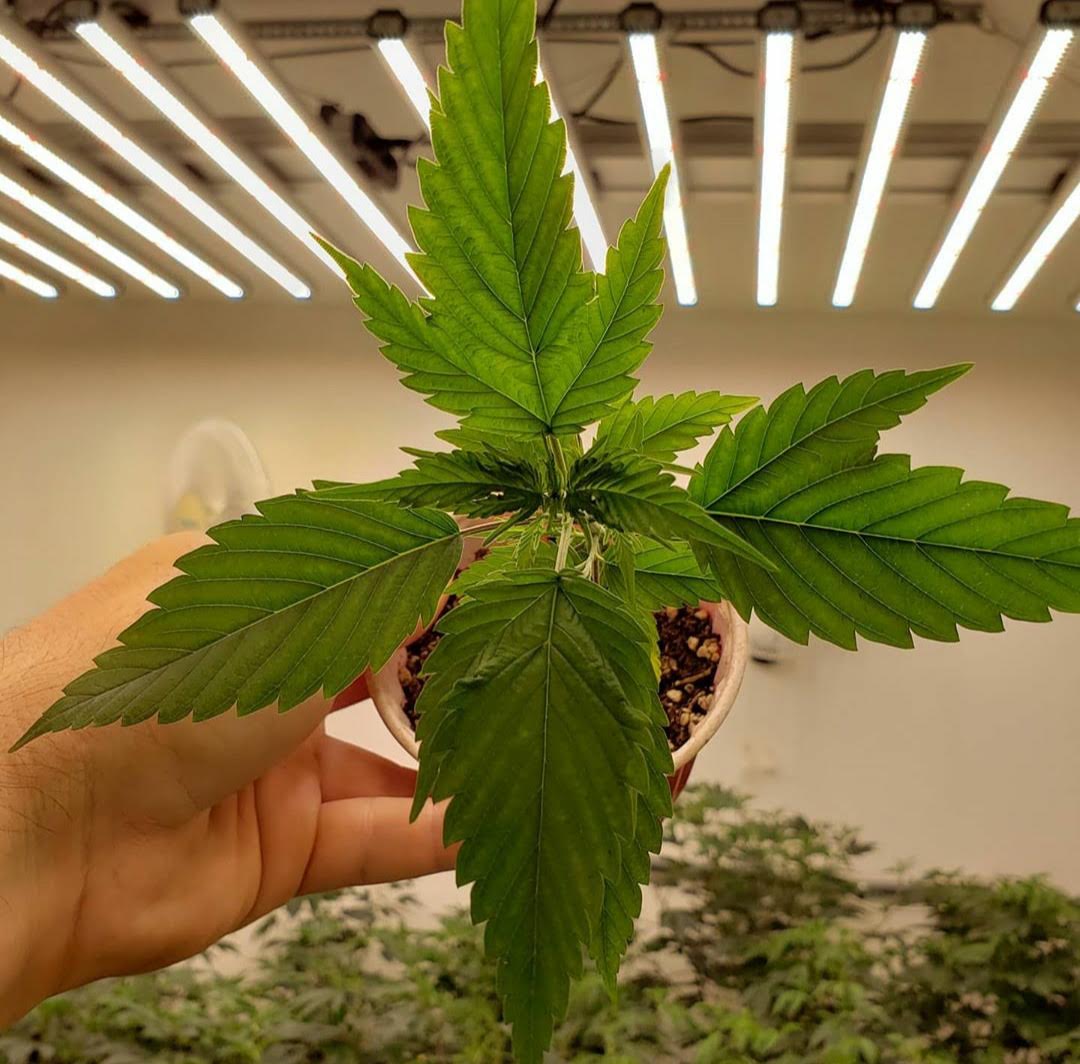
Getting Started: Growing Indoors
Growing indoors is unique in the fact that you have a significant amount of control over the environment and cleanliness. Temperature can be adjusted, humidity levels can be stabilized, weather conditions are not much of a concern, and pests and pathogens are not as much of an issue.
When setting up an indoor garden, it’s best to have two areas for growing; one area for vegging (ideally a windowless shed, basement, garage, or spare room), and one area for flowering, preferably a greenhouse or a separate room. Having two different dedicated spaces to grow in will allow you to veg and flower at the same time and lessen the likelihood of losing genetics due to a disease outbreak or pest infestation.
There are a few components that go into making an ideal room to grow cannabis plants. They include:
- A completely sealed indoor room
- Adequate electrical capacity
- Lights (LED, CMH, HPS, MH, Quantumboard, T5)
- HVAC (Air conditioning/Heater depending on location)
- Dehumidifier/Humidifier (Quest/Anden)
- Room controllers
- Fans
- Carbon dioxide (CO2 burner, CO2 gas)
- Air exchange
- Vent fan (intake and exhaust fans; HEPA for intake, carbon for exhaust)
- Filters (HEPA/Carbon)
- Hygrometer (measures humidity level)
- Thermostat (measures temperature)
- Air curtain
A completely sealed indoor room: Because young plants are less developed and more vulnerable, it's beneficial to keep them indoors. A veg room is a space to keep young plants under stable light exposure until they are big enough to be flowered. Often, it's a room that has seedlings, clones, and vegging plants.
If you will be using the room for seedlings and clones in addition to vegging plants, you will need separate areas and lights; one small area to be used as a nursery and the majority of the space dedicated to vegging. A movable shelf rack with a LED light strip, or other light fixture, underneath each shelf works well for seedlings and clones and allows you to use vertical space in a room.
When constructing a room to grow plants indoors, it is important to recreate an outside environment. Consider air ventilation and circulation, light source, temperature, and humidity. Ideally the space will not have any windows, will have bright white walls, and will have flooring that is waterproof and can be kept clean.
Grow tents are also popular, able to be pushed against the wall of most rooms or garages. They are convenient and quick to assemble. Grow tents should be durable, light tight, have reflective interior siding, and should be tall enough (8’) for plants to grow to the desired size. Cheap tents are usually not worth purchasing due to not being high quality, which results in a lower quality grow.
The priorities when designing a grow space are:
- Room location and size
- Electrical availability
- Lights
- VPD
- HVAC/cooling/heating
Electrical: It’s vitally important to understand electrical options before designing a room or space you intend to grow in. Electrical requirements will need to be well-thought out. Grow lights, air conditioning, and multiple outlets for fans will need to be accessible and able to be run at the same time.
Residential power options in the United States are 120v and 240v. We recommend using 240v and sufficient amperage for all your lights, cooling and heating as well as dehumidifiers/humidifiers.
Commercial power allows for 3 phase 480v power, which is ideal for large cultivation but requires a transformer or step down to allow 240v and 120v power. The higher the voltage, the more efficient the power. For example, a light fixture that typically requires 6 amps at 120v will require 3 amps at 240v and 1.5 amps at 480v (not many lights are 480v compatible). So essentially it costs ½ as much to run a light at 240v vs 120v; meaning lower cost or more lights.
Warning: Electricity is life and death! It's important to contact a licensed electrician and discuss your options for all power upgrades or major electrical work.
Start with the electrical panel to see what type of amperage (by the breakers) you have available in your location. A single breaker is 120v and a double breaker is 240v. We recommend having a subpanel installed if you plan on anything over 100 amps. If you’re installing an HVAC system, it’s recommended to hire a professional, but if you are familiar with electrical wiring, you can install an HVAC disconnect; the size would be recommended by the manufacturer.
Designing your room/space: First you need to know the size of your space and the power supply. Next, you will need to choose what type of lights you want to use. All lights are different from manufacturer to manufacturer.
Lights: The correct lighting technology will be dependent on room specifications such as ceiling height, square footage, the number of plants, and whether you'll only need to veg them or if you will flower under them too. Certain cannabis varieties will perform differently under certain bulbs, so researching bulbs and knowing what strains you will have in your garden should help guide you in making a decision on what the best bulb will be.
Light is used by plants for different purposes:
- Photomorphogenesis describes a plant's growth and development in response to light, including leaf thickness and size, internode length, and branch patterns. This allows plants to optimize their use of space and light.
- Phototropism is the directional response that influences a plant to grow toward or away from a light source. A plant’s ability to sense and respond to light is crucial for survival and affects how well it can perform when competing with another plant for light or space. There are different photoreceptors that mediate the response of plants to a light source. These photoreceptors are composed of a light-absorbing pigment and a protein that are covalently bonded, called a chromophore. Once bonded, they are known as a chromoprotein.
- Phytochrome is a family of chromoproteins in plants bound to light-absorbing pigments that help initiate developmental and floral processes when activated by red or far-red wavelengths.
- Photoperiodism is a plant’s ability to use light to track time. By sensing and using different wavelengths of light, plants can tell what time of day it is, the duration of each day and night, and can also sense seasonal changes, or what time of year it is. This is how a plant is able to control flowering.
- Photosynthesis is a plant’s ability to use light to make sugar from water and carbon dioxide. Photosynthesis is also used to convert sugars into complex molecules like cellulose. From there, with the addition of nitrogen atoms, nucleic acids and amino acids are created, which are the building blocks of proteins.
There are three factors that contribute to plant health when it comes to light:
- Light spectrum (quality)
- Light intensity (quantity)
- Light duration (photoperiod)
Full spectrum is ideal for vigor and growth as certain wavelengths influence different plant processes; it’s believed that full spectrum leads to a higher rate of photosynthesis.
Plants benefit from the following wavelengths of light:
- UVA and near-ultraviolet light (315-400 nm): chlorophyll absorption starts and light is used to manage plant architecture and long-term health
- Blue light (440-500 nm): plays major role in plant development and quality, one of the most beneficial wavelengths for vegging plants as it aids in root development, ensures chlorophyll absorption is maximized, and manages growth
- Green light (510-610 nm): used for photosynthesis and can help improve plant size, weight, and growth
- Yellow-red light (610-700 nm): optimum wavelength for germination, chlorophyll absorption, and flower development. This wavelength is ideal for bloom and for photoperiodism. When balanced with blue and green light, this wavelength can translate into perfect plant growth and yield.
- Far-red light (700-800 nm): increases the rate of photosynthesis and can promote extension growth
Chlorophyll is the molecule in plants that traps light and is responsible for influencing photosynthesis. Chlorophyll absorbs red and blue wavelengths, and is how a plant is able to produce sugars.
In veg, blue spectrum keeps leaves tight and reduces stem elongation. Blue light reduces a plant’s need to compete with a neighboring plant that may be shading it for light by signaling to them that they don’t need to stretch out.
Red photons are less energetic than blue, but are used in much greater quantities during development to produce stems, leaves, and flowers. Red photons influence bloom and can also be used to imitate sunrise and sunset.
For these reason, both blue and red spectrum lights are commonly used for growing indoors. While you want both spectrums present throughout all stages, you want more blue spectrum during veg and more red spectrum during flower.
 Plants need proper exposure to light and darkness to develop correctly
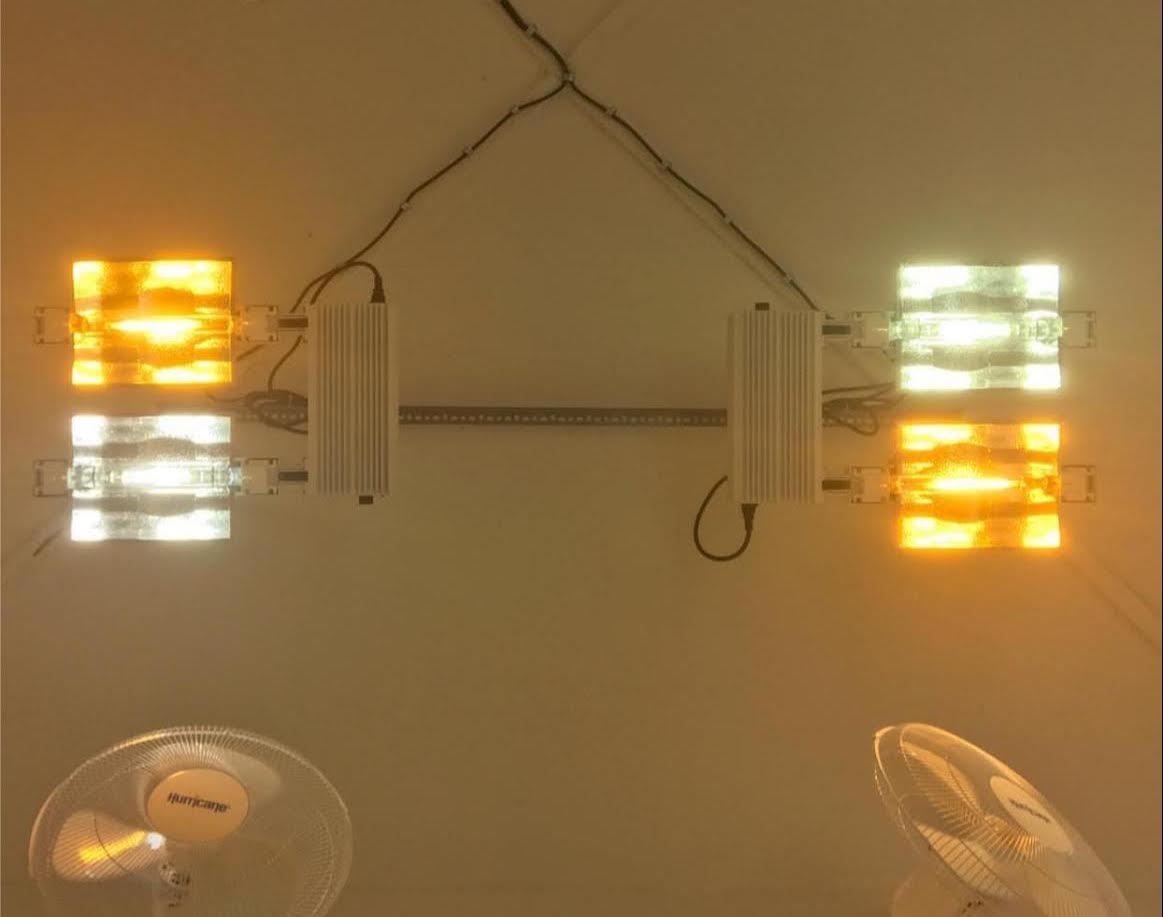
Light fixtures include:
- T5 Fluorescent Light: Works great for seedlings and smaller vegging plants. Cost effective. Don’t put out a lot of heat, but will burn a plant if it touches the fixture. Should be placed 10-12” from the top of a plant.
- 315w, 500w, 630w Ceramic Metal Halide (CMH): Closely imitates full spectrum light. Works well for vegging and flowering, and will provide quality growth. Should be placed 3’ above plants.
- LED: Great, low cost option for veg and bloom. Energy efficient, runs cooler. Long life with little loss in intensity. Sunrise and sunset feature. Should be placed 3-4’ from the top of a plant.
- Metal Halide (MH): Works well for vegging, but is also used in bloom. . Flowers have improved quality with a little smaller yield. Should be placed 3’ above a canopy.
- 600w High Pressure Sodium (HPS): Works well for flowering. Known for yielding better due to a high intensity bulb, however, yield can suffer slightly in quality. Should be placed 3-4’ above a canopy. With a rectangular footprint, lights should hang in rows.
- 600w, 1000w Double Ended (DE): Works great for flowering cycle. Needs to be at least 4-6’ above plants.
Please note: The correct distance a light should be above a plant is largely dependent on the fixture and the settings of the light in addition to the strain.
In addition to having a favorable bulb, you will also need the correct number of lights depending on how many plants you have. Several growers use mixed spectrum lighting and alternate every other fixture with a different bulb.
For several fixtures, a plant underneath a light in the middle will be exposed to a more intense light than a plant on the edge. Once a plant gets about 4’ away from a light fixture, light intensity decreases substantially, lowering the quality that can be achieved. Use a PAR meter (Apogee) and closely monitor plants when trying out new light fixtures, or moving new strains into a room. If needed, place smaller plants or Sativa-dominant strains in the middle and bigger, Indica-dominant strains around the edge.
Recommended lights and brands:
- 8 bar LED (Thinkgrow, Fluence Spyder, Esttech)
- 315w CMH (Luxx, Growers Choice, Sun System)
- 1000w *HPS DE (Luxx, Dimlux, Gavita)
*It’s recommended to checker-pattern the room with 1000w MH DE bulbs for mixed spectrum light. T5 are becoming outdated, so it’s tough to recommend a company, but they are fairly inexpensive and don’t produce much heat unless a plant is close to it; so, we’ll say for cloning, 2 bulb T5 fluorescents in the 4k color are effective.
 Select the best light for your grow space to maximize a room’s potential
Understanding the advantages and disadvantages of your light choices will help in the decision process:
- LED advantages: extremely bright, amazing light spectrum, low power consumption, low cooling requirements; great for lower ceilings, grow tents, or racking systems
- LED disadvantages: cost, light penetration, and in cold climates you will have increased heating costs (due to low heat output)
- CMH advantages: good light spectrum, low power consumption, good light penetration moderate cooling requirements, decent for lower ceilings and grow tents
- CMH disadvantages: more heat than an LED, less light spread requiring more fixtures than DE HPS/MH. Cost; bulb replacements recommended every 6 months.
- DE HPS/DE MH advantages: best light penetration, big light spread, very powerful lights, great for high ceilings (10’+)
- DE HPS/DE MH disadvantages: power draw, higher cooling requirements, difficult to use with low ceilings. Cost; bulb replacements recommended every 6 months.
When you're growing with the sun, the full color spectrum is present, but when choosing lighting technology for a garden, providing the correct bulb at the correct time is important for healthy growth. For most lights, gardeners and pets should not have lengthy exposure, or
problems with eyesight may develop. If you need to work in the light, wearing grow glasses designed for working under grow lights is recommended. They allow you to see better indoors than typical sunglasses while protecting your eyes from intense light.
HVAC (Air Conditioning/Cooling/Heating): Choose your lights before deciding on your cooling or heating system (especially if you live in a colder climate). Mini Splits are preferred over window AC. Light manufacturers will recommend the BTU needed to cool the light fixture of choice. It’s better to have too much cooling power than not enough (especially if you live in a location with hot summers).
An air conditioning or heating unit can also eliminate extreme fluctuations during the day and night, which encourages mold and other unwanted variables. Temperatures should not drop or increase more than 10 or 15 degrees between the day and night, or humidity levels will swing causing plants to be susceptible to diseases and improper growing conditions, likely stunting growth. When deciding on what kind of air conditioning or heating unit to go with, consider the cubic footage of the space; and the type and number of lights you are running.
Electric/Propane Heater: When setting up a grow that may require heating, it would be best to pick a CMH or DE HPS/MH and run the lights before deciding if you will need to add any heat. (These lights will produce a decent amount of heat.)
Dehumidifier: A dehumidifier allows you to better influence the humidity levels in a room. It takes moisture out of the air and condenses it into water, collecting it in a container, or it can be plumbed outside. If applicable, dehumidifiers need to be emptied regularly and humidity levels need to be closely monitored to ensure plants are comfortable. Quest and Anden dehumidifiers are highly recommended, preferably 240v, but some smaller models may only be available in 120v.
Many times, veg rooms won’t need a dehumidifier, but we recommend installing one for large humidity swings caused when the lights go out. In a flowering room they are very important; to select the right size, you will need to calculate gallons of water used per day and convert it into pints before selecting a dehumidifier (based on the amount of water you are putting into the room each day).
Humidifier: If a room is particularly dry, humidifiers can add moisture to the space. We recommend an Anden steam humidifier to get your room’s VPD on point and to push your plants’ limits. If you are dealing with drops in humidity below 60% it will negatively affect your plants. When you are deep into flower, less than 2 weeks from harvest, 60% humidity is fine.
Carbon dioxide (CO2): Carbon dioxide is an odorless, colorless, non-flammable gas. Plants take in carbon dioxide to complete processes like photosynthesis. To increase vigor in plants, incorporate CO2 into the grow room.
1,200-1,500 PPM is an ideal amount of CO2 to use for plants. In order to sufficiently stimulate rapid metabolism, the temperature should be slightly higher (80-85 degrees) in a room with CO2. Plants can use CO2 quickly, so close monitoring and replacement tanks are necessary to ensure rapid growth. Because carbon dioxide speeds up growth, a plant will need increased amounts of water, nutrients, the correct light intensity, and increased maintenance. CO2 should not be used at night as this is a time when plants
respire, which will naturally cause CO2 levels to increase. If you’re running CO2 and the plants are respiring, you risk too much CO2 being in the space. If there is too much CO2 in a space, it’s recommended to exhaust the room to drop CO2 levels below 1,200 ppm.
You can run a completely sealed room with CO2; a CO2 rain dripper line with a CO2 tank works well. 50 lb. tanks are preferred, but can be a bit heavy. 20 lb. tanks are lighter and easier to move around when it's time to refill. You can also use a CO2 burner in place of CO2 drip lines. These can run off of natural gas or liquid propane. It’s important to install the burner at the correct distance from the ceiling, plants, and walls. A 2-burner works well for smaller rooms while a 4-burner is ideal for larger ones.
Please Note: Growers may feel dizzy or short of breath if working in a CO2 room for an extended period of time. Always be aware of how you are feeling and take breaks from the room if needed.
Air exchange: We recommend installing an air exchange if you don’t plan on using CO2. You need to calculate your grow space’s cubic feet to size the CFM (Cubic Feet per Minute). You will also need to pick the right size inline fans; a HEPA filter on the intake and a carbon filter on the exhaust.
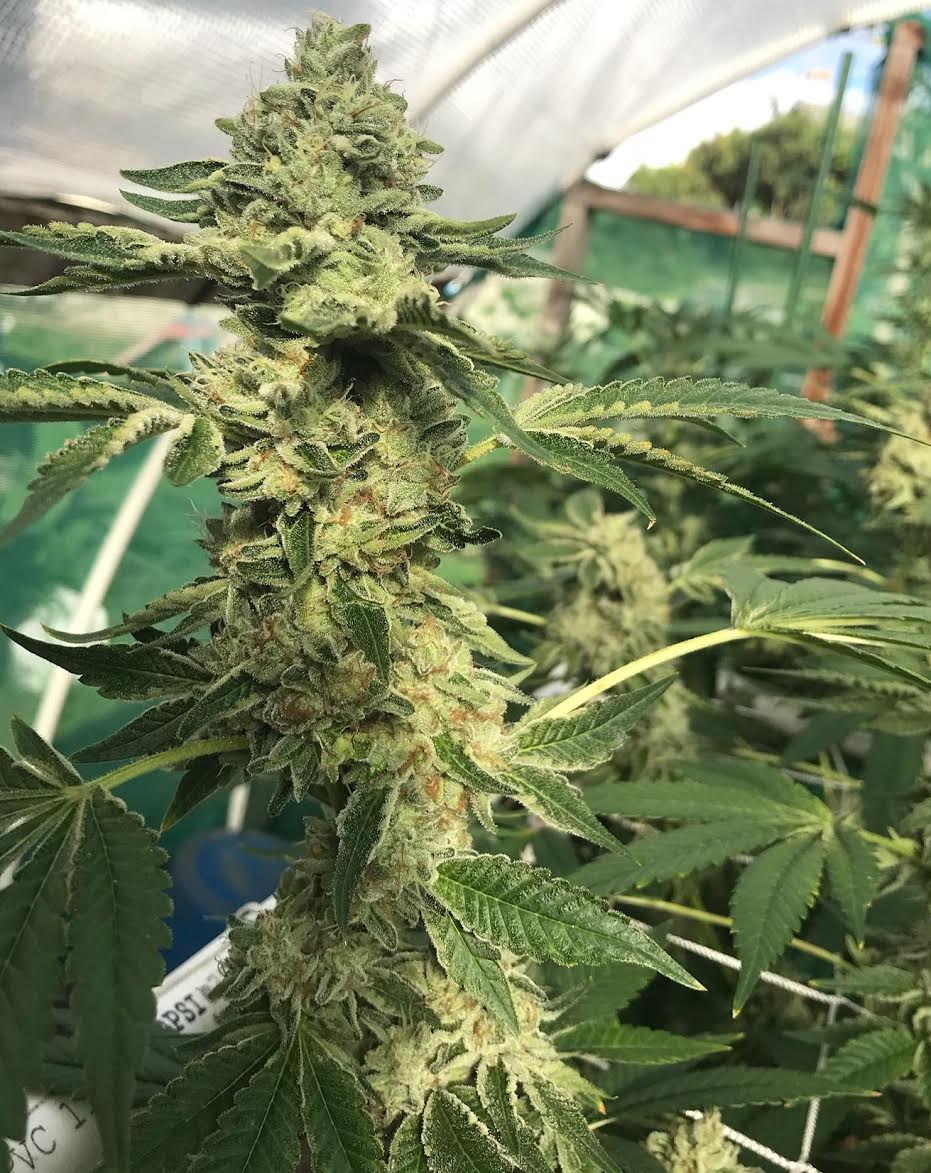
 8 bar LEDs work well for indoor growing
Room controllers
8 bar LEDs work well for indoor growing
Room controllers: Having your equipment hooked up to a controller will allow greater ease when it comes to monitoring and controlling your garden. Controllers allow you to monitor your garden right from your phone or favorite hand-held device.
Recommended controllers include:
- Grow Room Controller: The Hydro-X controller will control the grow lights, HVAC, dehumidifier, humidifier, and CO2 all on one device.
- Light Controller: Allows for control of the light cycle (for example, 18/6 veg or 13/11 flower). LED’s have a special red light that can be used to emulate sunrise and sunset, and helps put the plants to sleep faster.
- CO2 Controller: Used to control the release of CO2 into the room. We recommend 1,000-1,200ppm and 1,400ppm for flowering.
- Dehumidifier Controller: Used to control the dehumidifier to keep the VPD in the room dialed.
- Heat Sensor: Needed to shut lights off in case of HVAC failure, or if other issues arise.
Fans. Indoors, fans are used to help move air around, eliminating stale spots that naturally occur between walls and plants, where pests and diseases like to settle, and also help plants with transpiration by imitating natural breezes. Multiple fans are recommended. Oscillating fans are ideal, and all fans need to be regularly cleaned. Make sure fans are not pointing directly at a plant, preferably above or below it.
Vent fan. These fans help remove air from a room, allowing fresh air to enter and consistently circulate. This will help create and maintain a healthy environment, which will produce and encourage healthy plants.
Filters. Helping keep a room clean and free of harmful particles that may enter and float around in the air, filters should be an appropriate size and in appropriate numbers based on the room size, and - like everything in your operation - should be cleaned regularly.
Air curtain. An air curtain is a small machine that hangs over a door and produces a downward burst of air each time the door is opened. This curtain of air blasts any particles off the person entering the room and also discourages pests (or pathogens) from being able to fly or crawl in.
Getting Started: Growing Outdoors
Growing a cannabis plant outdoors is slightly more challenging than indoors due to the fact that you have less control over the environment. Light cycles, temperature, humidity, VPD, and increased exposure to pests and pathogens are a few of the challenges. Regardless, outdoor cannabis can produce an exceptionally unique flower and medicine.
Choose the best location for flowering. When deciding on where your outdoor garden should be, take into account the environment you live in and the natural elements your plants will be subjected to. In addition to daily circumstances, be sure that you pay attention to rain, wind, and seasonal changes as well.
Where you live will play a leading role in which season you can grow outdoors, how many harvests a year you can achieve, and several other factors, such as daylight hours and sunlight intensity, all ultimately affecting the quality of your flower.
To produce quality cannabis, your plants need to be in a place where they can receive plenty of direct sunlight every day, be planted in good soil, kept at an ideal temperature, sheltered from the wind and rain, and be free of pests and disease.
Meticulous gardening can yield outstandingly superior results; some people are unwilling to put in that work and may consider hijacking the fruit of
your labor, so consider the security of your garden when deciding where it will be located. Choose a place on your property that is somewhat hidden, at least not in a highly-trafficked area. You may also want to consider investing in a good security system; fenced-in yards, surveillance cameras, and a good guard dog work nicely for a backyard garden.
Be selective with the foliage surrounding your greenhouse or garden space as well, as it can be home to different kinds of cannabis-loving pests and diseases. If you have foliage that you can't remove, and you notice it has pest or disease damage, it is worth regularly treating the area with an organic spray and regular maintenance.
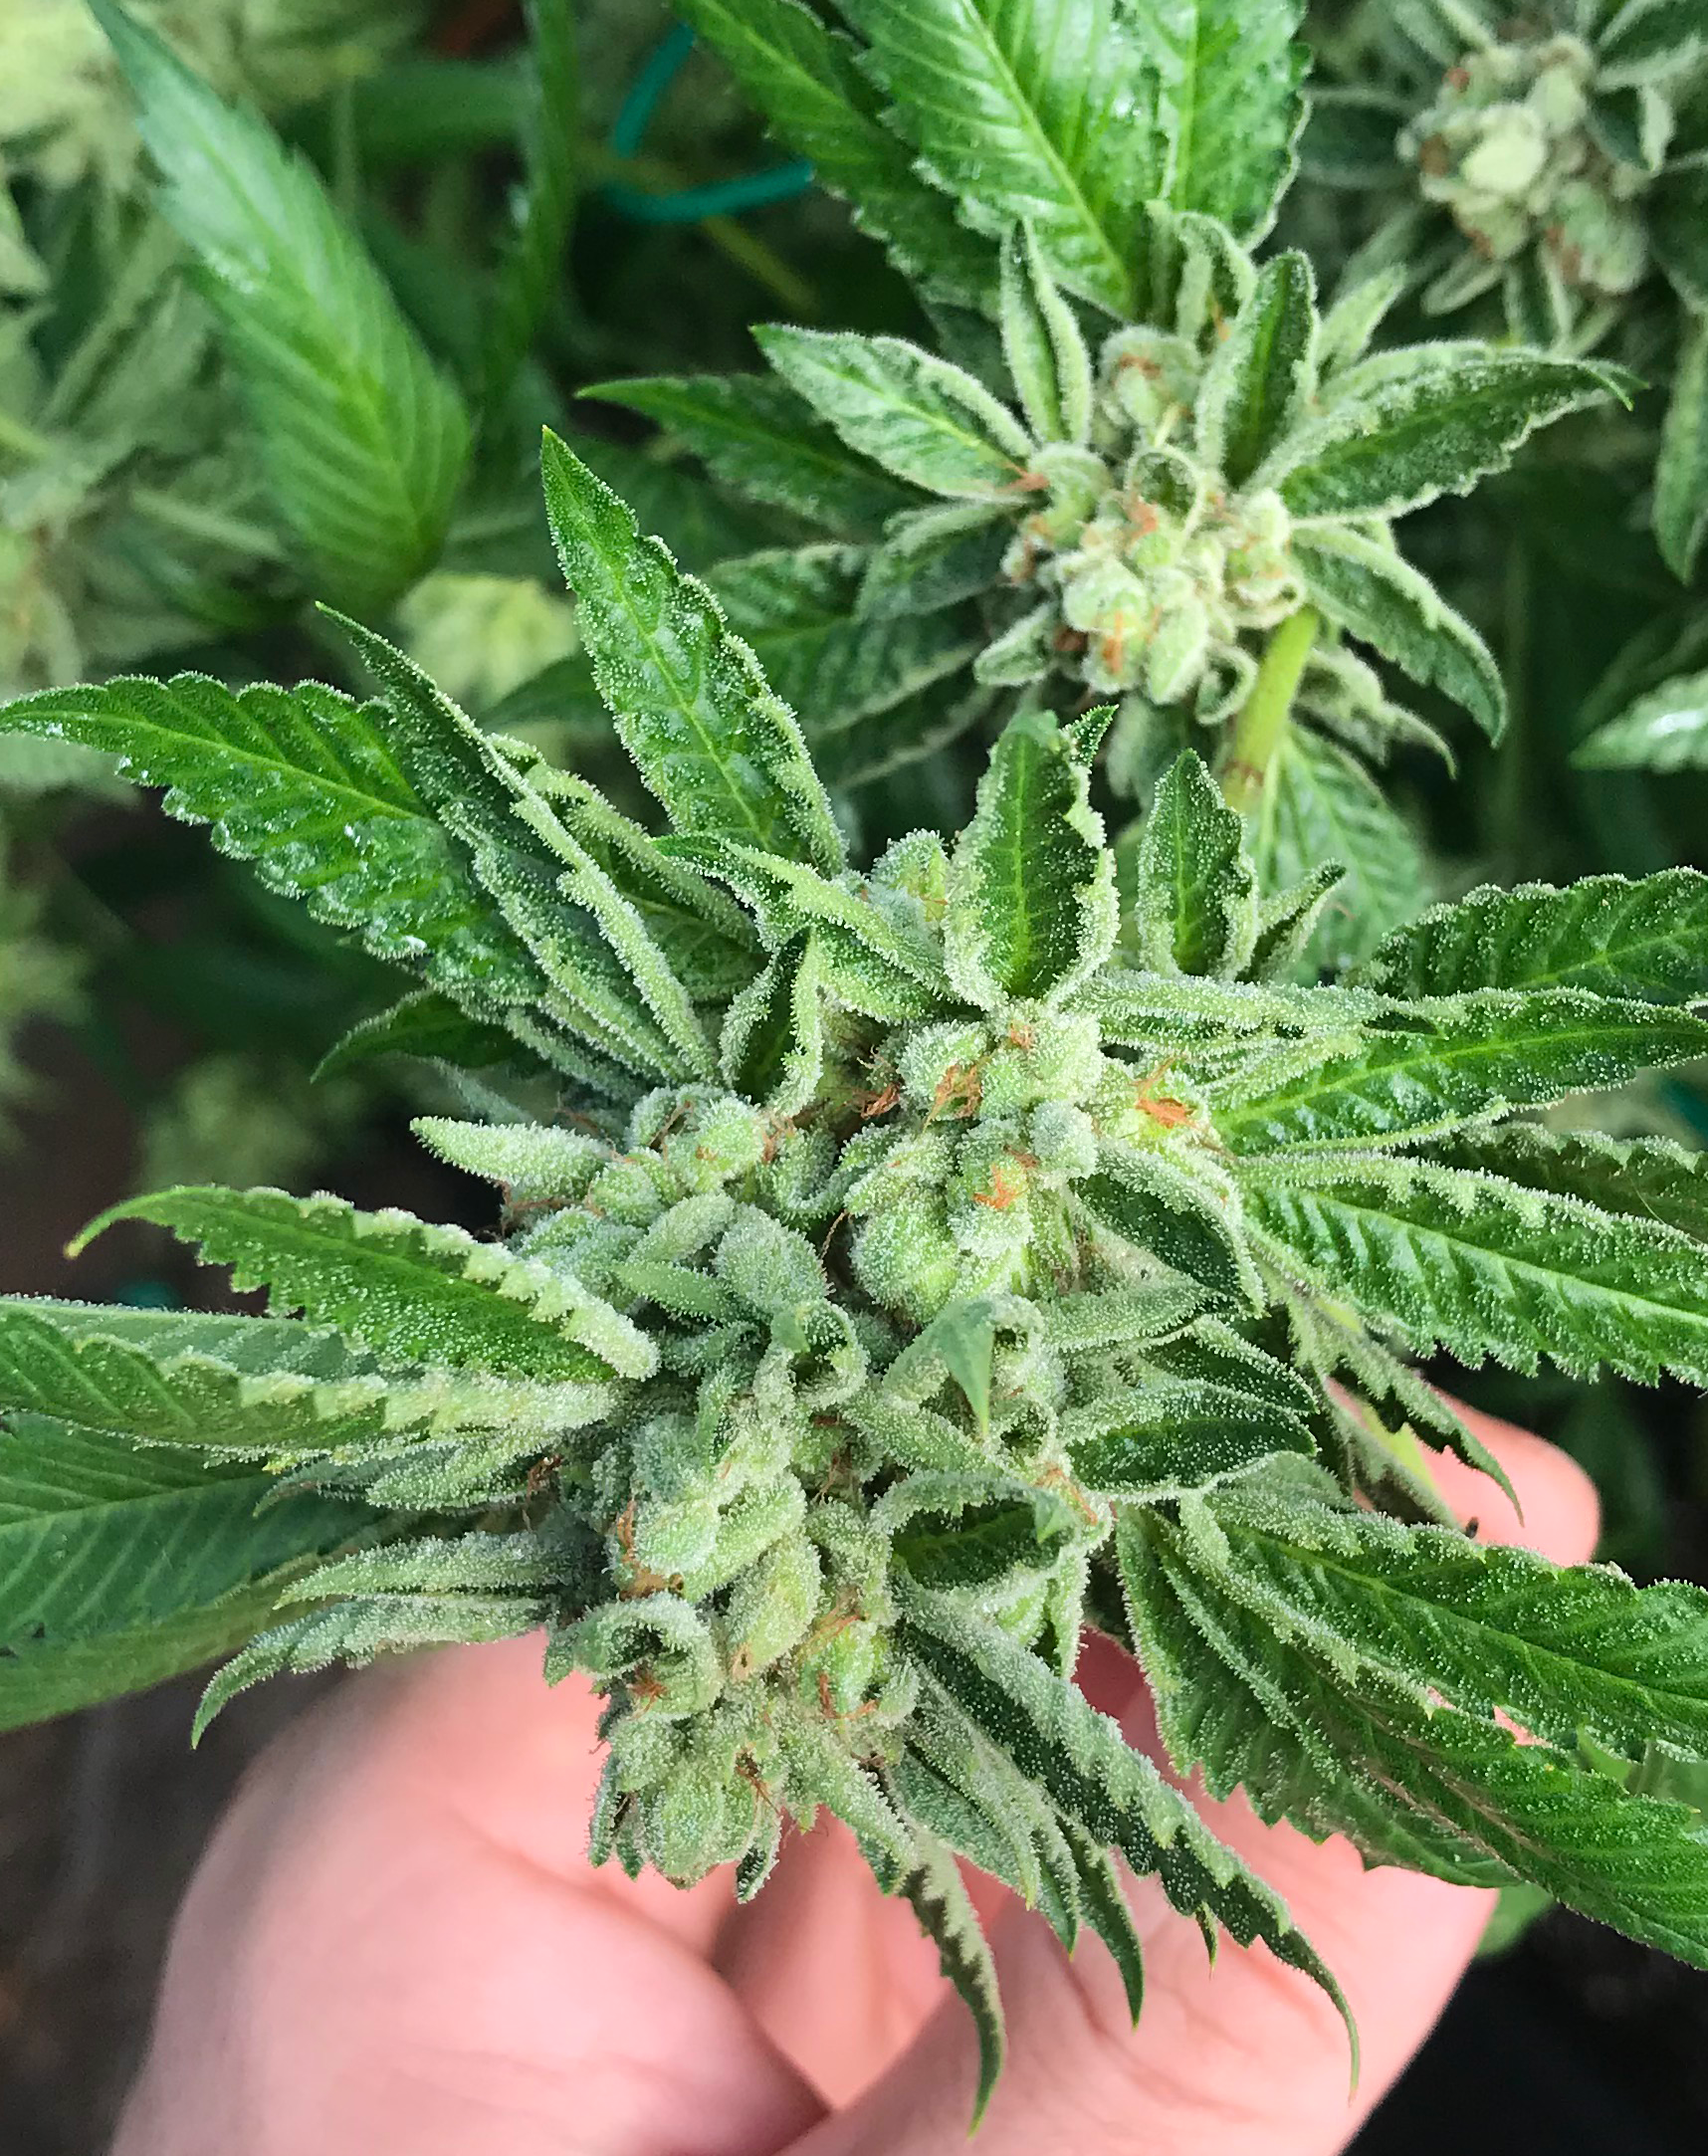
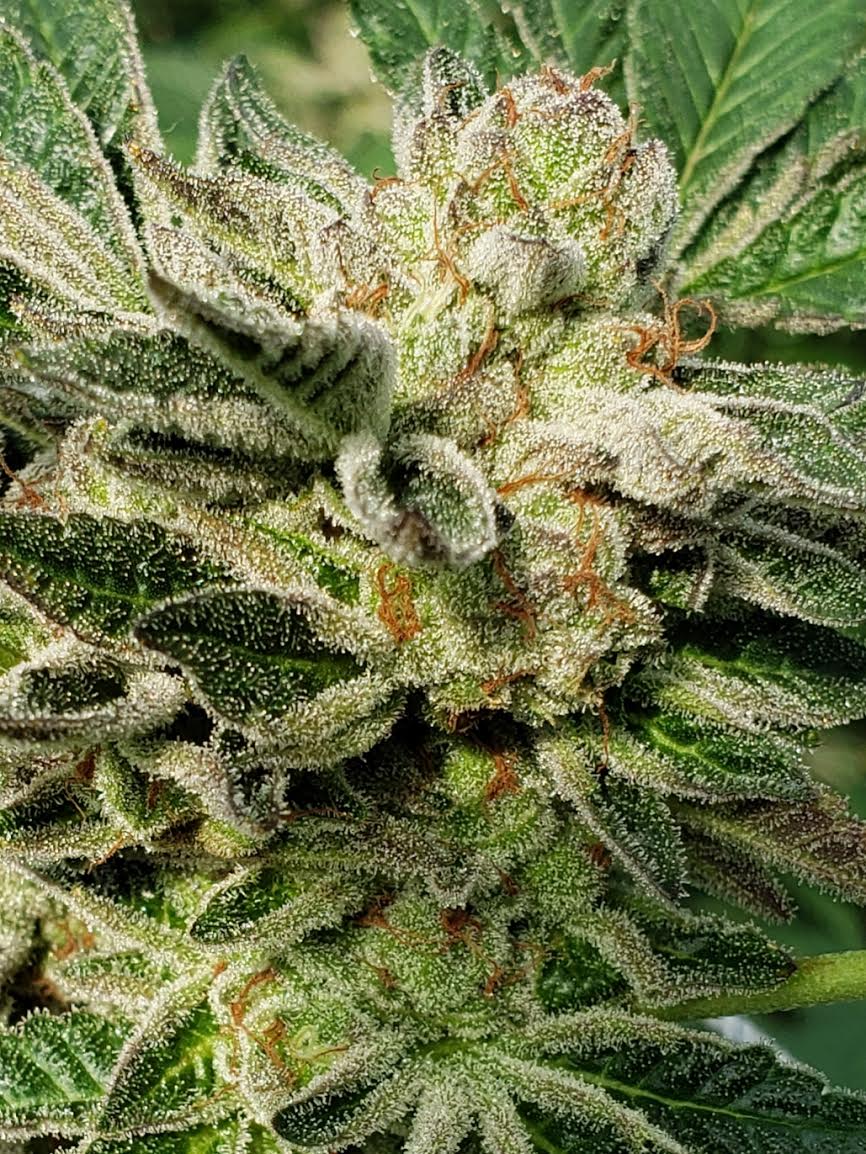
 Organic sungrown cannabis is believed to contain the highest medicinal value
Back to top
How Climate Affects Flower Quality
Where you live dramatically influences the quality of flower you can achieve when growing outdoors with tropical climates providing promising conditions due to the intense sunshine and ideal temperatures. It’s important to note that, especially in tropical regions, microclimates are common, and growers in one town may achieve different results than growers in a neighboring town simply because of small variations in the weather. Researching the microclimates available to you to select the best temperature and humidity will provide the environment needed to produce the best flower.
Many climates, however, are favorable for growing cannabis outdoors (at least for 1 season) and provide weather conditions that will produce nice, healthy plants. The season you choose to grow in will affect your daily routine as a gardener, what kind of pests you will encounter, and can impact the yield and quality of your flowers.
When deciding if you should set up an outdoor garden, keep the following conditions in mind:
Sunlight. Cannabis is a full sun plant, requiring specific amounts of direct light exposure every day. A benefit to growing outdoors: the lumens of sunlight are stronger than any current man-made light fixture available and cover the full light spectrum as well, encouraging a plant to reach peak health. Among other benefits, full spectrum light produces increased resin and improved terpene profiles.
When deciding where your outdoor plants should go, be sure you choose a sunny location that ideally receives at least 8 hours of direct light every day. The middle of a property is usually favorable, however, take all factors of a location into consideration before committing to it. It can be helpful to sit down in the chosen location and observe the surroundings to better understand what your garden will be exposed to.
Some advice on sunlight:
- Before deciding on a location, track the sun to determine the path it takes over your garden
- Take note of tall trees or structures that might shade the garden at any point throughout the day, and choose the location that gets the most direct sun
- If you live in a somewhat unforgiving environment, in drier climates where the sunlight is too intense (especially in the late afternoon of summer), you may have to put shade cloth over your plants to help cool the garden or plant a cover crop to prevent rapid moisture loss
There is no replacement for sunlight; it's how plants have been surviving forever, so if you live in a climate that allows it, growing with the sun has undeniable advantages. Not only can you grow with the power of the sun, but you can also cut costs when it comes to electricity. Be diligent about your garden’s light exposure and your plants will reward you for it.
Light Cycles. With the changing seasons comes changing light cycles and how much light a plant will receive each day in an outdoor garden.
When you're deciding on what month you should start your garden, it's important to consider the light cycle and temperatures it will be exposed to from the outset. Summer typically sees longer days and shorter nights while winter has the shortest day and longest night hours. For some, summer is the best time to flower cannabis outdoors (light-dep); however, for tropical climates, late fall through early spring is ideal, as there are favorable daylight hours and cooler temperatures that benefit greenhouse crops.
When starting plants in areas that receive snowfall, it’s best to wait until the last frost before putting plants outside. If the light cycle has not yet reached the 11/13 or 12/12 photoperiod, plants will continue to veg until the light cycle changes. If a plant blooms in tropical climates as the days are getting longer (June and July), it could actually start to reveg.
Plants that spend too much time in the light will appear stretched with flowers that are less dense. Plants that don't get enough light won't be able to make adequate amounts of glucose, will have stunted growth, decreased vigor, and lower trichome and terpene production.
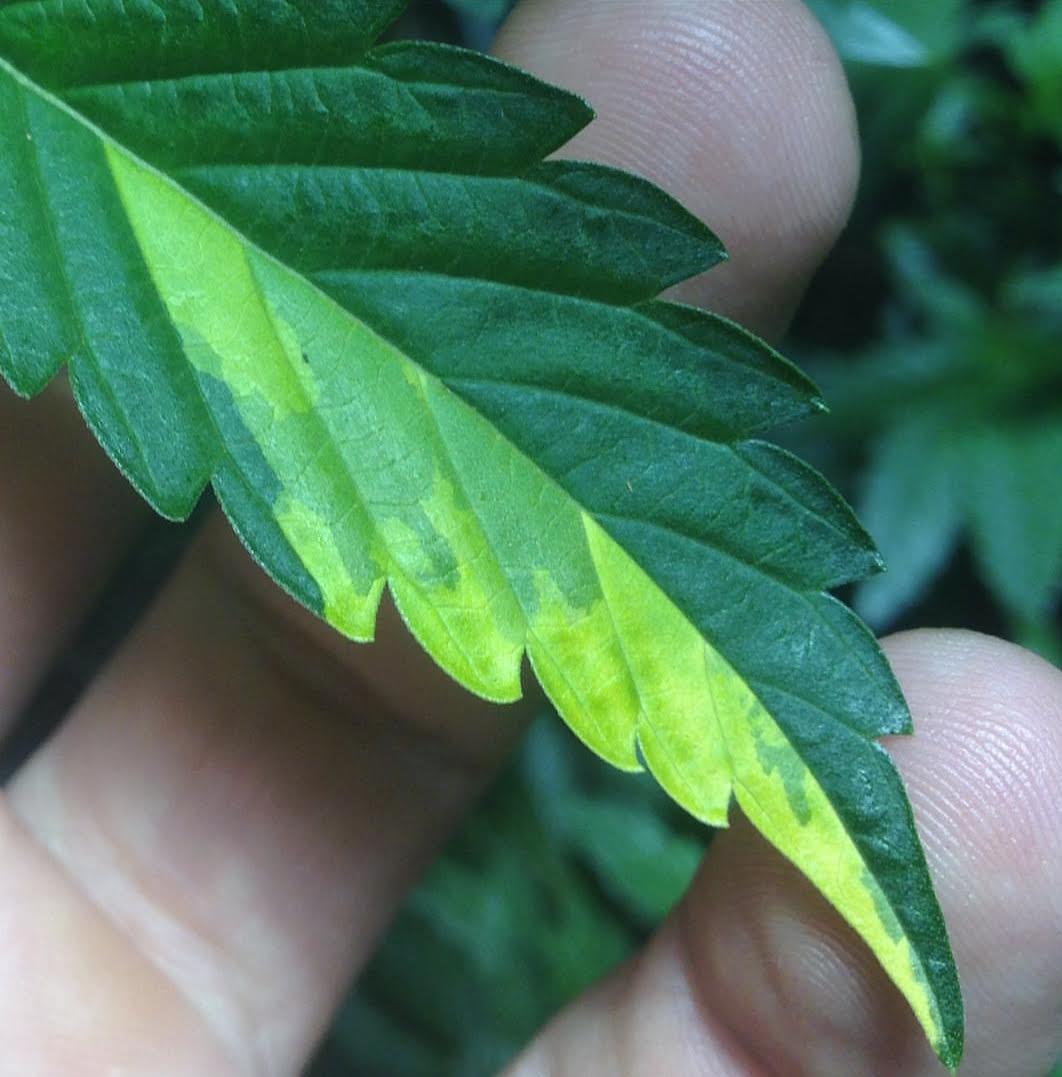 Leaf variegation is a genetic trait that may disappear without proper light exposure
Gardening causes the outdoor grower to be keenly aware of the weather. It will dictate the needs of your garden, both when it’s good and when it’s bad. As far as sunlight is concerned, its presence and absence is noticeable in a plant. Do your best to make sure your outdoor plants get enough light or darkness every single day so they develop as expected.
Light Manipulation. How do you influence light exposure if you're growing outside under the sun?
If you are vegging a plant and need more light than what is available in a day, you can hang string lights or another weatherproof light fixture above your plants. This is called supplemental lighting. For optimal growth, you’ll want to make sure your plants are the correct distance away from the light, that the light source is the correct wattage, and that you have enough lights for the number of plants in your garden.
For the backyard grower, if your plants are flowering outdoors and you are in the summer growing season (therefore needing less light exposure), you can pull a large cover or tarp over your greenhouse at the end of each day, increasing the dark hours by blocking out the light. This is called light-deprivation or
light-depping; imitating a light cycle to encourage a plant to flower. The smallest amount of light, even Christmas lights, can add to the time your plants internally calculate. Plants need complete, uninterrupted darkness, to develop correctly.
Covers should be 8-11mm thick or made of material that will sufficiently block out light and rain. If using a cover on an unsealed greenhouse, once it gets dark, it's good to remove it to allow better airflow and encourage proper humidity levels. There are covers made for greenhouses that allow air to flow through while also blocking out light. Greenhouses with advanced technology have light-dep features built in or as an option, making it easy to accomplish alone.
If required, light-depping will need to be completed daily for the length of the bloom cycle, or until the light cycle changes, or quality will be compromised. To know when to use the cover each day, calculate how many daylight hours you'll have compared to the 11 hours that a flowering plant prefers. Covers do wear down over time and will need to be replaced when they do.
When it comes to light exposure, stability and consistency matter.
Wind. Gentle wind exposure benefits a cannabis plant in several ways. In addition to keeping temperatures comfortable and humidity levels stable, wind also helps a plant strengthen its branches and stems by providing a small force for them to push against. When a plant is exposed to windy conditions, it can trigger some varieties to produce
cellulose, which helps support a plant and keep it upright, and increases the thickness of its cell walls.
Air movement is important in a greenhouse or enclosed space as stale or warm air can collect between plants, in corners, or towards the ceiling, encouraging pests and pathogens. In addition, air circulation allows fresh CO2 exposure and a balanced rate of transpiration.
Fans are a simple yet effective way to encourage air movement. Remember not to point fans directly at your plants, preferably having them oscillate, and keep them at an appropriate distance, at least 3’ from a plant. You should see leaves gently fluttering with fresh air, not getting whipped around. Strategically pointing your fans in a direction that allows favorable air circulation, encouraging movement from one side of the garden to the other, will help keep plants happy.
This setup also works well if you have PM or pest control problems. Keep infected plants toward the back of the greenhouse; make sure the fans are pointing at or are closest to clean plants, and if needed, infected plants get placed in a location that does not cause fans to blow on them and then on clean plants. In other words, clean plants should be placed in front of infected plants that are being treated as fans can blow spores and pests from plant to plant.
While you want to grow in a ventilated area, intense wind exposure can negatively impact the health of a plant. Wind can cause excessive water loss, leaf burn, broken branches, and if it’s strong enough, can knock over or break entire plants.
Outdoor plants need shelter from the wind and extra care during storms, sometimes requiring support stakes, extra clips or wire, and a prayer or two. It's another factor that is easily solved by having your plants protected in a greenhouse. Wind also helps move pollen from a male plant to a female, an important reason to completely remove males from your garden if you want seedless flowers.
 Wind quickly blows male pollen all over a garden, seeding female flowers
Rain
Wind quickly blows male pollen all over a garden, seeding female flowers
Rain. Rain is something that a cannabis plant and your soil never need to come in contact with. The biggest threat from rain is that if your plants are uncovered over-watering is likely to occur. Overly saturated soil is almost guaranteed when exposed to heavy rainfall, resulting in a loss of oxygen and a damaged microbial environment. This is an easy way to develop deficiencies.
Rain also adds weight to a plant, making it easier for branches to break, as well as creating ideal conditions for mold, especially when a plant is in bloom.
If your plants don't have a roof over them, it’s recommended you always move them out of the rain (if possible). Flowering in beds is best, but if you don't have a greenhouse, pots may make more sense and secure a better harvest if you have to move your plants out of the rain. Ideally, you move plants under cover
before it rains as opposed to once it's already started to keep your plants and soil from being compromised.
For those living in a considerably wet and rainy climate, you’ll need to take extra care if your plants are in the ground. Creating mounds when planting, adding amendments to the soil to promote drainage and aeration, and digging ditches around your garden to direct water away are techniques that will help improve conditions and overall plant health.
What's the worst that could happen from a few rainy days?
Besides overwatering, when it rains off and on for several days, it creates ideal conditions for diseases like powdery mildew (PM). Consistently erratic wet-dry-wet-dry conditions allow humidity levels to swing and create pockets of dead air that easily allow spores to settle and overtake an area. Trying to achieve consistency with the VPD and the environment will greatly benefit the health of the plant and reduce the likelihood of a pathogen overtaking the area.
Rain can also cause fans to shut off; remember to check them regularly in wet conditions and turn them back on as soon as possible.
Cannabis plants can’t stay constantly wet or they will also be susceptible to root rot, stem rot, and inadequate nutrient consumption; they will lack vigor, attracting pests and pathogens, so be sure to check your garden every time you hear that rain falling hard. Check to see if any rain gets into the grow area and try to avoid having water fall on a plant or the soil. If your plants do get wet, gently shake or tap the main stem at the base of the plant, or individual branches, to remove excess water. If you can increase airflow with fans, do so.
Consider using a greenhouse. Due to the increased protection it provides, the best way to grow cannabis outdoors is in a greenhouse. When it comes to the assembly, you can hire a company to set one up for you, buy prefabricated ones, or custom-build one depending on your budget and know-how. The most important thing a greenhouse does for a garden is provide protection from damaging rain and intense wind, in addition to discouraging pests and pathogens from easily finding their way into your garden.
 Blueprints for a backyard DIY greenhouse, Image Credit: Rylan Kapuy
There are a few greenhouse principles and parameters you can include that will increase the health and simplicity of your garden.
You want:
- flat ground
- flooring material to keep things clean; preferably material that doesn't absorb liquid
- protective but translucent ceiling that allows sunlight in while keeping intense wind and rain out
- breathable sides to help stabilize temperature and humidity
- several fans to encourage adequate air circulation and humidity control
- a thermostat to keep a close eye on the temperature
- a hygrometer to measure humidity
- gravel, pallets, or cement blocks to keep soil from being flooded during heavy rain if not planting directly into the ground
The way a greenhouse is assembled will influence the necessary components to include. For example, if a greenhouse is not sealed, wall chillers and dehumidifiers will not be very helpful. However, if it is completely sealed, they are components you should consider incorporating.
Since one of the most important decisions you’ll make when it comes to setting up your cannabis garden is where it will be located, make sure you
consider all options and choose the place that is most favorable for plant health.
The Takeaway
To briefly review, climates and seasons vary, so be sure you are conscious of the following:
- Outdoor Growing Seasons: summer, fall, winter, spring
- Light Cycles: long days, favorable daylight hours and location, short days
- Elements: temperature, humidity, wind, rain, frost
- Growing Medium: sand, clay, silt, living soil, coco, rock wool
- Variables: pests, humans, pets, cleanliness, natural setting, beneficial organisms, animals, predators, storms, natural disasters
The location of a garden, and the environment surrounding it, will determine what kind of flower you are able to produce. Everything influences development and quality in one way or another: sunlight, temperature, humidity, wind, rain, growing medium, even the wildlife your plants are exposed to.
Not only will the location determine the quality of flower you can achieve with a cannabis plant, but so will the season. Is this growing season particularly wet? Dry? Warm? Cold? All of these factors will work together to give you a unique harvest each and every time.
--
Outdoor gardens are without a doubt exposed to uncontrollable factors; however, they are exactly what many believe help a cannabis plant reach its full potential. Recognize the importance of not only providing a plant with its necessities, but providing it with an environment that allows it to flourish. Work with Mother Nature, the season you’re growing in, adjust what you need to to keep plants thriving, and you’ll have results that’ll make you smile.
 Outdoors all of the factors will work together to give you a unique harvest each and every time
Back to top
Chapter 2: Dialing In Your Environment
There are a few basic things every plant needs for survival: light, water, nutrients, growing medium, favorable temperatures, and air. Ensuring the environment is dialed in to meet a cannabis plant’s needs will provide the conditions needed for success. Whenever you make changes to your environment, whether it’s replacing a light fixture, changing the settings on the thermostat, or switching containers, it's important to always check on your garden more often, so you can closely monitor any changes in your plants.
When it comes to a proper environment, consider the following:
Light. One of the most important factors when it comes to quality and overall plant health is light. Light helps a plant produce sugars through the process of
photosynthesis, which allows it to grow.
To perform photosynthesis, 3 things are needed:
- Light energy
- Carbon dioxide
- Water
A plant absorbs light energy through the tops of its leaves, carbon dioxide through small pores, called
stomata, underneath its leaves, and water through its roots. The light energy acquired causes a chemical reaction that allows a plant to convert carbon dioxide and water molecules into glucose (sugar) molecules and oxygen. After glucose is produced, mitochondria convert it into energy (adenosine triphosphate) that can be used for growth. For the most part, above ground, oxygen is not used by a plant and is given off as a by-product, leaving the plant through the same tiny pores that absorbed the carbon dioxide.
The scientific equation for photosynthesis looks like this:
Water + Carbon Dioxide + Sunlight → Glucose + Oxygen
6H2O + 6CO2 + Light Energy → C6H12O6 + 6O2
 Image credit: Emily Nelson, Sustainable Plant Solutions LLC
There are two main factors to consider when it comes to plant health and light:
- Length of exposure: The photoperiod is the relationship between how much light and how much darkness a plant receives during 24 hours. Vegging and flowering plants need to be exposed to both light and darkness for different lengths of time. It is important that plants receive proper exposure to encourage vigorous growth and to maintain good health.
- Light intensity: To promote rapid growth, plants should be under light that produces an adequate level of intensity, dependent on the age of the plant.
Cannabis plants love light, but are particular about exactly how much light they want as they mature. For proper development, a plant needs to have more light exposure when they’re young and vegging (18 hours) and less when they bloom; they perform at peak levels when they spend 12-13 hours in the dark during bloom.
Cannabis plants have a special relationship with light, especially as they begin to produce flowers, and with every change in spectrum and intensity, undergo a physiological response. Lacking a central nervous system, plants have a circadian clock that they adhere to. Light fixtures like LEDs have settings that allow you to imitate sunrise and sunset, gradually exposing or decreasing their exposure to light rather than abruptly doing so. By recreating sunrise at the beginning of each day and sunset at the end, plants are able to seamlessly transition to their biological functions, which are guided by the 24-hour light cycle.
A plant’s main goal throughout the day is to absorb light energy to produce energy for growth through photosynthesis. As darkness begins, it triggers a plant to “rest” and produce a hormone called auxin, which controls its growth and development. During this time, they metabolize the energy created during the day and grow their root systems or flowers. As light begins to increase at the start of each day, plants face the light and “pray” (point their leaves towards the sky or light source), preparing for photosynthesis. The cycle of creating energy during the day and using it to grow at night continues.
Signs a plant needs
more light include:
- Stretching
- Changes in new growth (smaller leaves, not as green)
- Pale leaves
- Yellowing of newer and older leaves
- Brown leaf edges and tips
- Lower and inner leaves dry and die
- Thin stems
- Loss of variegation
- Inability to produce flowers
Signs that a plant needs
less light include:
- Pale colors at the top of the plant, or on leaf edges
- Scorched areas, appearing white or tan-colored
- Leaves that curl up like a taco or wilt
- Leaves fall off
- Flowers that are not as dense
Please note: Signs will vary depending on what week of growth a plant is in.
Temperature. Temperature is defined as the degree or intensity of heat present in a location, expressed by a comparative scale and measured by a thermometer. Maintaining appropriate temperature levels is extremely important for the health of the plant, and is toward the top of the list of plant priorities. Temperature is influenced by factors such as sun intensity, wind, rain, elevation, and season.
What's the ideal temperature for a cannabis plant?
Cannabis plants prefer soil temperatures around 68F, 20C and air temperatures around 68-78F, 20-25C. The ideal number will be determined by the age of the plant. Vegging plants like warmer temperatures and a little bit higher humidity level, while flowering plants favor slightly cooler, drier conditions. Correct temperatures allow a plant to successfully perform functions needed for growth.
Recommended temperatures:
- Veg: 75-78F, 24-25C
- Flower: 68-78F, 20-25C
- Soil: 68F/20C
- Water, Food, Tea: Room temperature (around 70F/21C)
Heat. Temperatures that are too hot cause large amounts of stress on a plant. Plants are constantly regulating their own moisture and temperature levels, absorbing water through their roots and releasing it through their leaves, a process known as
transpiration. An optimized environment is important for plant development because conditions will determine the effectiveness with which a plant can accomplish tasks like transpiration and photosynthesis.
As temperatures rise, metabolic functions and growth slow down or stop. Bubbles can form inside stems, blocking the normal flow of water and preventing a plant from receiving hydration. A plant needs more water as internal leaf temperatures climb - which can quickly happen under artificial lighting or intense sunlight as leaves store heat emitted from light sources.
Anything above 82F, 28C is hot. When conditions are extremely hot, 110F, 43C and above, stomata close up in order to prevent excessive moisture loss. Leaves wilt to limit the surface area exposed to the sun, reducing the intake of carbon dioxide and the ability to photosynthesize, significantly impairing a plant's ability to grow.
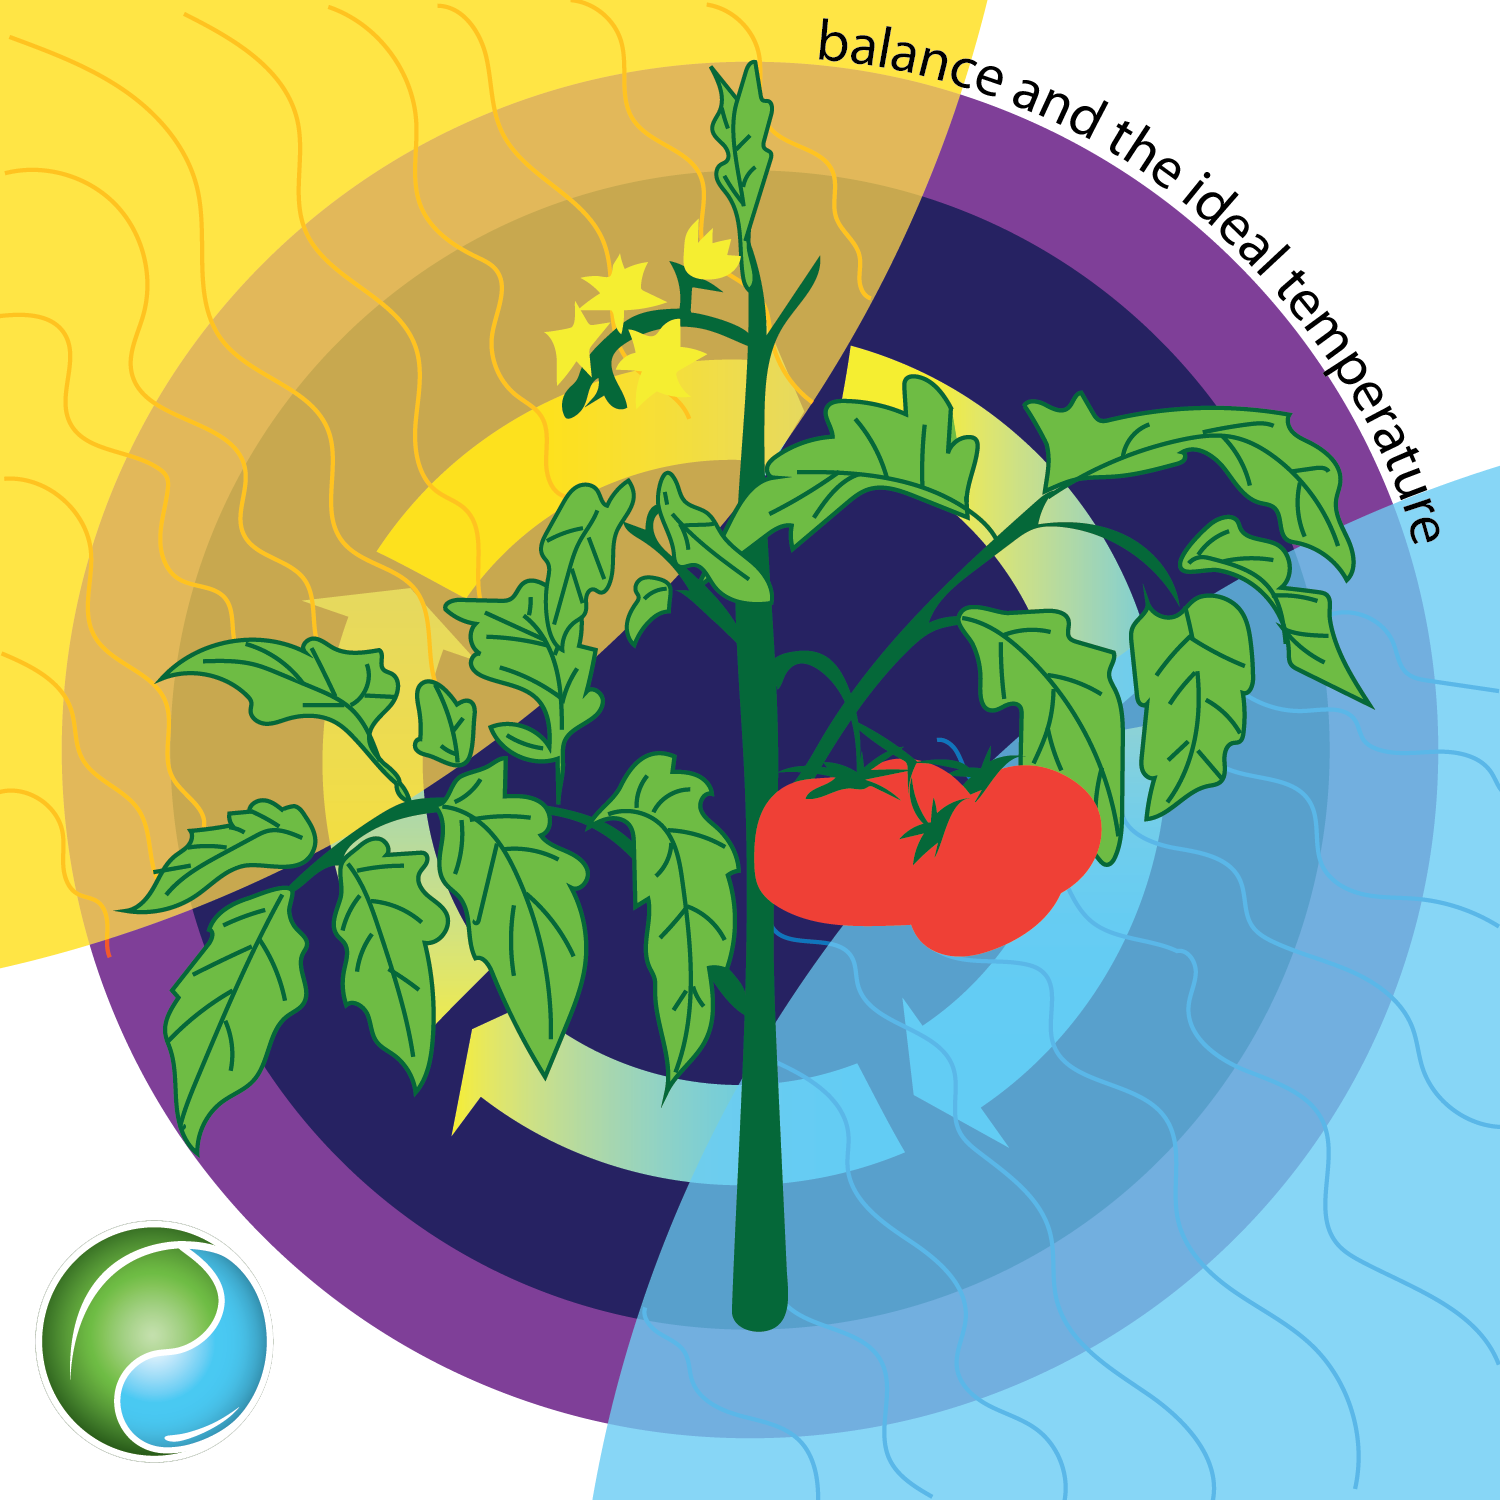 Image credit: Emily Nelson, Sustainable Plant Solutions LLC
Especially during summer, temperatures can quickly rise, easily reaching above 82F, 28C. If a plant is in a pot, the soil can quickly dry out. As the months become warmer, it's good to check on plants more frequently to get an idea of their water needs. The surface a pot is sitting on is also a significant variable. Material like cement will be a hotter substrate than grass, for example. While it may not negatively affect a plant in the fall or spring, it could cause issues in summer.
Some things to know about these conditions:
- If a plant gets too hot, to the point where its soil dries out, the plant will wilt, causing delicate root hairs to die, and nutrients will not be absorbed efficiently.
- In high temperatures, a plant increases its rate of transpiration which causes excessive moisture loss. If it isn't able to recover within a short amount of time (exposed to favorable temperatures and access to water), it will cause stress or the death of a plant.
- Hot temperatures will cause leaves to discolor, die, and fall off a plant; flowers won’t develop as expected, stretching can occur, and cannabinoid content may be compromised.
Signs a plant is in too hot an environment include yellowing leaves, chlorosis, brown leaf tips and edges, and curling leaves.
- Certain varieties perform better in warmer conditions. Selecting a variety that performs well in your particular location will make it easier to achieve a successful harvest.
Ways to cool a plant down include:
- Air circulation. Fans help move air around, lower temperatures, and keep humidity levels stable.
- Air conditioning is usually used indoors for vegging plants. It works well to keep temperatures at the ideal levels; however, humidity levels need to be checked and maintained.
- Wall chillers are used to cool greenhouses down, but are only used in sealed structures.
- Ventilation is very important when it comes to maintaining plant health. Not only does it help a plant transpire at favorable rates, it keeps temperatures stable as well.
Cold. Most plants cannot handle cold temperatures, cannabis being one of them. When the temperature is too low, water begins to freeze, preventing a plant from being able to access water and nutrients normally. Plant growth is slowed and root systems are damaged, making it almost impossible for a plant to survive.
Some things to know about these conditions:
- A plant’s susceptibility to cold weather is dependent on factors such as the location, soil, duration of exposure, and other variables.
- Cold weather freezes the cells within a plant, disrupting nutrient and water pathways.
- If temperatures get too cold, plants won't be able to complete regular functions and processes, or develop like they should.
- Cold weather causes a plant’s metabolism to slow down, and dramatically influences its ability to uptake nutrients, especially magnesium.
- Signs a plant is in weather too cold (53F, 12C) include decreased vigor, stunted growth, weak plants, small flowers, and increased deficiencies.
- Blackened stems and tissue death are also common signs of a plant affected by weather that is too cold.
Often, cold weather is difficult to escape for a backyard grower, especially if plants are in a flower bed. There are some ways to keep a plant warm, including:
- Greenhouses or shelters help influence temperature levels, especially when it comes to cold weather. In addition to keeping rain and wind off the gardening space, they also trap air inside; heaters and dehumidifiers can be used.
- Heaters help keep the greenhouse or structure at an appropriate temperature during the cooler months.
- Heating pads work well for potted plants. Larger pads are available for bigger containers and are useful to have on hand if you live in a cooler climate. They also work well for seedlings and clones.
- Blankets are used to wrap around containers and are also sometimes temporarily placed on top of the soil to retain heat.
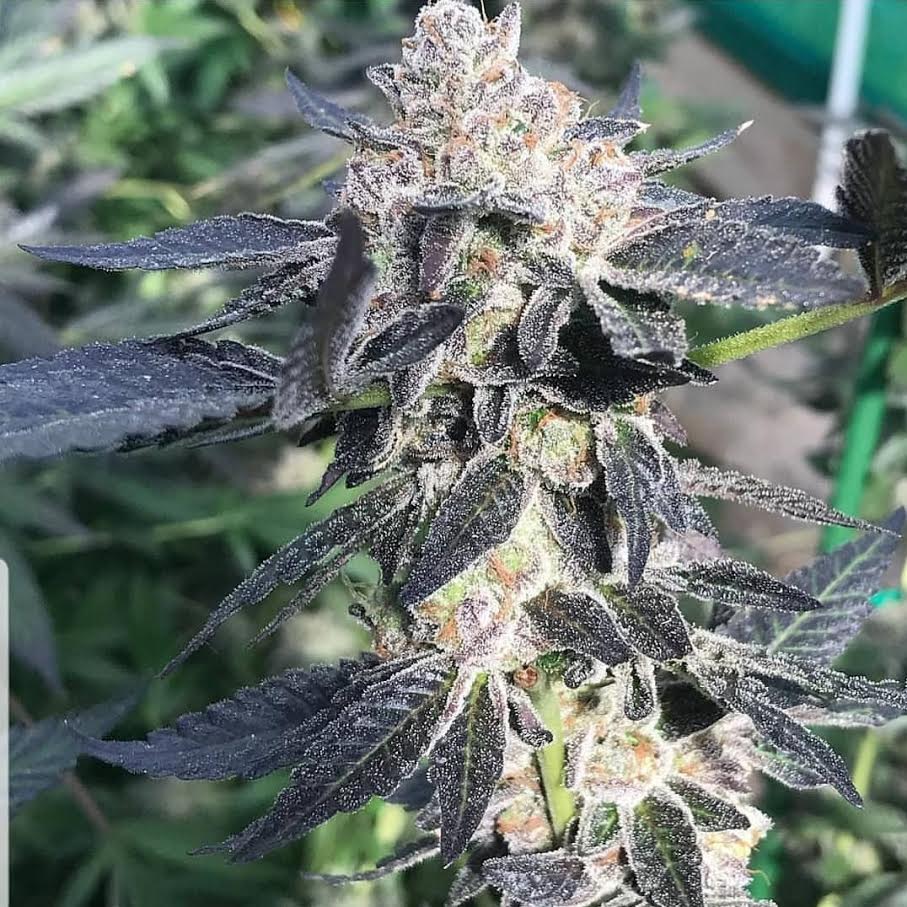
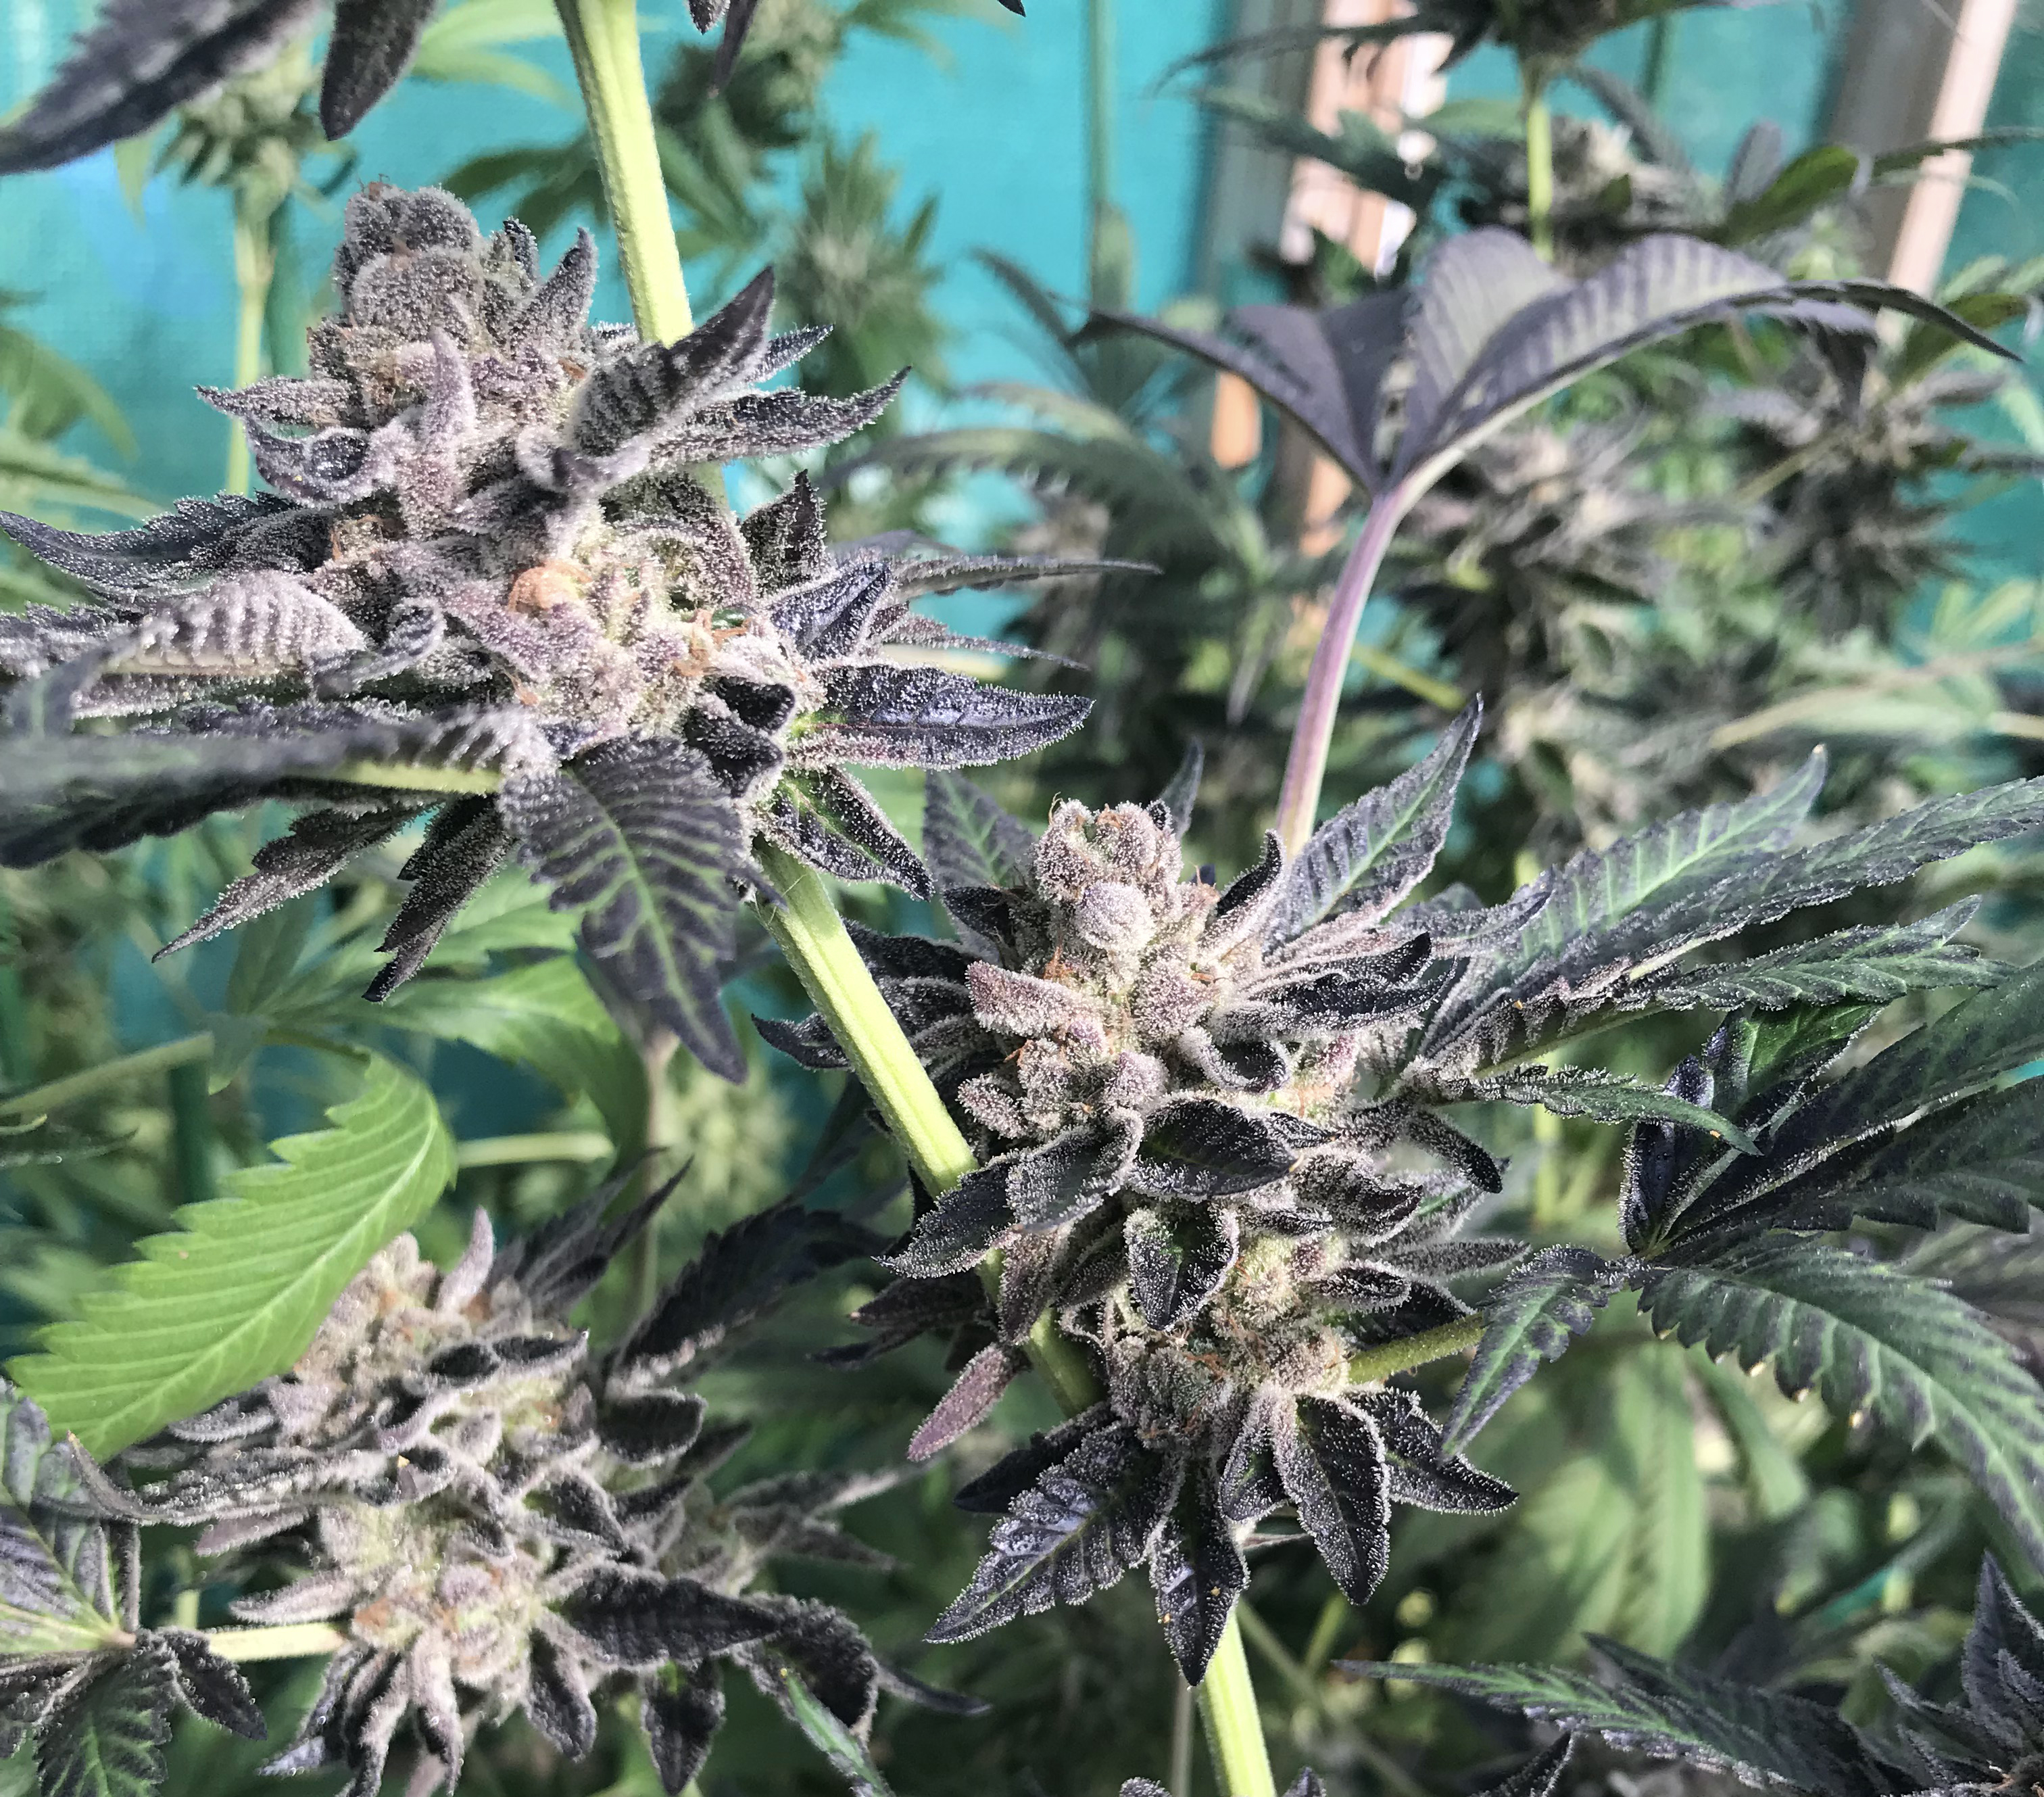
Fun Fact: While colored cannabis is mainly due to genetic traits, cooler temperatures also bring out the color in cannabis flowers, creating maroons and dark purples. These colors typically show up in the last 7-14 days of bloom.
Temperature fluctuations. Typically, day temperatures are warm while night temperatures are cool. For indoor and outdoor growers, it is important to not let the temperature rise or dip by more than 15 degrees between night and day.
Outdoors, during certain times of the year, frost and temperature fluctuations are greater and can cause stunted growth, susceptibility to disease, and lower yields. Because of this, in many locations, outdoor cultivation is limited to the months of May through October. If you're in a location that experiences cold weather or excessive temperature fluctuations between day and night, it is important to be diligent about when you put plants outside to flower to ensure they finish correctly.
 When conditions are right, cannabis performs beautifully
Humidity
When conditions are right, cannabis performs beautifully
Humidity. Humidity is defined as the amount of water molecules or water vapor in the air. It is directly related to temperature.
The humidity level influences the rate at which a plant can transpire. If the humidity is too high, a plant cannot release water into the air, instead keeping it locked in the soil. If a plant's roots are exposed to too much water for too long, they rot, eliminating a plant's ability to absorb water and nutrients, eventually killing the plant. If the humidity is too low, a plant will transpire too much, soil will quickly dry out, and plants can easily be lost to dehydration.
When it comes to controlling humidity levels in an outdoor garden, it is challenging, but you can control it to some degree. First, by thoughtfully designing a garden space, like a greenhouse, with humidity in mind, you can help influence levels more easily. Having sides that are breathable is one significant way to do so if high humidity is an issue.
Additional things you can do include:
- Fans. If you have a greenhouse, fans can help move air around, remove unneeded moisture from a garden, and keep humidity levels in check. Multiple fans will likely be needed. The size of the fans needed will be dependent on the size of the space. Make sure not to point fans directly at plants, instead pointing them above and below the plants or down aisle ways. Oscillating fans are nice, but not always doable in an outdoor garden. Fixed fans work well as long as they are strategically placed and protected from moisture and the elements.
- Proper plant spacing. The number of plants will affect the humidity level and temperature due to added moisture and decreased space and air flow.
- Proper maintenance. One of the best ways to keep humidity levels favorable is to really focus on pruning and maintaining each and every plant. Mold, pests, and other variables can appear overnight, so a daily inspection of the garden is key. Proper defoliation and airflow will help your garden perform how you want it to, and will maintain the health and quality of the plants.
- Soil moisture. Paying close attention to how saturated the soil is at all times helps with maintaining ideal humidity levels as well. This requires practice and getting to know your soil and environment. While changes may be minimal, moist soil will increase humidity while drier soil will lower it.
To raise humidity levels, you can use a humidifier, apply a foliar spray, mist the air with water, or leave a bucket full of water in the space. Sometimes extra pots of soil are added to a space and watered in an attempt to raise the humidity. Make sure you pay close attention and don't allow humidity levels to increase too much.
- If humidity levels are too high, too much moisture is in the air, encouraging mold, rot, and other negatives. High humidity levels also prevent plants from releasing moisture through their stomata, causing it to be trapped in the soil. If left there too long, root rot and stem rot are likely.
- If humidity levels are too low, conditions will be too dry, causing a plant to quickly dry out and wilt, jeopardizing factors like root hair formation and functioning, crucial for development. It is also likely to create increased fluctuation rates in the plant’s liquid uptake, which is not favorable.
Recommended humidity:
- Seedlings: 70-75%
- Vegging: 70-75%
- Flowering: 55-60 (night) - 65-70 (day)%
Vapor Pressure Deficit (VPD). The VPD is a measure of how much moisture
is in a space in relation to how much moisture
can be in the space. It is affected by temperature, wind speed, and humidity. For example, a space that has a low VPD might have a temperature reading of 65F/18C and a humidity level of 70%. This space would have a low VPD because based on temperature, the air couldn't hold much more moisture.
Why does VPD matter?
Transpiration is the process that moves water from a plant's roots up through the stems and branches to the leaves and then into the air. It allows a plant to cool itself down and also influences nutrient uptake and gas exchange capabilities. In addition, it contributes to helping a plant be able to stand upright. Up to 99% of the water absorbed by a plant’s roots will be lost due to transpiration. A plant's ability to transpire is greatly influenced by temperature and humidity, or the VPD of the space.
A low VPD means that the space has too much moisture, stunting plant growth and potentially causing water to condense on leaf surfaces, which can lead to mold, mildew, and rot. A high VPD means the space is too dry. These conditions cause a plant to transpire too quickly, causing leaves to curl and tips to burn.
It is possible to achieve an ideal VPD by adjusting the temperature and relative humidity; there are several acceptable VPD levels. Optimal ranges differ slightly depending on whether a plant is vegging or flowering.
Ideal levels are:
- Veg: 0.8-1.06 (kPa)
- Flower: 1.0-1.4 (kPa)
 Ideal VPD levels; Art by Rylan Kapuy @420air
Pay close attention to your flowering plants as they approach harvest, ensuring temperatures are comfortable (65-75F, 18-23C) and humidity levels are kept in check. This will prevent mold and other harmful fungi from developing in large amounts, as dense, resinous flowers can create perfect conditions for that to occur.
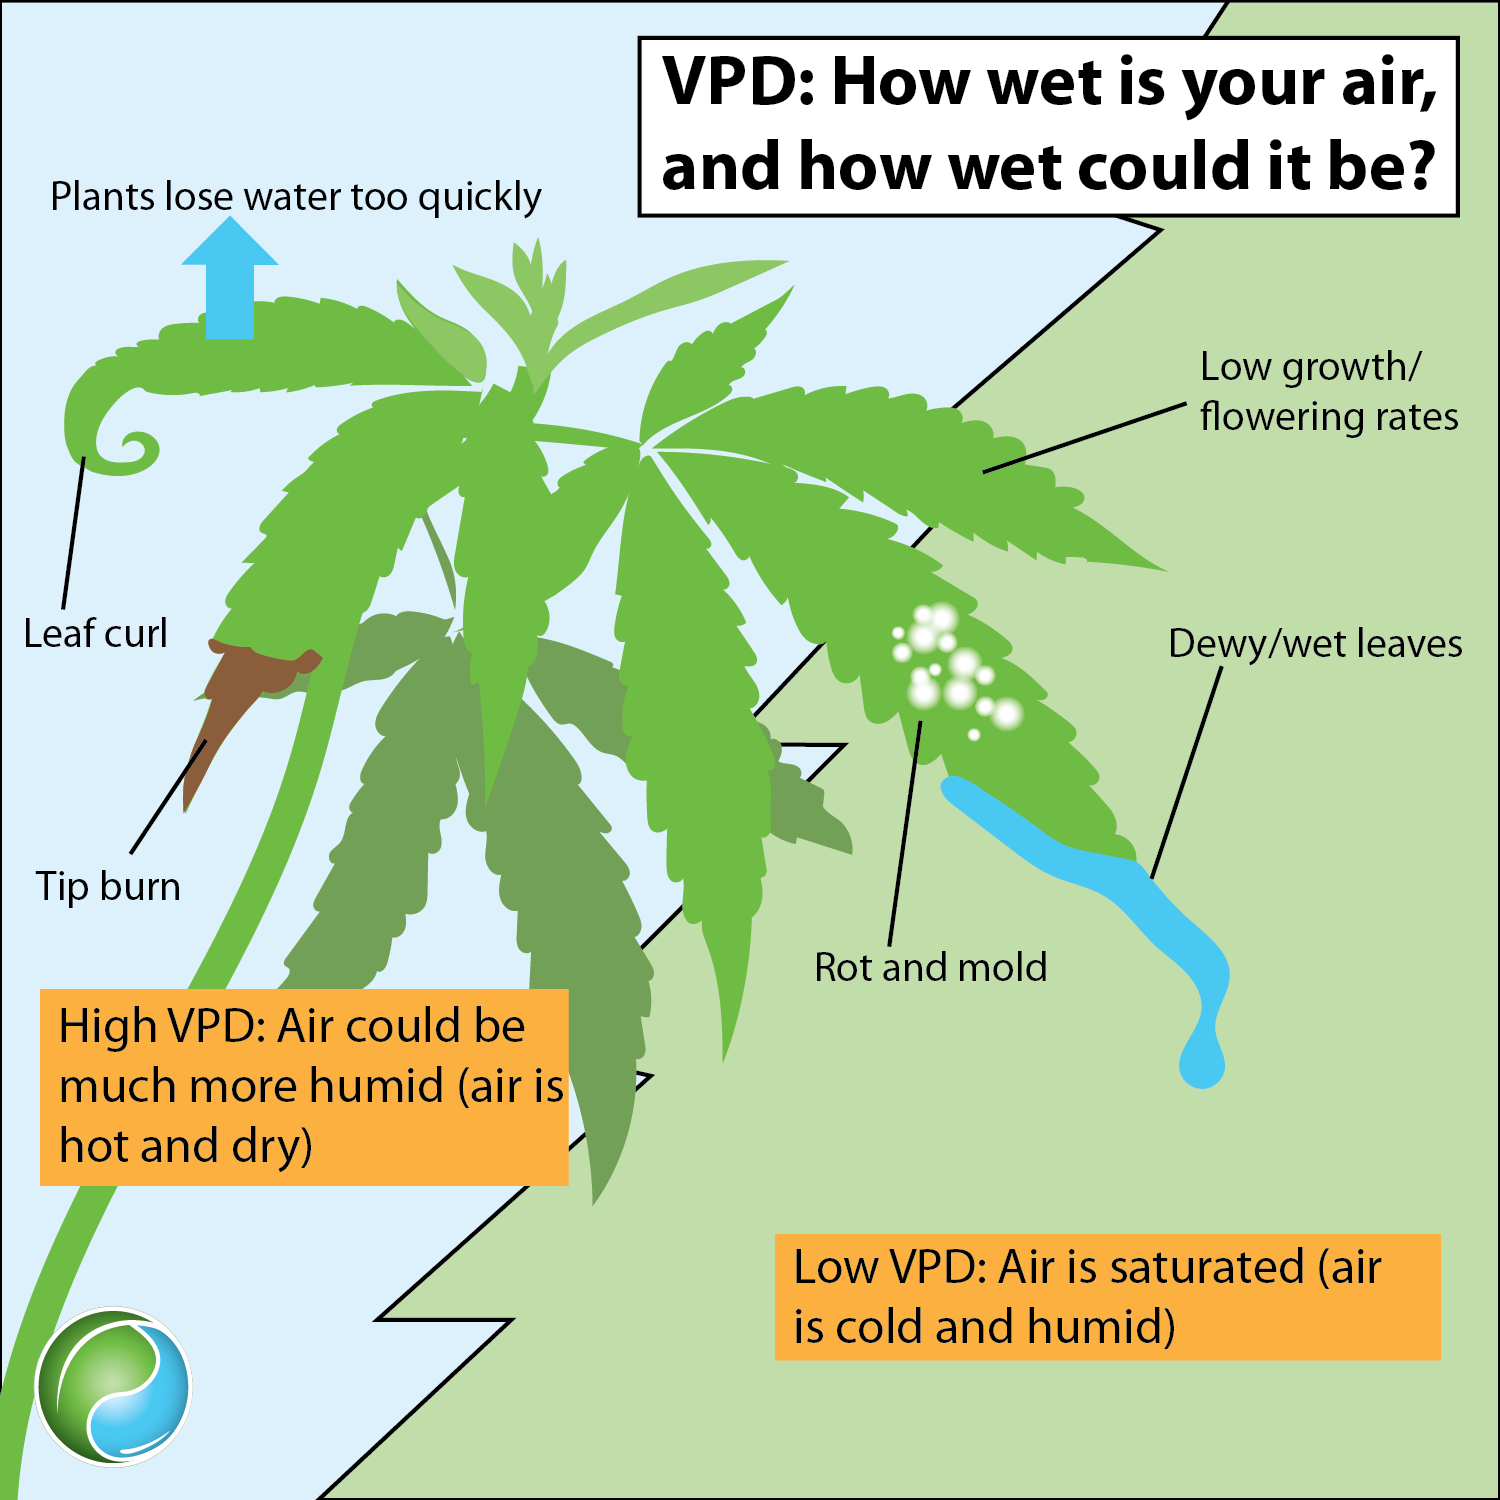 Image credit: Emily Nelson, Sustainable Plant Solutions LLC
For optimal results, you are aiming to provide the ideal temperature and humidity for your gardening space, with ideal numbers dependent on the age of a plant; doing so will encourage the best growth possible. Experiment to find the best VPD for your environment and garden.
The Plants
When it comes to the plants in your garden, consider:
Indoor/Outdoor:
- What strains favor your environment?
- Are your selected strains compatible with each other? Will they require similar care?
Outdoor:
- What season are you growing in?
- How much light does the space receive throughout the day?
- What are the best growing techniques for your location?
Numbers: When deciding on the number of plants, consider the square footage of your garden space, how big you want each plant to be, and how many hours a day you have available for gardening.
Be sure to only take on as many plants as you can handle on a daily basis. If you have too many plants and can't properly tend to them, or can’t give them enough time, your entire crop will likely suffer because of it; more plants aren’t worth the increased frustration.
It’s also important to note that if there are too many plants crowded in a small space, it will increase the chances of developing mold, mildew, pests, and deficiencies. Giving each plant enough space is important for the health of the entire garden and will influence the quality that can be achieved. Proper light exposure, air flow, temperature, and humidity are all factors dependent on the number of plants in a particular space.
Keep in mind, it’s nice to have a few different cannabis varieties and flavors rather than just one kind. This will not only allow you to treat diverse medical issues, but will also keep things colorful in the garden. Observing the distinct characteristics of each plant and strain keeps it interesting, increasing the likelihood that you will put in the required time and effort.
Your location will greatly affect how well a particular strain will perform in your garden. Some varieties do better in certain climates and locations while others should only be grown indoors, so be sure you know exactly what strains you are planting. If possible, ask growers in your area which ones perform best for them.
 Your location will greatly affect how well a particular strain will perform in your garden
Strains that do well outside have the following characteristics:
- Less likely to mold
- Resilient to environmental conditions and diseases
- Have thicker leaves and stems that are less likely to be attacked by pests, and more likely to withstand wind and weather conditions
Size: Ideally, all of your plants are a similar, manageable size. Bigger plants typically yield more, but it is harder to obtain a high quality flower. This is because they require more food and resources and must spend a longer time in veg, increasing your chance of deficiencies or that an issue will arise. Larger plants also take up more square footage and have more surface area to maintain and protect against bugs and diseases.
When it comes to cannabis, the size of a plant is really a matter of preference; however, plants that are put into flower when they’re about 3-4’ tall are easier to take care of, yield nicely, and
increase the likelihood of producing those high quality flowers you want. Making sure your plants are all a similar size will ensure an even canopy, allowing your garden to get relatively even light exposure and air circulation, which can influence yield. In addition, uniformity adds to the visual appeal, inspirational when it comes to providing adequate care.
To achieve plants that are uniform in size, you can do a few things to influence consistency. You’ll need to either start all of your seeds at the same time, and top taller ones, or cut your clones exactly the same size. To ensure your clones are evenly sized, use a 6-8” pre-measured wood skewer or chopstick to determine where you’ll make the cut. It’s also common to top a plant above the sixth node (starting from the top down). Because each plant grows depending on how healthy it is, even cuttings of the same strain, you will also need to properly train and maintain each one to achieve a uniform canopy.
Plant Placement: When it comes to planting, placing strains that require similar food recipes, watering needs, and care in the same container or next to each other will help make things easier.
Lining plants up in straight rows allows you to keep track of and tend to each one and allows you to properly maintain your entire garden easily. Ideally, plants should be spaced far enough apart that their leaves don't touch (4-6 ft apart), letting sunlight and air reach the middle branches. If space is an issue, the closest you want plants to be placed is where their leaves are barely touching.
Take into account how many branches or how bushy each plant is. Place every plant in the location that each variety favors. Some varieties may need extra support, or more space, or prefer a corner spot as opposed to a middle-of-the-bed location.
When it comes to planting, using a string to line up where the plants will rest in the bed will help keep things neat and uniform. Remember to tag the plant with the strain name and date of planting. Organization is a gardener's best friend.
Make sure the beds or containers are placed far enough away from the sides of the greenhouse to leave enough space for you to move around each and every plant.
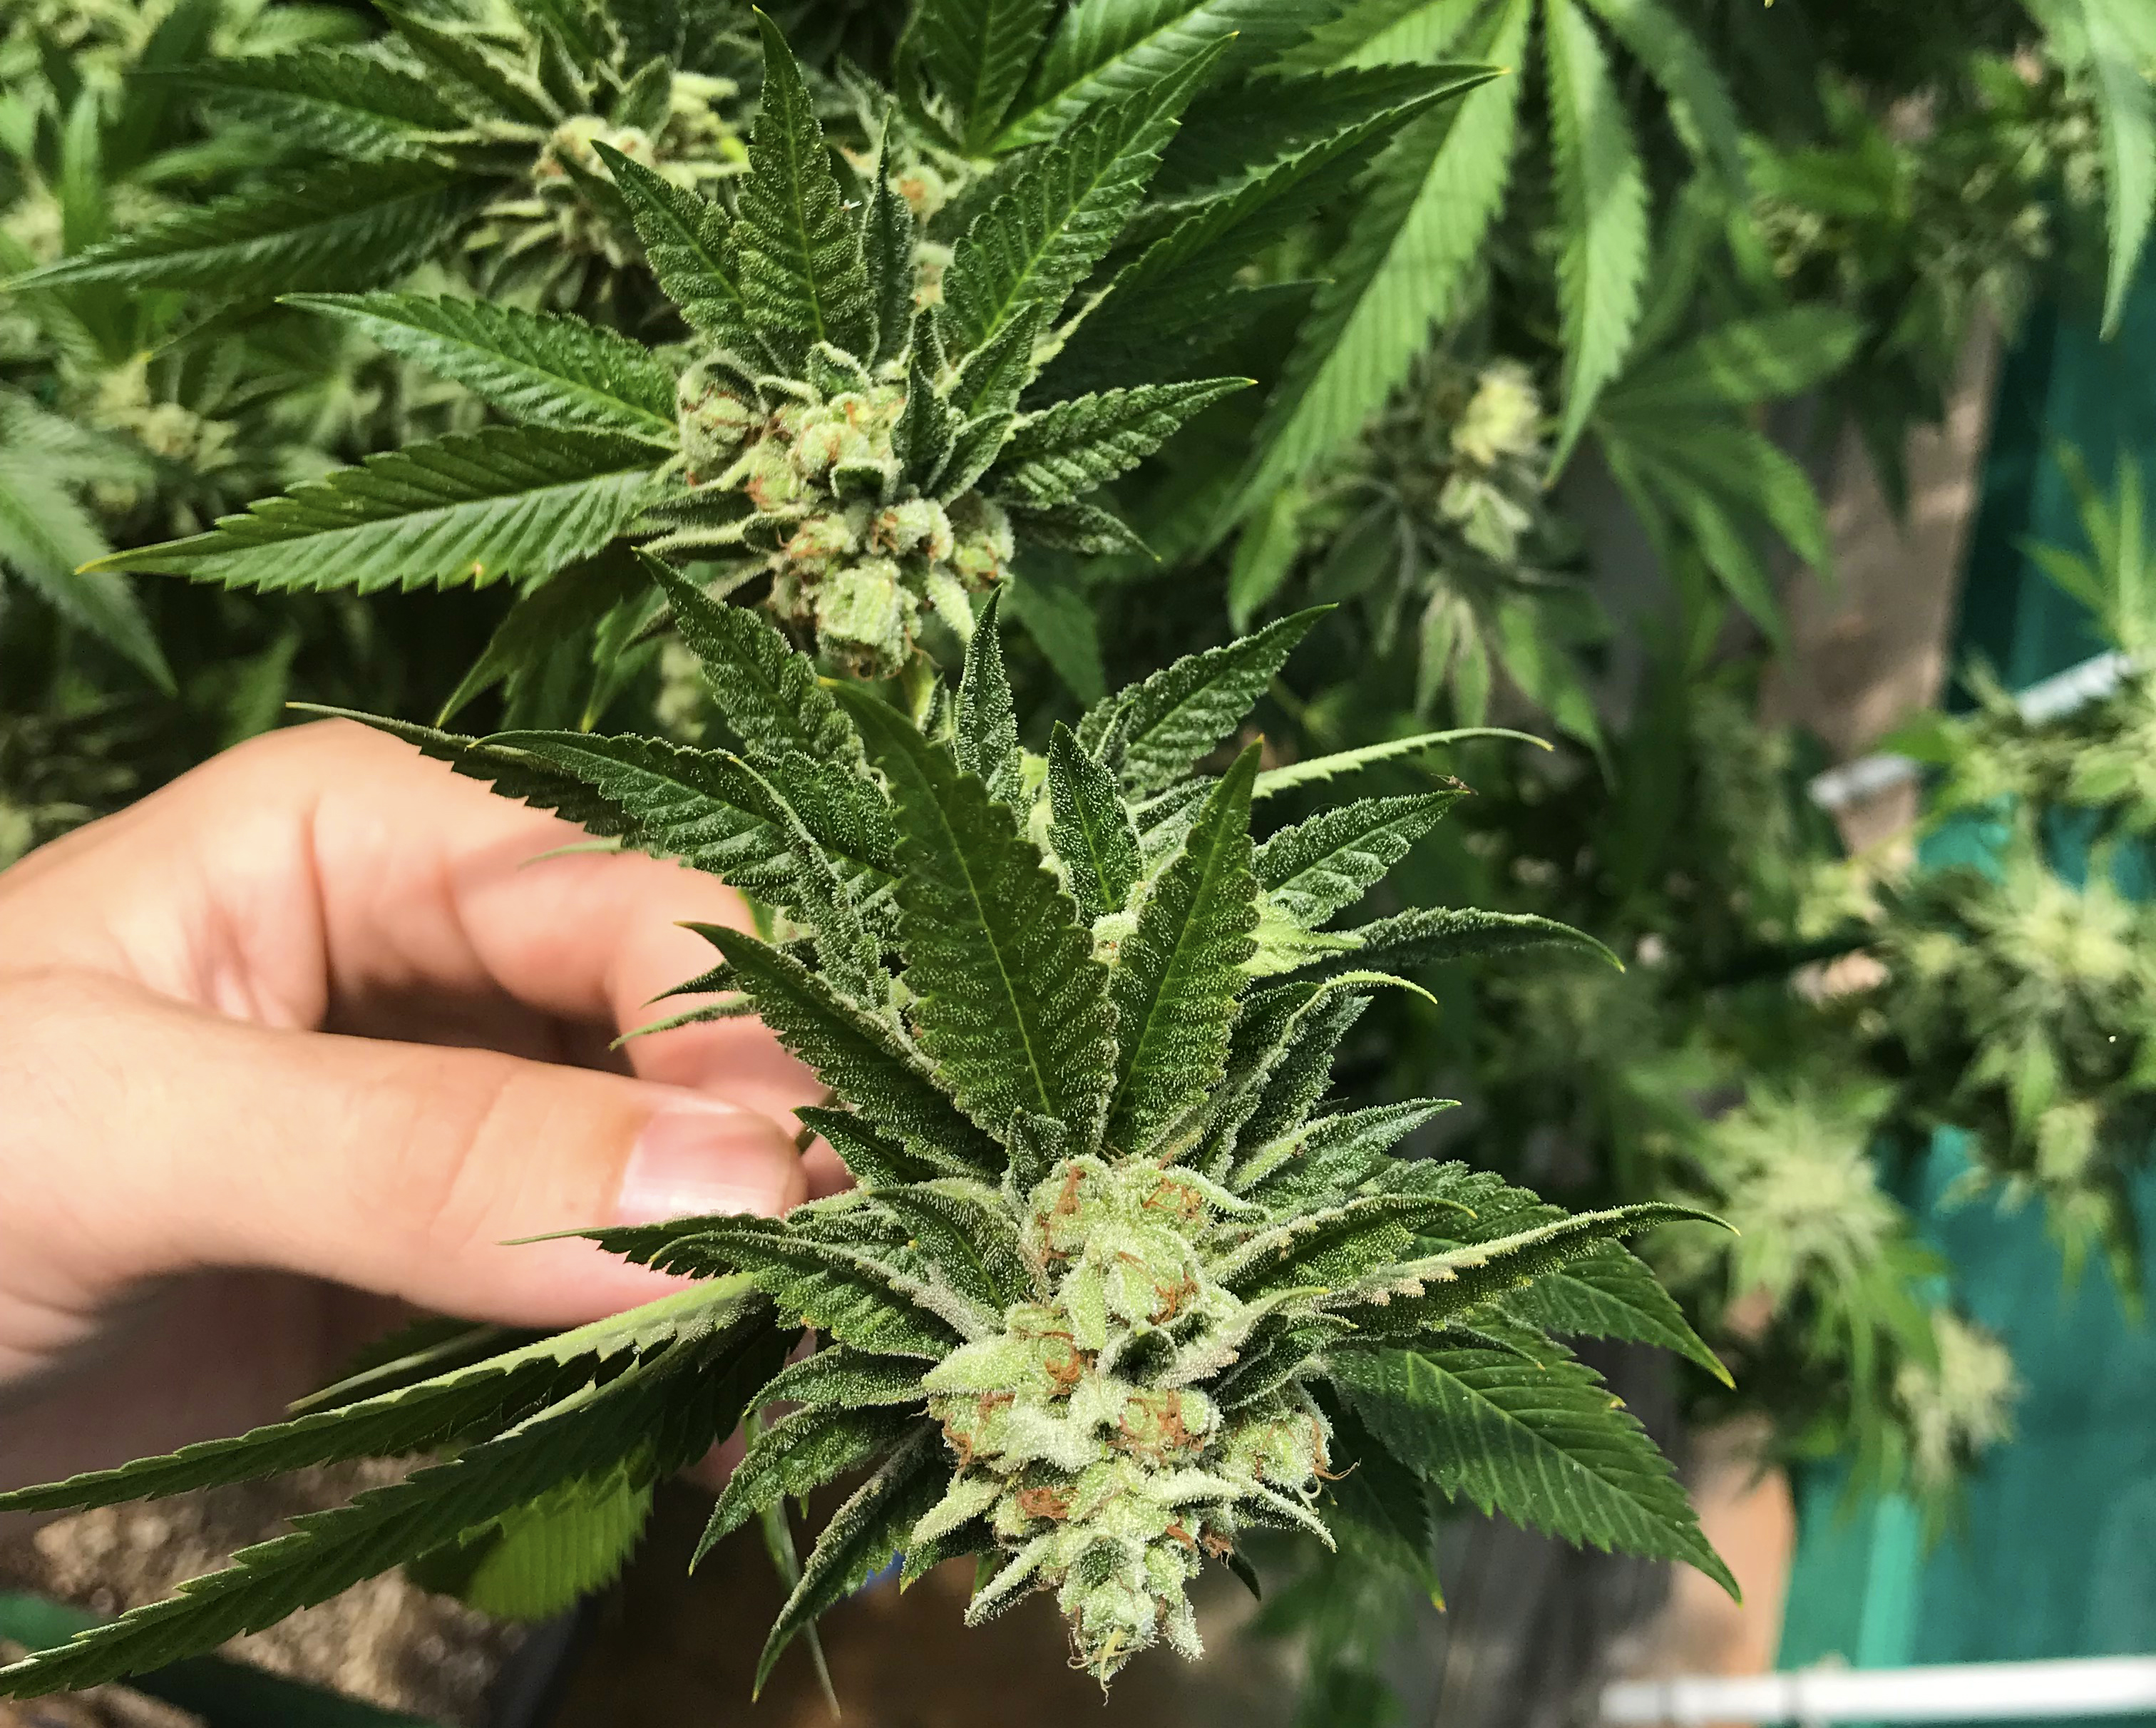
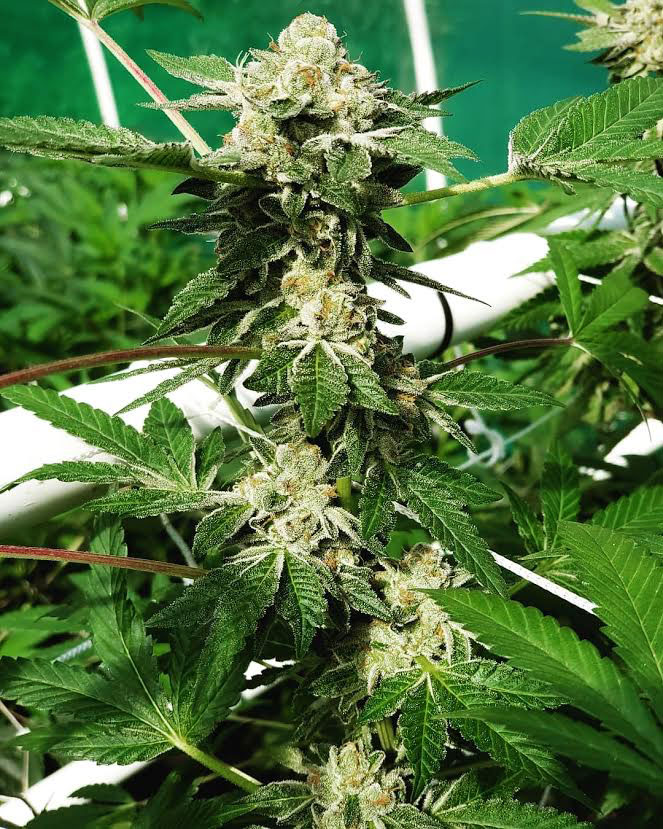
Growing Technique: With a focus on health - to produce flowers of medicinal quality - growing
organic cannabis is recommended. Organically grown flower will burn more smoothly, have more intense flavor and aroma, and is the only kind of cannabis many longtime patients will consume. An added benefit, this way of growing is more forgiving than other methods as the soil will take on some of the responsibility when it comes to stabilizing the health of a plant.
 Medicinal cannabis contains adequate amounts of cannabinoids and terpenes, and is grown organically
What specifications make a garden ‘organic?’ The word organic can be defined as something that is “relating to or derived from living matter,” or in its simplistic form, “contains carbon.”
To keep it short and sweet, organic cannabis differs from non-organic cannabis in one basic way: how it is grown. True organic cannabis is grown in soil with beneficial microbes, under the sun, without synthetic nutrients, and with natural pest management techniques. While you can find large-scale organic grows, it is uncommon, as it requires more time and attention in order to pull off a successful harvest. Most non-organic cannabis is grown indoors with bottled nutrients, sprayed with pesticides, and is often grown hydroponically, or without ever touching soil.
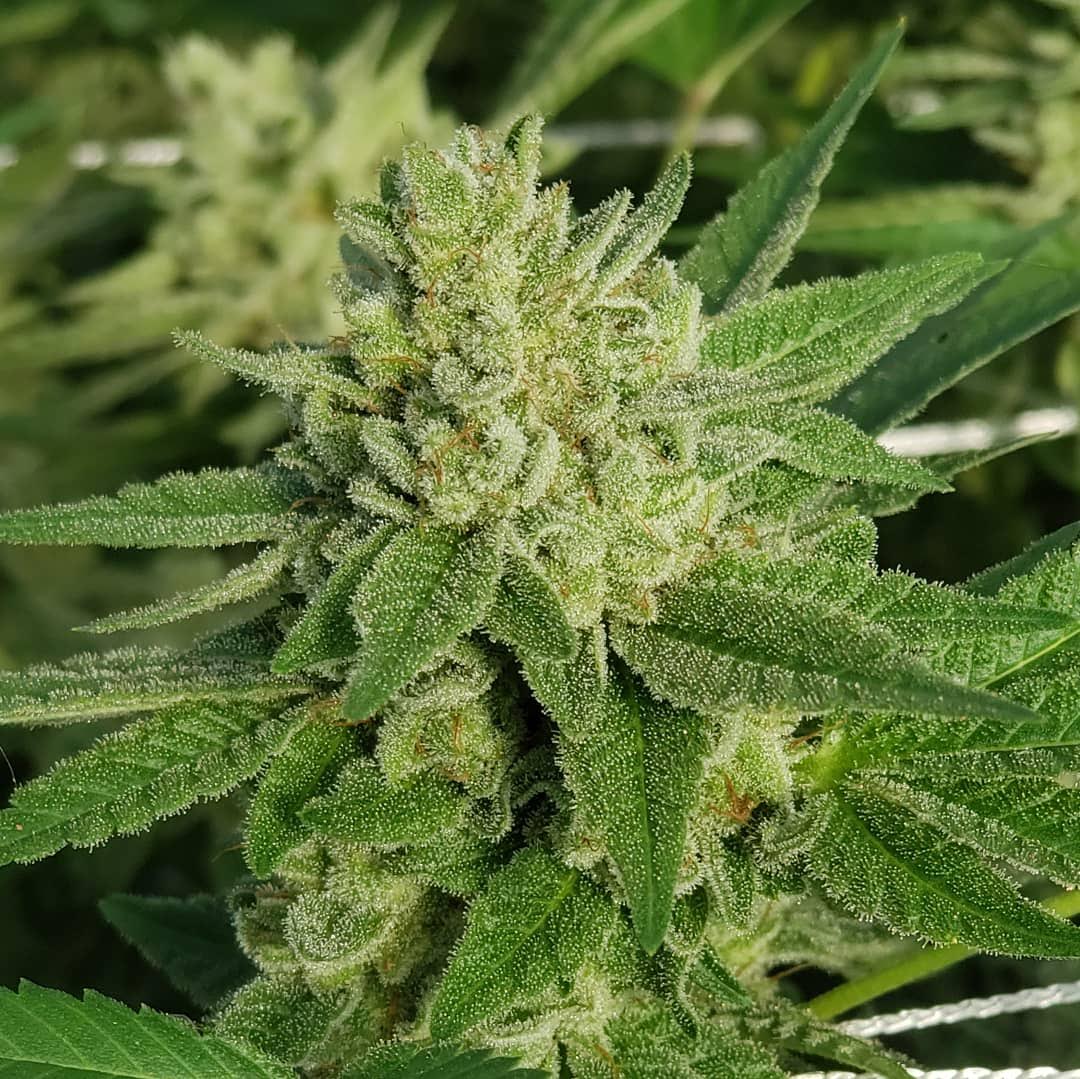
Another distinction with organic cannabis is that it has a higher nutrient density, which produces higher brix levels. The
brix level is the percentage of sugars present in a plant's sap. The higher the brix level, the higher the quality of the flower. As far as cannabis is concerned, higher brix means plants are healthier, have more aroma, flavor, medicinal value, and the shelf life of a flower is extended. Non-organic cannabis may be able to achieve high THC and CBD content; however, it will typically have lower terpene profiles. While THC and CBD content are important in determining the effectiveness of a strain, without the terpene profile to back it up, it is not as medicinal and the effects are short-lived.
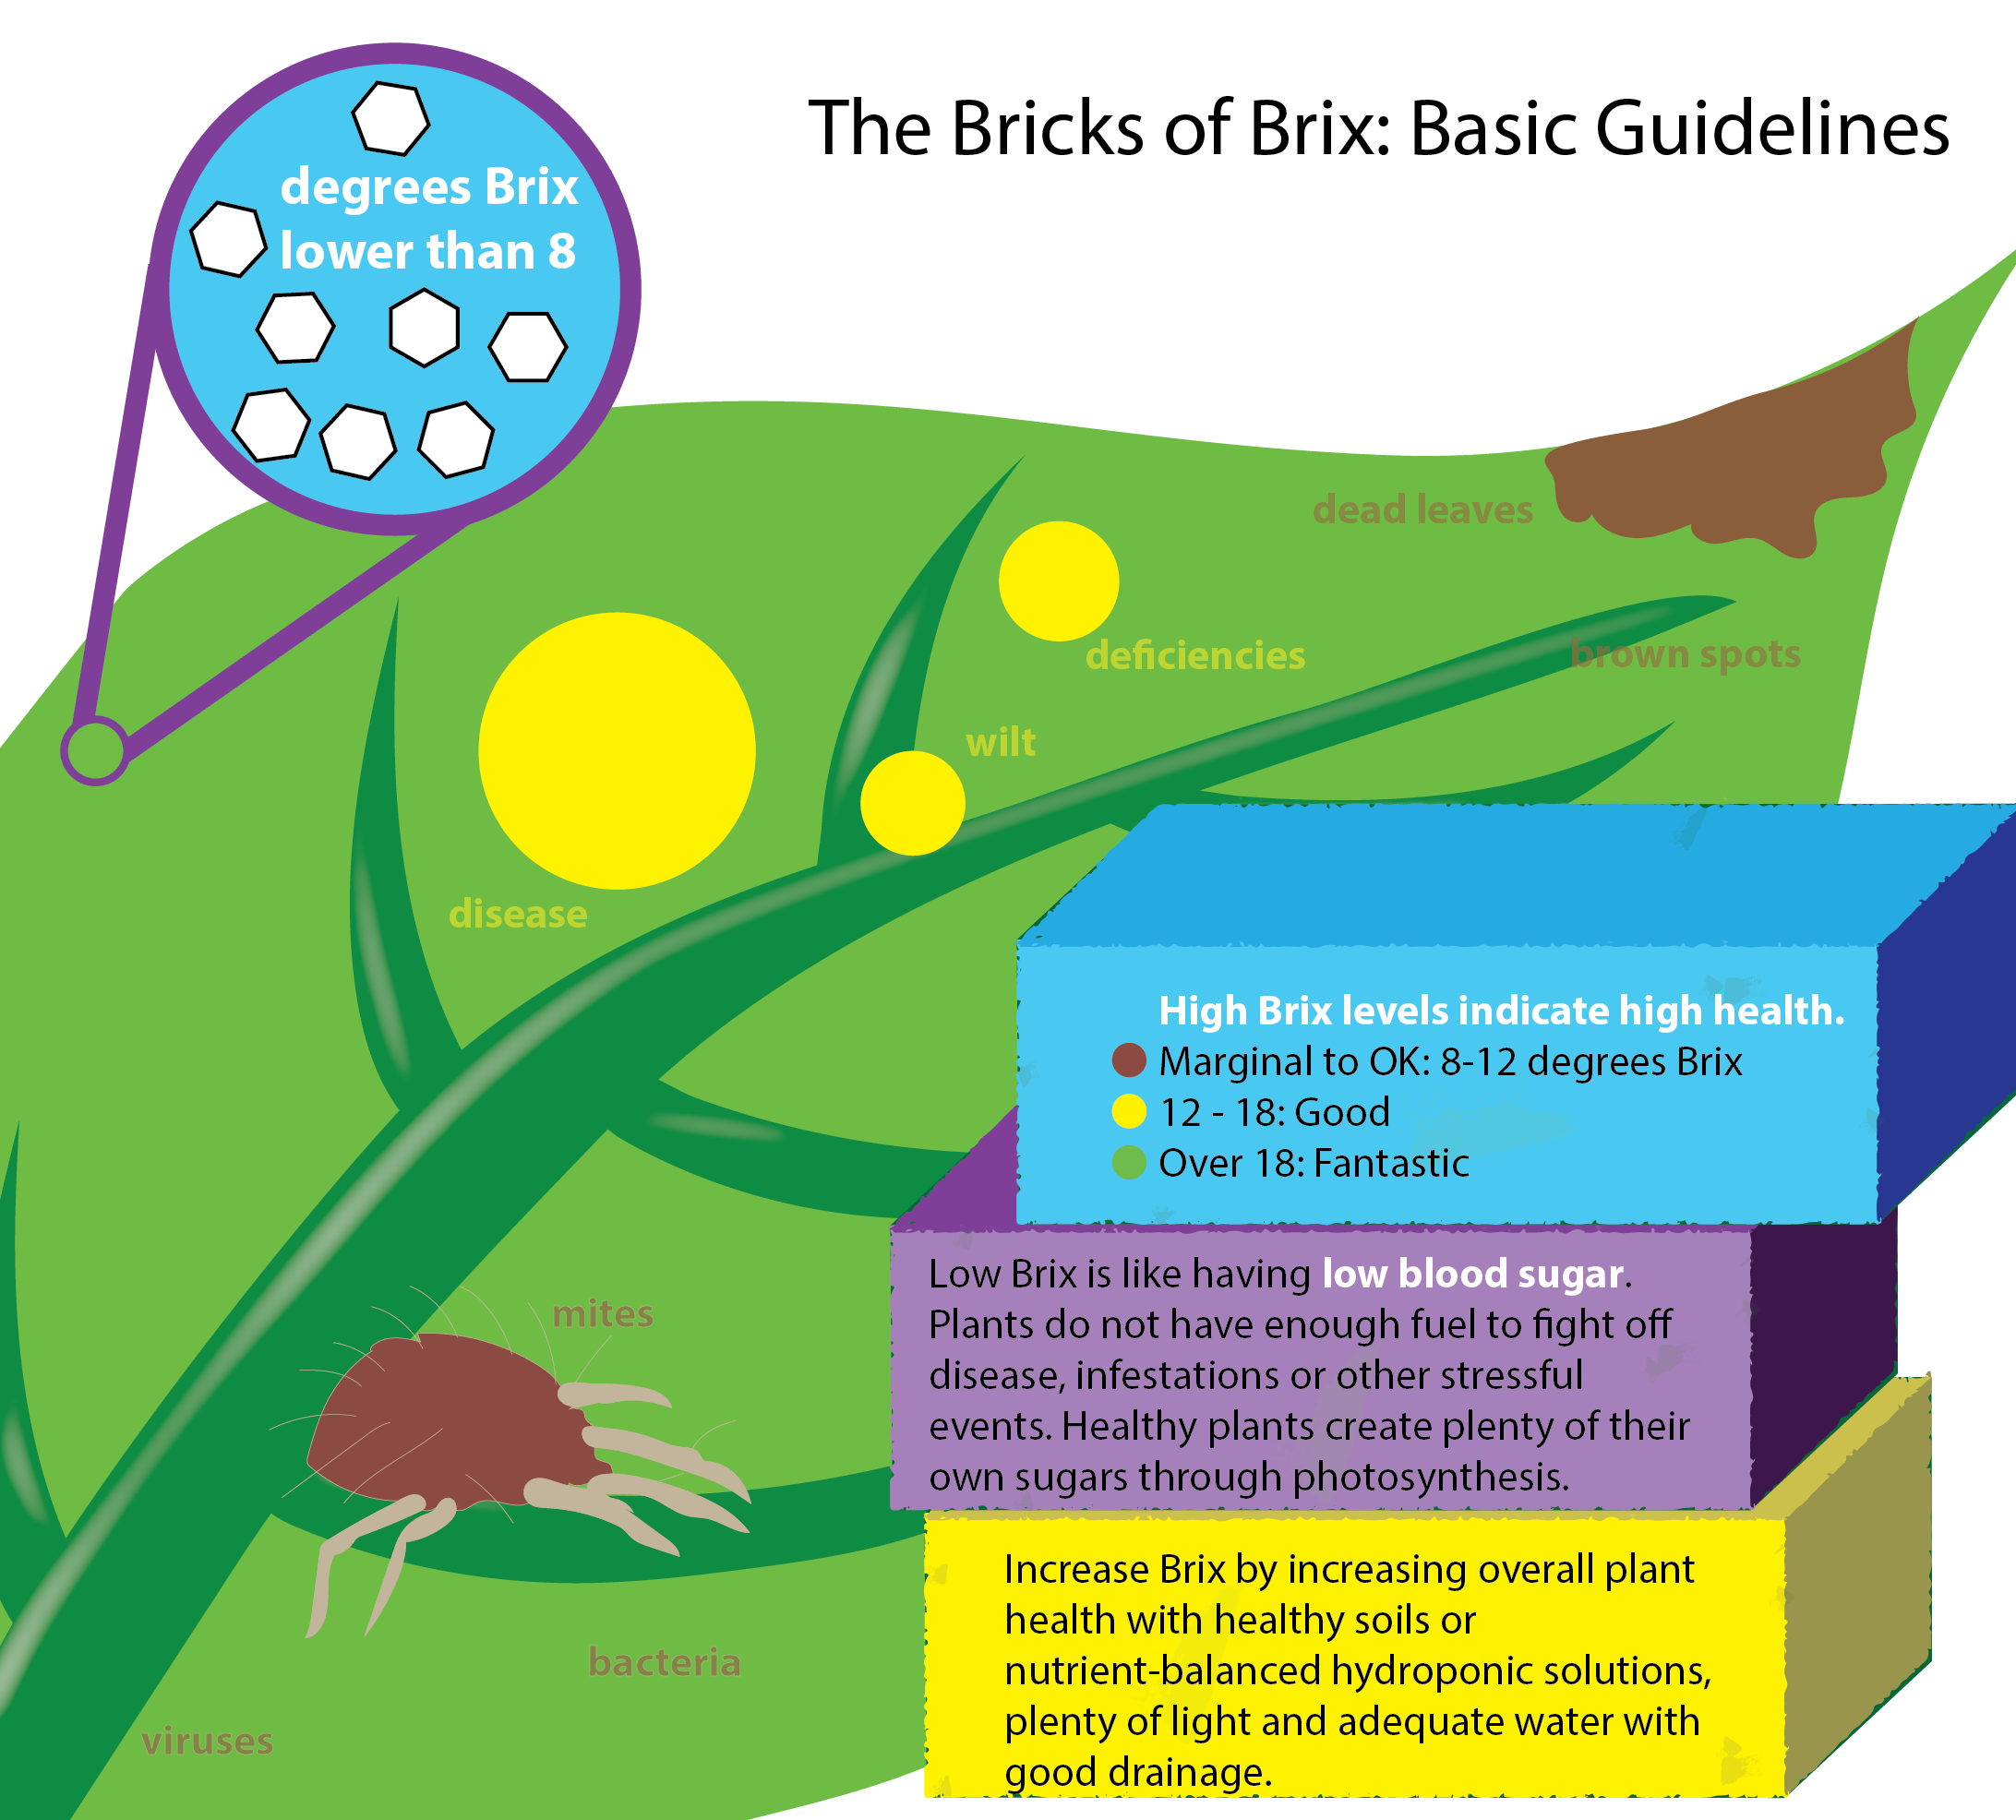 Image credit: Emily Nelson, Sustainable Plant Solutions LLC
When you’re setting up an organic garden, the goal is to recreate as natural a setting for your plants as possible, while making sure you minimize the negative variables as best you can; to grow plants in harmony with nature. Exposure to sunlight, living soil, gentle winds, beneficial predators, and select wildlife, like songbirds, are all encouraged, and are the factors that help distinguish organic cannabis. Rain, intense temperatures, and pests are some of the variables that will need your intervention and monitoring to ensure optimal plant health.
If a cannabis plant, which is especially sensitive to the environment it grows in, is allowed to develop as naturally as possible, it is able to reach peak medicinal value. Certain uncontrollable factors, like light intensity and microbial activity, will help a plant produce the terpenes and characteristics that allow it to reach that status.
The philosophic goal of organic gardening is to utilize gardening techniques that revitalize the environment and encourage sustainability. Organic farming protects the environment; from the pollinators that fly in the air to the microorganisms that live in the soil, contributing to a better place for all.
Vibe: Often overlooked but highly influential, a cannabis plant is greatly affected by its environment: the vibe of its space. Environment, as used in this book, includes the soil composition, air quality, temperature, light exposure and intensity, interaction with other living organisms, and the overall feel of a place.
How do you feel when you hear your favorite song? When you smell your favorite food? What makes your happy place so appealing to you? It’s what a place provides and how a place makes you feel that determines how much you like it, often contributing to how well you perform there. Comfort, encouragement, and cleanliness are also big determinants of a desirable place to be, something heavily missed when absent.
Since plants are stationary, it will be your job to provide them with their own happy place. Organic plants need to be exposed to essential elements and surrounded with beneficial organisms in order to stimulate natural processes that strengthen them, allow them to make food, perform at peak levels, and provide them with energy; overall, allowing them to simply be a healthy plant. While there are many different ways to grow cannabis, the organic method produces plants with the greatest potential.
 Cannabis plants are highly sensitive to their environment and their caretaker
There’s one more, often underemphasized, component to growing cannabis: the grower’s attitude while in the garden. It borders on the metaphysical, but cannabis plants appreciate when you go above and beyond with care, no matter what stage of life they are in. This doesn’t mean to do too much; simply pay attention and give them the love they need when they need it.
Play music while you’re gardening; talk to your plants - say ‘good morning’ to them; anything that increases positivity in your growing space. Studies conducted by botanists such as Dr. T. C. Singh and Dorothy Retallack have shown that certain music can positively influence plant health and growth, improve pest and disease resistance, as well as increase the development of good fungi and bacteria in the soil. Factors such as tone, frequency, time of day, and length of exposure all matter, especially for cannabis plants, as they are strongly influenced by vibe. While plants cannot hear sounds, they can feel vibrations created by sound.
What kind of music should you play? Some suggestions include:
🎶 Classical songs
🎶 Instrumental songs
🎶 Reggae songs (Bob Marley)
Research has also shown that speaking kindly to or around plants helps them grow better and keeps them healthier. Imagine what the opposite does. Try not to answer your phone or have negative conversations while you’re in the garden. Being mindful of your thoughts, words, and actions will go farther than you might think.
Every grower has a different vibe, their own way of doing things, and in addition to the feel of the environment, that vibe will affect the plant and end results. Another way of looking at it: your garden will be a reflection of its caretaker. You are the Chef, and the seasonings and vibrations you emit will enhance or inhibit the character of your plants.
--
Back to top
What’s your vibe?
Bottom line: the environment you create for cannabis will greatly impact the health of your garden and the quality of your flowers. For the greatest chance of success, remember to utilize the best growing techniques and strains for your climate to ensure you’re getting the most out of your garden. Expertly provide a cannabis plant with the things it needs to thrive and experience what it’s really capable of.
Chapter 3: Building Soil
In a garden, there are 3 different communities to care for:
- Soil community
- Root community
- Plant community
All of these communities interact with each other, and although two out of three of these communities remain underground mostly unseen, they are major influencers of a healthy plant and garden.
Let’s talk in-depth about the soil:
How important is the growing medium when it comes to the development of a cannabis plant? What should good soil do for a plant throughout its lifetime? Similar to constructing a house, you want your plant to have a solid foundation. A good soil recipe and the proper maintenance of it is the foundation of a healthy cannabis plant. The soil is where the roots, the most important part of the plant for maintaining health, live.
First thing to know, cannabis thrives in a living soil; a soil that is made up of several components that harmoniously work together to create an environment that allows a plant's root system to establish strong architecture, encourage root hair development, and obtain the nutrients required for it to prosper.
 Cannabis plants thrive in living soil; it’s what they want and need
Understandably, inexperienced gardeners often assume they can simply use the soil found on their property, ordinary ground soil, to grow their plants in. While this may be true in certain places, much of the soil that comes from the ground is nutritionally void - too sandy or containing too much clay. These types of mediums are not only lacking nutrient content, but can also be crowded with tree roots, have unbalanced pH levels, have difficulty holding and shedding liquid, don't have suitable heat retention capabilities, and lack adequate levels of oxygen; all problematic for cannabis plants.
Good soil is dependent on what's inside of it and should not be exposed to pesticides. Organic matter (such as carbon, humic, and fulvic) is what makes soil so nutritious for plants, attracting microbes and beneficial fungi. Living soil is key to producing flowers of quality. It is what plants are used to interacting with; it's what they've been growing in and developing with since the beginning of time. In basic form, it's what they know.
Soil serves many purposes, including:
- A place where food is made and stored
- A place where water is present, balanced, and stored
- A place where air is present and circulated
- A place for the roots to live and grow
- A place for microorganisms, fungi, and beneficial insects to live
One way to obtain living soil is to make it yourself. If thoughtfully completed, a good soil mix will provide a plant with the components it needs to help sustain it throughout its time in veg or bloom, and if properly maintained, can last quite a while.
Getting To Know Your Soil
The best way to understand how soil works and what goes on inside of it is to get to know it. How do you do that? You touch it. You pay attention to it before you plant anything, when it's wet, when it's dry, when it's in different stages, when it's time to transplant, and after you harvest. Ask yourself: what’s different? What’s the same? What’s missing? Can anything be improved upon?
Soil should not be:
- Unbalanced (too acidic, too alkaline)
- Unable to absorb or shed liquid as needed
- Too compact or too loose
- Too wet or too dry
- Too hot or too cold
- Dead or without life
Sending soil samples to a lab for testing will also give you valuable information that may not otherwise be attainable. You can learn what kind of nutrients are available, which ones are missing, and get a good idea of how your soil is performing. The soil needs to be exceptional if you expect an exceptional harvest.
Once soil is mixed, there are several characteristics you should notice:
- Appearance - Soil should be dark and rich in color
- Composition - Certain ingredients are needed to allow proper performance
- Moisture - Soil should not be too wet or too dry
- Nutrient Content - Soil should be nutrient-dense and full of life
- pH - Soil pH should be between 6.5 and 7.0, with 6.8 being ideal
- Texture - Soil should have a loose, fluffy texture with enough water, oxygen, and space
- Cation Exchange Capacity - The CEC is largely influenced by how well soil is built
Appearance: A balanced soil is dark and rich in color, which means it has suitable amounts of organic matter, moisture, and necessary amendments.
Composition: Cannabis plants require a combination of different ingredients that will allow the medium to properly absorb and shed liquids, provide essential nutrients, and maintain an acceptable temperature, pH, and texture.
When soil lacks certain ingredients, it is non-absorbent. Soil that doesn’t hold liquid will allow it to quickly drain out of the bottom of the container, and the plant won’t have time to uptake an adequate amount of nutrients or water. It's a good indicator that the soil composition is unbalanced or poorly maintained.
If you're growing in the ground, it’s extremely important to know exactly what kind of soil you will be working with. If you choose to go this route, it's a good idea to take soil samples, have them evaluated, and then if needed, make sure to stabilize the pH, check for insects, add necessary amendments, and implement favorable techniques for your circumstances.
Moisture: Even, consistent soil moisture will promote the best growth in plants. It's important to not let the soil become too wet or too dry. Favorable respiration rates take place when water-filled pore space is around 60%.
It's important to not let the soil become too wet or too dry. Wet soil is heavy and can cause precious air to be forced out of the environment; air that is crucial for the survival of life inside. Microbes live in pores found in a soil mixture, and require a balance of both moisture and air in order to thrive. Root hairs also require exposure to the same environment.
In addition, overly saturated soil provides the perfect environment for the establishment of anaerobic bacteria (harmful bacteria that thrive without oxygen). Too much anaerobic activity quickly lowers the health of a plant and the soil, and could cause a plant to die.
On the other side of the spectrum, dry soil quickly kills root hairs and affects microbial life as well. If soil is allowed to get too dry one time, it can cause deficiencies within a plant or be the cause of its death.
There are a few amendments you can add to promote water retention and shedding. Perlite and peat moss are examples of ingredients that help soil hold water. Perlite also creates space in the soil, allowing oxygen to be present. Biochar is another extremely helpful amendment for water retention and will often be the last ingredient to lose moisture.
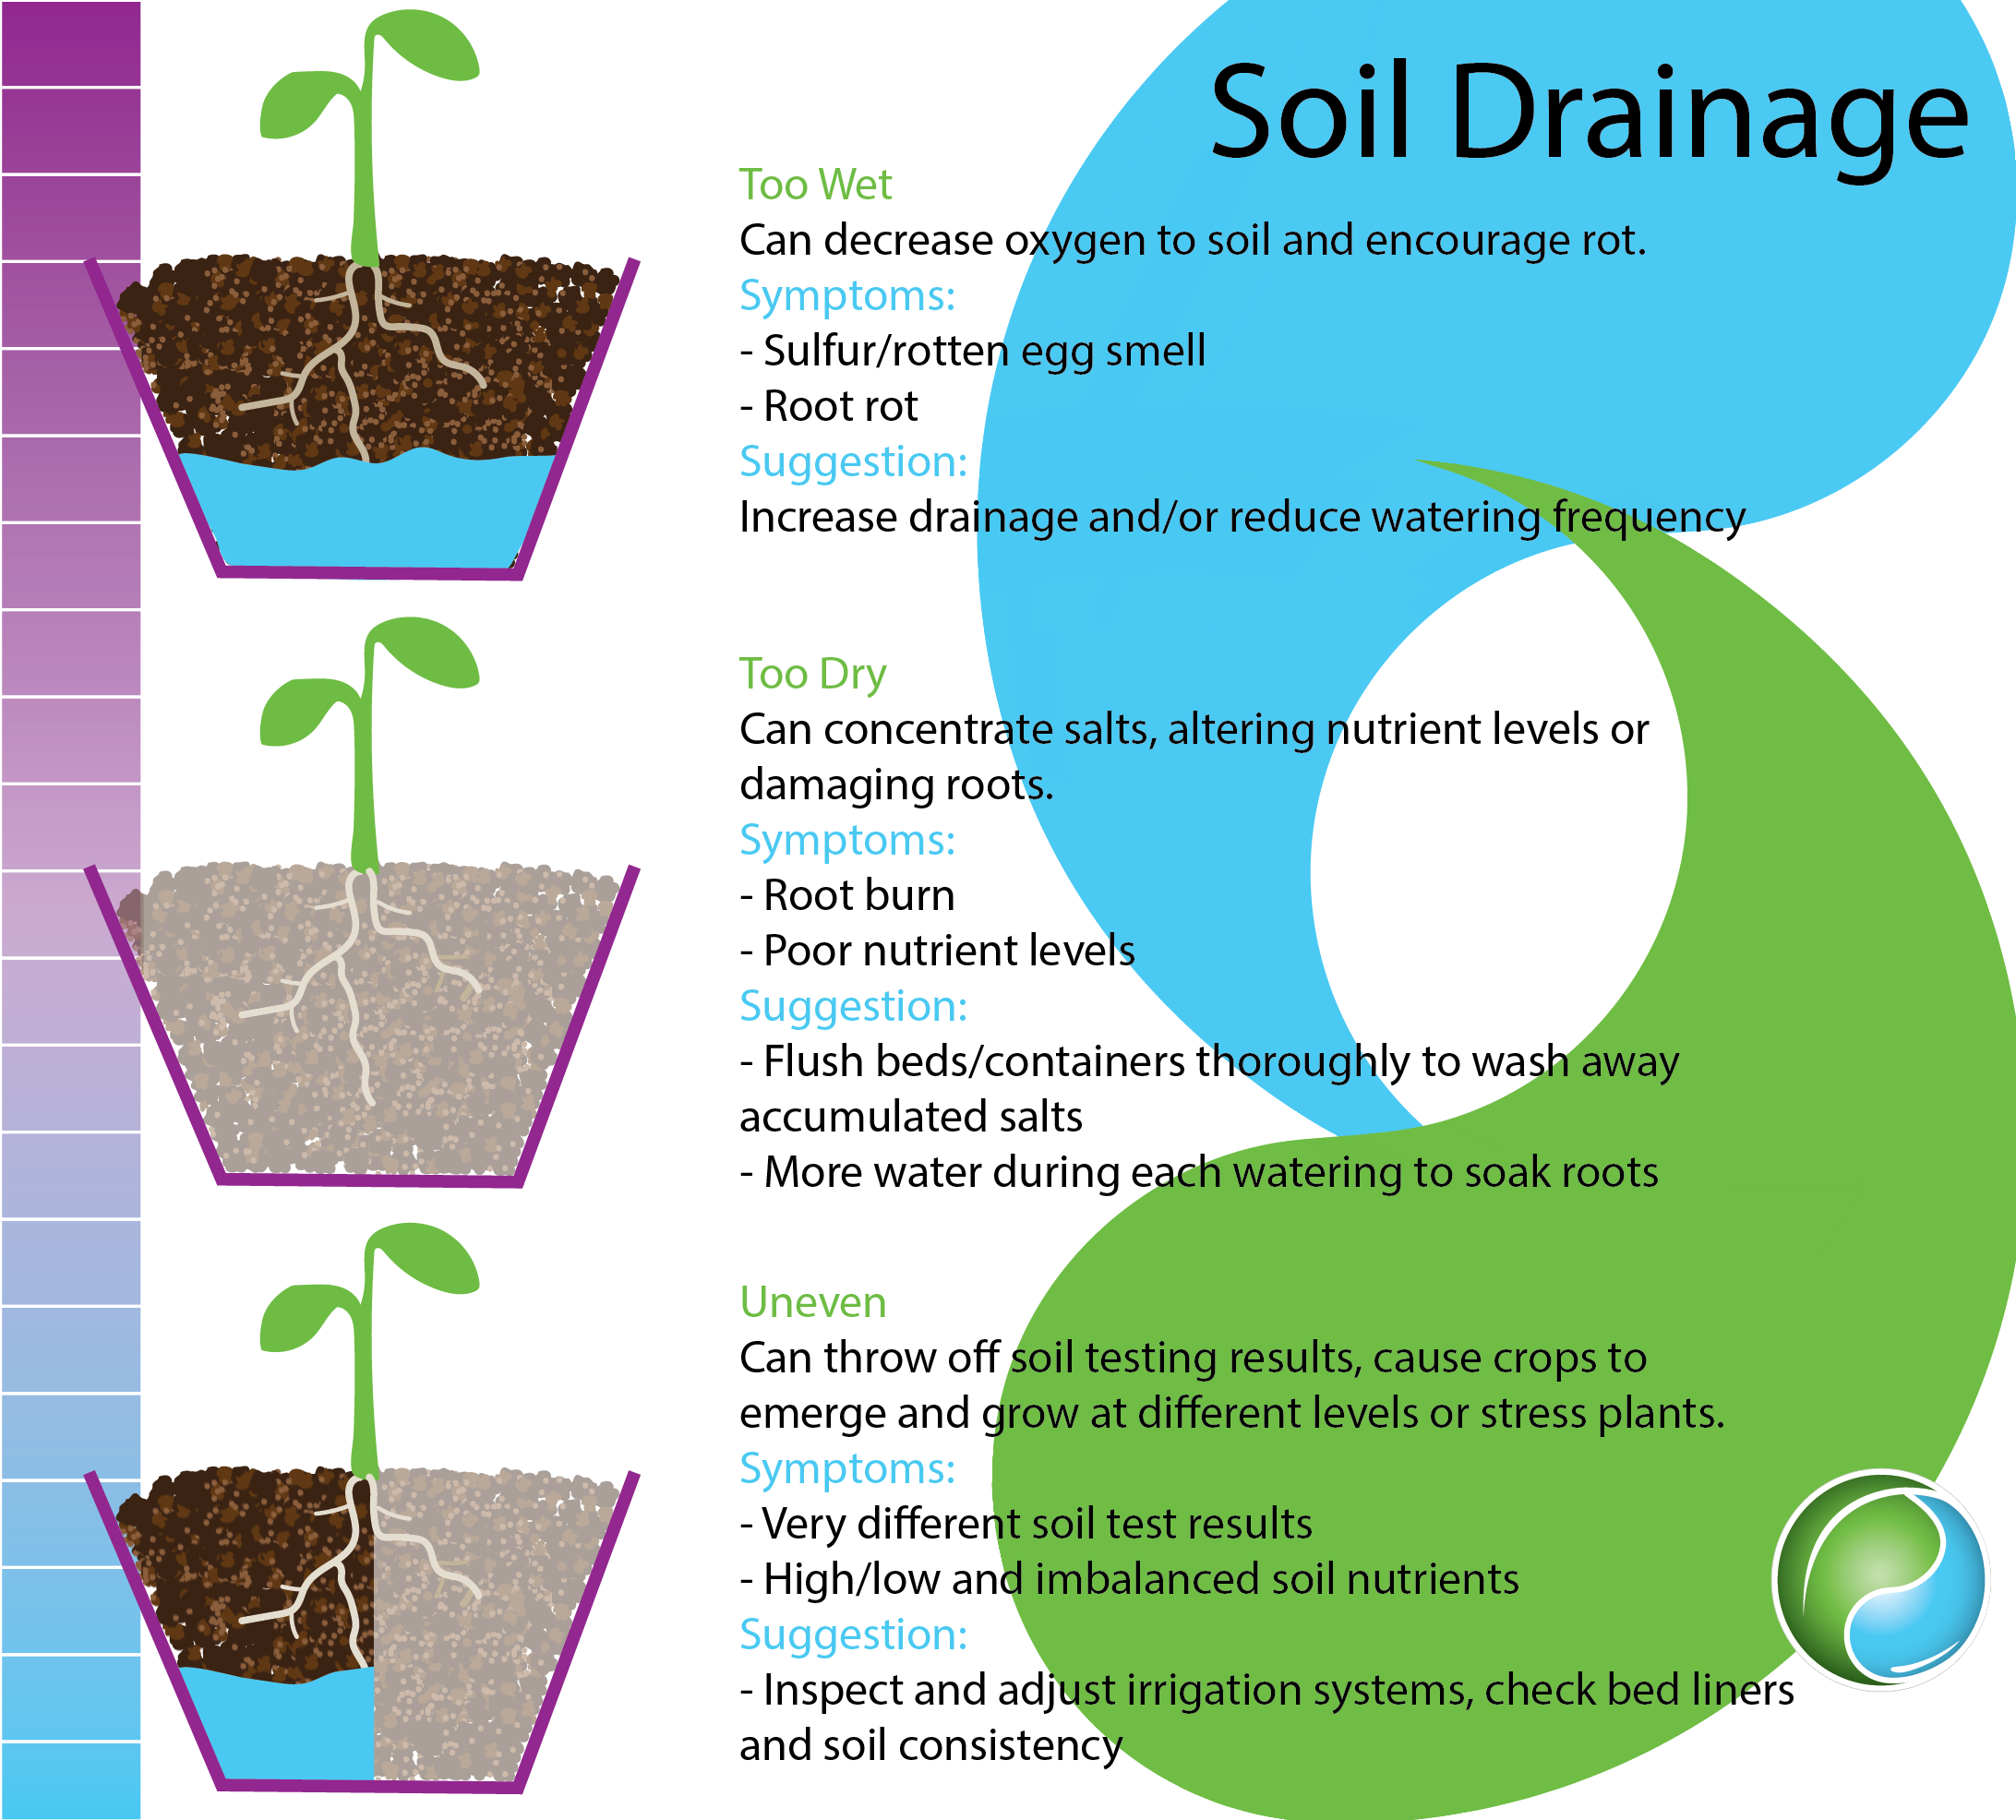 Image credit: Emily Nelson, Sustainable Plant Solutions LLC
Ultimately, the only way to achieve proper moisture content is to focus on adding moisture regularly while avoiding oversaturation. It’s a fine balance, but an important one; one of the biggest factors in excellent plant health.
Nutrient content: While plants do make their own food, some of it is released to attract and feed microbial and fungal life, which will provide nutrients that a plant cannot make on its own. To encourage optimal health, soil should contain organic matter and amendments that promote plant growth and microbial life as a plant matures.
The most important components for plant health are:
- High carbon content (organic material)
- Calcium and magnesium
- Good granular humic that's also rich in fulvic
- Nitrogen, phosphorus, and potassium (correct ratios for veg and bloom)
- Worm castings
- Azomite (diverse trace minerals)
- Plant available silica
- Biochar
- Bacteria colonies
- Fungal networks
Carbon, calcium, and magnesium are the fundamental building blocks of a living soil; without them the soil and a plant will never be optimized. Additional ingredients that contribute to healthy soil include humus and microbial activity and diversity.
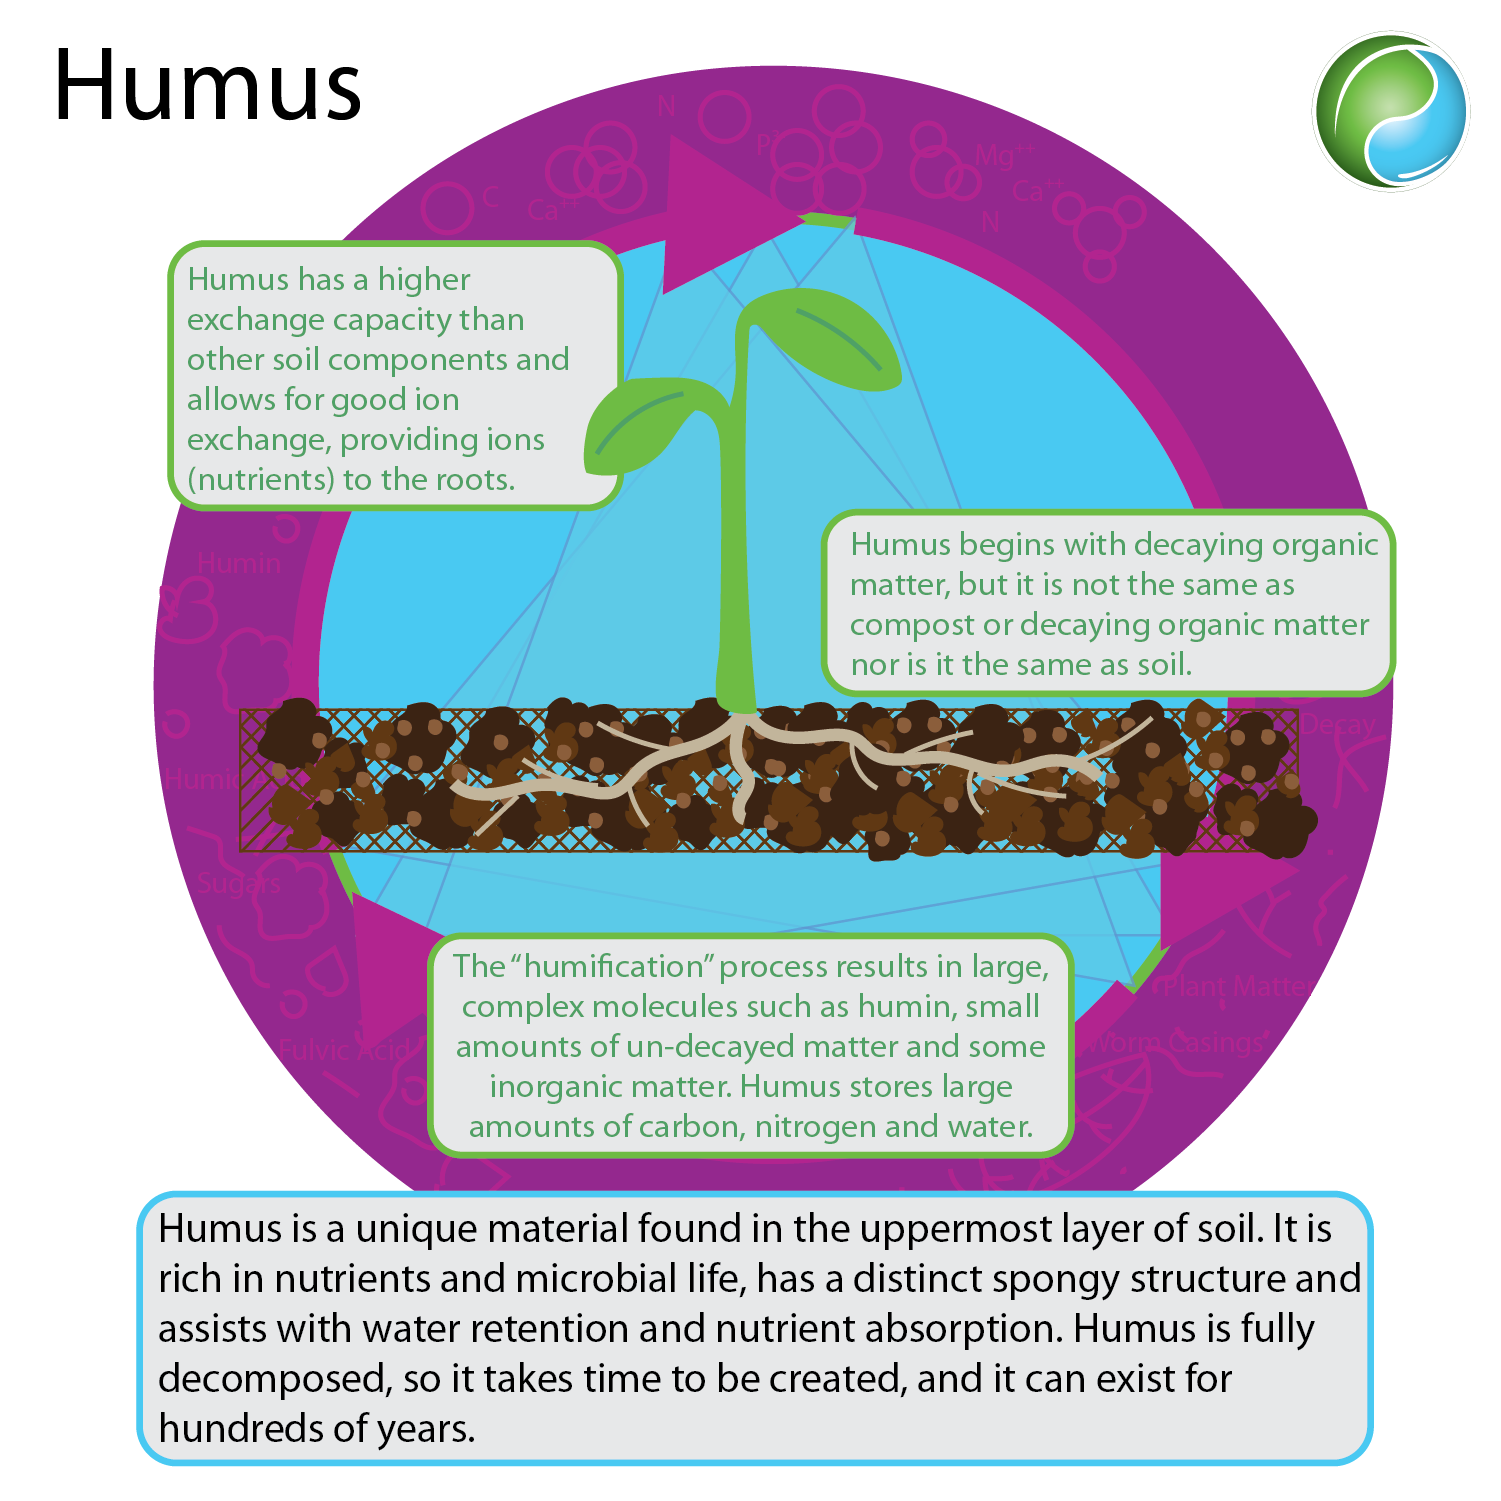 Image credit: Emily Nelson, Sustainable Plant Solutions LLC
Ideal quantities of ingredients like nitrogen, potassium, phosphorus, chitin, and trace minerals also benefit cannabis plants by providing nutritional content and helping build their immunity to better fight off pests and pathogens, enabling plants to produce large amounts of cannabinoids and terpenes. As time passes, microbial life is able to establish itself in the soil and around the roots, helping to increase the nutrient availability.
Many commercial or pre-mixed soils are made with ingredients that don't satisfy cannabis, causing leaf burn and improper development; they often contain pest larvae as well. When you mix your own soil, you are able to provide choice ingredients in preferred ratios, without worrying about pests, which has a great influence on plant health and vigor.
pH: For a plant to properly uptake nutrients, develop a strong root system, and carry out necessary functions, it needs to be in a soil that has a suitable pH level. The pH level majorly influences nutrient availability for a plant. pH is also needed at appropriate levels for root hair development and microbial populations.
Soil that is too acidic (too low of a pH) will prevent the plant from absorbing nutrients like calcium and magnesium. A soil that’s too alkaline (too high of a pH) will lock up nutrients like potassium, iron, and zinc.
Soil pH is typically lower (more acidic) during the warmer months when bacterial activity increases and higher (more alkaline) during cooler months. Test your soil mixture before planting to determine the pH level. Cannabis plants prefer a soil pH level of 6.5 to 7.0, with 6.8 the ideal.
To lower pH by up to half a point (7.0 to 6.5), you can add organic amendments that contain nitrogen; for example, alfalfa meal. To raise soil pH, you can use dolomite lime (not recommended for soils high in magnesium), or ground oyster shell (takes awhile to break down and become available). Be sure to thoroughly mix the amendments into the soil prior to planting for the best results.
Organic soil increases the likelihood that your plant will flourish even though the pH may be slightly off balance. This is because certain amendments and components help stabilize pH levels making the root system healthier and still able to extract the nutrients it needs despite conditions not being ideal.
Texture: In order for soil to maintain a proper texture, certain amendments are required to allow water retention, drainage, and proper amounts of oxygen. If soil is allowed to get too wet or too dry, it will change the texture and functionality of it.
The goal is to provide soil that absorbs liquid at a favorable rate. The soil shouldn’t get muddy or hold liquid on top for too long. When you squeeze it in your hand, it should feel almost sponge-like, form a clump and then, after a second or two, break up.
For both plant roots and microbes, soil texture also needs to be balanced in another way: not being too compact or too loose. The components of soil determine its density and are required in the correct ratios for optimized performance. Worm castings, large coarse perlite, and biochar are some of the materials that improve soil texture.
If soil doesn’t maintain proper consistency throughout the entire life cycle of a plant, it will disrupt plant growth as well as microbial activity, lowering health and the quality of everything in your garden.
Cation exchange capacity (CEC): is an important measure of the soil’s ability to hold positively charged ions, or nutrients. It influences factors such as nutrient availability, soil pH, and soil structure stability (Hazleton and Murphy, 2007). Components of organic matter have an increased number of surfaces with negatively charged ions, which attract and hold positively charged ions (cations, nutrients) by electrostatic force. Plants rely on this electrical charge to supply them with nutrients due to the fact that nutrients exist as cations. Clay soils have less of a negative charge than organic soils and sandy soils have even less than clay. Soils with a large negative charge are more fertile than soils without because of their ability to retain more cations, or nutrients (McKenzie et al., 2004). Calcium, magnesium, sodium, and potassium are generally referred to as base cations as they are the main exchangeable ions associated with the CEC (Rayment and Higginson, 1992).
Other facts about the CEC:
- Soils with low CEC have an increased likelihood of developing cation deficiencies, especially potassium and magnesium deficiencies
- For plant nutrition, it’s important to have adequate net amounts of calcium and potassium for growth
- The CEC can change depending on soil depth, with top layers usually having the highest CEC due to increased quantities of organic matter
- The lower the soil’s CEC is the faster the pH of the soil will decrease over time
When getting your soil analyzed to determine its CEC, you may receive different results depending on the lab testing it. This is because they may be using different ways to obtain their findings; some measure the bases while others calculate the CEC directly.
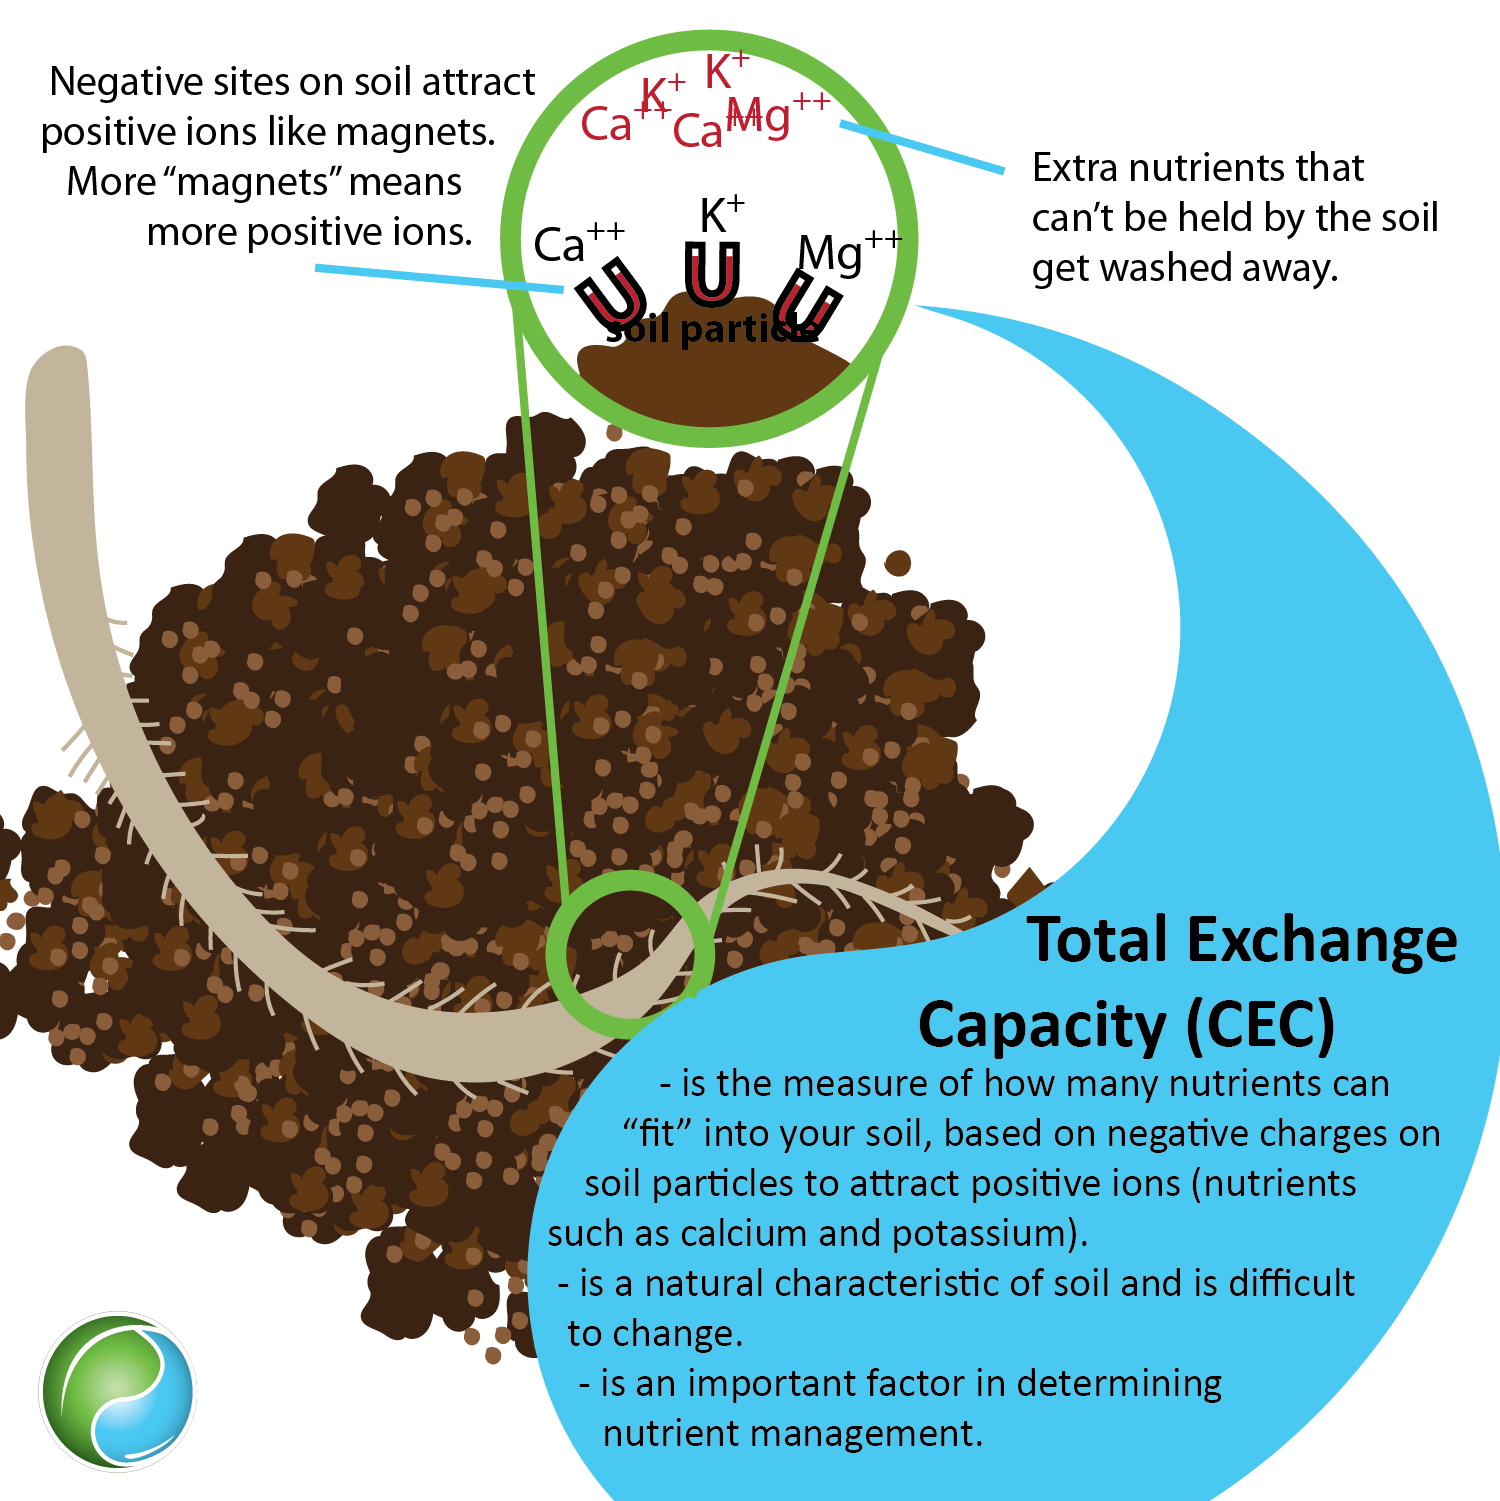 Image credit: Emily Nelson, Sustainable Plant Solutions LLC
Back to top
The Soil Food Web
When soil is healthy, soil is alive; alive, meaning, you can see beneficial arthropods, earthworms, even a centipede or two in it. If you take a sample and look at it under a microscope, you see microbial life. And when the correct balance of life is present, your soil is happy, and your plants are happy.
Playing leading roles in healthy, living soil are the components that make up what is known as the Soil Food Web. Like any other food chain, smaller microorganisms feed the larger ones, and each individual has a specific job that benefits the whole community.
The components of the soil food web include:
- First Level: Plant roots and organic matter (waste and metabolites from microbes, plants, and animals)
- Second Level: Bacteria, fungi (mycorrhizae, saprophytic), and nematodes (root-feeders)
- Third Level: Protozoa (amoebae, flagellates, ciliates), nematodes (fungal and bacterial feeders), arthropods (shredders)
- Fourth Level: Arthropods (predators), nematodes (predators)
- Fifth Level: Higher level predators (birds and animals)
For any organism, a favorable environment and food sources are needed to support life. Warm temperatures, balanced moisture content, favorable aeration, neutral pH levels, and organic matter all play a part in promoting microbial activity in soil. Maintaining organic matter will allow a diverse community of organisms to build and establish a strong habitat and favorable conditions that will benefit a plant.
According to Dr. Elaine Ingham, American microbiologist and soil biology researcher, inside of living soil there can be 75,000 individual species of bacteria, 25,000 species of fungi, and 1,000 species of protozoa. In a single teaspoon-size sample, there can be up to 1 billion bacteria, 500 micrograms of fungal hyphae, and 100,000 protozoa.
For an organic gardener, increasing the number and diversity of organisms in the soil is of utmost importance. But how do you promote life in the soil? You first have to know a little bit about the soil world.
It works like this:
Plants, beneficial bacteria, fungi, insects of all sizes, worms, and other organisms function together to produce food for each other with almost all of the action taking place right on or around the root system, an area known as the
rhizosphere, home to one of the most diverse ecosystems on Earth.
Cannabis plants consume mineral nutrients and water mainly through their roots. Roots need nutrients to be in a readily available form; broken down into small enough particles to uptake. This is what the microbial life does for a plant; breaks down or produces nutrients that a plant can use but cannot make on its own.
Above ground, plants take in sunlight, carbon dioxide, and minerals through their leaves, and through the process of photosynthesis, convert them into compounds they can use for growth. Plants can release some of these compounds in the form of sugars and amino acids through their roots to attract and feed the microorganisms and beneficial fungi found in the soil.
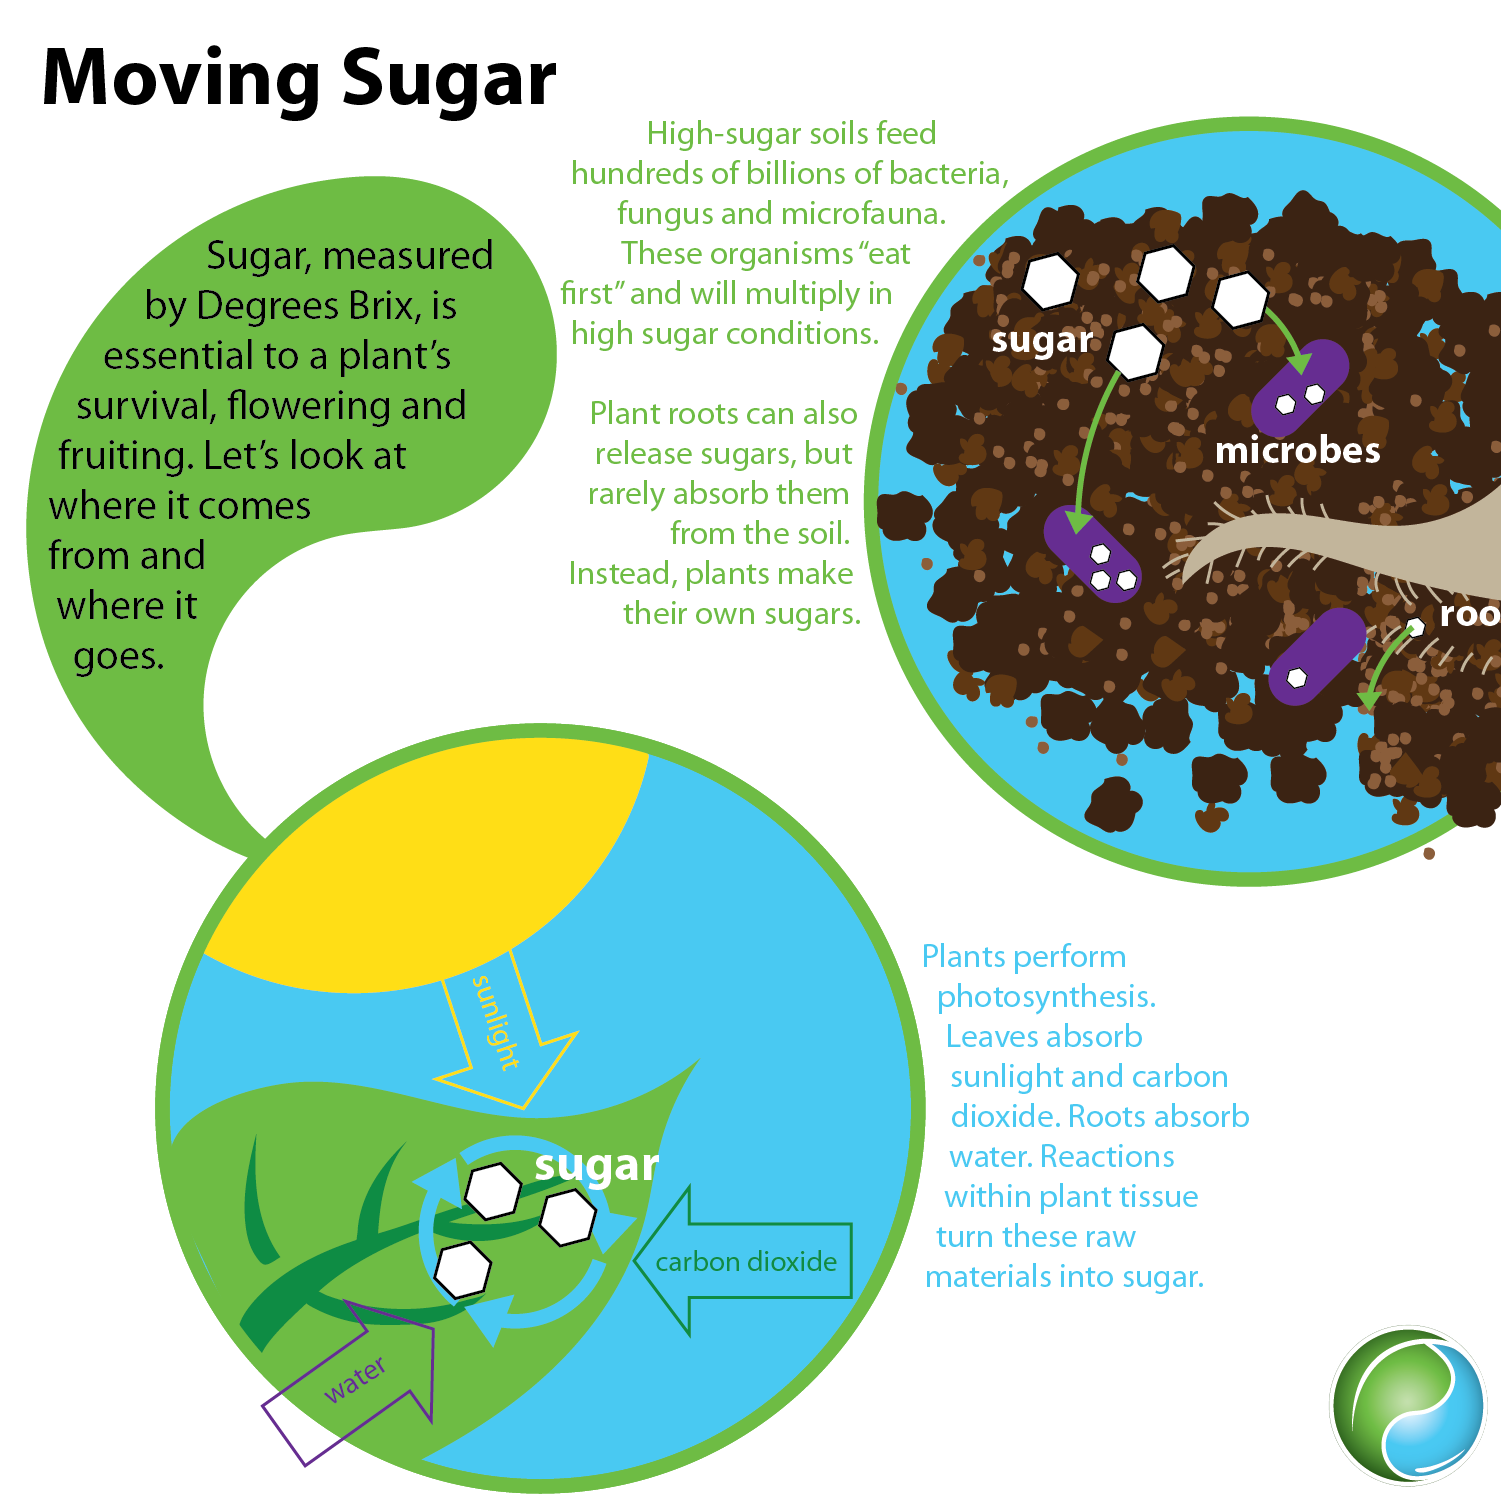 Image credit: Emily Nelson, Sustainable Plant Solutions LLC
The relationship between plants and microbes is one of give-and-take. Just as the plant depends on the microbes to obtain nutrients, microbial life within the soil requires plant sugars to develop and maintain a healthy population.
The fluid emitted from a plant’s roots is called
root exudates, which are composed of things like sugars, amino acids, fatty acids, plant growth regulators, nucleotides, and vitamins. A plant can change the composition of the fluid it emits based on what it’s trying to attract or repel. A plant will attract different species depending on what stage of life it is in, what nutrients it needs, or will produce exudates as a deterrent for harmful bacteria and fungi.
As a plant's root system grows, it casts off outer layers of cells (made up of cellulose and pectin) which also feed the members of the soil food web found in the rhizosphere. Each plant will create its own unique rhizosphere based on its health and interaction with the soil and environment.
At the smallest level, bacteria and fungi consume and process the exudates emitted from roots, as well as other bits of organic matter, and excrete them as nutrients that the plant will uptake and use for growth. Each time organic matter is consumed, it is broken down into smaller particles.
Larger predators, like protozoans, feed on the smaller microorganisms that have been attracted to the root exudates and organic matter. Protozoans are found moving about in the film of water surrounding soil particles, eating thousands of bacteria each day. As soil recyclers, they then release unused nutrients into the soil, which help feed the microbial life and plant. Nematodes and earthworms move throughout the soil, from root to root, in search of protozoans, organic matter, and smaller prey. More nutrients are created from their waste.
Arthropods can be found shredding plant material into tiny pieces of organic matter that will break down into compounds that the members of the Soil Food Web can consume. At the highest level, birds and other animals eat the earthworms and arthropods, adding to this tiny but amazing, virtually invisible world.
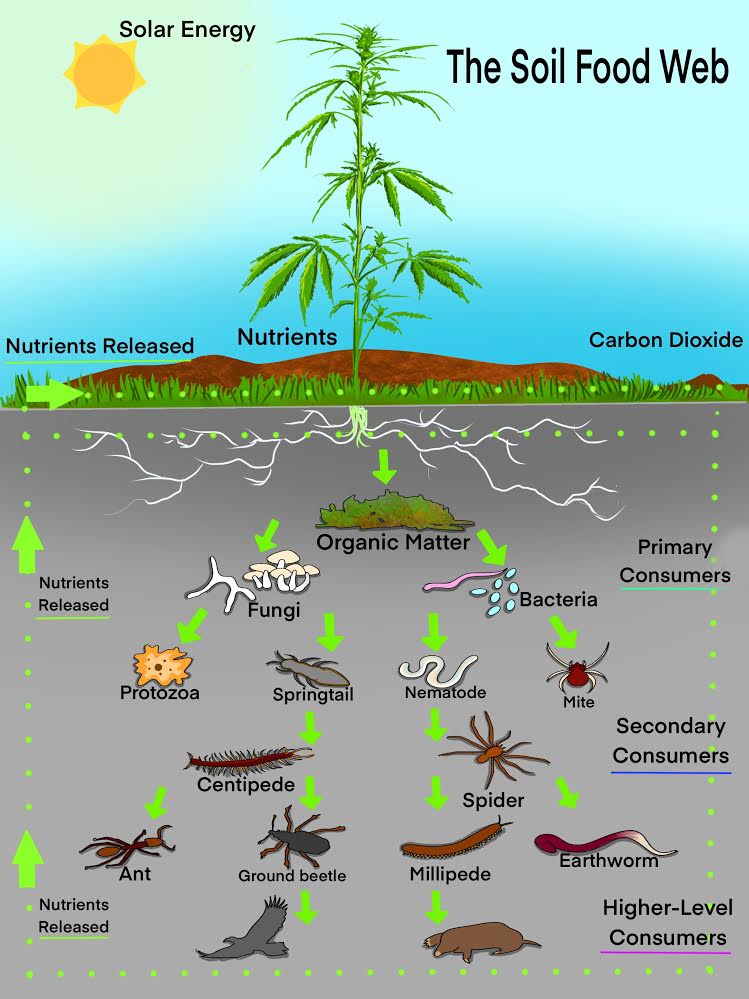 The Soil Food Web, Image Credit: Rylan Kapuy
In addition to the Soil Food Web producing and providing much needed nutrition, the movement of and interaction between the organisms, bacteria, and fungi also benefit a plant by improving the soil structure, aerating the soil, and helping neutralize the soil’s pH.
These occurrences happen in a continuous cycle as long as all components are available and balanced.
Bacteria. Bacteria are the smallest and most abundant organisms in living soil. A garden's bacterial colony will largely determine a plant's potential. Most bacteria are decomposers, living on organic plant matter, root exudates, and carbon compounds. First to show up once nutrients are added to soil, they begin converting minerals into available compounds that the rest of the food web will use. If a garden is missing certain species of beneficial bacteria, it could lack nutrients or nutrient availability that it needs for peak performance.
Some of the most important species to expose cannabis plants to include:
- Bacillus licheniformis (bacterium) - contributes to nutrient cycling due to the enzymes they produce
- Bacillus pumilus (bacterium) - acts as a fungicide, preventing harmful fungal spores from germinating on and around root systems
- Bacillus subtilis (bacterium) - synthesizes many secondary metabolites, hormones, cell-wall-degrading enzymes, and antioxidants that help improve a plant’s defense against pathogens
- Bacillus megaterium (bacterium) - produces phytohormones that are used to promote growth, improve root hair formation, lateral root formation, root architecture, and improved water and nutrient uptake
- Azospirillum brasilense (bacterium) - converts atmospheric nitrogen into a usable form, especially useful during vegetation stage
You can buy these types of bacteria; they are commonly found in amendments and other gardening products. Keeping bacteria alive requires them to have a food source, found in kelp, molasses, humic acids, fulvic acids, and amino acids. These components also stimulate growth rates in addition to lowering the likelihood of nutrient and pH lockout.
Fungi. Like microbes, there are several different types of fungus. Some are good and some are bad.
Some harmful fungi include:
- Fusarium
- Pythium
- Rhizoctonia
- Sclerotonia (white mold)
Mycorrhizae is one of the good fungi, creating associations with root systems to establish a 2-way nutrient exchange between it and the plant. The types of mycorrhizal fungi that you want in your garden include:
- Glomus aggregatum (mycorrhizal fungi) - enhances growth and biomass, obtains carbon from the plant in exchange for nutrients and sugars
- Glomus mosseae (mycorrhizal fungi) - improves root growth, photosynthetic gas exchange parameters, and chlorophyll fluorescence characteristics
- Glomus intraradices (mycorrhizal fungi) - penetrates and extends a plant’s root system to improve nutrient exchange, improve water retention, and reduce environmental stress
- Glomus etunicatum (mycorrhizal fungi) - improves nutrient uptake, drought resistance, and pathogen resistance
- Rhizophagus intraradices (mycorrhizal fungi) - improves the Soil Food Web greatly by helping to strengthen water retention capabilities, purify water, provide nutrients, and improve soil structure
- Trichoderma reesei (mesophilic and filamentous fungi) - produces proteins, cellulase, and hemicellulase
- Trichoderma harzianum (fungus) - improved plant growth, increased leaf size, plant height, and flower yield; produces chitinase, hydrolytic enzymes that break down glycosidic bonds in chitin
These fungi surround and sometimes penetrate the root system to allow water and nutrients (like zinc and phosphorus) to move from throughout the soil to the plant.
Like bacteria, beneficial fungi also play an important role in decomposition and nutrient cycling. Although taking longer to establish colonies compared to bacteria, fungi also help enhance the physical structure of the soil and create chemical compounds that bind
soil aggregates; strongly bonded groups of soil particles. The space between aggregates provide areas for the exchange and retention of water and air.
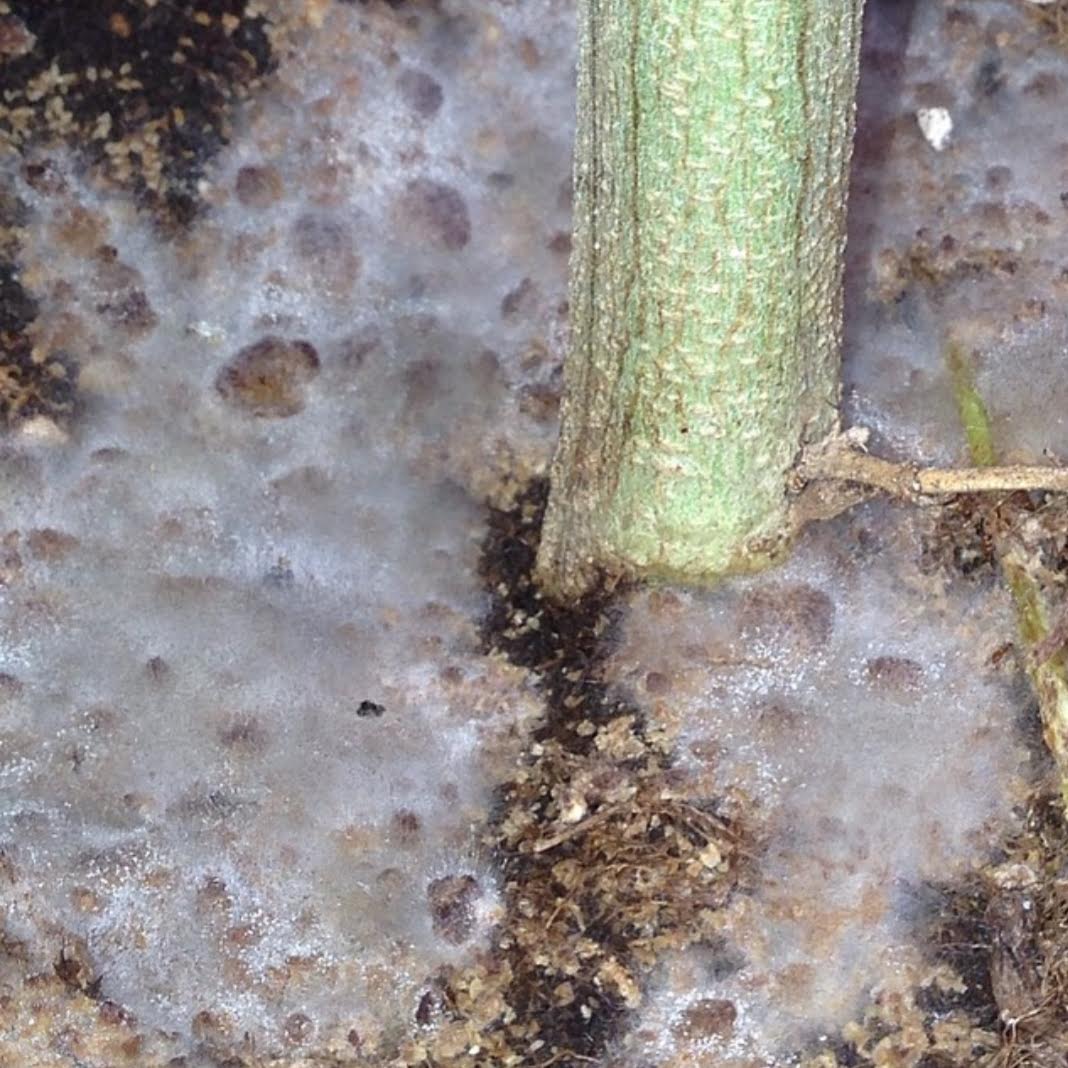 Beneficial fungi also play an important role in decomposition and nutrient cycling
Mycelia
Beneficial fungi also play an important role in decomposition and nutrient cycling
Mycelia are the vegetative parts of filamentous fungi that branch out in thread-like forms, called
hyphae, and create these specialized underground networks. These networks can be small in size or span thousands of acres, depending on fungal type, nutrient availability, soil composition, and other conditions. Due to their small size, they are able to reach nutrients from spaces that may be too small for a plant's roots to reach, and also help convert unusable forms of nutrients into usable forms, increasing the nutrient availability to a plant.
In addition, fungi can also improve a plant’s tolerance to salinity and drought, and reduce attacks from pathogens. It helps with nutrient retention and transportation, pH stabilization, and soil structure. Returning the favor, plants pass photosynthesized sugars to the fungi, which allow them to remain healthy and aids in their development.
Another benefit, perhaps one of their best qualities, is that healthy fungal networks help plants stay connected to each other through their root systems. If well developed, chemical signals flow from one plant, down through its roots across the mycelial network, to a nearby plant's roots, allowing communication to occur. It’s a place where a plant can learn about its environment and communicate with another plant nearby; communicate about threats, distress, or simply that everything is okay. (Amazing!)
Plants communicate with each other, particularly with neighboring plants, when they’re under attack from pests or under stress, and are able to share nutrients with nearby plants if one plant is struggling. This may be one of the many reasons why cannabis plants seem to do better in flower beds as opposed to individual containers or pots; because they can better support and communicate with one another. The network that is created helps naturally boost a plant’s immunity. Their stationary lifestyle requires this behavior and is one of the ways they have existed and survived for so long.
The benefits good fungi provide include:
- Improves nutritional value of the soil, enhancing flower quality
- Improves a plant’s ability to use nutrients (especially phosphorus), decreasing the need for fertilizers
- Improves water quality
- Improves water retention, allowing plants to perform better in drier conditions
- Improves soil structure and nutrient retention
- Increases the health of the plant and suppresses pathogens, reducing the need for pesticides
- Improves root health and survival, raising plant development to peak levels
To better understand the fungal activity present in your soil, you will need to use a microscope or have your soil tested by a lab to determine the ratio of fungi to bacteria. For cannabis, a slightly more bacteria-dominant soil is typical, but the presence of beneficial fungi will improve plant performance if given the chance.
Because most cannabis gardeners use soil out of a bag, mycorrhizal fungi is not established. Luckily, Endomycorrhizal fungi or Arbuscular Mycorrhizae (AM) are fairly easy to cultivate. Brewing teas with AM spores and adding it to soil is the easiest way to introduce this type of fungus to your plants.
Once in the soil, it takes anywhere from 4-12 weeks to grow and develop a relationship with a root system, so introducing it early in a plant's life is ideal. By growing a small plant in a big container, you are able to eliminate transplanting and are better able to establish fungal networks that will benefit plant health and growth. Fungi require a host in order to survive, so planting a cover crop can be helpful when attempting to establish a fungal population, especially when preparing a final place prior to planting a cannabis plant. However, if an environment is healthy enough to support fungi, they will usually establish themselves on their own.
Once established, how do you determine the health of your soil’s fungal network? Three factors to consider include:
- Population type: How many different types of good fungi your soil contains.
- Level of activity: Are they performing tasks efficiently?
- Average size: When determining the size of a fungi, the diameter is what is measured. The diameter size of fungi lets you know if it is good or bad. You can also tell how diverse the population is by how many different average diameters you find. Typically, you want to see fungi with diameters of 2.5 micrometers or bigger.
A good way to help keep the fungal population healthy is to make sure you don’t till, turn, or move the soil after putting it in a flower bed or container. If you're growing in the ground, it's best to leave root balls intact after harvesting to avoid disrupting established fungal networks.
Indigenous Microorganisms (IMO). Microorganisms vary from region to region. Each species of microorganisms has a specific purpose. Certain ones may convert nitrogen into readily available forms, while others may break down phosphorus. The type of microorganisms present in a particular area is heavily dependent on the soil, climate, plant life, and specific conditions of that area.
Especially popular in Korean Natural Farming (KNF) growing techniques, it is beneficial to use microorganisms indigenous to your environment. Not only will they achieve a higher success rate at colonization, they help a garden flourish and influence a special flower unique to the location. This is accomplished because microorganisms that are naturally surviving in a specific environment will be better adapted and more capable of withstanding environmental conditions and predators, which are inescapable components of outdoor gardening. If you were to introduce microorganisms that were foreign to an area, they might have a difficult time with certain environmental variables.
IMO are beneficial for:
- being better able to withstand natural conditions
- decomposing organic materials into simpler elements
- producing enzymes that speed up chemical processes
- suppressing diseases
- replenishing the life of soil
By using IMO, you are also encouraging natural rejuvenation of the soil and planet, which are badly suffering from poor farming practices.
Earthworms. The presence of earthworms is one of the best indicators that your soil is healthy. You shouldn't have to add them, they should arrive on their own. You can add them to encourage them to stay, but if they don't like the environment because of a lack of food or moisture, they will simply leave.
Earthworms help increase microbial activity by improving the physical, chemical, and biological parts of soil fertility. When an earthworm passes soil through its gut, it increases the mineralization of organic matter. In addition, earthworm castings contain large amounts of phosphorus, nitrogen, potassium, and carbon, allowing greater amounts of nutrients to be available for both the microbes and the plants. As they burrow through the soil, they create tunnels, improving the structure of it by allowing water and air to pass through.
Fresh earthworm castings are one of the best ingredients in a soil mixture and for a cannabis plant. Castings can be mixed in soil or given in teas. Earthworm castings are easy to find at gardening stores, but if you’re interested in having the freshest castings available, you can raise your own worms.
Worms are typically raised in a separate, contained area to allow easy monitoring and collection. While there are several types of earthworms, red worms and African nightcrawlers are some of the best to have. If you want to feed earthworms, composting fruits, greens, coffee, dirt, and eggshells is a classic mix that will help keep them happy. Including discarded cannabis leaves, as long as they are clean, works well in compost bins.
DIY Worm Composter. To raise your own worms for castings, complete the following steps:
You will need:
- 3 black 5-gallon buckets, worm bins, or identical containers that are stackable
- 1 lid that securely fits on top of preferred container
- Shredded newspaper
- Kitchen scraps
- Large handful of red worms
- Spray bottle filled with water
- Drill with ¼” drill bit
- Small shovel
Prep directions:
1.
Drill holes in your containers.
- Drill several ¼” holes spaced 2” apart in the bottom of 2 containers. This will allow liquid to drain into the bottom container and allows the worms to migrate up.
- Drill ¼” holes on the sides (3-4” below the top) of the same 2 containers, spaced 2-3” apart. This allows extra air to move in and out of the containers.
2.
Add spacers. Take the bottom container (without holes) and stack another drilled container on top of it. If needed, add a few wood blocks for spacers (6-8” tall) into the second (middle container).
3.
Lightly dampen the shredded newspaper with water. To dampen, use a spray bottle.
4.
Prepare the containers. In the top container, layer a few handfuls of shredded damp newspaper, damp soil, and more shredded damp newspaper.
5.
Add red worms. 1-2 handfuls is enough.
6.
Stack containers, one on top of the other; the empty solid container on the bottom, the empty container with holes (and spacers) in the middle, and the container with newspaper, soil, and worms on the top.
7.
Cover the top container with a lid. This will discourage bugs and animals from getting into your containers as well as provide darkness for the worms.
8.
Store in a cool location. Place the stacked containers in a secure, dark place around 70F; in a shady garage or shed works nicely.
9.
Wait 3-4 days before adding food scraps. Check on the top bucket daily to make sure it doesn’t dry out. If it is too dry, dampen with a spray bottle filled with water.
Feeding instructions:
1.
Take the lid off of the top container.
2.
Add about 2 cups of kitchen scraps to the top container. Place 1-2 large handfuls of shredded damp newspaper on top of the kitchen scraps.
3.
Cover. Put the lid back on the top container, making sure it’s secure.
4.
Check the containers often. Add a handful or two of kitchen scraps as needed. If scraps don’t provide enough moisture, add some with a spray bottle.
5.
Wait. After 3 weeks or so, the worms will have multiplied and castings should be visible in the middle container.
6.
Stop feeding the top container. After about 3 weeks, or when enough castings are present,
stop adding food to the top container.
7.
Collect the castings. Lift the top container off of the middle one. Gently separate any worms that are inside the middle container and add them to the top container. Scrape the castings up with a small shovel, or dump them into a bag.
8.
Switch containers. Place the middle container at the top, and the top container in the middle (switching spacers if needed).
9.
Prep the top container. Layer the top container with a few handfuls of damp shredded newspaper, a handful of the castings, about 1-2 cups of kitchen scraps, and another handful of damp shredded newspaper. After 3-5 days, the worms will migrate up to the top container, leaving the middle one.
10.
Restack containers in the correct order. The active container with food and worms should be at the top, followed by the drilled empty container in the middle, with the solid empty container at the bottom.
Remember to secure the lid on the top container.
Collecting the castings and tea:
1.
Wait 3 weeks to collect new castings.
2.
Check on all the containers regularly. To check, lift one container at a time, and restack in the correct order when you finish inspecting them. The top container is the active container. The middle container will be where the castings accumulate. The bottom container will collect any vermitea, a highly nutritious liquid you can add to your tea mixture or soil.
3.
Repeat. Continue feeding, misting (if needed), and switching the top 2 containers for a continuous supply of fresh worm castings.
Note: Be sure to avoid giving earthworms citrus and alliums.
Earthworm Food Recipe
To really allow your worms to put on weight, mix the following ingredients together and sprinkle on top of your earthworm habitat:
- 1 handful clean cannabis leaves
- 1 Cup uncooked oats
- ½ Cup yellow cornmeal
- ¼ Cup alfalfa meal
- 3 tsp azomite
- 3 tsp dried & powdered eggshells (microwave or bake to eliminate risk of salmonella)
Back to top
Root Health. As far as the roots are concerned, soil is the place to find shelter, support, food, water, and microorganisms that help keep them healthy.
Roots serve a plant in many ways:
- Roots are the starting point into a plant's vascular system
- Shallow roots can access nutrients and water from the top soil
- Roots form bonds with fungal and microbial populations that promote nutrient and carbon cycling
- Roots hold a plant upright
- Roots help aerate the soil
- Roots improve the health of the soil
- Dead roots in ground soil increase the amount of water it can hold
Small root tips and root hairs are places where the roots absorb water and minerals. If healthy, root tips are constantly growing and moving throughout the soil, increasing in length, number of root hairs, and surface area. The energy required for growth is provided by photosynthesis. The larger parts of a root system serve as a place for storage and transport, which ultimately make photosynthesis possible.
When oxygen is present, nutrients in the soil are able to be absorbed by a plant's root system with the help of osmosis, a process that is only partially controlled by a plant.
Osmosis is the "movement of a solvent (such as water) through a semipermeable membrane (as of a living cell) into a solution of higher solute concentration that tends to equalize the concentrations of solute on the two sides of the membrane." (Merriam-Webster) Simplified, it’s the movement of liquid from the outside of a plant to the inside of a plant's cells.
This means that the nutrient mixture you apply to the soil should be a lower concentration (PPM) than the concentration of sugars and water located inside the roots. If it's not, water is sucked out of the roots into the soil, dehydrating a plant, and potentially leading to death; an important reason to check the ingredient ratios and parts per million (PPM) of any food mixture. Nutrients are then carried throughout a plant. As food is distributed to various plant cells, each cell uses the nutrients it requires to perform its specific function.
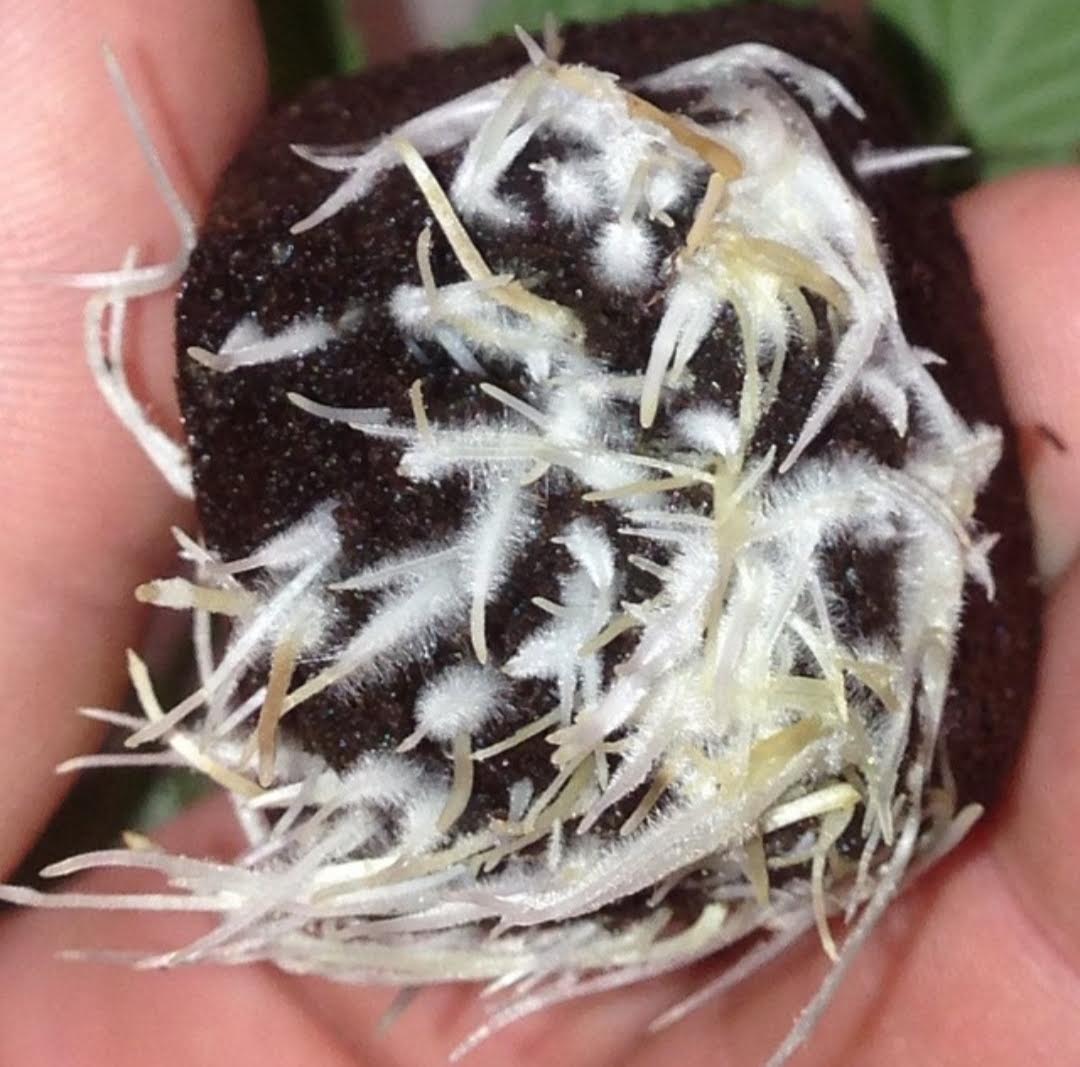 Healthy roots are vital for healthy plants
Roots require a few things to remain healthy, including:
- Space
- Oxygen
- Balanced moisture
- Ideal Temperature
- Correct pH Level
- Organic Matter
- Microbial Interaction
Visually, you can tell a plant's roots are healthy if they are white with fuzzy hairs all over them, and if they are branching out in all directions. Root hairs develop along the root system in large numbers, and each one is a site that can interact with beneficial microorganisms, uptake nutrients and water, or release exudates into the soil. Extremely delicate, not always visible to the naked eye, and formed as soon as a seed germinates, they die if they’re exposed to too much water, too little oxygen, harmful pH levels and temperatures, harsh fertilizers, or dry conditions; a reason to always take care of your plants, regardless of what age they are.
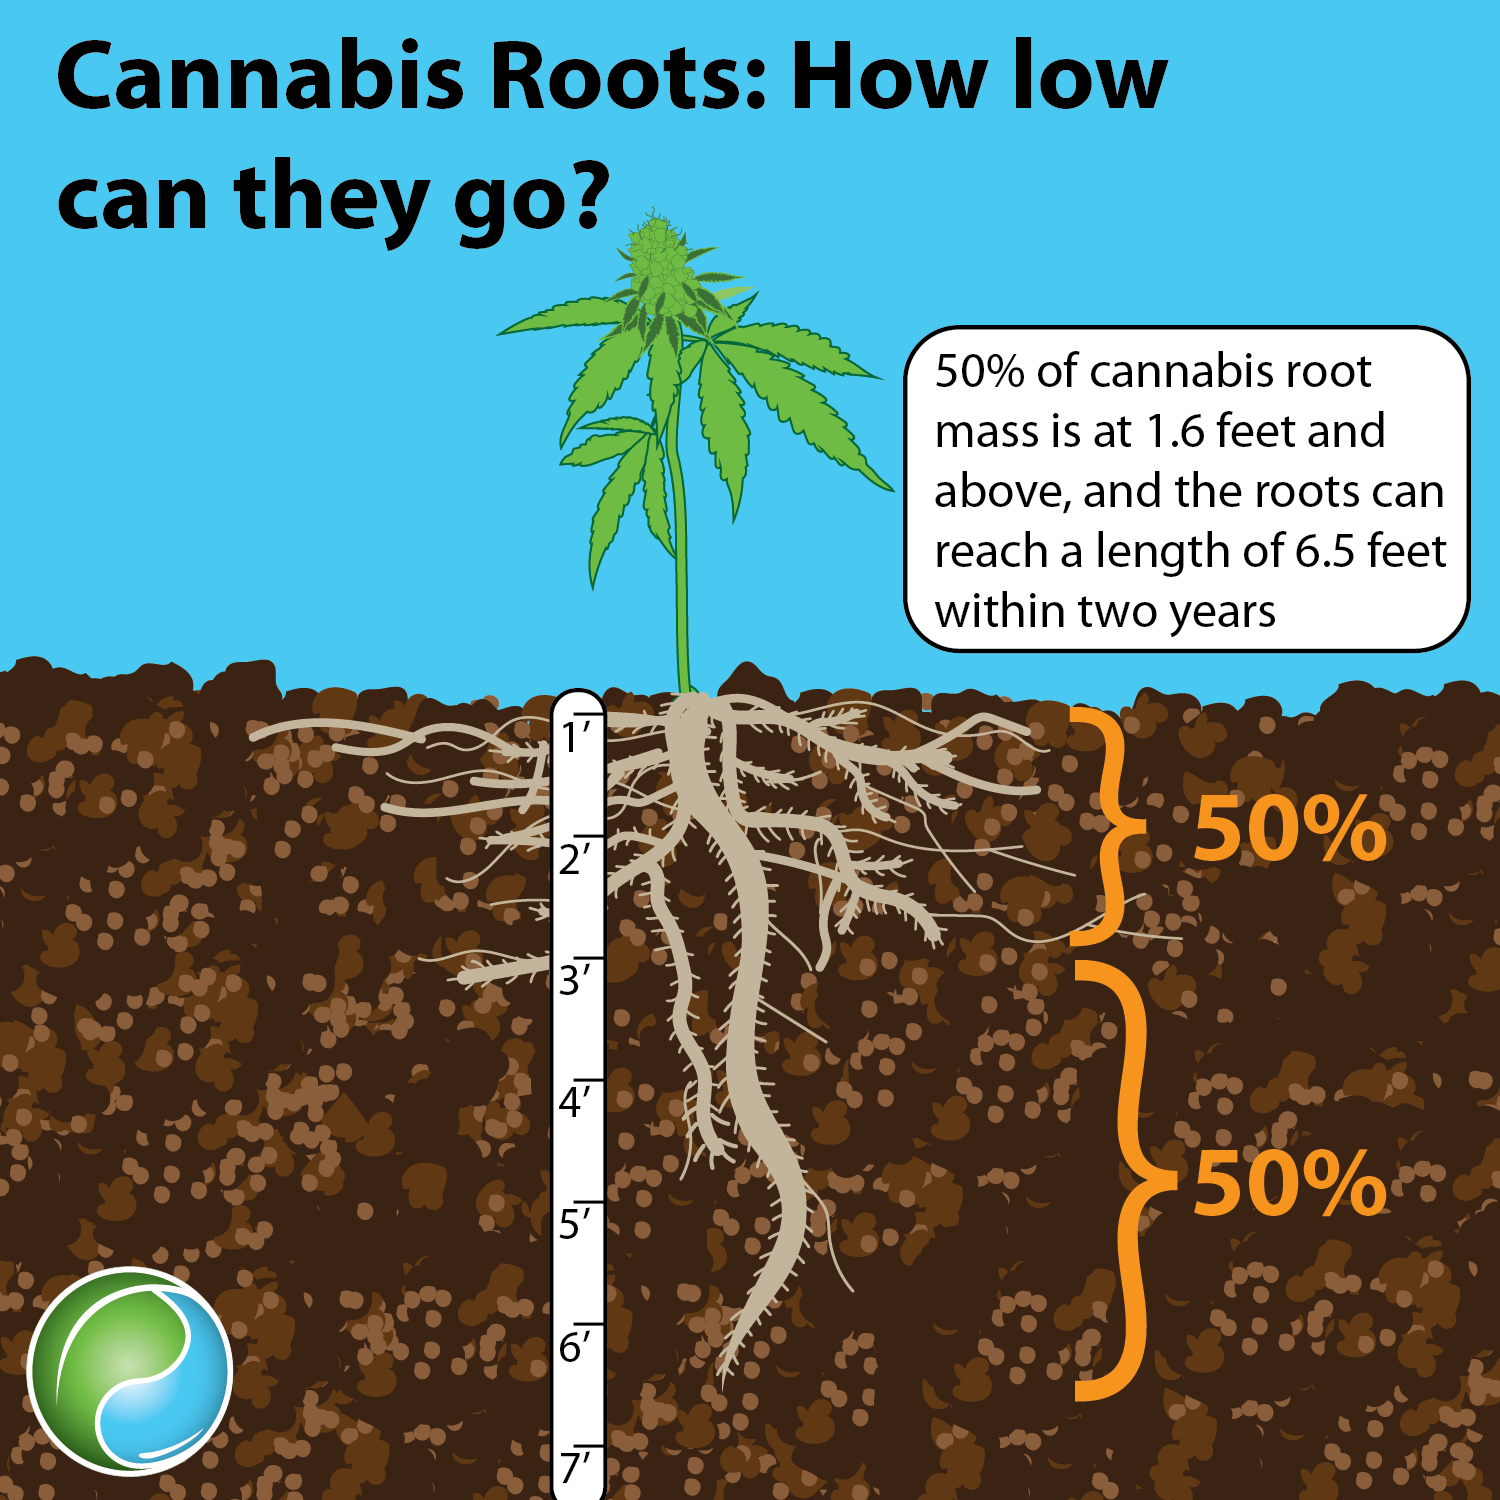 Image credit: Emily Nelson, Sustainable Plant Solutions LLC
The healthiest plants also have a long taproot extending 1-7 feet in length with modest lateral branching, taking on a similar appearance to the plant growing above. Root systems usually extend below as widely as the leaves above depending on the size and health of a plant. This is typically the root structure of a plant from seed as clones don’t develop taproots. Regardless, having enough space in a container is important to allow a plant’s root system to perform as it should.
Roots are happiest when they are kept at an ideal temperature (68F/20C), and they have an adequate supply of water and air. They are also happy when they have room to branch out and grow.
If roots are unhealthy, they will be brown in color, small in size, and the plant will be visibly unhappy. Root systems develop quickly, and can easily become crowded if left for too long in a pot or container that is too small. In pots, once lateral roots reach the sides of a container, they will grow down and thicken, often becoming
root bound, which will eventually cause a plant to lock up or not be able to uptake nutrients or water efficiently. Root bound plants will show signs like purpling stems and the lower leaves will have deficiencies.
Transplanting is one of the most important things you can do for a plant's root system. While transplanting, take the opportunity to examine the roots without disturbing them. Roots should look healthy and not be too crowded.
Signs that let you know that the root system doesn’t have enough space include:
- You see stunted growth
- You see scraggly plants with pale leaves
- You see top heavy plants that easily fall over (in a pot)
- You see water immediately run out of the bottom of a container
- You see roots sticking out of the bottom of a container
- You see more roots than soil
With transplanting, timing is everything, and you want to accomplish this task before seeing any of the above signs. The correct time to transplant differs from strain to strain and also from week to week, but generally speaking, is fairly consistent based on the age and health of a plant. It's always best when transplanting to use a bigger container as opposed to a smaller container.
The length of time a plant’s root system has been in the soil will determine the strength of the symbiotic relationship with fungi and bacteria. In the right conditions, it can take 1-2 weeks for bacteria to re-colonize, while fungi take around 1 month or longer. Bacteria thrive in soil with a pH of 6.5-7.5 and where nitrogen levels are high. However, nitrogen is not beneficial for fungi and is detrimental to their colonization; avoiding excessive amounts of it is important.
Cover crops. A plant species that is grown for the protection and enrichment of the soil is known as a cover crop. There are both living cover crops and dead cover crops.
Popular species of living cover crops include clover, alfalfa, mustard, and grasses. Living cover crops provide the following benefits:
- Increased inhabitable root area for microbial life
- Making additional nutrients available
- Pulling excess nitrates from the soil, helping to make and keep them balanced
- Insulates the soil surface from heat and sunlight, helping control moisture levels
- Can serve as an indicator of how dry the soil is. The cover crop will dry out half a day to one full day before a cannabis plant, allowing you to better monitor moisture levels.
- Provides a place for beneficial predators to live
 Image credit: Emily Nelson, Sustainable Plant Solutions LLC
To grow a living cover crop, simply evenly sprinkle the preferred seeds over the top of the soil and gently press them in to ensure a favorable seed-to-soil contact. The seeds shouldn’t be pushed too far into the soil; no more than ⅛”. Water them regularly and expose the area to favorable light conditions. You can prepare the soil in advance, so you are able to use it for a full cycle, or you can selectively use it; for example, when a plant gets put into the flower cycle.
When using a living cover crop, it’s important to monitor its growth. Avoid having it climb up a plant, instead encouraging it to grow over the sides of a pot or bed. Like most things, there are some negatives. Living cover crops can easily attract pests and ants. To prevent them from seeking residence, it’s important to keep everything clean. Spray essentials, organic sprays, or use companion plants to prevent and eliminate harmful pest populations that may inhabit cover crop foliage.
There are also dead cover crops, which is when you scatter already harvested material, like hay or straw, over the top of the soil and around the base of a plant. These crops do not provide the same benefits as living crops, but do help retain moisture. A downside is that they can encourage mold and fungi to form, some of which are harmful to cannabis plants.
Making sure a dead cover crop is not too thick will allow the soil to retain more water than it would without it and dry up quickly enough to be able to feed a plant at a healthy rate and avoid mold. Covering large portions of the soil surface while still exposing it sporadically in other areas is favorable for soil and plant health by helping to retain moisture. If plant leaves are healthy, you can mulch them on top of the soil after pruning.
When you mix dead and living cover crops, you create a great environment for fungi and microbes; however, they are not a necessary component to achieve quality flowers.
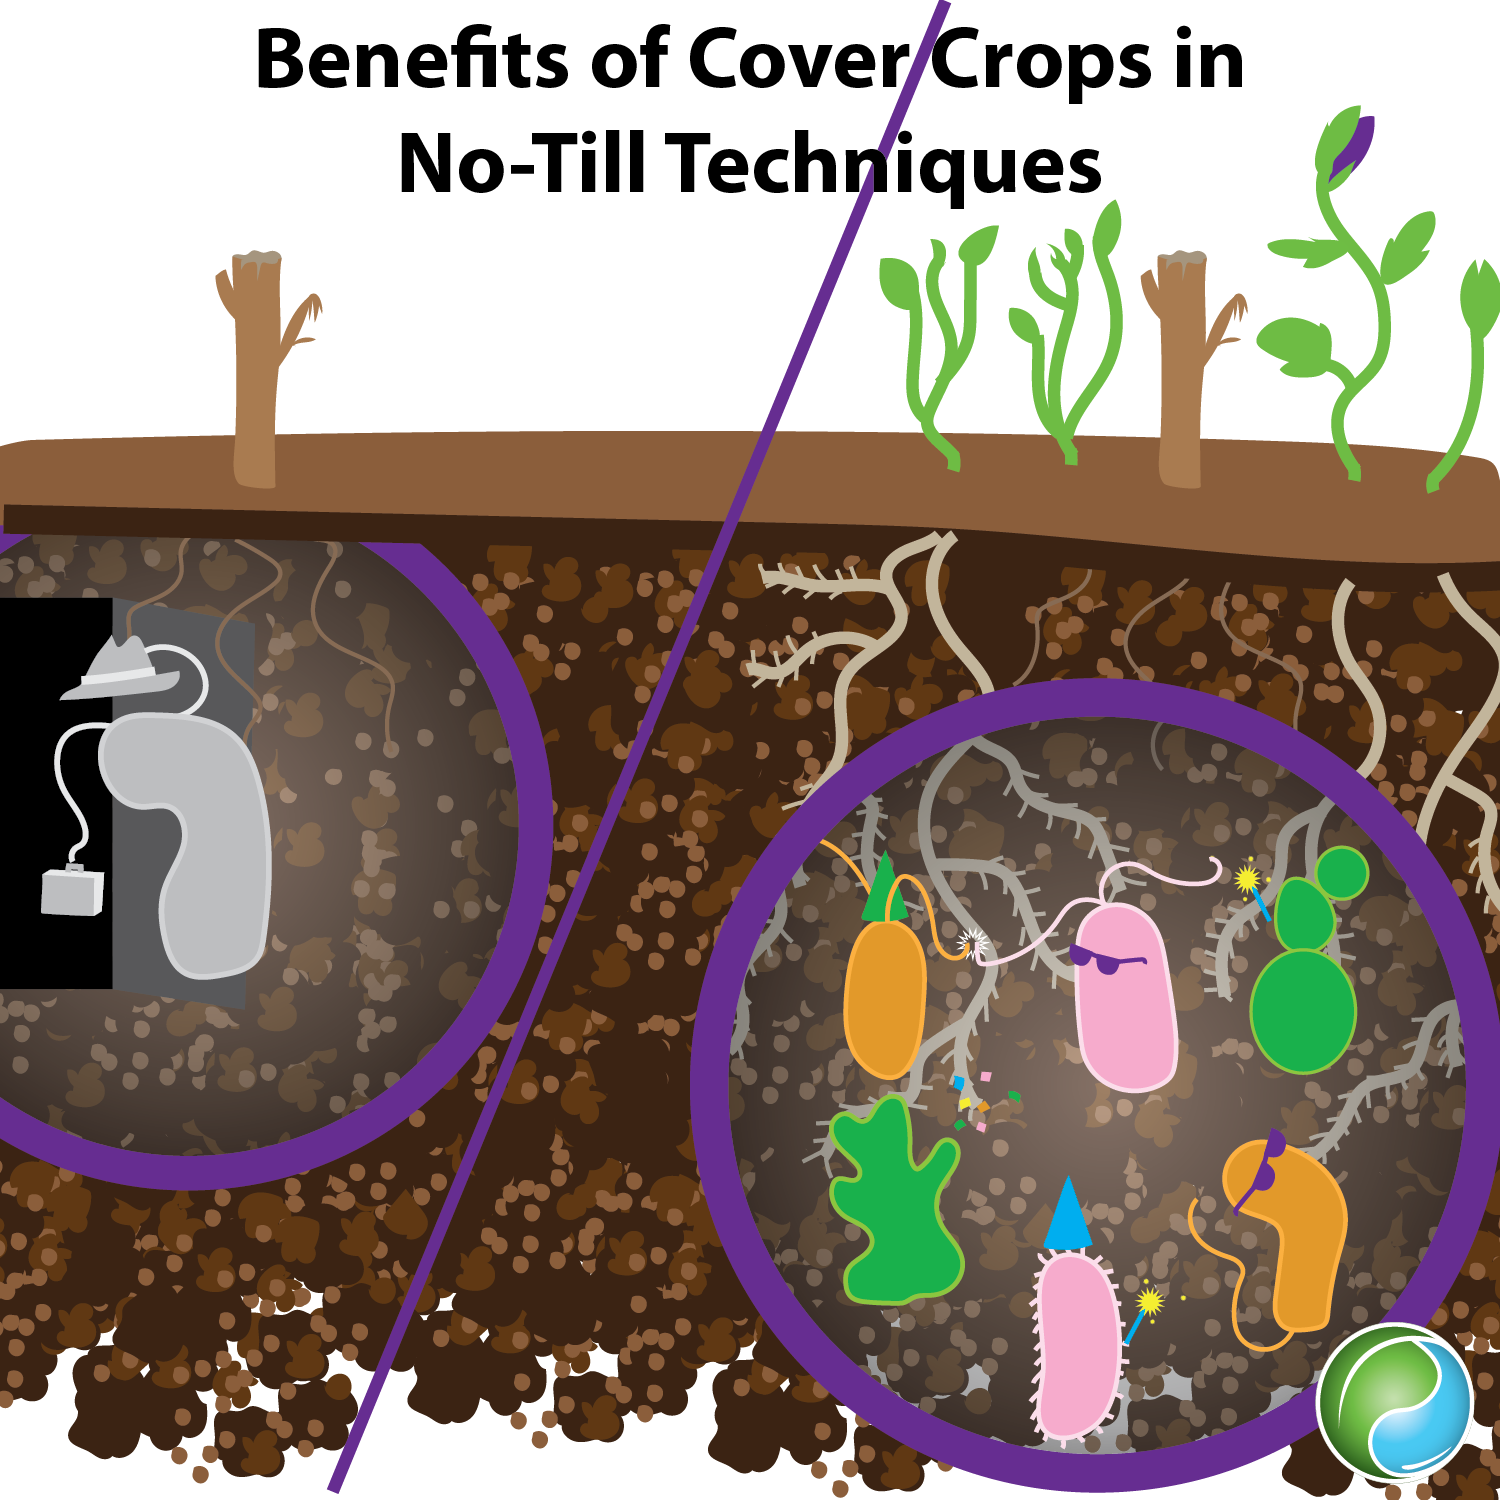 Image credit: Emily Nelson, Sustainable Plant Solutions LLC
Microbiome
Image credit: Emily Nelson, Sustainable Plant Solutions LLC
Microbiome. Each plant has its own unique
microbiome, made up of the totality of fungi, bacteria, and viruses on and around the plant which contribute to its overall health and functionality.
There are several different parts of the microbiome:
- Phyllosphere: Above-ground plant surfaces including leaves, stems, and flowers; host habitat for microbes.
- Endosphere: Microbes inside a plant, or endophytes, inhabit the space inside and surrounding a plant's cells. Endophytes can enter a plant during its early development, through natural breaks in plant tissue, or through the root tips.
- Rhizosphere: The underground microbial environment on the outer layer of the roots, or in the soil surrounding the roots.
The microbiome a plant creates for itself and is exposed to will be dependent on what microbial species it is exposed to, how favorable the conditions of the environment are, and overall plant health. The healthier the plant’s microbiome, the more likely it will be able to function properly.
Other relevant plant terminology includes:
- Spermosphere: External environment of a germinated seed
- Anthosphere: External environment of flowers
- Carposphere: External fruit environment
The Magic Of Living Soil
Back to top
To summarize, each living organism, whether it’s bacteria, nematodes, or fungi, has a job to do that benefits either the soil, the plant, or both. Some of the jobs include:
- nutrient cycling
- nutrient storage
- water holding capacity
- creating air pockets or helping structure the soil
- being food sources for other organisms
- targeting and destroying harmful organisms
All work together to create an environment that allows a plant and the soil to thrive. Living soil is the best soil to use for cannabis and therefore has:
- Amazing carbon and mineral content
- Diversified soil biology (nematodes, protozoa, worms, and arthropods)
- Proper structure (aeration, composition)
- Consistent moisture (never overly saturated, never too dry)
- Ideal pH level (6.8)
This community, this living soil, is one of the reasons why it’s so important to be aware of what you are feeding and exposing your plants and soil to. Certain bottled nutrients, popular plant fertilizers, and pesticides will kill off these fragile microorganisms and fungal networks, leaving the plant with limited food options, methods of defense, and forms of soil wi-fi communication. Many also leave harmful salts behind in the soil (bone meal pulls salts from the soil), which renders it unusable after a short time. When you grow organically, you are promoting a diverse population of living organisms and simultaneously extending the life of your soil.
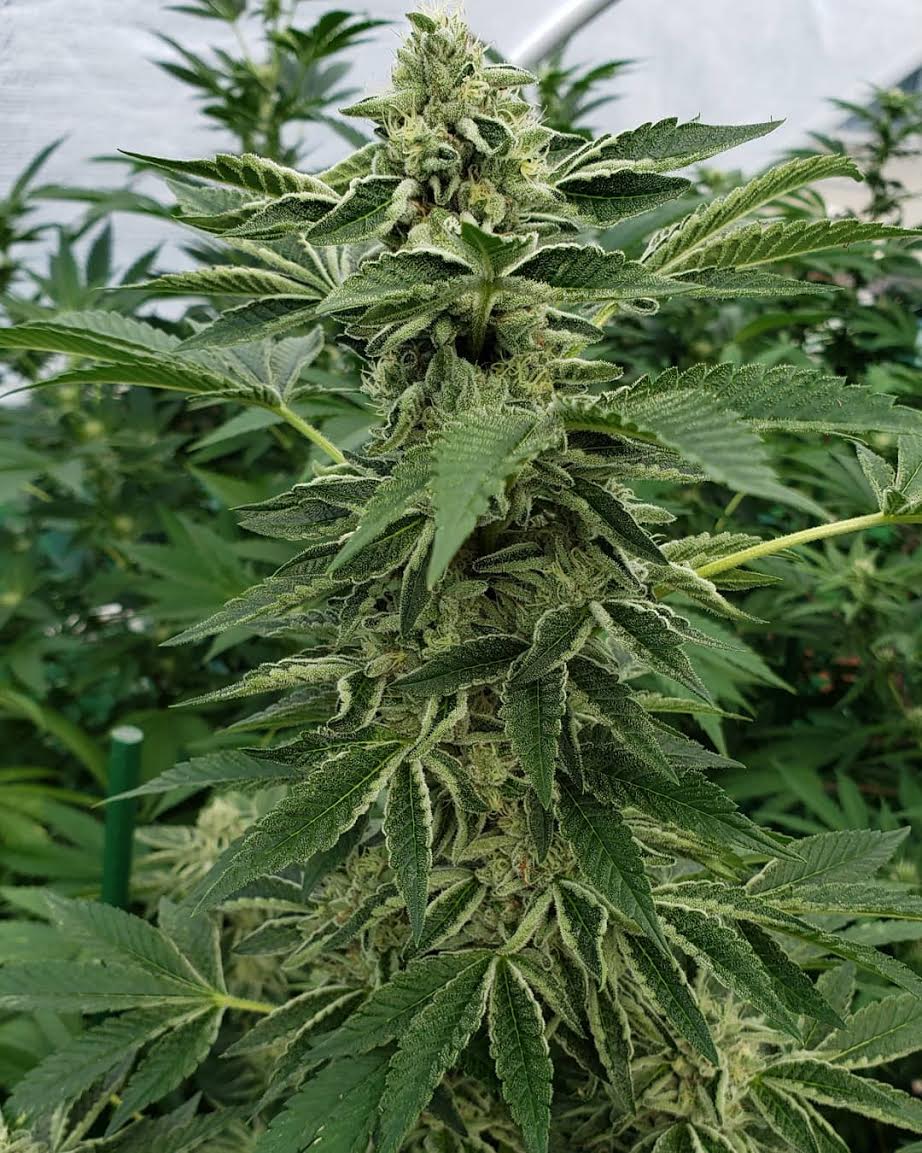 A happy cannabis plant
While many growers focus on feeding a plant, organic growers also focus on feeding the soil (introducing fungi and bacteria with a carbohydrate source; e.g., high brix molasses, cane sugar along with carbon, humic and fulvic acid). Remember, a large portion of a plant’s health is dependent on the soil it’s growing in. Knowing what ingredients and techniques are needed to keep soil in peak health will determine the quality you can achieve with your flowers. It’s not just about the plant, but the soil, too.
The best way to get to know how your soil performs is to start with a proven recipe, hand mix it, consistently check on its moisture content, and - extremely important - leave it alone and let it work its magic.
In nature, everything is interconnected, and all of these things take place on their own without any intervention from humans. Being conscious about these occurrences and interactions, a gardener can have a positive influence by jump-starting natural processes in a flower bed (which often has no established life in it) and ensure success by diligently checking that the soil stays at the correct saturation point and has the amendments and microorganisms it needs to support life; in the end, allowing the environment to thrive and produce a healthy garden.
The relationship between gardeners, cannabis plants, and microorganisms is a good example of symbiosis, where several components live in close proximity and mutually benefit each other. When attempting to create a natural, living environment for a plant, you’ll have to take care of both the visible and invisible. It’s when all of the components in an environment can seamlessly interact that you begin to see results unique to your location and obtain a medicinal flower at peak levels.
When you, as a caretaker, help create pathways for interaction and movement for your plants, you help establish a strong community and environment - and what plant wouldn't thrive in a place like that?
How To Make Exceptional Soil That Will Help Your Garden Thrive
Exceptional soil helps produce exceptional quality throughout all stages of a cannabis plant's life. By opting to make your own soil rather than buying pre-mixed, you’re able to produce a medium that caters to your cannabis plants’ specific needs and allows your plants to perform at the top of their game.
There are several elements that make up good soil. Components include:
- Balanced pH
- Ideal temperatures
- Nutritional content
- Microbial life
- Indigenous microorganisms
- Proper aeration and drainage
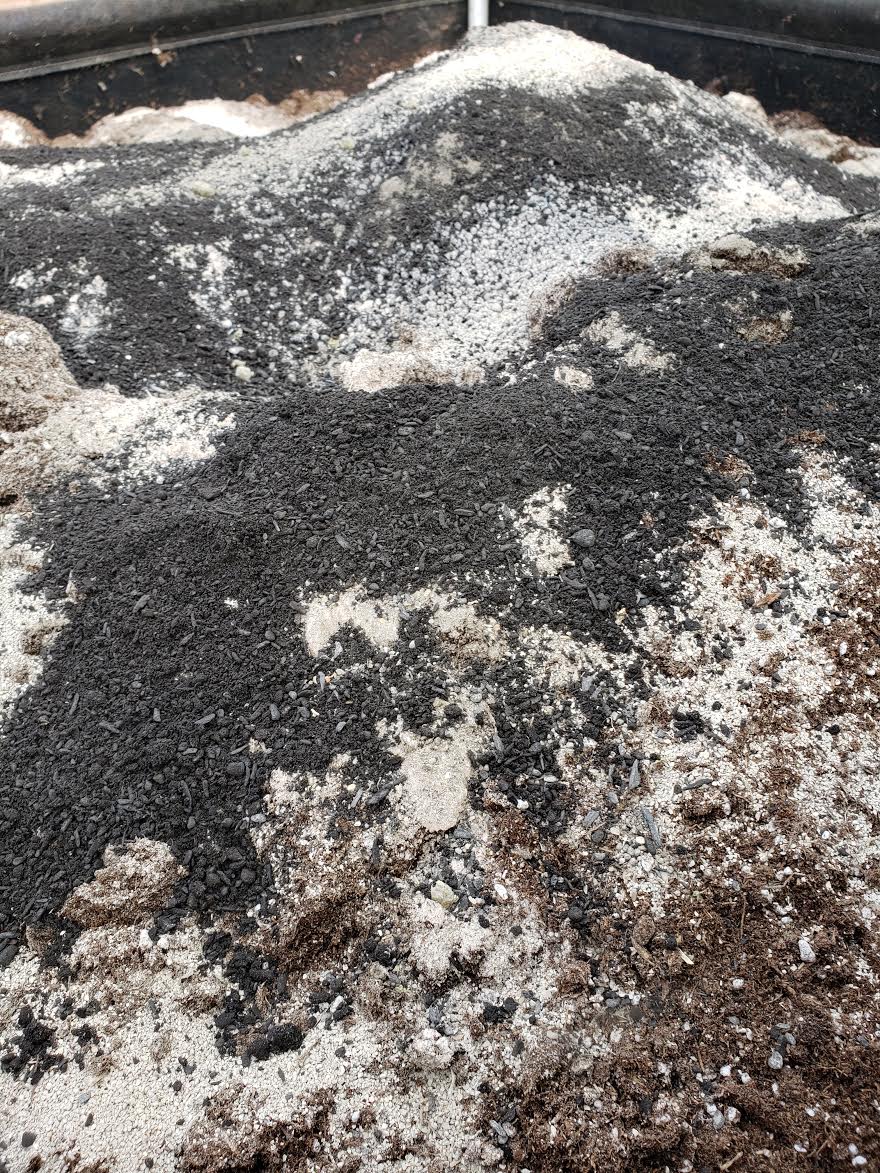 Exceptional soil helps produce exceptional quality throughout all stages of a cannabis plant's life
Soil Amendments
The amendments you choose to use will influence what kind of flowers you will be able to grow. When creating a super soil mixture, it’s important to make sure to include proper quantities of each nutrient required by a plant. Some amendments will be readily available while others need to be decomposed by water and microbial life. Like any good food recipe, the quality of ingredients, ratios, and textures are all important.
To attain living soil, you need:
Organic matter + nutritional content + microbial life + indigenous microorganisms + mycorrhizae + balanced moisture = healthy cannabis plants
The amendments listed below break down at different rates, help provide readily available sources of nutrients, and boost plant immunity, ensuring plants don't suffer from deficiencies and can better withstand attack from pests and disease.
Different mediums include:
Sphagnum Peat Moss: Easy to find at gardening stores and nurseries, this peat has a light brown color and helps give your soil mixture body. It works well to retain liquid; it’s able to hold up to 30 times its own weight. Fresh out of a bag, it lacks any kind of nutrient, making it a great blank canvas to work with. Its pH ranges from 3.0-5.0, a bit low for cannabis, and is likely to continue to drop after decomposing for several months. After amending, it’s able to hold onto nutrients and pH should increase. Peat is cleaner than mediums like coco. If you can source clean coco, add 30% to peat to acquire a better cation exchange (ability to uptake nutrients).
Hypnum Peat Moss: This peat moss is darker in color, has a pH of 5.0-7.0, is more decomposed, and contains some nutrients compared to sphagnum peat moss. However, it is less common in gardening stores and cannot retain as much liquid. Regardless, it is a good option when it comes to mediums.
Coco Coir: This material is made from the outer fibers of coconut shells. You will want to know the coco’s general properties and how it was made before deciding to grow with it. Clean coco can be difficult to find. Currently, many fail testing due to the presence of heavy metals. Because it has a fluffier texture, it can hold more liquid and give great space and air exposure to root systems, but will also dry up faster. If you can locate clean coco, it's helpful to add 30% to your soil mixture in order to improve the cation exchange.
For pH:
Fine Dolomite Lime: Use before planting. A mixture of magnesium and calcium, it helps balance the pH and can never raise the level higher than 7.0. Only small amounts are needed. It is slow-acting and increasingly slower in coarser forms. Mix 1/2-1 cup per cubic foot of soil. If you choose to incorporate it in a soil mixture, make sure to mix thoroughly. If it's not mixed well, it can stratify, forming buildup that will burn and severely affect a plant's root system. Overuse will create too much magnesium for your plant.
Hydrated Lime: Used to quickly raise pH, this is water-soluble and extremely fast-acting. It only contains calcium, not magnesium. Mix well in warm water and apply to the soil. Do not exceed ½ cup for each cubic foot of soil, or plants can suffer stunted growth or death. After roughly two weeks it will wash out of the soil. It can also be used as a fungicide as it eliminates fungus on contact. Simply sprinkle it on the floor of an affected garden room or area.
Earth Juice: To raise or lower the pH level in teas and nutrient solutions, use Earth Juice Natural Up or Natural Down. These products are all-natural pH adjusting crystals. By ensuring your teas and mixtures are within an acceptable pH range, plants will be able to uptake nutrients and optimally perform.
For drainage, absorption, and aeration:
Perlite: Volcanic glass derived from obsidian that has been heated to produce a popcorn-like expansion. It's best used for aeration, drainage, and absorption. Perlite has irregular surfaces that encourage air in soil, help structure soil, and allow a root system to branch out. It's available in fine, medium, and coarse grades. Coarse grades are recommended. It can stratify the mix or float if present in large amounts and should only make up about 10% of a 100 lb. mixture. If you're using bottles, perlite doesn't promote salt buildup from fertilizers.
Pumice: This amendment is a mined, light volcanic rock. It has catacomb-like spaces that easily hold nutrients, water, and air. It works by helping to retain even moisture, aerates the soil, enhances drainage capabilities, and improves soil structure. Only about 5-10% is needed per 100 lbs. of soil.
For a microbial inoculant:
Urb Natural: This product is triple certified as an organic product and was specifically formulated for cannabis. It contains several different species of beneficial microbes, including trichoderma and bacillus, and is mixed with a humate base, dramatically improving the health of a plant. It works great for rooting, vegging, and flowering plants; you’ll find yourself using this product for everything.
Because it is mostly water it can be used in drip systems. You don't need much to satisfy the soil, and once you introduce the microbes, as long as you properly maintain the soil, you won't have to apply it more than a few times per cycle. Benefits include enhanced vigor, color, cannabinoid content, terpene profiles, and quality. Plant roots appear strong with impressive growth. In addition, it can improve a plant’s resistance to pests and pathogens. Urb Natural is so effective, it can reduce the amount of other products you use in your garden.
Recharge: Formulated to help create and maintain living soil, Recharge is a superpack inoculant that introduces bacterial colonies and beneficial fungi to soil and plants. It contains mycorrhizae and trichoderma fungi, humic acid, fulvic acid, kelp, molasses, and amino acids. This product increases nutrient availability and plant vigor within 48 hours of applying it. It can be mixed with water and used for seedlings or brewed in teas; highly effective regardless of how big a plant is.
For beneficial bacteria::
Azos: Made by Xtreme Gardening, this product is all-natural and includes beneficial nitrogen-fixing bacteria that capture nitrogen from the air and convert it into a readily available form for a plant to use. It also works to speed up a plant’s natural growth hormone, promoting fast rooting. Recommended to use for the initial transplanting of clones, it allows a beneficial bacterial colony to form on the root system, helping to reduce shock and allowing a plant to adjust quickly to its new environment.
For mycorrhizal spores:
Mykos: Also made by Xtreme Gardening, Mykos is recommended to use each and every time you transplant. It contains the fastest and most aggressive colonizing mycorrhizae,
Rhizophagus intraradices. Beneficial fungi improve the Soil Food Web greatly by helping to strengthen water retention capabilities, purify water, provide nutrients, improve soil structure, and more. This product works to strengthen root production, optimizing a plant’s ability to access nutrients and water. Only apply as needed.
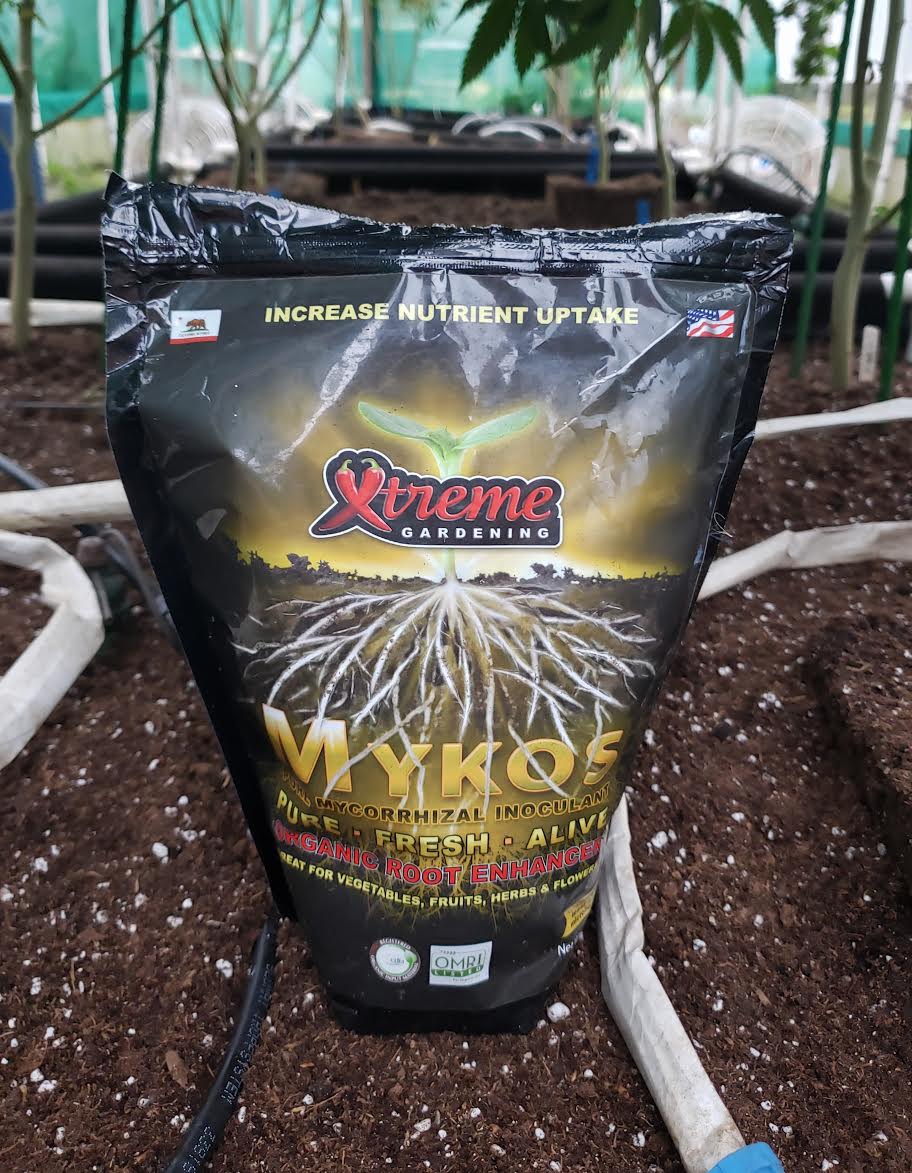 Use Mykos each and every time you transplant for increased nutrient uptake
Hendrikus Organic Fertilizers
Use Mykos each and every time you transplant for increased nutrient uptake
Hendrikus Organic Fertilizers: These products are highly recommended. They have multiple organic certifications, are made from high quality ingredients, and produce high quality flowers. These amendments consist of a well-thought out blend of mycorrhizae, bacteria, and minerals with all of the ingredients rolled and coated in molasses, serving as a food source for microbial life. It works so well that you can see a mycelial bloom within a matter of days after topdressing. Benefits include boosted plant health and performance, increased resistance against pests, pathogens, drought, and temperature, enhanced cannabinoid content and terpene profiles, bigger flowers, and an all-around better harvest. Extremely effective and will give you the results you’re looking for.
For KNF:
Organics Alive: This eco-friendly company makes an all-natural product line for regenerative farming. Products include fermentations (like FPJ, FPT, and FPF), fertilizers, amendments, and microbials. Pre-made, high quality products for KNF save time and enhance the performance of a garden. Their fertilizers are carbon based and free of heavy metals, classifying them as truly organic. Organics Alive worm castings and tea brewer are highly recommended (along with everything else they make).
For indigenous microorganisms:
Collect Your Own: Microorganisms that have lived in a particular environment and helped create it will be beneficial in an outdoor cannabis garden. They help decompose organic materials into simpler elements, produce enzymes that speed up chemical processes, suppress diseases, and replenish the life of soil. Because IMOs can only be collected in your specific area, you will most likely have to collect and make the mixture yourself; they can be collected year-round. It is helpful to seek advice from other farmers who utilize similar techniques, or otherwise have the experience.
For nutritional content:
Alfalfa Meal. One of the most well-rounded macronutrient amendments, alfalfa meal is derived from alfalfa plants and contains a combination of nutrients that not many others have. The three major nutrients required by cannabis, nitrogen, phosphorus, and potassium, are all found in alfalfa meal. In addition, it also contains natural plant growth hormones, vitamins, folic acid, biotin, riboflavin, and almost 20 amino acids. It works by improving nutrient transfer, balancing soil sugars and proteins, and increasing microbial activity. Using alfalfa meal will also enhance cannabinoid content and terpene profiles. It is
not water soluble.
Azomite: Included in this amendment is an incredibly diverse source of nutrients, containing over 70 trace minerals. It's helpful to remember the name is an acronym for “A to Z Of Minerals Including Trace Elements.” It is mined from a North American desert. Good for re-mineralizing soil and increasing the amount of available nutrients for a plant, it boosts root growth, increases sugars or brix levels, improves color and flavor, and produces a greater number of bigger flowers. It is more easily found than glacial rock dust. A plant doesn't necessarily need azomite, greensand, and glacial rock dust together, but you can combine them since they break down at different rates.
If only using one of these, azomite is most recommended. Micronized azomite is water soluble.
Biochar: When organic material (grass, straw, wood) is allowed to slowly burn with restricted exposure to oxygen until the charcoal stage is reached, the remaining material is biochar. Because the material is chunky, not in ash-form, it’s full of holes that allow soil microorganisms to cling to it. The carbon it contains loosely bonds with nutrients, preventing them from being easily washed away by water. In simple terms, biochar acts like a microbial and nutrient magnet. Another benefit, if soil is drying up, biochar will be one of the last places for microbes and roots to find moisture. It promotes vigorous health and growth, drought tolerance, improved resistance against pests and diseases, and a larger root system. It contains water soluble compounds.
Bokashi: An easy, effective way to add microbes to a soil mix is with
bokashi. Bokashi is a composting process that involves converting organic waste, like food and foliage, into a soil amendment a plant can use by fermenting it with bran and without oxygen. It contains lactic acid bacteria (LAB) and is used to establish a healthy and hearty Soil Food Web. These bacteria are microscopic decomposers that work to break down organic matter and convert it into readily usable forms of nutrients. Plant productivity increases and so does yield. Plants also have increased tolerance against pest and pathogen attacks. It can be topdressed or mixed into soil; however, mixing it in the soil is preferred. If you want to use IMO, you do not need to use bokashi. IMO is a better source for microorganisms; however, bokashi is more convenient.
Chitin: Structurally, chitin is made up of long chains of glucose molecules that are linked to each other; it is related to cellulose. It’s a naturally occurring molecule found in crustacean shells, insect exoskeletons, insect frass, crab meal, neem cake, and other sources. Chitin works by fortifying a plant from its cell walls out. It provides incredible defense against pests and diseases, boosting vigor and increasing a plant’s tolerance against attack. It also promotes soil biology, serving as a highly desired food source for members of the Soil Food Web. In addition, it helps with maintaining a good pH. Soil structure, aeration, and drainage are all improved due to chitin’s course texture. As a result, chitin will help increase terpene and resin production, which ultimately leads to a flower with greater medicinal value. It is
not water soluble.
Crab Meal: This amendment contains richness that only the ocean can provide, and is a source of nitrogen, phosphorus, magnesium, chitin, and trace minerals. It’s also a great source of calcium. Since it contains chitin, it helps boost a plant’s immune system, enhancing cannabinoid and terpene synthesis. It is a slow-release amendment, and does not affect pH levels in the soil. It is
not water soluble.
Feather Meal: This amendment is made by heating and grinding poultry feathers. It contains both quick and slow-release forms of nitrogen. Chlorophyll, photosynthesis, and leaf development all benefit from feather meal. It also encourages strong root systems, helping a plant with growth and vigor. This is best used during the vegetative stage as higher amounts of nitrogen are needed by a plant when it’s young. It is
not water soluble.
Fish Bone Meal: Another marine-based fertilizer, this amendment is made by heating and grinding fish bones. It’s a great source of organic calcium and phosphorus and includes a small amount of nitrogen. Phosphorus helps a plant develop a strong root system and also stimulates and boosts flower production and vibrancy. Among other benefits calcium is needed to metabolize several other nutrients. Ocean fish have a higher mineral content than land animals. Because of this, fish bone meal is a preferred source of calcium to bone meal, which is sourced from cows. Another advantage, fish bone meal is also a food source for the microorganisms in the Soil Food Web. Incorporating this amendment into a plant’s feeding regimen is a great way to increase yield. It is
not water soluble.
Glacial Rock Dust: This amendment is created by glacial action. As a glacier carves its way through rock, it leaves behind a mineral-rich dust which contains calcium, iron, magnesium, potassium, and trace minerals. It’s also used as a soil enhancer, to boost root growth and microbial activity, and to improve soil structure. This micronized amendment works well to provide plants with essential nutrients needed for optimum plant performance. It doesn't take long to break down and is beneficial for increased vigor, maintaining good health, and bigger flowers.
Ground Oyster Shell: This is a slow-release, high quality soil conditioner made from oyster shells that have been ground up into different sizes: powder, medium, and coarse. It contains high amounts of calcium carbonate and trace minerals. Oyster shells can stabilize soil pH; however, it takes a long time to decompose and effectively help. Because it doesn’t break down quickly, it steadily releases nutrients for plants to uptake, encouraging improved cellular structure, enzyme formation, and nutrient content. It also creates spaces for microorganisms in the soil. Not for bottles or short term soil use.
Gypsum: This is a naturally occurring mineral found in layered sedimentary deposits. Used as a soil enhancer, it is a calcium and sulfur source. Additional benefits include improving soil acidity, soil structure, and improving aggregation and water permeability. It’s main purpose is to help with roots and shoots, encouraging their growth and development. Gypsum works well for overwatered soil as it helps loosen up compacted soil and heals plants from salt exposure and damage. Use granular gypsum for a slower release amendment and micronized gypsum for a fast release option. It is somewhat water soluble.
Humus: Humus refers to complex, highly stable compounds that cannot be broken down any further. It occurs naturally in soils, streams, and oceans as heavy and dark brown long-chain molecules formed from the decomposed remains of organic life (like plants and animals). After death, organic life-form molecules become available for other organisms' benefit inside of the soil. Over time, after these organisms have broken down the remains through several cycles, what is left is humus.
Humic acids are attracted to a root system's negative charge, where they deliver the positive ionic nutrients which they pick up. This group of molecules then binds to root systems, increasing their exposure to water and nutrients, improving nutrient transfer. Humic acids perform a job similar to mycorrhizae. They help bond nutrients such as calcium, magnesium, and iron, increasing their availability to a plant. If mycorrhizae is absent in soil, humic acids increase in importance.
Benefits of humic acids include:
- Improves plant cell division
- Increases the permeability of plant membranes
- Buffers pH, allowing nutrients to become available in soils with unbalanced pH levels
- Neutralizes toxic conditions
- Helps aerate the soil
- Improves color, consistency, and soil structure
- Increases root systems
- Improves seed germination
Use both granular (slow-release) and liquid (readily available) forms to ensure a plant has a constant supply.
Insect Frass: See chitin.
Langbeinite: This is a somewhat rare 3-in-1 amendment containing potassium, magnesium, and sulfur that is sourced mainly from mines in New Mexico. It’s water soluble and readily available for plant use. Langbeinite is nutrient-dense with a neutral pH, and contains no chloride. It improves plant health, yield, ability to photosynthesize, and aids in the production of cannabinoids and terpenes. When balanced, potassium and phosphorus combine to increase Brix levels and deter pests and pathogens from attacking a plant.
Micronized Greensand: Also referred to as
glauconite, greensand contains around 30 trace minerals from the ocean floor, including iron and silica, and is rich in potassium and magnesium. It both boosts root growth and plant health. It is not readily available to a plant and gently releases nutrients over time. As far as soil is concerned, greensand helps loosen particles, retain moisture, and enhances structure. It’s
not water soluble.
Micronized Soft Rock Phosphate: This amendment is a natural clay material that is collected by surface mining. It distributes nutrients consistently over the lifetime of a plant as it is broken down by bacteria, increasing soil quality. It’s a good source of phosphorus that doesn’t leach away. Soft rock phosphate enhances calcium and magnesium in soils, and helps increase biological life and activity. It also contains trace minerals. Using soft rock phosphate will lead to richer flavor and bigger yields. It is water soluble.
Neem Cake: Neem is a type of stout tree that grows to about 40-50’. Each tree produces oily seeds that are harvested and pressed for that oil. The oil is a pest and nematode deterrent, and the material left over from pressing is called neem cake. In a garden it is an effective soil enhancer full of nitrogen, potassium, phosphorus, and trace minerals like zinc, sulfur, and copper; it also strengthens root systems and boosts vigor. It is a slow-release amendment, providing long-lasting nutrition for plants. It also helps reduce the alkalinity of soil as it produces organic acids. It’s best to use neem cake as an amendment in soil mixes rather than in a tea.
Spirulina: Spirulina is a type of algae that grows in warm lakes and ponds. In order for it to grow, it requires a lot of sunlight and mineral-rich water. A powerful superfood, it also works great in the garden. It’s full of trace minerals, able to improve plant health and yields. Spirulina can be used as a replacement for kelp and is recommended as a soil enhancer or foliar spray (veg stage only). High quality powdered forms are preferred.
Worm Castings: Earthworms are constantly eating a variety of things living in soil. As a result, they excrete waste known as worm castings or
vermicompost. Worm castings jumpstart plant biology, retain moisture in soil, facilitate nutrient absorption, buffer against unbalanced pH levels, and increase yield. They are one of the most important things needed to create a strong immune system in a plant. There are around 60 minerals and trace elements found in worm castings including nitrogen, phosphate, calcium, and potash (potassium). They are close to neutral in pH and they also contain humic acid. Castings provide similar nutrients as fertilizer. The purer - no filler - and fresher the castings, the better. Castings are water soluble.
It’s recommended that you don’t use worm castings in a topdress mixture (unless you apply a very thin layer) as they tend to cake up, compromising texture, and excessively hold moisture in soil, which can lead to potential problems when it comes to soil performance. Instead, thoroughly mix into the soil before planting or use in a tea. Different sources feed their worms different foods, creating different types of castings. It’s recommended you use one specifically blended for vegging plants and another for flowering. Organics Alive is a good brand to source worm castings from as they have both.
Use with caution:
Guano: Generally speaking, guano is a polite word for bird and bat manure. Bat guano is a waste product from bats, meaning the nutrients are already broken down. It’s either a source of nitrogen, phosphorus, or potassium depending on where it is sourced from, or what the bats’ diet is. Many times, bat guano causes issues and ends up burning plants because the nutrients are too readily available and when mixed with other ingredients, can often be present in toxically excessive quantities. Also true for seabird guano.
Garden Compost: Provides beneficial organisms and is rich in organic materials and carbon content, which quicken nutrient uptake; however, it typically contains pests and pathogens that can devastate a garden, as both love the organic matter that makes up compost. While compost is commonly used in many gardens and soil mixes, careful attention to the ingredients chosen is required.
Only use compost in your mixture if you can find a clean source, which can be difficult.
Grass cuttings are full of nitrogen and great for composting. Piles of cut grass 12-24” deep generate heat that range from 120-180F, killing pests, decomposing foliage, and releasing nutrients. Clean cannabis leaves can also be used. If properly made, compost can be a great ingredient to add to soil mixes and teas.
Supa Soil Recipe For Vegging Plants
When a plant is young and focused on producing root systems, leaves, and branches, it needs different nutrients than when it matures and starts to produce flowers. You should use one soil recipe for seedlings and vegging plants, and another for flowering ones to ensure a plant timely gets the nutrients and conditions it needs for optimum growth.
While living soil may be beneficial for plants on a complicatedly scientific level, thankfully, it’s fairly easy to make for the passionate gardener.
Here’s how to do it:
Back to top
Ingredients
For 100 lbs. of soil
When deciding which ingredients you would like to use, first think about what stage of development the plant is in and what variety it is. Below is a soil recipe that can be used with teas, topdressings, or bottles.
For soil that will be used in the vegetative stages of growth, mix:
- *1 Bale/3.8 Cu Ft Promix HP (BX will work)
- 20 lbs Premium Worm Castings
- 20 lbs Hendrikus Humagic (Premium Humic)
- ½ Cu Ft of BioChar
- 5-Gallon Bucket Large Perlite
- 4 Cups Hendrikus Complete
- 4 Cups Micronized Azomite
- 4 Cups Mykos Granular
- 4 Cups Bokashi
- 2 Cups Hendrikus Soil Enhancer
- 2 Cups Micronized Greensand
- 2 Cups Soft Rock Phosphate
- 2 Cups Food Grade Gypsum
- 2 Cups Neem Cake Meal
- 2 Cups Insect Frass
- 2 Cups Alfalfa Meal
- 2 Cups Langbeinite
- 2 Cups Kelp Meal
- 2 Cups Crab Meal
- 1 Cup Glacial Rock Dust
- 1 Cup Spirulina Powder
- 1 Cup Fish Bone Meal
- 1 Cup Feather Meal
*Can mix with coco 30/70 for faster cation exchange.
Recipe #2
Alternative recipe, veg
- 1 Bale/3.8 Cu Ft Promix HP (BX will work)
- 1 Cu Ft bag Organics Alive Veg Worm Castings
- 10 Cups Biochar
- 4 Cups Azomite
- 4 Cups Hendrikus Complete
- 2 Cups Hendrikus Soil Enhancer
- 2 Cups Glacial Rock Dust
- 1 Cup Crab Meal
- 1 Cup Bone Meal
- 1 Cup Micronized Greensand
- 1 Cup Neem Cake Meal
- ¾ Cup Roots Organic Elemental
Supa Soil Recipe For Flowering Plants
Exceptional soil is what helps produce flavor and quality in the flowering cycle. Flowering cannabis plants need different kinds and quantities of nutrients than vegging plants. As a plant develops and flowers, less nitrogen is needed and increased amounts of ingredients like calcium and phosphorus are required.
Ingredients
For 100 lbs. of soil
When deciding which ingredients you would like to use in your soil, don't forget to consider what varieties you will be planting. Below is a soil recipe that can also be used with teas, topdressings, or bottles.
For soil that will be used during the bloom stage, mix:
- *1 Bale/3.8 Cu Ft Promix HP (BX will work)
- 20 lbs Premium Worm Castings
- 20 lbs Humagic (Premium Humic)
- ½ Cu Ft of BioChar
- 5-Gallon Bucket Large Perlite
- 4 Cups Hendrikus Soil Enhancer
- 4 Cups Hendrikus Bouquet
- 4 Cups Micronized Azomite
- 4 Cups Mykos Granular
- 4 Cups Bokashi
- 3 Cups Soft Rock Phosphate
- 3 Cups Fish Bone Meal
- 3 Cups Langbeinite
- 3 Cups Crab Meal
- 2 Cups Micronized Greensand
- 2 Cups Food Grade Gypsum
- 2 Cups Neem Cake Meal
- 2 Cups Insect Frass
- 2 Cups Kelp Meal
- 1 Cup Glacial Rock Dust
- 1 Cup Spirulina Powder
- 1 Cup Alfalfa Meal
*Can mix with coco 30/70 for faster cation exchange.
Recipe #2
Alternative recipe, bloom
- 1 Bale/3.8 Cu Ft Promix HP (BX will work)
- 1 Cu Ft bag Organics Alive Bloom Worm Castings
- 4 Cups Hendrikus Bouquet
- 3 Cups Glacial Rock Dust
- 3 Cups Neem Cake
- 1.5 Cups Hendrikus Soil Enhancer
- 1.5 Cups Leonardite
- 1 Cup Roots Organic Elemental
- 1 Cup Bone Meal
- 1 Cup Crab Meal
Important Note: If you choose to use pre-mixed soil, you should not use the same ingredients or amounts as those listed above. This is because pre-mixed soil already has many of the ingredients listed. Fox Farm Ocean Forest and Rootz Organic Formula 707 are two good pre-mixes that are easy to find in stores.
Mixing Soil
Step 1: Gather the ingredients. Place your soil ingredients outside on a large tarp or in a clean container for convenience and to avoid contamination. Or, if you will be using it immediately, place it directly in a flower bed.
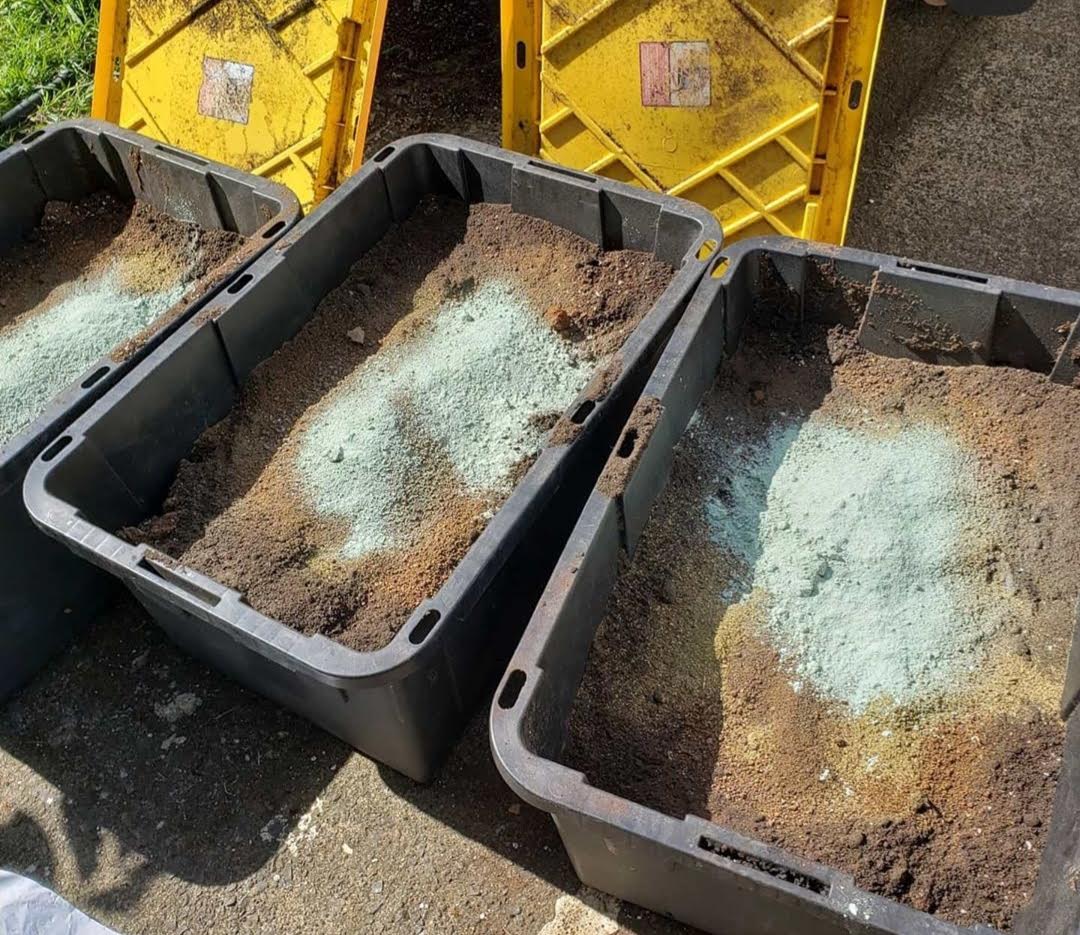 Mix and store soil in containers for added convenience
Step 2: Mix well
Mix and store soil in containers for added convenience
Step 2: Mix well. Make sure all the ingredients are thoroughly mixed, so you don't have pockets containing too much or too little of a certain amendment. Because the ingredients are dry and fine, they create dust. It's important to not breathe the dust. You will need a mask to prevent inhaling particles.
Step 3: Ensure it has proper texture. Use your hands, 2” wire screen, or gardening tool of choice to break up any clumps. The goal is to provide maximum space for your plant's root system to easily branch out, which can be difficult if there are tightly packed clumps everywhere.
 Make sure soil is mixed well and is free of large clumps
Step 4: Cook your soil
Make sure soil is mixed well and is free of large clumps
Step 4: Cook your soil. Let it sit for 2-4 weeks in a covered storage container. Put the container in the sun to expose it to heat. This helps sterilize the soil.
Step 5: Activate your soil. Mix 1 oz EM-1 or homemade lactobacillus (LAB) and 1 oz high brix molasses to 5 gallons of water. Mix thoroughly while spraying the soil with a hand pump sprayer that has a wand and brass or metal tip. Turn and evenly moisten the soil. You don't want to be able to squeeze water out of it; it should clump in your hand, kind of like dough. Activation lets the nutrients begin to break down and builds up microbes, essential components of good soil. This is when the soil starts to come to life.
Step 6: Store. After activating soil, store it in a clean trash can or large container and cover with a lid. Make sure the container is in the shade out of sunlight. Let it sit for 2-3 weeks (without further mixing) before using.
Soil Maintenance
When growing with living soil, it’s best to leave the soil alone once the plants are in it. Not disturbing it allows the organisms, fungal networks, and root systems to develop and function as intended. After all, it is a rare occurrence in nature that the soil would be severely disrupted.
To encourage proper soil performance:
Focus on moisture content. It’s important to only apply liquid to the soil if it needs it, which will be dependent on the weather or how quickly the plant uptakes liquids.
When it’s time to feed or water a cannabis plant, pour liquid on the soil evenly and slowly, wetting the entire surface of the soil; however, to eliminate rot and other diseases, avoid wetting the stem and branches of the plant. This will not only help maintain proper soil consistency, but also ensure the plant’s entire root system stays hydrated. Saturating the soil around the base of the plant will also encourage the roots to branch out and establish strong architecture.
Check your soil’s moisture content with a moisture meter every time you check your garden to not only get to know your soil and plants better, but to ensure you are monitoring moisture levels optimally.
Apply smaller amounts of liquid several times a day instead of large amounts all at once. By giving smaller amounts of liquid throughout the day, you ensure the soil is never dry or overly saturated. For example, for a 4x4 flower bed, instead of giving 3 gallons once a day, you could give 1 gallon 3 times a day, making sure you give the last one at least 5 hours before dark to prevent unwanted issues.
Consider setting up a watering system. These systems work well if properly set up, and can even allow plants to be watered without much interaction from the gardener.
The most important thing to do when first setting up a watering system is to make sure you know how much water is getting into the soil. Some watering systems allow water to be given via a drip system, while others apply water through a flexible tape. Overwatering can easily occur, especially if you forget to turn off the water or aren't aware of how much water your soil requires.
Once you learn the system, it can help prevent soil from ever being overwatered or from drying up, extremes which strongly influence the health of a plant and the soil.
Watch for a space forming on the perimeter. Especially true if you are using a pot, a gap can form on the perimeter of a container between the soil and the plastic or fabric, creating a hazardous area for roots due to air exposure that can quickly dry out the delicate root hairs. Add soil to fill in the space if the plants are still growing, and for flower beds, make sure to evenly spread out the soil after you amend it in between harvests.
Check the soil’s performance throughout a cycle. When soil is hydrated and then dries up, it contracts, diminishing air space, which inhibits liquid from being absorbed at the surface. If the soil is not absorbing or shedding liquid properly, a plant’s health will suffer.
When you’re feeding or watering, if you notice the liquid flowing over the top and emptying on the sides - not absorbing into the soil - that’s a problem. Similarly, if you notice the liquid draining immediately out the bottom of your container, that is also a problem, as the plant will not be able to absorb water and nutrients as needed.
Moisture fluctuation can also cause salt accumulation. These conditions make it challenging for roots to branch out and acquire the nutrients they need. The surface of the soil should look somewhat fluffy in texture and still maintain a rich, dark color.
If any of these situations occur, you may need to adjust your soil recipe or add necessary amendments once that cycle is done. Especially common with plastic pots, soil can escape through the bottom over time, lowering the amount of soil in the container. For a quick fix to any of the above, add a little soil to the top to encourage water retention and nutrient availability.
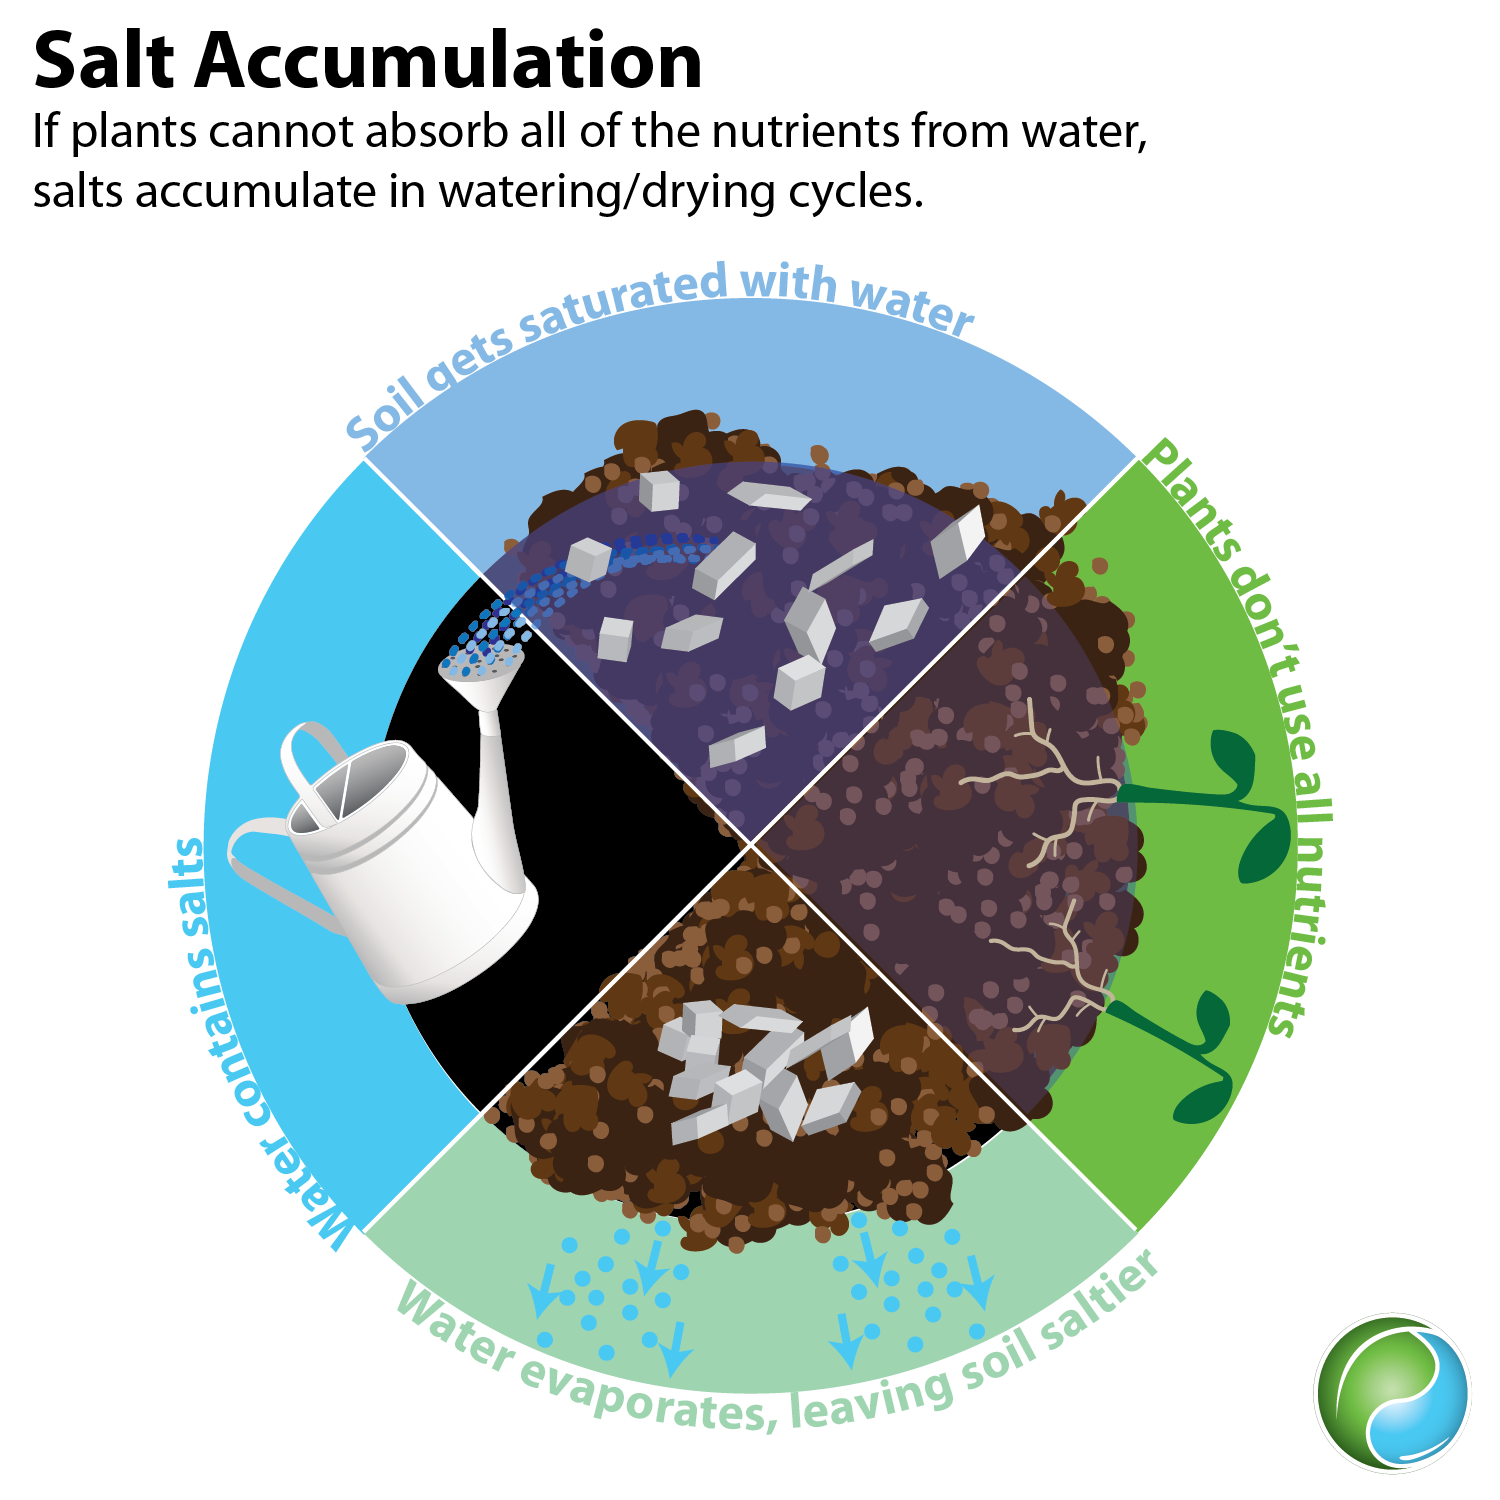 Image credit: Emily Nelson, Sustainable Plant Solutions LLC
Avoid stepping on or leaning on the soil
Image credit: Emily Nelson, Sustainable Plant Solutions LLC
Avoid stepping on or leaning on the soil. Primarily applicable to flower beds, avoid putting any weight on the soil while plants are in it. Added weight is not good when it comes to soil health; it compresses the soil, forcing precious air out, and eliminates space microbial life and organisms need to survive. If not careful, roots can also be crushed and damaged.
If you notice unexpected diminishing plant health, amend the soil for the next cycle. Also, if you’re reusing soil, after you harvest your plants, make sure you remove large root clumps that are left behind in containers.
Avoid reusing after three harvests. Over time, certain soils can become acidic, even if they are simply being stored, unopened, in a bag. Using freshly mixed soil every time you transplant will decrease the likelihood of your plants developing deficiencies, and will, not surprisingly, increase quality and yield. For sustainability’s sake, you can amend used soil and reuse it in the future, but proper technique and knowledge is required (see below). Not only is it important to use amended soil, it's important to closely monitor and test soil after each harvest to ensure the pH levels are within an acceptable range. For beginners that haven’t yet learned how to establish living soil, you should completely change the soil in flower beds or large containers after three cycles or if you notice plant health declining.
How To Amend Used Soil
Over time, and especially after a plant uptakes the available nutrients, the health and viability of the soil diminishes. For both affordability and sustainability, gardeners can amend soil, or add nutrients and microbes back into it to extend its life. It’s similar to mixing super soil, however, it doesn't require as many ingredients.
 Image credit: Emily Nelson, Sustainable Plant Solutions LLC
Here's how you do it:
Directions:
- Test your soil to determine exactly what nutrients it’s lacking or has too much of and to see what the pH is. You can send samples to a lab, or use a home test kit. If you need help deciphering soil test results, soil and growing media technicians, like Sustainable Plant Solutions, can assist; they send material to a lab on behalf of gardeners and help interpret the data to improve their growing operations.
- Remove any large root clumps left behind from previously harvested plants
- Add amendments
- Mix thoroughly. If you leave ingredients unmixed in a flower bed and have plants that are in beds next to it, especially with fans on, ingredients will get blown onto nearby plants, which should be avoided.
- Cook your soil (see Mixing Soil).
- Inoculate the soil by mixing 1 capful of Urb Natural per gallon of chlorine-free water, then apply by lightly spraying the soil with a hand pump sprayer.
- If mixing extra or not using right away, wait to inoculate. Store in a large container of choice and cover it with a lid.
Recipe (veg):
Per 100 lbs. of used soil
- 10-20 lbs. Premium Worm Castings (depends on consistency of soil)
- 5-Gallon Bucket of Biochar
- 4 Cups Hendrikus Grow
- 4 Cups Soil Enhancer
- 4 Cups Azomite
- 2 Cups Gypsum
--
Recipe (bloom):
Per 100 lbs. of used soil
- 10-20 lbs. Premium Worm Castings (depends on consistency of soil)
- 5-Gallon Bucket of Biochar
- 4 Cups Hendrikus Bouquet
- 4 Cups Soil Enhancer
- 4 Cups Azomite
- 2 Cups Gypsum
Back to top
Chapter 4: Starting From Seed or Clone
Cannabis plants go through three stages of development in their lifetime:
- Seedling
- Vegging
- Flowering
Assuring a cannabis plant is healthy and gets optimum amounts of the basic components in every stage of life will help produce a better medicine. The healthier a plant is in the vegging stage, the healthier a plant will be in flower and at harvest.
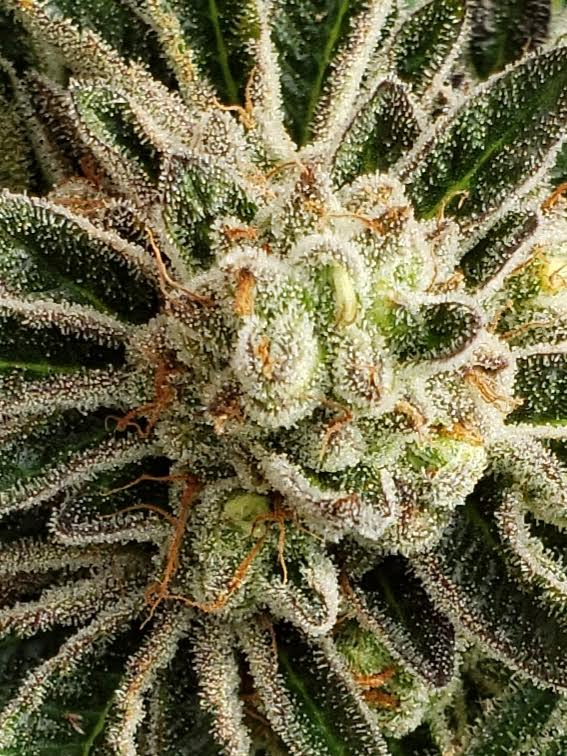 To produce the highest quality cannabis, you’ll need to start with quality genetics
--
To produce the highest quality cannabis, you’ll need to start with quality genetics
--
After you set up your garden space, you need to decide if you’ll be starting from a seed or a cutting. Regardless of that choice, to produce the highest quality cannabis, you’ll need to start with quality genetics. Some strains will naturally produce more THC or CBD than others; some are more resistant to pests; some are naturally more stable in certain environments; and some are less likely to be hermaphrodites or autoflowering. Investing in quality seeds or cuttings is highly recommended and will largely influence the grade of your medicinal cannabis.
Which is better: seeds or clones? Seeds for having something unique (and often better than clones), clones for knowing what you’re going to get (assuming it's from a legit source).
Here are a few tried-and-true techniques when it comes to taking care of cannabis plants through the beginning stages of life:
Back to top
How To Germinate A Cannabis Seed
Start 8-12 weeks before flowering
A cannabis plant has a relatively short lifespan; on average, if starting from seed, about 16-20 weeks. During that time, a tiny cannabis seed sprouts, develops into an adult plant, and if it’s a female, produces flowers containing the desired medicine.
Seeds can be exciting to work with because you never know what you’re going to get and you know nobody else will have whatever pheno you sprout. They are more resilient than cuttings because they have a taproot, and are fairly easy to acquire as well. They are also easier to store and transport than cuttings.
Like other seeds, cannabis seeds should first be germinated before they are put into soil. Doing this allows a seed to sprout and grow a taproot before it is exposed to soil, increasing the likelihood that it will survive and mature.
Here’s how to get cannabis seeds to sprout:
Step 1: Start with a winning seed. Winning seeds are rich in color, often dark brown, with a smooth exterior and preferably good tiger striping. There shouldn’t be any cracks or chips in the seed’s exterior shell. Ideally, it’s relatively young: less than 5 years old. If the seed is older, to increase the chances of it germinating, pre-soak or crack it with needle nose pliers.
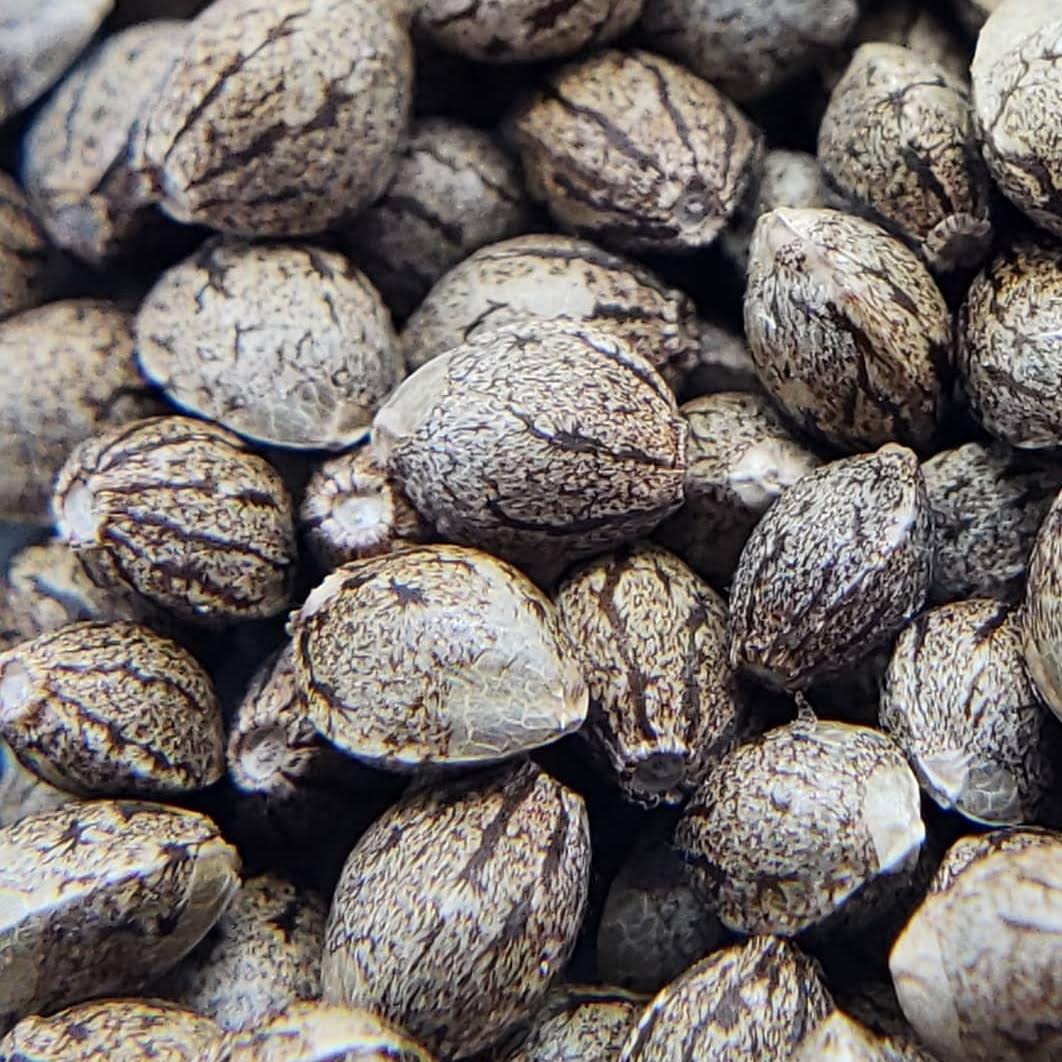 Winning seeds are rich in color with a smooth exterior and good tiger striping
Step 2: Pre-soak
Winning seeds are rich in color with a smooth exterior and good tiger striping
Step 2: Pre-soak. A seed needs to absorb water in order to germinate. The absorbed water starts processes that allow the life of a plant to begin. Place the seed in a cup of room temperature water. Then wait. Be sure to change the water daily. Make sure to change the water daily. Typically, seeds float at first, and once they’re ready to be germinated, will sink to the bottom. Within 48 hours, a seed should sink to the bottom of the cup or sprout. If it doesn’t sink to the bottom after 3-5 days, and fails to sprout, it may not be a viable seed.
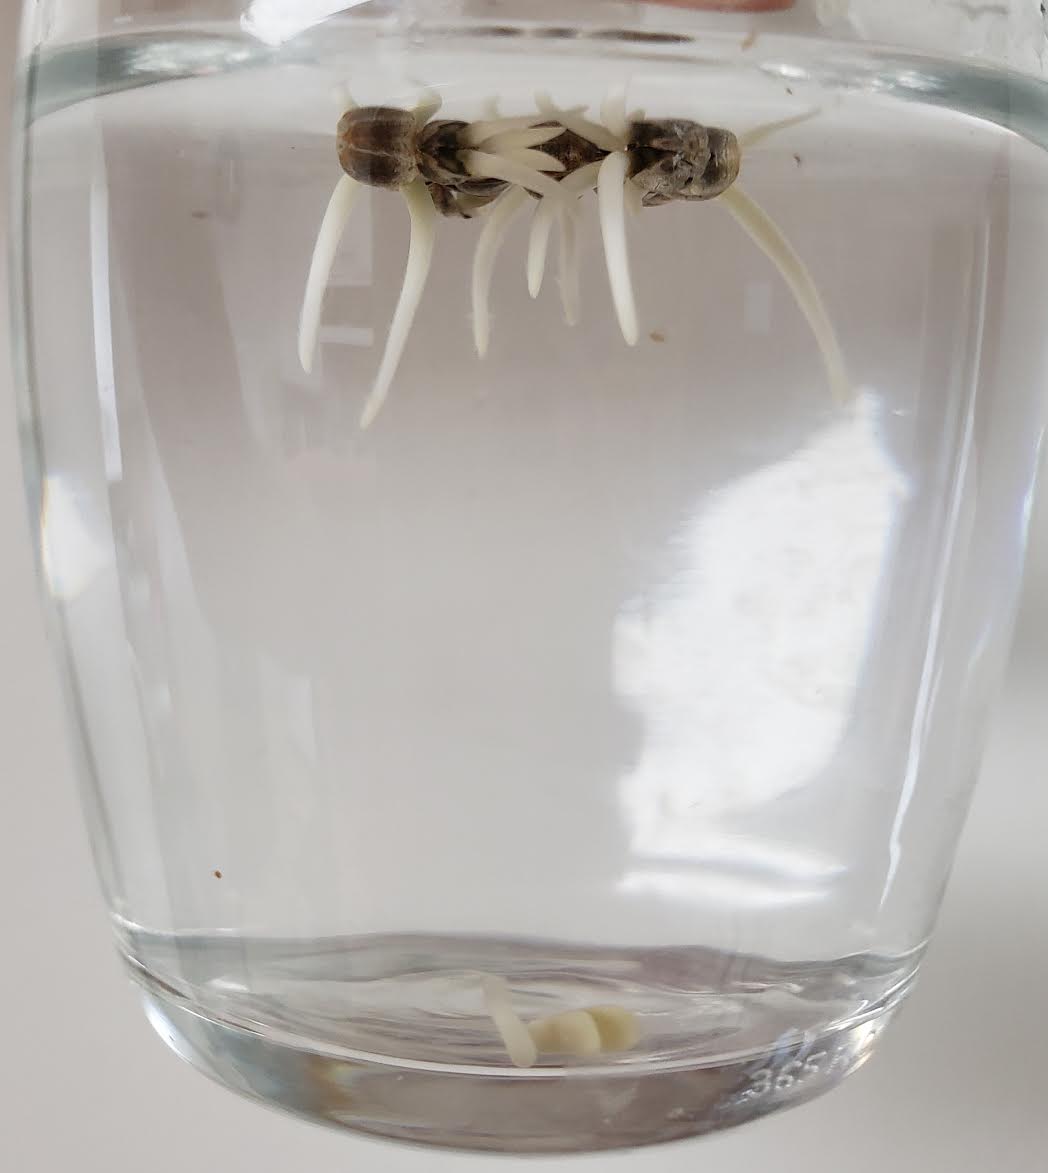 Drop seeds into a cup of water to allow them to germinate
Sometimes seed shells from particular strains are extra thick and can prevent moisture from penetrating the shell, not allowing the seed to germinate. As a last resort, take a pair of needle nose pliers and a gentle touch and carefully crack the seed open, placing the pliers along the seams of the seed. Once cracked open, examine the inside to make sure there is a nascent white taproot; if so, move on to step 3.
Note: To speed up germination time, blend up a small amount (5%) of aloe vera with coconut water and mix in the water. You can also add a small amount of Urb Natural.
Step 3: Prepare a paper towel for the seed to germinate. To make sure a paper towel is properly dampened, saturate it with water and then wring it out. You want moisture - but not too much. The paper towel should not be dripping wet, but damp enough that it doesn't dry out in a few hours. If it is too wet, the seeds will mold, and will not survive. Take the seed out of the cup of water and gently place it in the middle of the damp paper towel. Fold the paper towel in thirds with the seed completely tucked inside. If you are starting multiple seeds, space them a little bit apart; put no more than 10-20 seeds per paper towel.
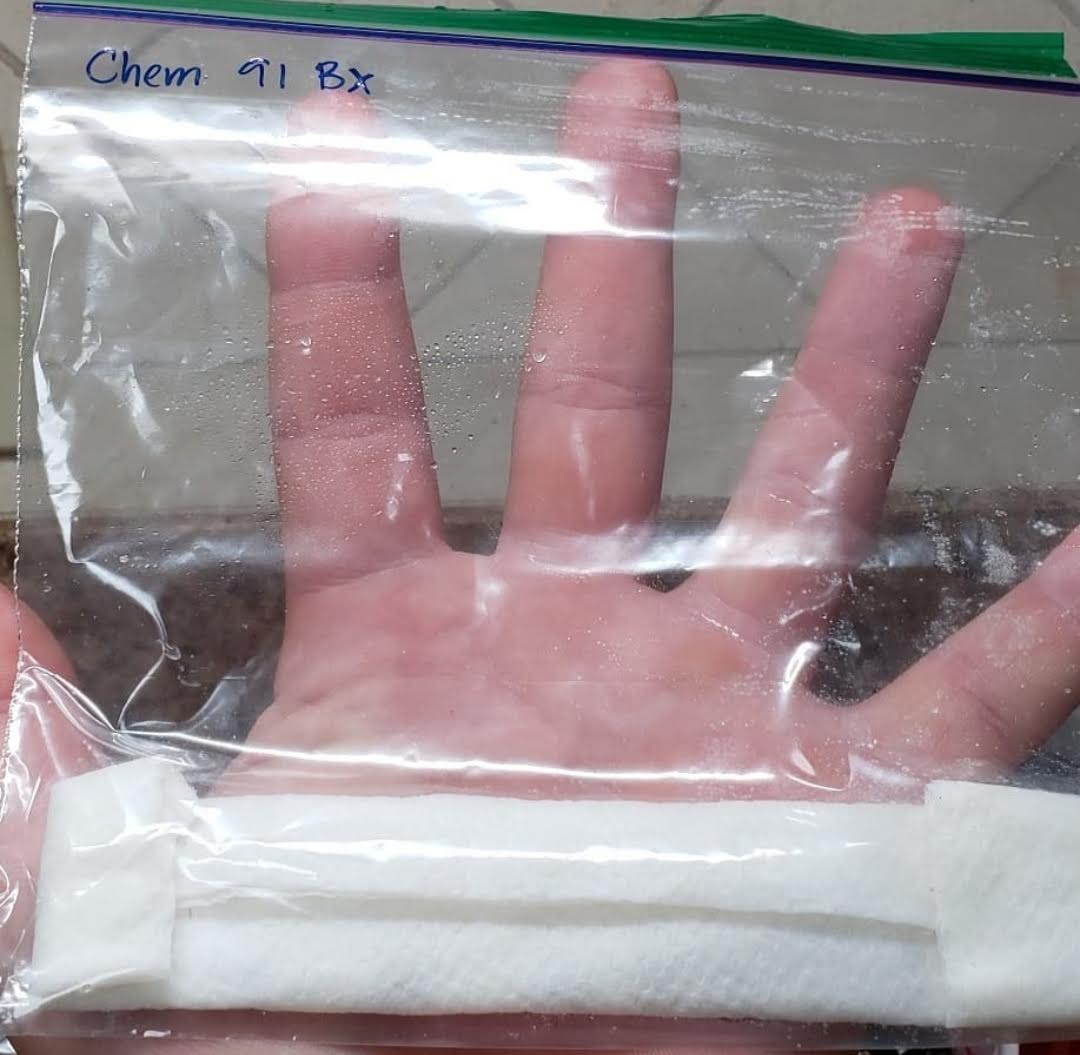 Germinating a seed in a damp paper towel is easy and effective
Step 4: Let it rest
Germinating a seed in a damp paper towel is easy and effective
Step 4: Let it rest. Store the paper towel in a sealed tupperware or ziplock bag, making sure it is kept in a dark space in a location at an ideal temperature of 70-75F, 21-24C. When it comes to germinating a seed, a slight difference in temperature can produce
dramatic differences in results. If temperatures are too cold, it will take the seed a long time to germinate, or it may not germinate at all. Heating pads work well to stabilize temperature and encourage sprouting. If it's too hot; above 77F, 25C; it will increase the probability that the plant will be a male.
Step 5: Check on the seed. Open the tupperware or bag 1x per day to make sure the paper towel has not dried out and to see if the seed has germinated. On average, a seed should germinate within 48 hours. If the paper towel is dry, get a spray bottle and lightly mist it with water.
You know the seed is ready to be planted when you see a white taproot emerge from the seed, preferably at least 2-3” in length. It’s best to plant once the cotyledons, or first leaves, are out of the shell. If it is still attached when the taproot has reached the desired length, gently remove it. It works well to separate the seed shell like chopsticks; place a thumb on each side of the shell against the tap root and open the shell gently. If it’s still firmly attached, leave it on. Seedlings are extremely delicate. You want to be careful with the newly sprouted root as well as all of the fuzzy root hairs, which are even more fragile than the root itself.
 Make sure to remove the sleeve that holds the leaves together; the sleeve is still attached to the top leaf in the photo above
If you are able to remove the shell, look for a little sleeve covering the leaves at the top of the sprout. With a careful touch, pull it off. The sleeve wraps the leaves together, and once removed, allows them to freely grow. If the tail of a seed has grown into the paper towel, rip the paper towel around the taproot, being careful not to damage the root, and plant the seedling with the small piece of paper towel still attached.
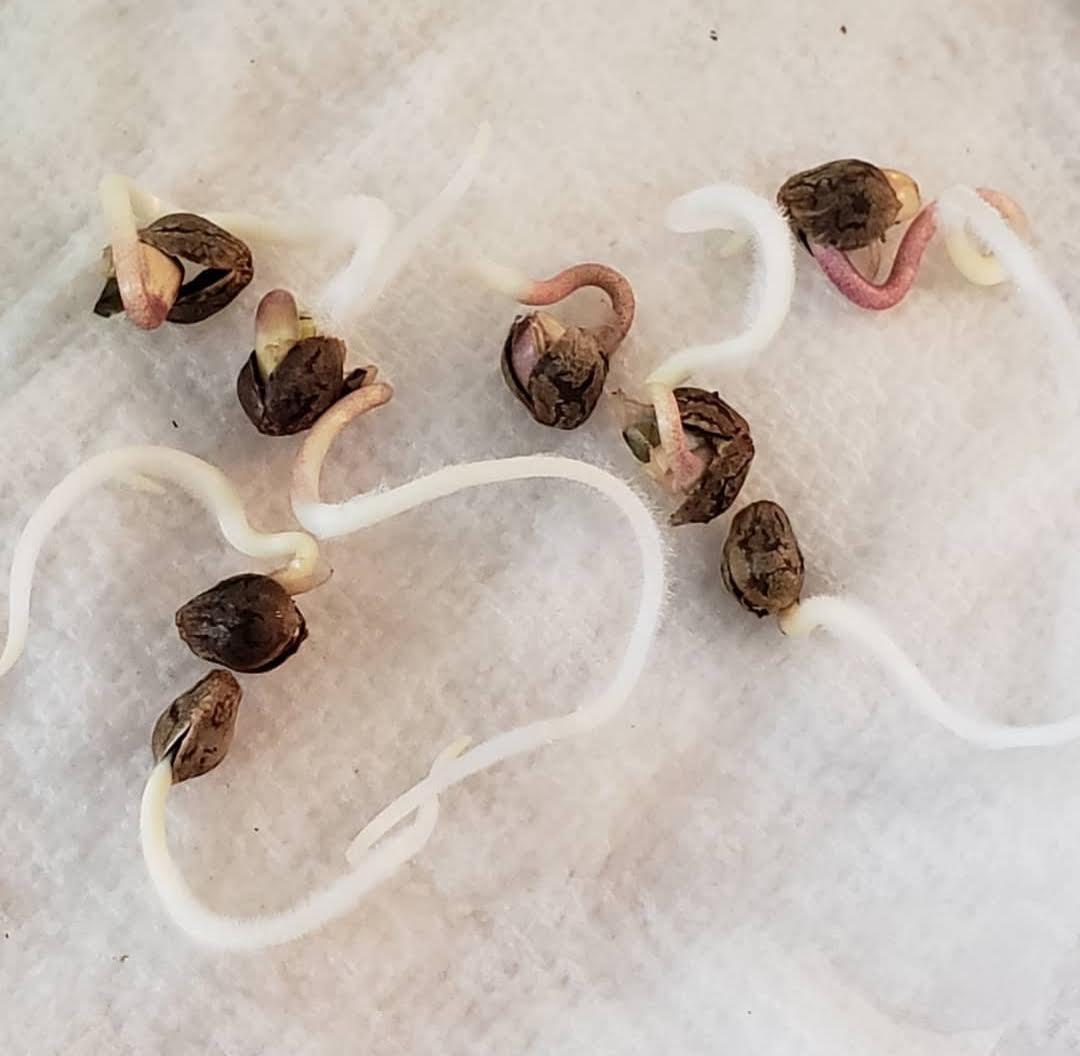 A seed is ready to be planted when it has a 2-3” taproot
Step 6: Plant it
A seed is ready to be planted when it has a 2-3” taproot
Step 6: Plant it. Because the Great Outdoors has so many variables, it’s recommended you don't plant a seedling directly in the ground; instead, start it in a plastic cup or small pot. If you decide to use a plastic cup, make sure you cut two or three holes in the bottom for drainage. The holes should be cut out in small rectangular shapes, not simply poked through the cup. Drilling holes in the bottom of the cup is a faster option if you have several cups to do. Likewise, if you use a small pot, make sure it also has holes in the bottom. The point is drainage - no sitting water in your soil at any time.
 Solo cups work well for seedlings - just make sure to cut holes in the bottom
When you’re ready to plant a seedling, you may notice it still has the shell of the seed attached to it. If you can remove the shell with a gentle touch, do so; however, if it’s still firmly attached, leave it on.
Seedlings are extremely delicate. You want to be careful with the newly sprouted root as well as all of the fuzzy root hairs, which are even more fragile than the root itself.
Fill up the plastic cup or small pot with soil, making sure to stop about an inch from the top. For reference, pick it up to check the weight of it, so you know what it feels like when it's dry. Then add enough water to wet it. Ideally, you apply enough water that you see a small amount begin to run out of the bottom.
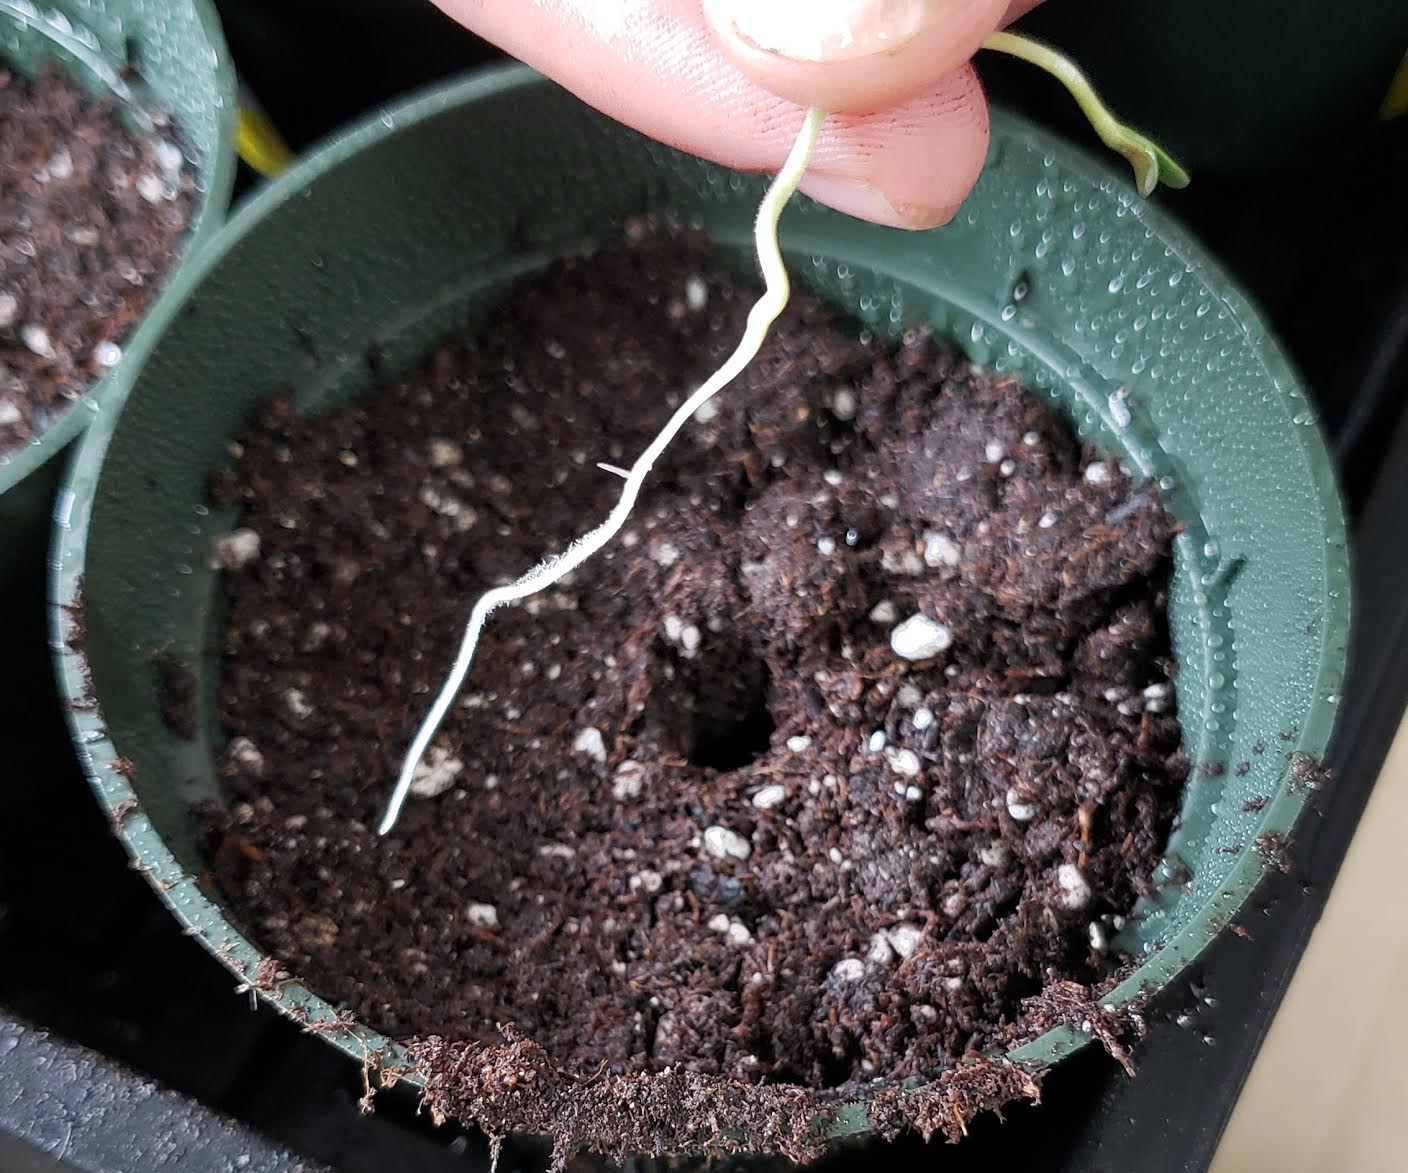 Seedlings are delicate; be careful when handling them
Use your finger or a chopstick to make a small indent, about 2-3” deep, in the center of the soil. The depth of the indent will be dependent on the length of the taproot.
Gently place the seedling in the space you made, with the root side (tail) pointing down and the seed (head) or cotyledons toward the top, and fill in the indent, pressing lightly, with a small amount of soil. Help the seedling by leaving the green top visible and poking out of the soil.
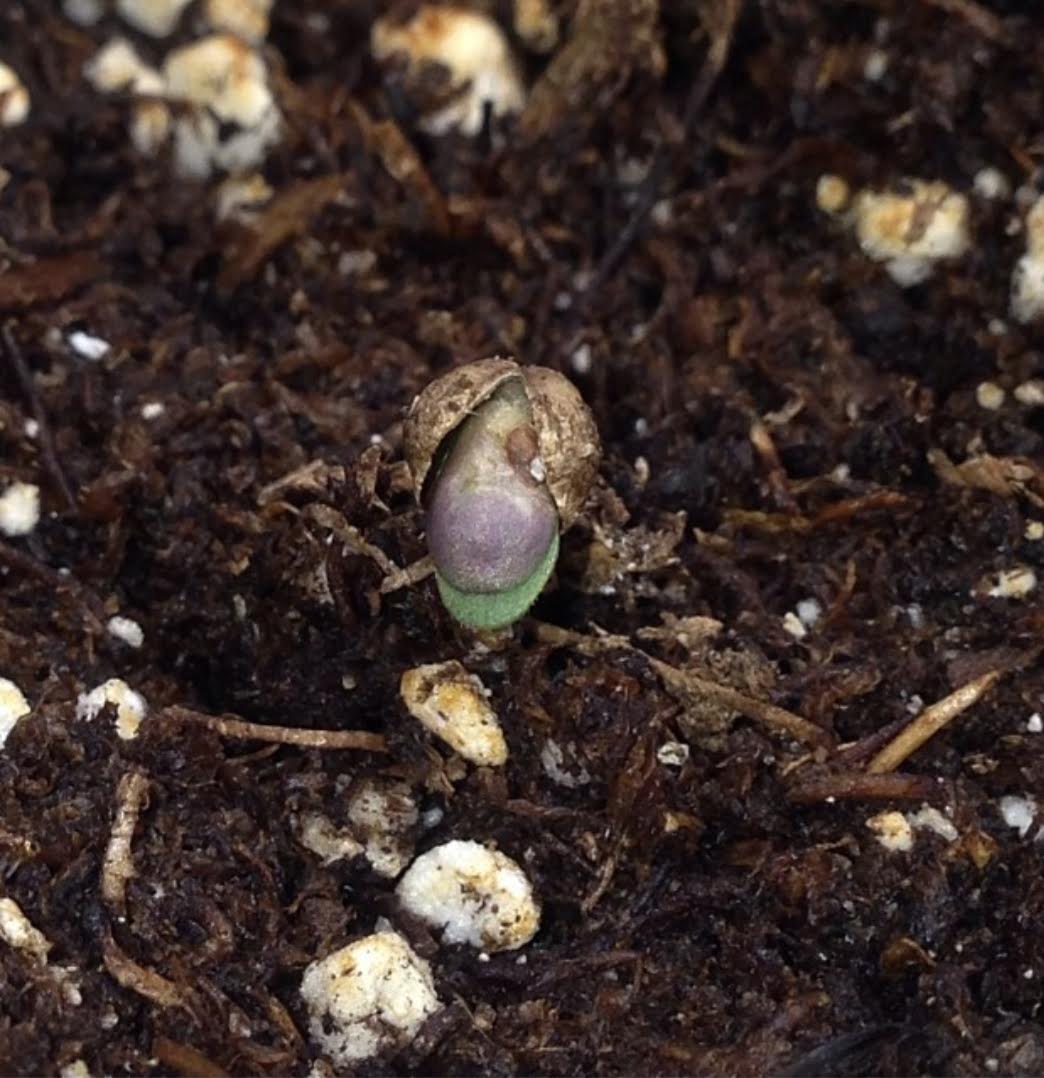 Make sure to remove stubborn shells before a seedling gets too big
Once a few days have passed, if you notice the seedling growing above the soil, and it still has a stubborn shell attached, gently remove it; it can cause the plant to top itself at too young an age, killing it.
Also: remember to tag each plant with the correct strain name.
Step 7: Water as needed. Make sure you don’t overwater your plant. An easy way to tell if the soil is in need of water is to pick up the cup or pot and check how heavy it feels in your hand. If it’s light, it probably needs water. If it’s not too light, wait to water it. Continue to check on the seedling 1-2x per day, especially on hot days, and mist with water as needed since it’s in a small container and will dry out quickly. It is important to use a pump sprayer to mist a seedling with water instead of pouring water on it to ensure the seedling doesn't get washed away, or that the roots aren't disturbed while trying to take hold of the soil. Due to their small root systems, seedlings don’t need too much water, and if the environment is on point, may only need watering every other day.
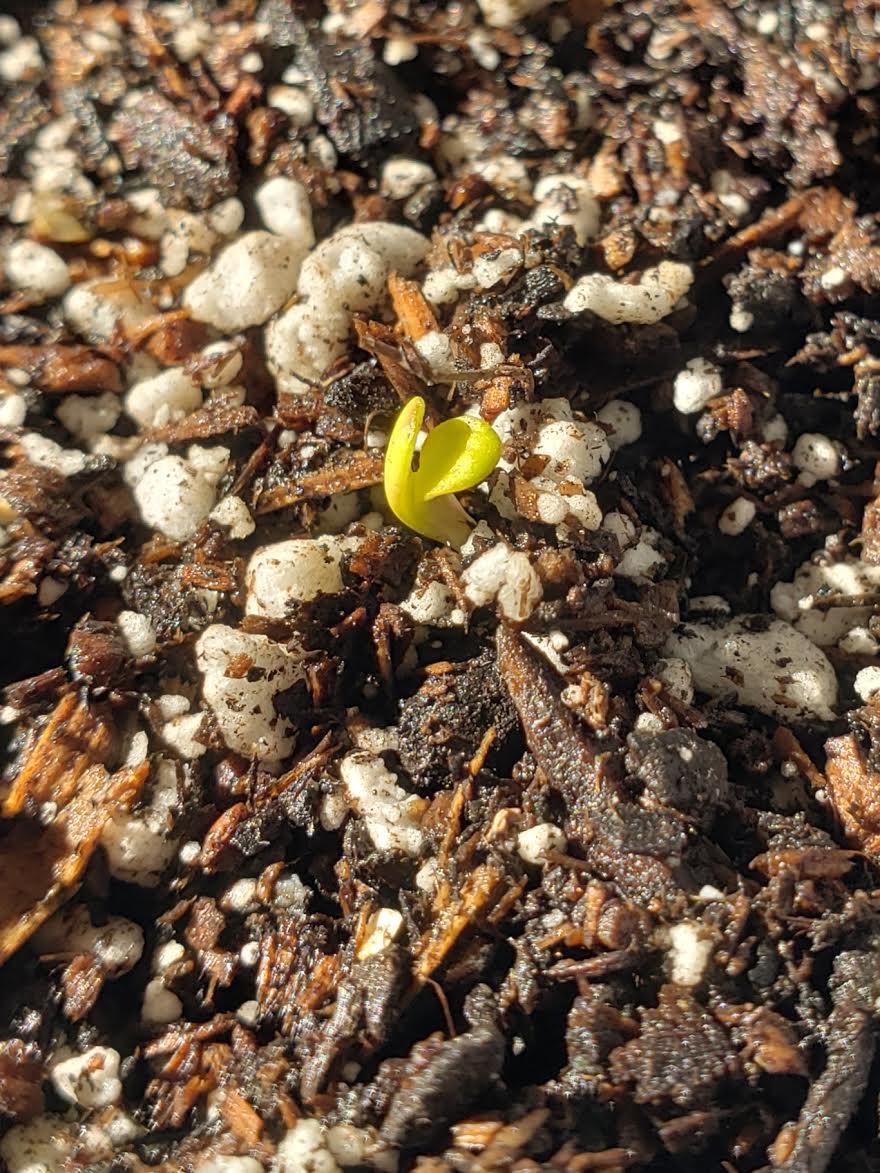 Seedlings need 18 hours of light and 6 hours of darkness to grow
Step 8: Put it under an adequate light source
Seedlings need 18 hours of light and 6 hours of darkness to grow
Step 8: Put it under an adequate light source. Luxx Clone LED or T5 fluorescent lights are recommended for seedlings as they are affordable to keep on and put off little heat. One with blue spectrum light is best. Seedlings should be kept about 10-12” away from the light and exposed to light for 18 hours a day. It usually takes around 3-4 days before you will see the seedling push its way out of the soil or show signs of noticeable growth.
Because a seedling's stems are small and fragile, putting it under a dome or container to increase humidity is not needed. Doing so will likely - and quickly - promote stem rot, causing it to die.
Step 9: Transplant to a bigger container. After about 4-6 weeks, the seedling will have matured into a young vegging cannabis plant, standing at about 1-2’ tall, and will be ready to be transplanted into a larger container.
Remember to tag each strain with the correct name.
Light: LED or T-5 fluorescent
Distance From Light: 10-12” under a light (from top of plant)
Light Exposure: 18 light hours/6 dark hours
Humidity: 70-75%
Temperature: 76-78F, 24-25C; 68F, 20C (soil)
pH: 6.8 soil, 7.0 water (If feeding 6.4 pH is preferred, not recommended for seeds)
PPM: 200-400 (0.4-0.6 EC)
Back to top
CO2: 1,200-1,500 ppm
Tip: When you start with a regular seed, you never know if it’s going to become a female or male plant. You’ll have to wait until it matures to see what it develops into. Regardless, sprouting seeds is a fairly simple process and can be a great way to start a garden. Make sure you plant seeds that come from a reputable grower or seed company, increasing the probability that they will be of quality.
How To Select A Keeper Pheno
Cannabis plants that have the same mother and father but come from different seeds are called
phenotypes. Phenotypes can have similar characteristics, or can be different, depending on whether they express more of the mother's genes or the father's.
Not every seed that is sprouted will produce an exceptional plant that is worthy to grow for generations. You will have to observe each plant's expressed characteristics to determine which one you want to keep around, which one is the best.
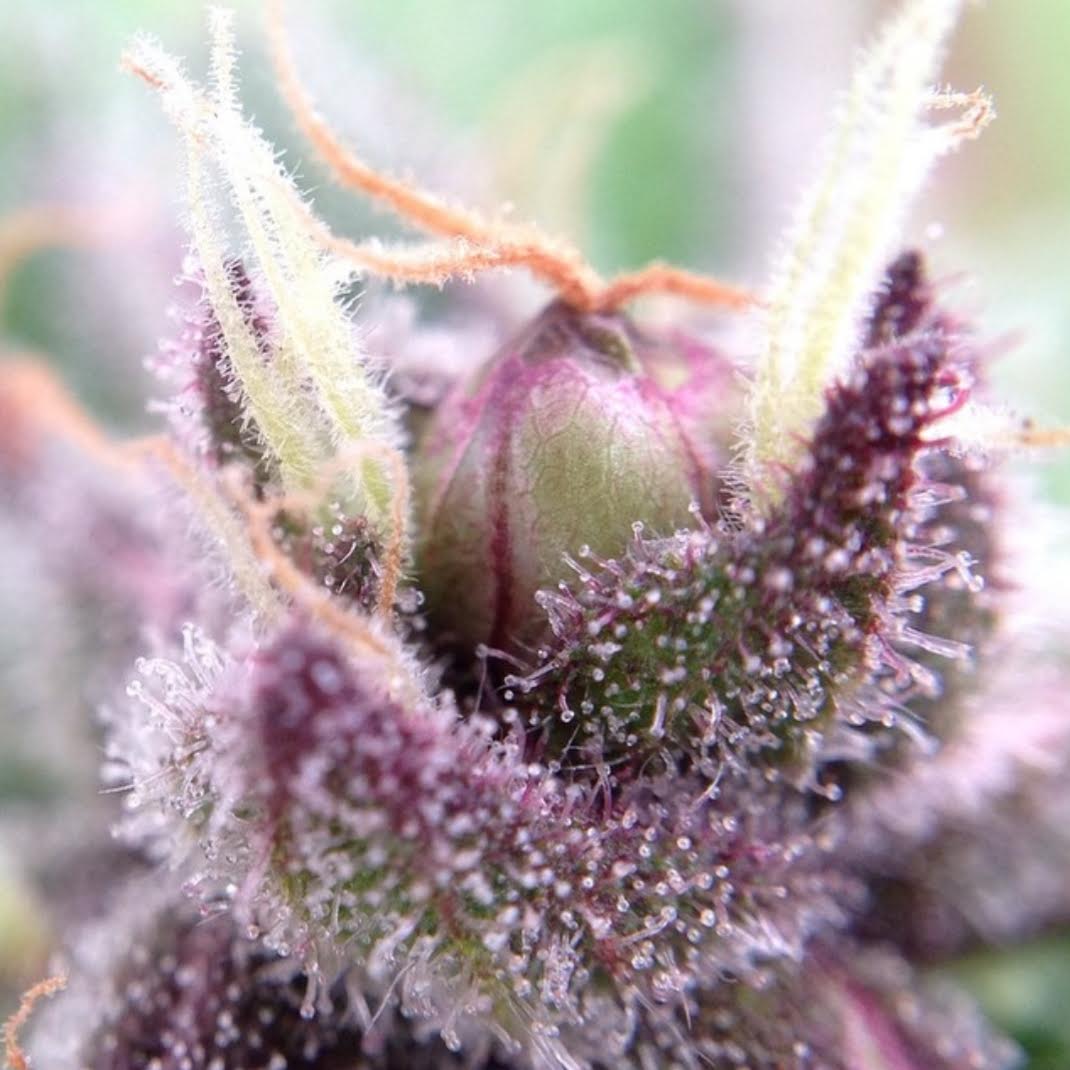 Phenohunting allows you to find a strain that nobody else has
With regular, non-feminized seeds, for comparison purposes, it's helpful if you pop several seeds at the same time, expecting around half to be males. For plants in veg, favorable phenos will have node spacing that best fits your grow space and technique.
You will also want to pay attention to:
- aroma
- affect
- taste
- leaf to flower ratio
- pathogen resistance
- roots
- structure
- vigor
- veg time
Additional considerations when it comes to selecting a keeper include:
Decide on traits you like. Do you like older strains? Modern strains? Are you looking for a unique terpene profile? High cannabinoid content? Decide what exactly you like in a plant or flower, and then make your selection based on those preferences.
Stress test it. Choose a plant that you can experiment on. Expose it to rain, throw off its light cycle, wait to transplant it, neglect it a little. If it handles well and doesn’t herm on you, it’s a hearty strain and could be worthy of keeping around.
Run the strain a couple of times. Sometimes you need to run a new strain a couple of times before you decide to toss it. This allows you to run it perfectly one cycle, stress test it another, expose it to different seasons and conditions, experiment with feeding regimens and recipes, and really get to know it.
Do a side by side comparison with another already selected keeper or several of the same seeds. Get a seed or plant big enough to be able to run next to a plant that you already know is good, or pop several of the same seeds. Running them side by side and making comparisons week by week can give you a lot of information and can help when deciding if a strain is good enough to keep.
Look for unique characteristics. Remember, looks aren’t everything. Sometimes a plant will have unique characteristics that make it worth keeping in your garden. Variegated leaves, certain mutations, and other attributes appealing to you can help you decide upon keeping or tossing a strain.
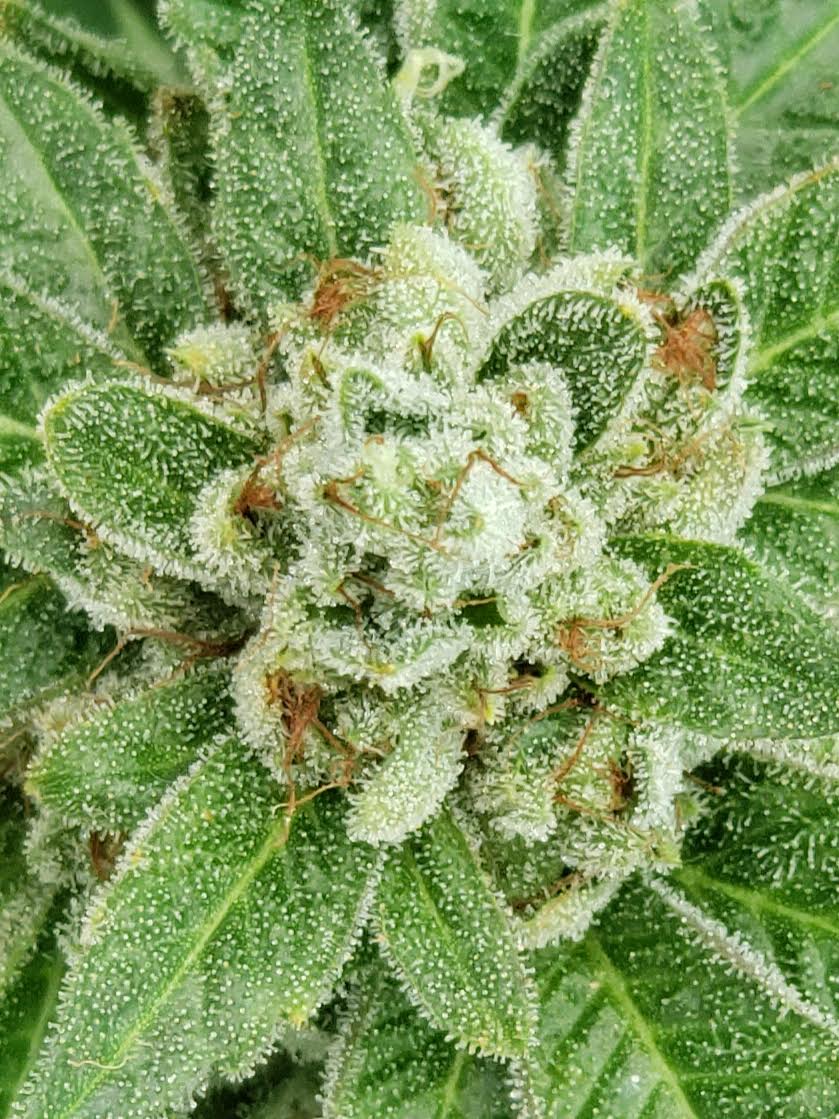 What characteristics would you look for in a keeper?
Decide on preferred resin characteristics
What characteristics would you look for in a keeper?
Decide on preferred resin characteristics. Using a macro lens on your smartphone is a great way to inspect the resin. Typically you want large resin heads with shorter resin stalks. Longer resin stalks typically mean smaller resin heads, but large head phenos can exist depending on the strain. Long resin stalks and large resin gland heads are great for extracting, but can be more delicate as a flower because the resin heads can more easily break off.
In addition, greasy or sticky resin is more desirable because it results in stronger medicine that will also burn slower in a bowl or joint. Once you have touched enough live plant resin, you will begin to understand prior to harvest which resin consistency you are after. Chalky resin is typically milder in effect, the flowers will degrade more quickly and burn noticeably faster in a joint.
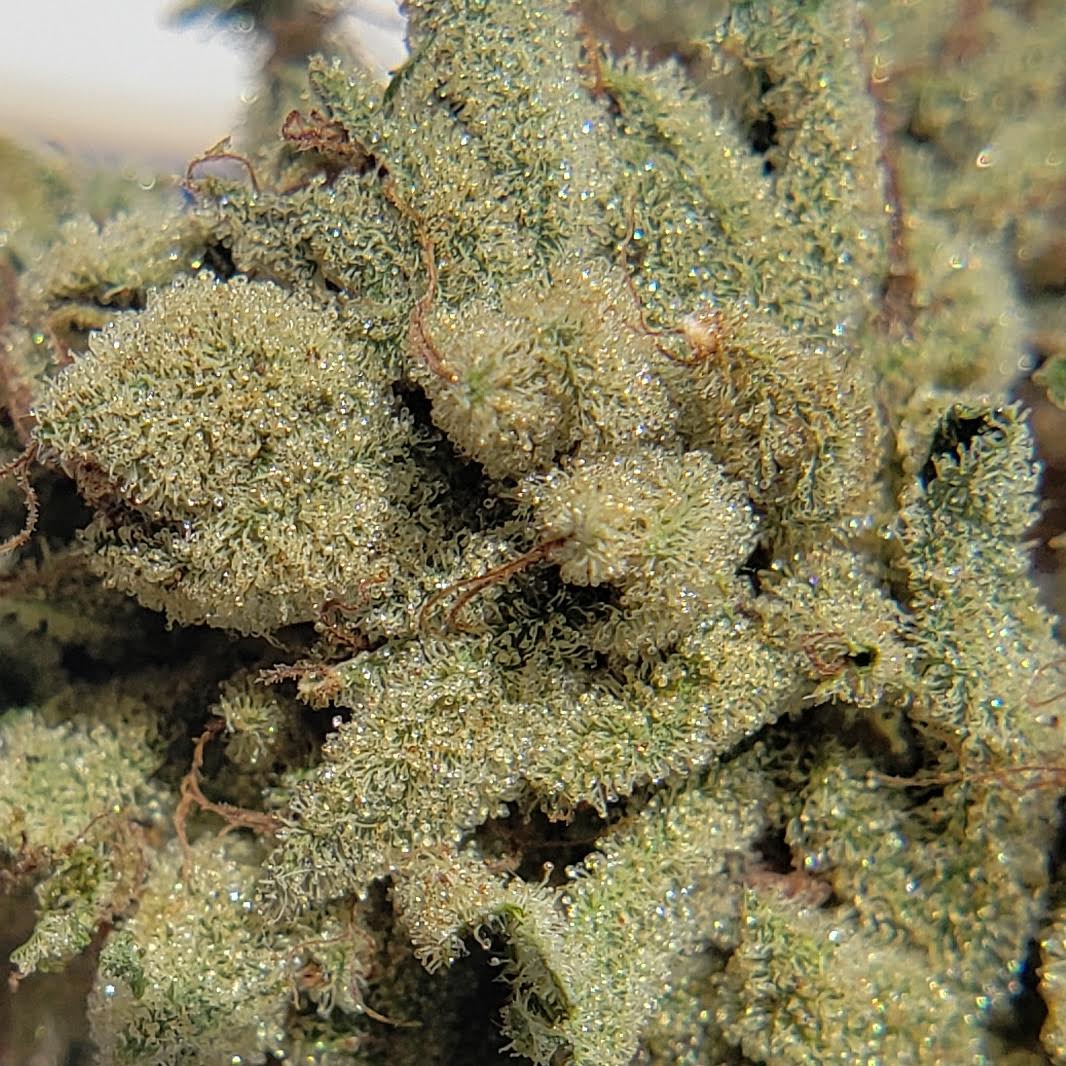 Looks like a keeper to me!
--
Terpene selection
Looks like a keeper to me!
--
Terpene selection. Your nose is one of your best resources when selecting a pheno. It is by no means the only factor, but when a plant speaks to you through aroma, you will keep going back to it time and time again to revel in the smell. This is a direct indication that your personal endocannabinoid system approves of the terpenes within that phenotype as a good medicine for you.
To ultimately decide whether or not to keep a particular pheno in your garden, you will need to flower, harvest, and cure it. (You will need to try it and see how you like it.) This means you will need to clone the plant
before you put it into flower.
How To Clone A Cannabis Plant
Cloning a cannabis plant is necessary when you want to flower a particular strain over and over again; when you want to save time by not starting from seed; or to simply save money and not have to buy from a vendor. Because cuttings from the same plant are genetically identical, you are able to create a more uniform canopy as they will all grow the same (assuming they are all kept healthy), which typically increases yield than if you were growing a bunch of seeds with decreased uniformity.
When cloning a cannabis plant, here’s a reliable method to get your cuttings to root:
Step 1: Select a healthy plant you’d like to clone. Choose a plant that has genetics worthy of keeping in your garden. Mature vegging plants (8+ weeks) are the ones that you should be taking cuttings from, but it can be done a little earlier if need be. You want them big enough to supply nice 6-8” cuttings, but not yet flowering.
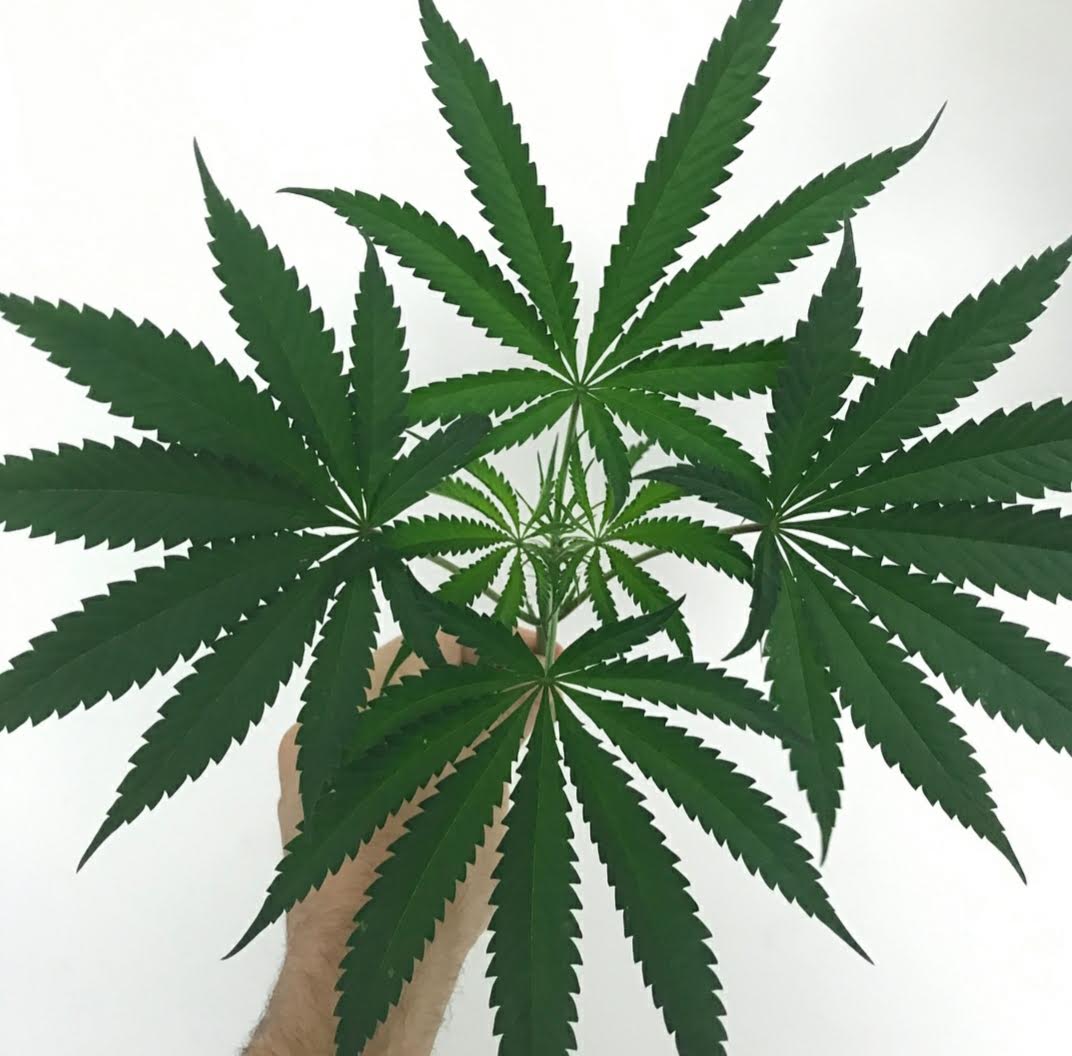 The nicer the clone, the nicer the plant
Back to top
Be careful not to cut a plant that is too small, or both the remaining plant and the cutting may be compromised, causing flower quality to suffer, or possibly resulting in the loss of the plant. For best results, clone plants a week or so before they go into flower.
Step 2: Take a cutting. To do this, first find the healthiest top(s), ideally deficiency-free, with thick, completely green stems. The healthier the cutting, the healthier the plant will be.
With a sharp razor blade
(preferred) or a clean pair of scissors, cut at a 45-60 degree angle, an inch or two above a branch joint on the top or side branches of the plant in 6-8” segments (use a pre-measured wood skewer or chopstick for evenly-sized clones and canopy). Keep in mind, the cuttings need to be able to fit under a dome, so shouldn’t be too tall in size.
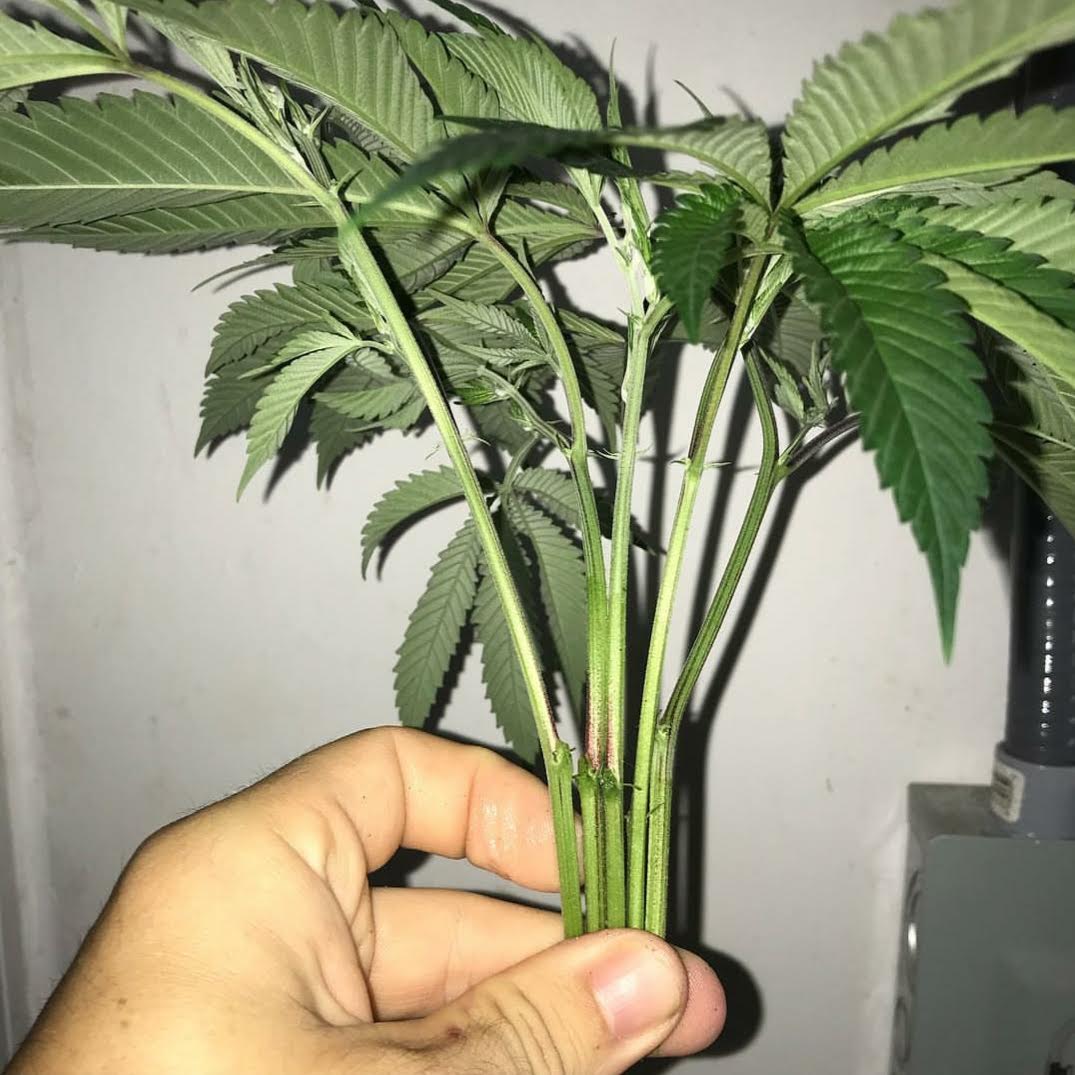 As long as the Mother plant is big enough, don’t be afraid to take nice sized clones
This is also how you top plants when they're growing too close to a light source, or to help create more tops on a plant, as 2-4 tops will grow from the one that was cut. An increased number of tops makes a plant bushier and increases the yield. If you need to top a plant, but don't need to save the cutting, simply discard it.
As you take cuttings, have a cup partially filled with reverse osmosis water to hold them in. Immediately after you make a cut, place the cutting in the cup of water. This will reduce the likelihood of air bubbles forming at the base of the stem, encouraging faster rooting. It’s also recommended that you label the cup with the strain name and separate cuttings of differing strains, so you don’t forget or mix them up. To improve cloning success, Urb Natural (1 capful) or Recharge (½ tsp) are great inoculants you can add to water.
Tip: It can be challenging when you first start cloning to get a cutting to survive and root. It’s always a good idea to take a few more cuttings than you plan to keep alive, just in case some of them don’t make it. If all of them make it, you can always toss the slow growers or weaker cuttings.
Step 3: Prepare the cutting. Dip the bottom inch of the stem into a cloning solution.
Clonex is recommended for quick rooting, but it does contain a PGR (Plant Growth Regulator). If you have access to a fresh aloe plant, it works great as a cloning solution, is organic, and only contains natural PGRs. Simply cut open a fresh mature (4+ years) aloe blade and rub the tip of the cutting's stem in it, coating around ½”.
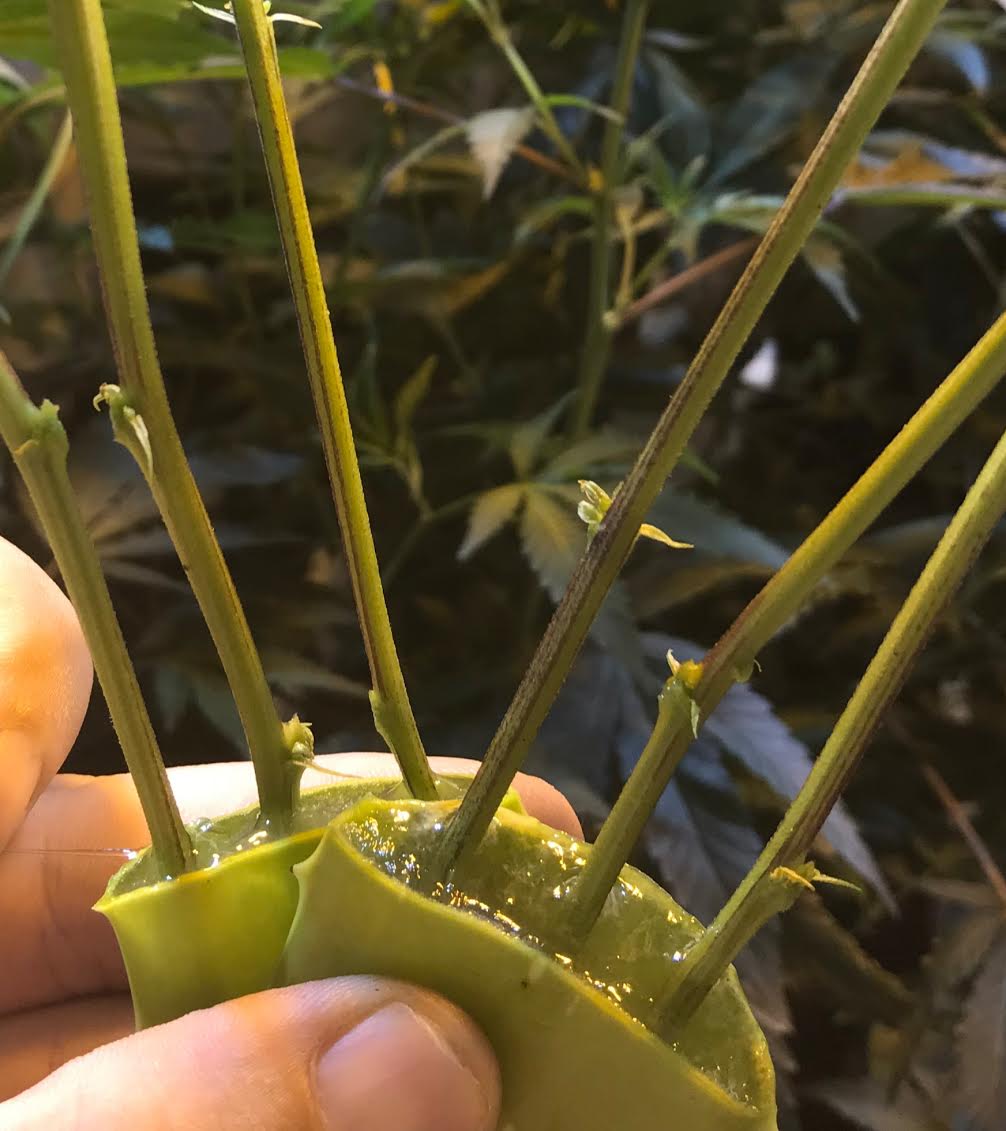 Aloe vera is a great all-natural cloning solution
After the bottom of the cutting’s stem is lightly coated in solution or aloe, place the cutting in a presoaked
Root Riot cube or other rooting cube. For the rooting cube soaking solution, mix 1 capful of Urb Natural with 16 oz of water. Give the cube a
gentle squeeze before adding the cutting to remove excess liquid. You don’t want water running out of the cube after a gentle squeeze. Too much moisture will cause rot while not enough moisture will cause wilting.
Trim the bottom two or three leaves off of the clone, which will prevent the stem from falling over or bending and will direct more of the plant’s energy into producing roots.
Step 4: Let it root. Temperature is important when it comes to rooting. Cannabis cuttings like to be kept at a somewhat warm temperature (76-84F, 24-29C) and like a humid habitat. If a cutting gets too cold, it will take longer to root, or not root at all. If it gets too hot, the stem will rot, killing the cutting.
Place the rooting cube and cutting in a rooting tray under a plastic dome and under an adequate light source for at least 18 hours a day. Luxx Clone LED or T5 fluorescent lights are recommended for keeping cuttings under; they should be kept 10-12” above the cuttings. Space the cuttings in the tray so they are not too crowded. Often clones will not root if the tray is too empty. Having several cuttings in a tray will help keep humidity levels favorable. The clone dome should be completely closed.
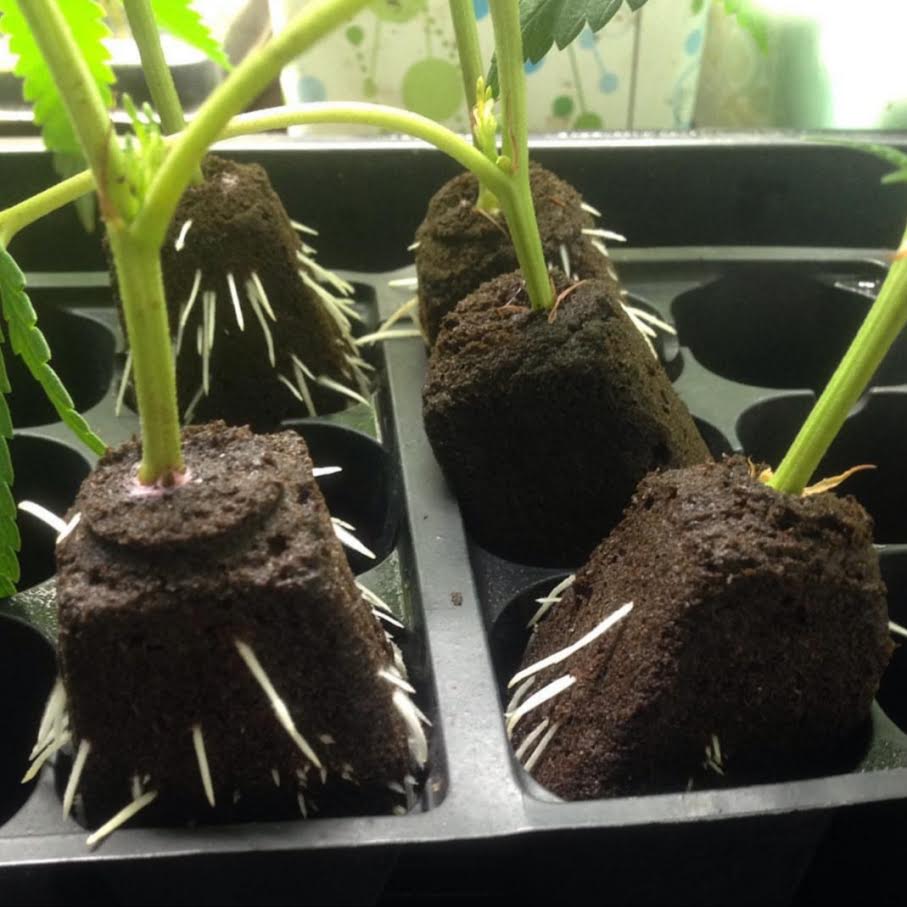 Clones are sensitive; sometimes the location in a room can affect rooting success
Rooting is difficult, but doable, and gets easier with practice. It's all about how moist the rooting cube is along with proper humidity within the cloning area.
Ez Cloners are great for rooting clones without a dome or cube. In order to benefit from this, you will need to make sure your Ez Cloner employs a timer that mists the bottom of the cuttings every 15 minutes to avoid the cloning reservoir from overheating.
Step 5: Water as needed. During all stages of the cannabis plant’s development, you should be careful not to overwater it. Using a spray bottle (or hand pump sprayer) filled with water works great with cuttings because you can really control the amount of water that comes in contact with them. The finer the mist you can apply the better. This will be determined by the type of spray bottle you have. Facial misters from a local salon store are ideal. You want the rooting cube and the dome to be damp, but not so wet that it causes fungal growth. Consider how many clones are in the dome when deciding how much moisture to apply.
It’s good to take the lid of the dome and gently fan the clones with it 1x per day. This allows air to move throughout the leaves and clones, and improves the health of the cuttings.
Step 6: Frequently check on them. 1-2x per day is ideal, but they might benefit from more frequent inspection if it is hot. Cuttings are sensitive and dry out quickly. If you determine the environment to be too dry, you can mist the cuttings and dome with water as needed, making sure to securely close the lid when finished. If the lid is slightly cracked or not sealed, it will cause the cuttings to dry out faster than usual and lower humidity levels.
Cuttings' leaves may initially droop once inside a dome; however, they should stand back up within 24 hours. Immediately remove any clones that fail to thrive.
Step 7: Harden off the roots. It can take around 10-14 days before a cutting will begin to show roots, in which case, it will almost be ready to take out from under a dome. To avoid humidity shock, make sure to harden off the roots before taking a clone out of a dome. This is done by slowly exposing them to the humidity outside of a dome.
This is done by slowly exposing them to the humidity outside of a dome. You do this by opening the dome vents ¼ at a time. Start with opening one vent (most domes have two or more vents). Once you open a vent in a ¼ segment, observe the clone(s) for a day or so. If you notice them wilting, you need to give them more time under the dome. Close the vent by ¼ and wait. If the cuttings don't wilt, open it another ¼. Continue until the vents are completely opened.
Once the vents are completely open for 24 hours, take the dome off. Keep a close eye on the cuttings, checking on them every couple of hours. If they are fine after another 24 hours, they are ready to be transplanted and moved next to vegging plants.
Step 8: Plant the cutting. When you see roots poking through the sides and bottom of the cube, and it’s able to withstand conditions outside of a dome, you know it’s ready to be planted in soil. Only cuttings with white fuzzy roots should be kept and grown out.
Remember to tag each plant with the correct strain name.
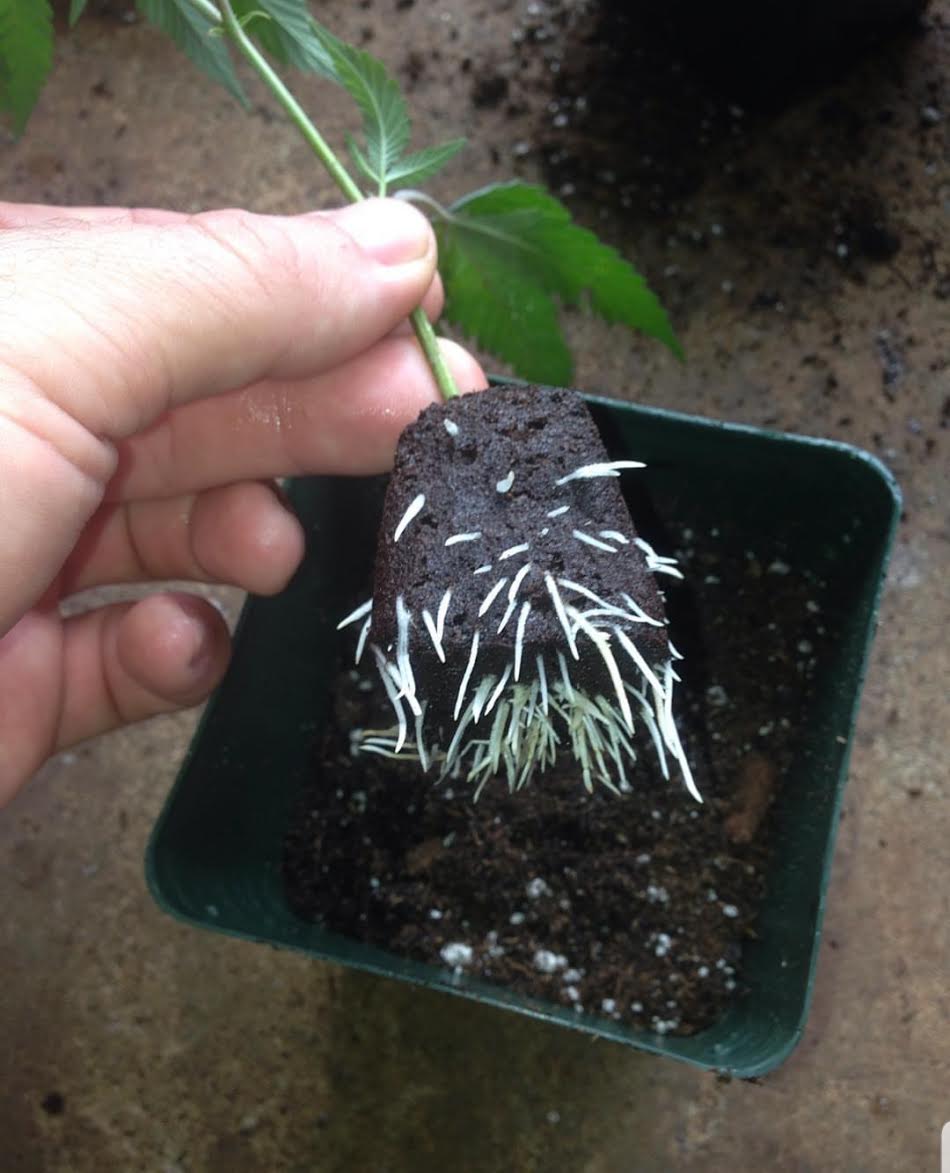 Roots that are ready for soil
--
Light
Roots that are ready for soil
--
Light: LED or T-5 fluorescent
Distance From Light: 10-12” under a light (from top of plant, T-5), 6-12” (LED single strip), 2-3’ (8 bar LED at 40% power)
Light Exposure: 18 light hours/6 dark hours
Humidity: 70-75%
Temperature: 76-78F, 24-25C; 68F, 20C (soil)
pH: 7.0 water
PPM: 400-600 (0.6-0.8 EC)
CO2: 1,200-1,500 ppm
--
Tip: Cloning can be challenging. Some varieties are harder to root than others, and there are many different ways to achieve favorable results. After enough practice, you’ll get a technique down that works best for you and your plants, and eventually be able to have a high success rate at the cloning process.
Back to top
Chapter 5: Water & Nutrients
Unless you're growing with good soil and water only, or you’re taking care of seedlings and clones, most of the water a plant receives will be mixed with food or given with teas. Water can also be given as a more affordable option, allowing a grower to alternate between feedings with water. However, to maintain good plant health and ensure proper development and trichome production, it's important to provide nutrients as much as possible. A light tea or water should be given exclusively during the last 7-14 days or so of flower.
The Importance Of Water For Plant Health
Watering a cannabis plant, for the most part, seems elementary; however, the scientific benefits and complementary techniques for doing so are a bit more complex. Water is another requirement that all living things need for survival. A large percentage of a plant’s composition, up to 95%, is made up of water, which means it needs quite a bit to be stable and maintain proper structure. While watering a plant is something you could probably do with your eyes closed, there are certain watering techniques that will improve the health of a cannabis plant. Perhaps the most significant and challenging part of maintaining plant health is dependent upon the balance of moisture in the soil.
Let’s cover the basics:
One of the most important things water does for a plant is it allows a plant to photosynthesize, i.e., use carbon dioxide and energy from sunlight to make food for growth. When the correct amount of oxygen is present in the soil, water and nutrients enter a plant's vascular system through its microscopic root hairs, found all along the root system. They are then pumped through small capillary (xylem) channels, similar to human veins, up the main stem where they are transported to branches and leaves. The movement of liquid and nutrients throughout a plant is known as the
transpiration stream.
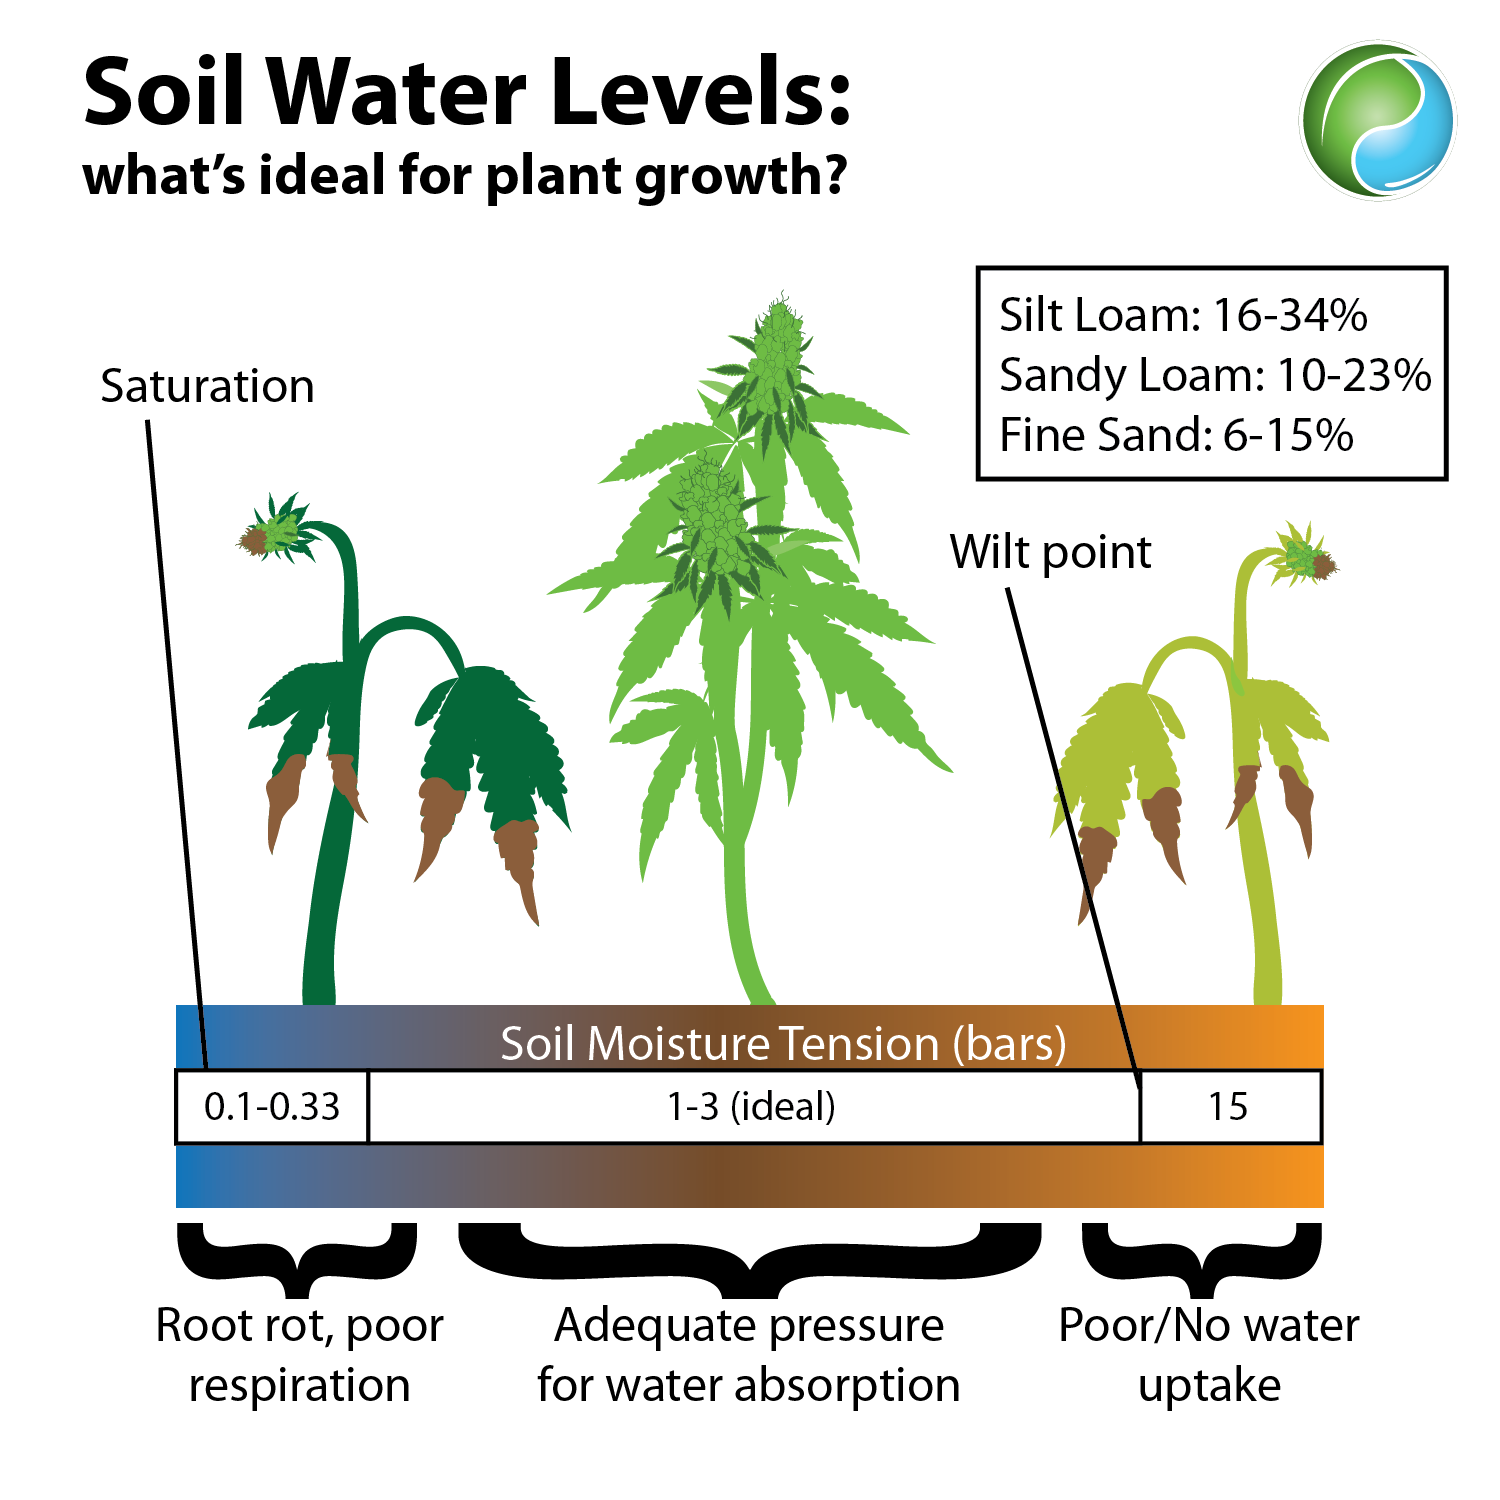 Image credit: Emily Nelson, Sustainable Plant Solutions LLC
Plants also use water to help regulate internal temperature levels. Through the stomata underneath the leaves, water evaporates into the air, taking waste products (oxygen and water vapor) with it. The longer the stomata are open, the more water is lost. Water evaporation is regulated with the help of
guard cells, found on both sides of each stoma. As water is taken into guard cells, they become swollen and open up, releasing water in vapor form into the air. As it is released, the guard cells relax and shut, preventing water from escaping. Guard cells are strongly influenced by temperature, light intensity, humidity levels, carbon dioxide, and wind.
Water is able to move against gravity up to the top of a plant due to the bonding properties of water molecules and the negative pressure created at the top of a capillary each time water evaporates through the stomata. After all of this takes place, a fraction of the water returns glucose that the plant made back to the root system. This entire process is known as
transpiration.
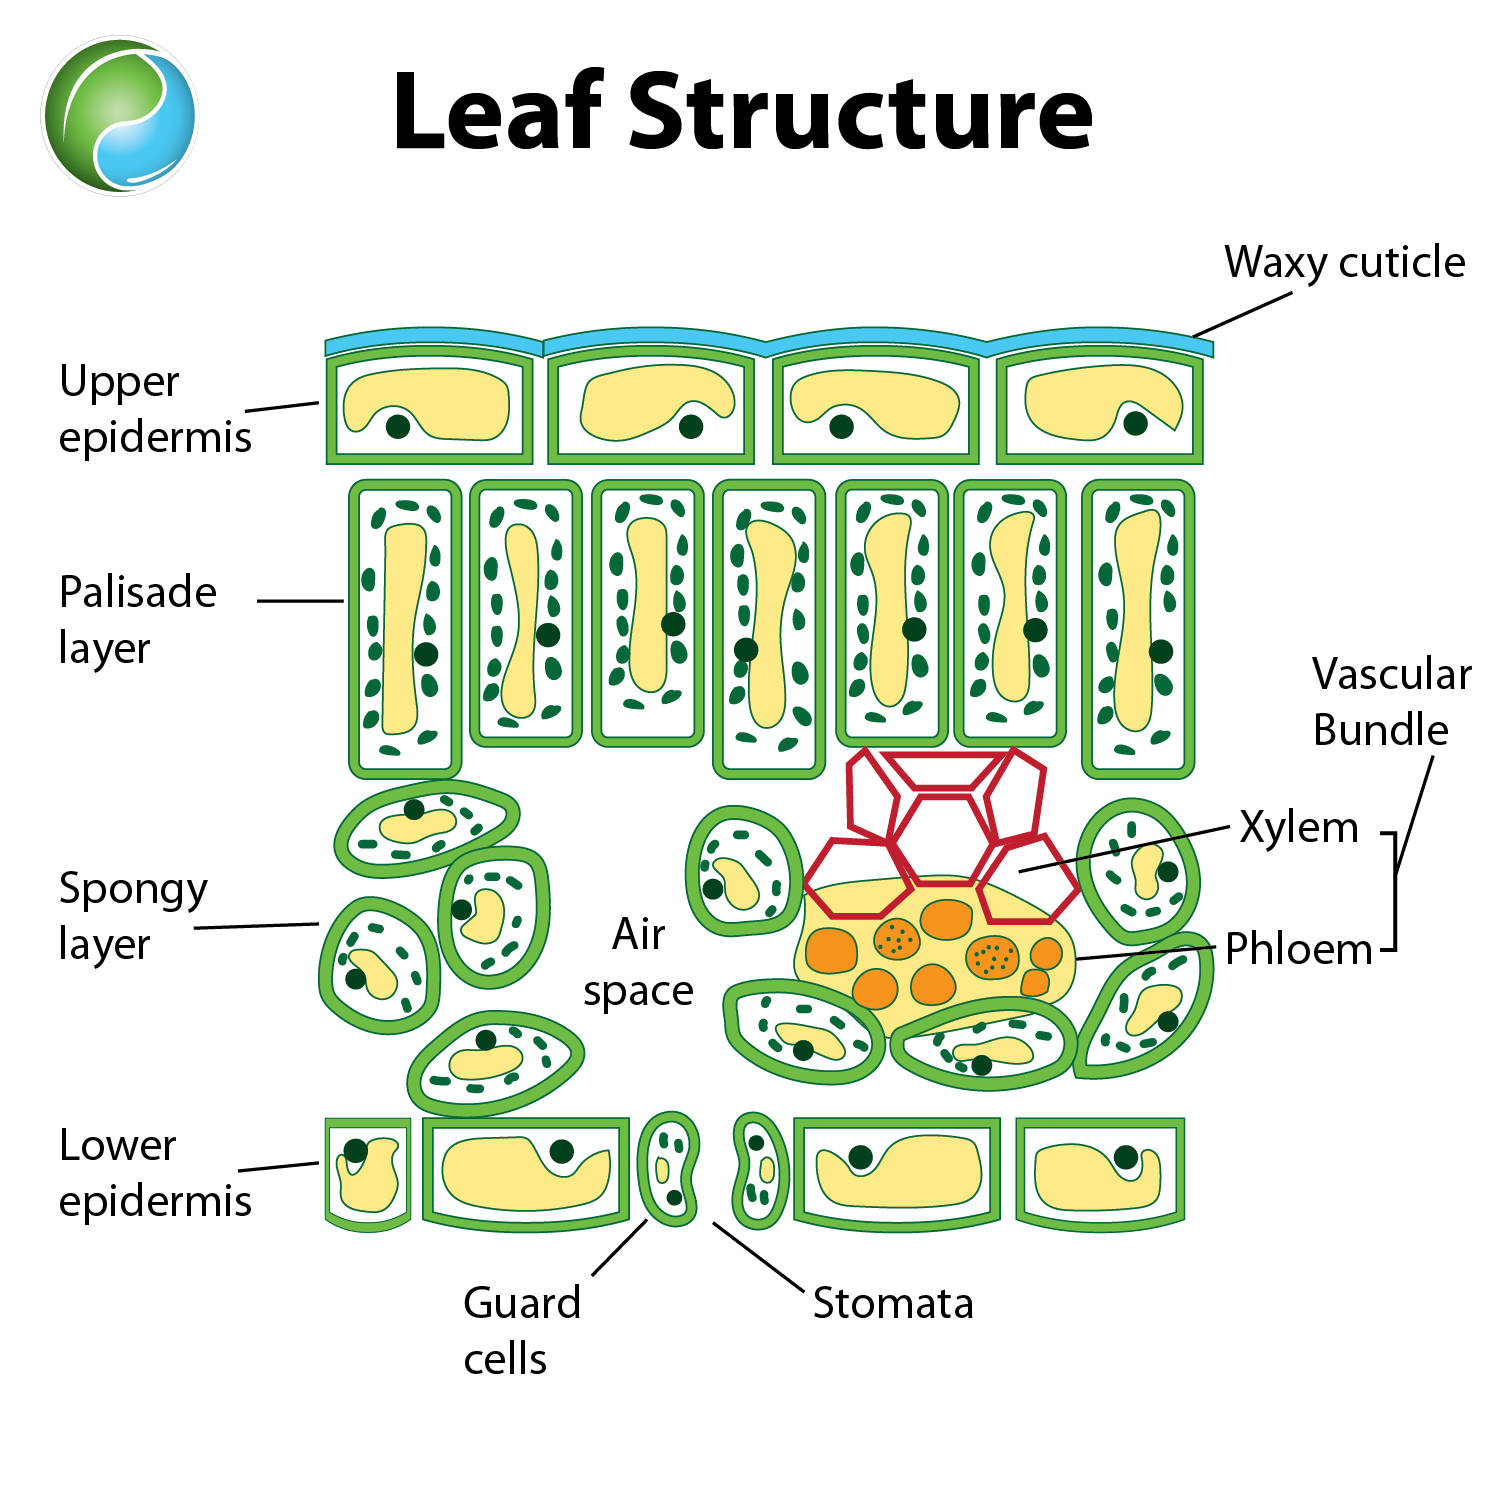 Image credit: Emily Nelson, Sustainable Plant Solutions LLC
In order for water to efficiently complete this task, it needs to be of quality, without harmful salts or imbalances. Tap water often contains high levels of calcium, sulfur, sodium, and chlorine. Similarly, ground water can also be unbalanced, containing large amounts of salt, especially in coastal locations. It is important to test the water you will be using in a garden, and if necessary, use proper filtration techniques to improve water quality.
When to water. It's best to give plants water in the morning, especially when it's sunny. This way you'll help provide them with the water they need to complete functions for growth throughout the day.
Soil composition and environment play a leading role in how often you need to water a cannabis plant. It can vary by season, or even day to day. Like feeding, if you live in a warmer climate, or it’s the summer growing season, you’ll most likely need to give liquids more often than those exposed to cooler conditions.
Certain cannabis varieties will drink more than others, so when determining if a plant needs water, you need to do a quick evaluation of each plant and its soil. You can either touch the soil, or use a moisture meter. If the top 4-5” or so are dry, or your meter is reading above 120, the plant and soil need liquid. For smaller potted plants, it's best to lift the side of every container each time you feed and water so you can get a feel of how much dry and watered containers weigh.
The following measurements usually satisfy plants and should be used as a reference anytime you give a plant liquid (all strains and phenos have different water absorption rates so a water sensor is important when learning each plant’s needs):
- 1/4 gallon for a plant in a 1-gallon pot
- 1/3 gallon for a plant in a 3-gallon pot
- 1/2 gallon - 3/4 gallon for a plant in a 5 or 7-gallon pot
- 1 gallon for a plant in a 10-gallon pot
- 1-1 1/2 gallon for a plant in a flower bed (depending on moisture meter reading)
- 3 gallon for a plant in a 30-gallon pot
When learning, each time you apply liquid to the soil, touch the soil and observe it, disturbing the soil as little as possible. The soil should feel wet, but should not be puddling or muddy. It should still maintain a nice texture and not be so wet that it loses aeration. Trying to maintain a moisture reading between 100-120 will help you obtain a healthy living soil.
Under watering. Not giving a plant enough water is a common mistake. Under watering will result in poor root quality and unstable plant health. Without water, photosynthesis can't occur, glucose, a plant's food and bartering source, cannot be made, and a plant will die.
Small containers dry out quickly and are often where a plant is kept under watered. The ability to keep acceptable amounts of moisture in the soil cannot be overstated and is of utmost importance for plant health, root health, and microbial life. If a plant’s soil becomes too dry, the root hairs and microbial life will be compromised, taking away countless sites of mineral creation, absorption, and interaction, compromising plant quality. Under watering will result in poor root quality and unstable plant quality. Early signs of a thirsty cannabis plant include dry, light-colored soil and light pots, while drooping, limp leaves occur in extreme drought.
Additional signs of an under watered plant include:
- Drooping leaves that recover after watering
- Curled leaves
- Yellow lower leaves
- Leaves with brown tips and edges
- Brown, dry leaves at the bottom and inner parts of the plant
- Stunted growth
- Delayed flower formation
A plant decides when it needs to uptake minerals and liquids through its roots. Through processes like osmosis and
diffusion, plants uptake minerals and water based on pressure differences in the soil and its root system. If the soil dries out even one time, it can deprive a plant from obtaining what it needs, thus causing deficiencies.
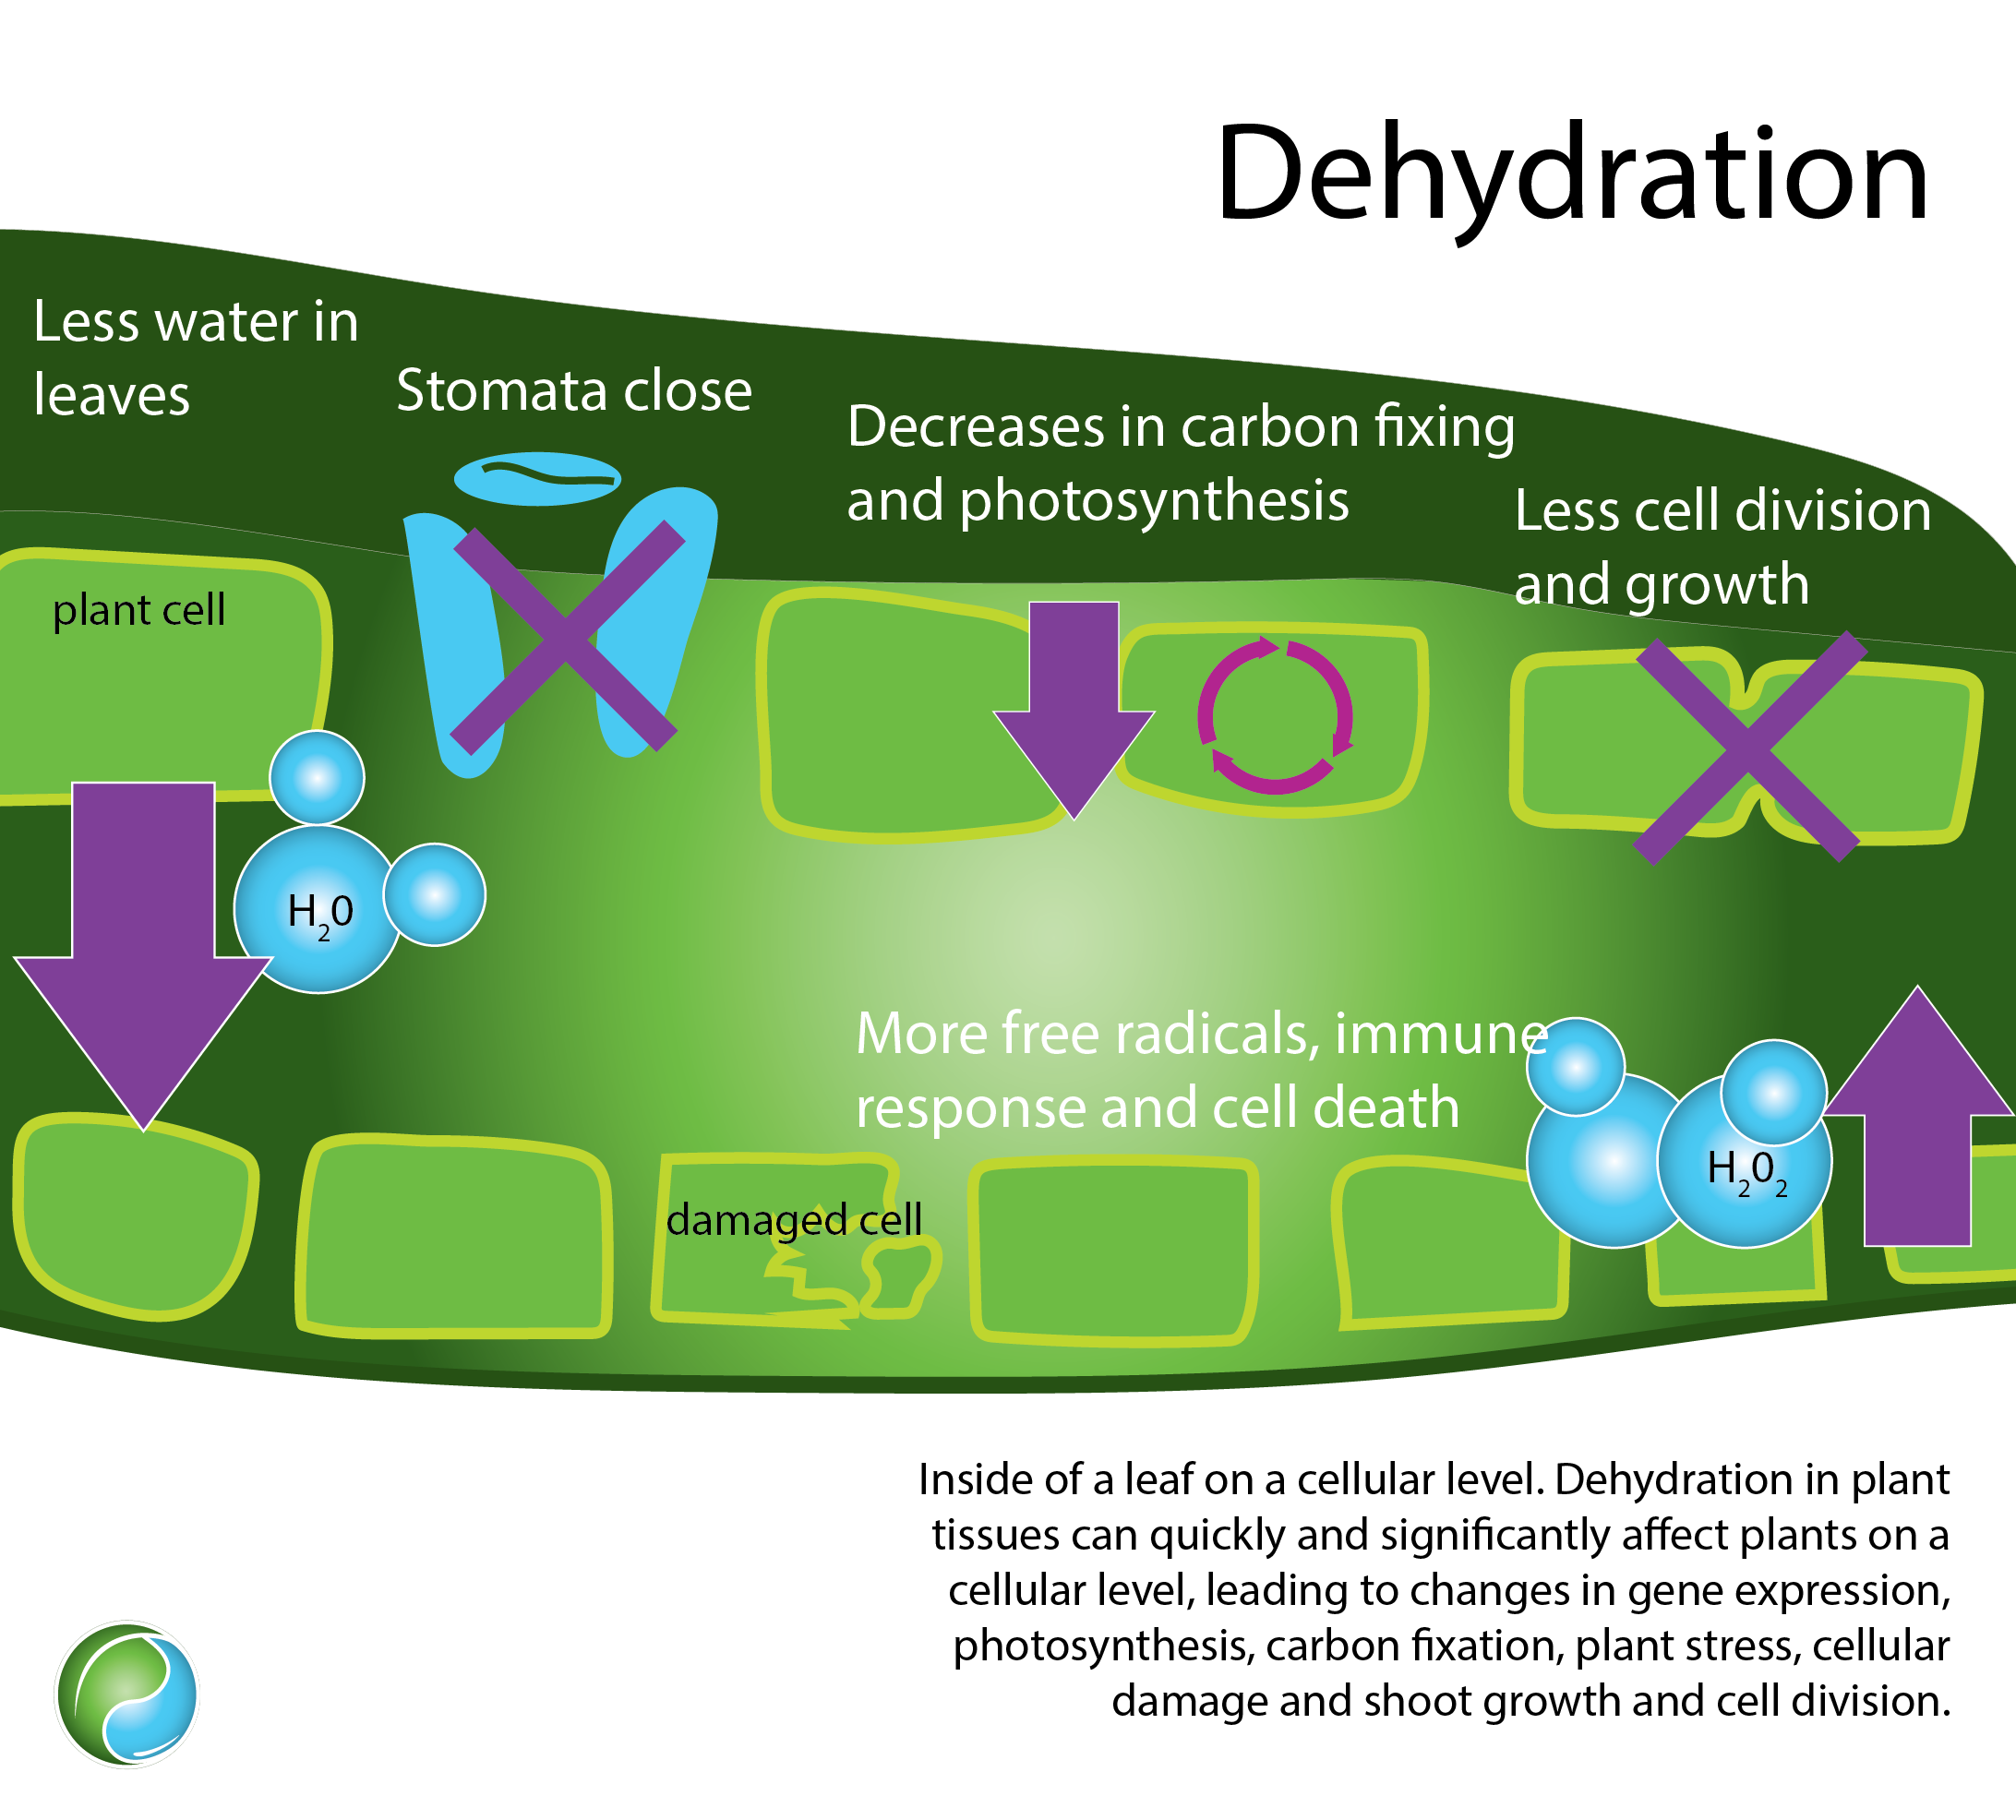 Image credit: Emily Nelson, Sustainable Plant Solutions LLC
In some cases, soil will have dry pockets, where only certain areas are lacking water. If a plant's root hairs are exposed to one of these pockets for an extended period of time, the ones exposed will die. Depending on the soil mixture, the top layer can look wet while the middle and bottom layers are dry. Correctly mixing soil, adding necessary amendments, and properly maintaining the soil will lessen the chances of acquiring unwanted dry pockets.
If you notice a plant wilting, with its leaves dropped down, it needs liquid right away. If it stays like that for too long, it won't bounce back and won’t survive. In soil that is too dry, a moisture meter will read above 120. Give small amounts of water, avoiding giving too much in desperation to save it. Wait 30-60 minutes and check on the plant to make sure it will recover and to see if more liquid should be given.
One of the biggest challenges when it comes to growing high-grade cannabis is maintaining adequate levels of saturation in the soil. To ensure your plants get acceptable amounts of water, be sure to check on them and the soil regularly, especially on hot days.
Overwatering. Too much water can be just as devastating to cannabis plants, and is one of the most common mistakes growers make. It's easy to do.
Poor air ventilation is one of the main causes of an overwatered plant. Transpiration allows a plant to move water from the soil into the air. If there isn't enough air circulation, the air retains the moisture, increasing humidity. If there is adequate air ventilation, the moist air is replaced with fresh, dry air, and if balanced, creates an ideal environment for a plant.
How much water a plant needs is more dependent on how much moisture the soil needs. Often, soil can look dry, but upon closer inspection, only a thin top layer of the soil is dry while the rest of the soil remains damp. If you water soil that is too damp, you’re overwatering. Plants may need less water than you think to remain healthy. It's more important to provide appropriate levels of consistent moisture.
It only takes a plant being overwatered one time for it to be severely compromised for the remainder of its life. Overwatering causes many nutrients to become locked up and it can lead to several deficiencies, or even death. Excessive amounts of water can also attract unwanted pests and is just as harmful to plants as under watering, so if in doubt, always give a plant a little less water than you think is necessary.
Signs that a plant has been overwatered are often subtle, sometimes making it difficult for inexperienced gardeners to correct in a suitable time frame. Overwatering will cause a plant’s leaves to droop down, turn yellow, and develop areas of
necrosis (the death of cells or plant tissue). Too much water also encourages anaerobic activity, which can be devastating for the soil and plant.
Additional signs that a plant is being overwatered include:
- Wet soil with a wilting plant
- A lot of yellow leaves
- Leaves with interveinal chlorosis
- Leaves with brown edges or spots
- Drooping and falling new and yellow leaves
- Brown leaves
- Mold and fungal growth
- Root rot
- Lower than usual yield
Using a moisture meter makes it easier to know exactly when it's ready. If the meter reads under 90-100, the soil is too wet.
If your outdoor plants are sitting on the ground, you may want to consider putting something under them to lift them up, helping to avoid too much water from being soaked up through the bottom of the pot during times of rain. Wood pallets or other materials that help provide a space between the bottom of the pot and the ground is the goal.
How To Amend Overwatered Soil
Back to top
To correct a plant that is suffering from being overwatered, you can try to revive it by:
- Avoid giving the plant any liquid until the soil has dried out sufficiently
- Transplant to a larger container with completely dry soil, or add dry soil to the top of a container to help even out the moisture
- Topdress
- Remove dead leaves (brown and wilted)
- Treat with a fungicide after 2-3 sunny days, or when a moisture meter reads 120-140
Recipe
Applying a topdressing to supply the plant and soil with nutrients can also help boost life that may have gotten depleted. The following topdress recipe is for ten 4’ overwatered plants in large containers or beds:
- 10 Cups Hendrikus Bouquet
- 4 Cups Hendrikus Soil Enhancer
- 20 Tbs Roots Organic Elemental
Directions:
- Check the moisture level of the soil to get a better idea of how much it's been overwatered.
- Measure ingredients and mix in a 5-gallon bucket. Wear a mask to avoid inhaling any fine particles.
- Using a measuring cup, scoop 1 cup of the mixture and sprinkle on top of each plant's root ball.
- Add a tiny bit of tea or water (¼ cup) to the topdressing mixture. Pump sprayers work well to lightly saturate.
- Wait 4-7 days to see improvements.
Moisture meters. To take much of the guesswork out of watering, moisture meters are a great investment. They are a small stake-like device that you stick 7-8” in soil to get a reading of how much moisture is present. If using a moisture meter, you are looking for a reading of 100-120. Lower numbers will indicate the soil is too wet while higher numbers indicate it's too dry. Test multiple locations, including right next to the rootball. When testing a new location, it's best to let the meter sit for 2-3 hours before reading to ensure accuracy.
- Too wet: 0-100
- Ideal: 100-120
- Too dry: 120-200
 Ideal soil moisture will read between 100-120 on a Blumat meter
Watering systems
Ideal soil moisture will read between 100-120 on a Blumat meter
Watering systems. If you can afford one, watering systems are a great option when it comes to keeping a garden properly hydrated. Not only do they offer convenience for the gardener, they can improve the health of a plant and its root system.
Watering systems need to be fine-tuned in order to perform optimally. They can apply water slowly over a set time; however, a system does not need to be operating for a long period of time to thoroughly water. The water can be given by a gravity system, and can come from a hose or a reservoir. If coming from a reservoir, it needs to be checked, refilled, and cleaned regularly. Some hose systems can be buried in soil prior to planting which allows thorough and even saturation.
These types of systems are especially helpful if you have a large garden, or need to lessen the workload, and can also help conserve water. Test them for a few days to find the right level of saturation. Make sure the soil gets watered thoroughly, drains effectively, and isn't getting overwatered. Watering systems encourage optimum health of a plant's root system and the microbial activity by providing consistent moisture, often better than a gardener could, improving uniformity and yield.
Tip: A recommended company to purchase a watering system from is Blumat Watering Systems. They offer easy to set up systems for home gardens and also make moisture meters.
Water Preparation
Because most water contains impurities, it's recommended that you never give a plant straight tap water or groundwater. Tap water is often treated with chlorine, and if present in excess, will kill beneficial microbes in the soil and lower plant health. To keep that from happening, it's best to attach a chlorine filter to your water source. Doing so will save time and money, and allow you to give water to your plants without any extra work.
It's also important to always check the temperature of the water, especially when using filtered hose water on a hot day. If hose water feels warm to the touch, leave it on, and wait until it's cool before filling any reservoir or giving it to a plant.
If you don't have a chlorine filter, here's how to correctly prepare water for a cannabis plant:
Step 1: Prepare a reservoir. Fill up a container with water (5-10 gallons for a 10 plant garden in 4’×4’ flower beds). Make sure your reservoir is kept clean and filled with fresh water.
Step 2: Aerate the water. This allows the plant to more readily absorb the nutrients you feed it by letting the chlorine evaporate first, which happens when it comes into contact with air. It also allows the water to reach ambient temperature. Allow aeration for at least 24 hours and up to 48 hours before watering.
Step 3: Check the pH. Balanced water has a pH value of 7.0, and will allow the plant to perform at its best. The pH of tap water can fluctuate throughout the year, so regularly checking the pH is important.
Step 4: Water your plant. When the water is ready, be sure you pour it on the soil evenly and slowly, preferably from a watering can or a hose nozzle on the “shower” setting. Remember: it is extremely important that you don't overwater your plants. It is best to water first thing in the morning, before it gets too hot, and throughout the day, increasing the plant's ability to efficiently move nutrients around as it goes through that day's light cycle.
Step 5: Refill your reservoir. Because the water needs to aerate for up to 24 hours, make sure you fill up your reservoir for next time and turn on an air pump, bubbler, or other source of oxygen.
Tip: For improved taste in your flowers, cannabis plants should be given a light tea or only water - no food - the last 14 days before the end of their flower cycle. Plants should then be completely deprived of liquid altogether the last 48 hours or so before harvest.
Keeping Your Garden Properly Hydrated
Perhaps one of the most important tasks of taking care of a cannabis garden is constantly checking on it to make sure all of your plants are happy, adequately watered, and looking their best. There is a bit of a learning curve as far as balanced moisture levels are concerned. When it comes to keeping your garden properly hydrated, your judgment and experience will be put to the test. It’s important to regularly observe and get to know your garden and environment, and adjust your techniques to best suit your garden’s needs and preferences. When you reach that level of dedication, you’ll notice the quality of your garden improve, thereby improving the quality of your flowers.
pH - Test It, Adjust It, Know It
When it comes to any substance that comes in contact with a cannabis plant, the pH needs to be checked. The pH level will tell you exactly how acidic or how alkaline something is. Measured on a scale of 1-14, one is considered acidic, 7 neutral, and 14 is alkaline. Slight number fluctuations equates to major differences in how acidic or alkaline something is. For example, a decrease in pH from 6.5 to 5.5 means the solution is 10 times more acidic.
pH is important because it determines the solubility and biological availability of nutrients. In order to correctly absorb and distribute nutrients and water, to not only survive but thrive, a cannabis plant needs to be exposed to favorable pH levels. High pH levels will cause trace minerals like zinc, manganese, and copper to lock up. Macronutrients such as nitrogen and calcium will become unavailable to a plant if pH levels are too low. You need to check the pH level of the soil, water, food, tea; anything that will come in contact with the plant or its roots.
Test soil pH before planting and check the water, food, and tea pH each and every time they are given to a plant. Your soil, food, and water pH levels all work together and influence the total pH level your plants are exposed to. If you know your water pH runs high, lowering the pH of your food mixture would be beneficial to help balance out the pH. Once you learn the interactions of your recipes, ingredients, and techniques, you will not have to test the pH quite as much, but it’s still a good practice to ensure healthy plants.
Recommended pH for cannabis plants:
- Soil: 6.5-7.0 (6.8 preferred)
- Water: 7.0
- Food: 6.2-6.4
- Tea*: 6.2-6.4
How do you test the pH? For liquid, there are a couple of different ways you can check pH levels, the easiest probably being with an electric meter, which can be found online and at gardening stores. Make sure whatever mixture you’re testing is mixed well and that you test it 2-3 times to get an average. Also, make sure to give the water, food, or tea to a plant within 1 hour after testing the pH to ensure it doesn’t shift.
Signs a plant may be exposed to unbalanced pH levels include:
- Leaf discoloration; tan or brown patches on leaves
- Stunted growth
- Decreased vigor
--
To raise and lower pH, there are several products on the market that you can buy, such as Earth Juice Natural Up and Natural Down. Having products on hand
before you need them will ensure nothing goes to waste and that you can achieve and maintain appropriate pH levels. For increased safety, when transporting nutrient or pH products in a vehicle, always place them in a larger sealed container to avoid spills. Some products can burn skin on contact, so safety is important.
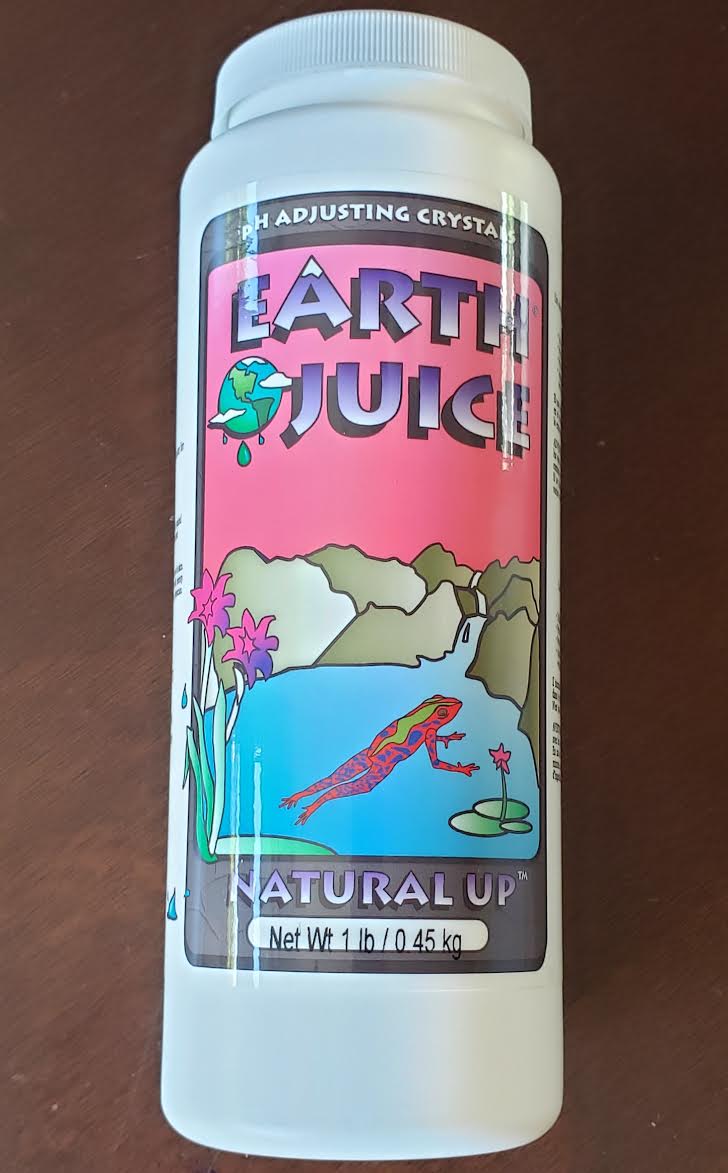 *Because a tea is alive, the pH can dramatically shift up or down. As long as you have enough sugars or a food source for the microorganisms to eat, the pH should stay fairly consistent. It’s when the food supply runs low that you risk the pH changing (aerobic to anaerobic). An easy way to tell if a tea has gone bad is by the way it smells. If it smells bad, it cannot be used and needs to be thrown out.
Understanding Nutrients
Arranged on the Periodic Table are the 118 known chemical elements occurring in nature, each one distinguished by its atomic number, or the number of protons in the nucleus of its atom. By definition, an element is a substance that cannot be chemically interconverted or broken down into simpler substances; they are primary constituents of matter.

Nutrients exist as positive ions or
cations in soil. A plant’s root system has a negative charge, which attracts positive ions. This attraction is part of what allows a plant to access and absorb nutrients and use them for growth.
Each cell of a plant requires specific nutrients in order to function and complete necessary processes. Composed of many cells, a plant needs to be able to access a variety of nutrients for each cell’s unique specific needs. A balanced diet is something that all living things need for optimum health and it's believed that plants require around 17 essential elements, or nutrients, to remain healthy.
Plants obtain non-mineral structural elements like carbon (C), hydrogen (H), and oxygen (O2) from the water and air while the mineral elements are found in the soil and food sources. When feeding a cannabis plant, it’s important that the nutrients are readily available, not only in broken down or simpler forms, but also the correct ratios of each. Knowing which nutrients help others work effectively will be key to producing the quality you’re looking for.
You will also need to consider the age of the plant; young plants require different nutrients than flowering plants. A plus: when a plant reaches peak health, its immune system is greatly increased, making it resistant, if not relatively immune, to common pests and pathogens.
Nutrients Every Cannabis Plant Needs
Plants use all of their components - roots, stems, branches, leaves, and flowers - to make food, move nutrients around, and maintain proper health. It is important to understand why plants need and use each nutrient to better understand how to care for them.
A plant’s roots acquire nutrients two ways. First, nutrients must move to the plant’s roots from throughout the soil. This is achieved thanks to leaf transpiration, diffusion, microbes, fungi, water, etc.. Second, nutrients must then be able to cross from the outside of the roots to the inside. This is made possible by a corky strip of living cells that surround a plant's root system, called the
casparian strip, that acts as a type of filter, only allowing approved nutrients to enter a plant’s roots. To receive nutrients, plant cells exert energy from
adenosine triphosphate (ATP), which is produced from oxygen.
The most important thing to know about how plants use nutrients is that they need them in proper amounts.
Not enough of a certain nutrient can affect how a plant is able to absorb and use other nutrients; similarly,
too much of a particular nutrient can cause the same thing to happen. Not only correct measurements are needed, but a variety of nutrients are needed, each playing a different part in a plant’s development.
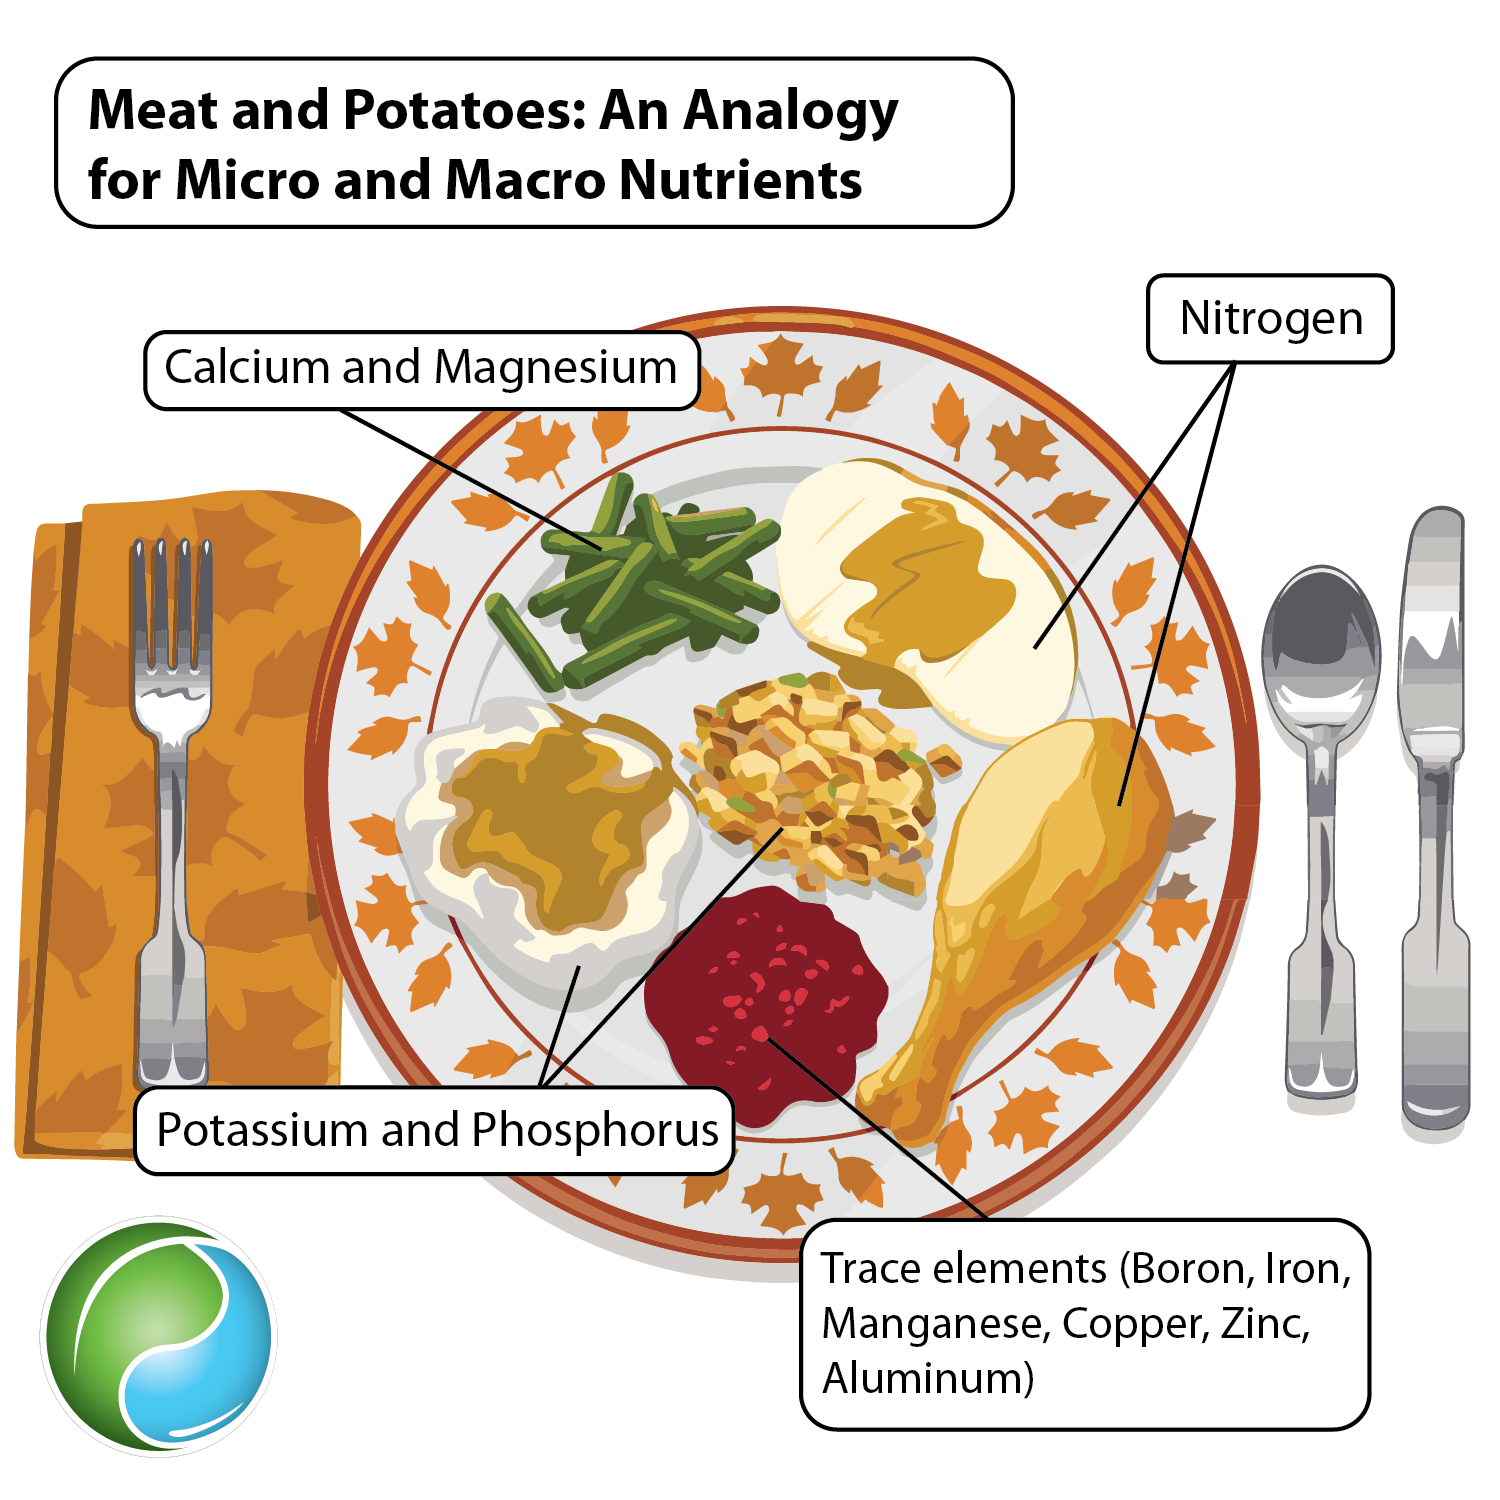 Image credit: Emily Nelson, Sustainable Plant Solutions LLC
Back to top
Mobile vs. Immobile
There are two main categories that nutrients fall into: mobile and immobile.
Mobile Nutrients: Mobile nutrients are able to be moved to different parts of a plant as needed, sometimes being transported from older leaves to younger ones in hopes of resolving a deficiency. This is why many leaves begin yellowing and becoming discolored at the bottom of the plant first; because that’s where all of the plant’s
oldest leaves are located. So, if a plant is showing signs of deficiency at the bottom, it’s likely it’s in need of a mobile nutrient.
Mobile nutrients include:
- Nitrogen (N)
- Phosphorus (P)
- Potassium (K)
- Magnesium (Mg)
- Chlorine (Cl)
- Molybdenum (Mo)
Immobile Nutrients. Immobile nutrients cannot be moved around in a plant, instead, helping where they are deposited. Immobile nutrient deficiencies are the opposite of mobile nutrient deficiencies in the sense that you will notice a plant’s
youngest leaves showing signs of distress; the signs show up at the top of a plant instead of at the bottom.
Immobile nutrients include:
- Calcium (Ca)
- Sulfur (S)
- Iron (Fe)
- Zinc (Zn)
- Manganese (Mn)
- Boron (B)
- Copper (Cu)
- Silica (Si)
For both mobile and immobile nutrients, their availability can be different in a plant and in the soil. Some nutrients that are mobile in a plant are immobile in the soil and vice versa. This is one reason why pH is so important. Unbalanced pH levels greatly affect how nutrients are able to move around in not only your plant, but the soil too.
Primary, Secondary, & Trace Elements
--
Nutrients are also categorized by how much a plant uses of each.
Primary and
secondary elements are required in larger amounts than
trace elements; each, however, affects the overall health of a plant and must be present at the correct times and amounts throughout its life cycle.
 Provide plants with the nutrients they need to reach their full potential
Primary Nutrients (Macronutrients)
Provide plants with the nutrients they need to reach their full potential
Primary Nutrients (Macronutrients)
Macronutrients are the elements used most and are required for rapid growth. On nutrient labels they usually appear as: nitrogen (N), phosphorus (P), potassium (K).
Known as primary nutrients, these nutrients are so essential they need to be present in higher amounts than the others throughout
all stages of a plant’s life cycle. However, additions are needed in order for the plant to properly use those three nutrients. (For example, calcium is needed for the plant to move phosphorus around.)
1.
Nitrogen (Mobile): One of the most important nutrients you can give a cannabis plant, particularly during veg, nitrogen is easily depleted and is one of the most common deficiencies, but is also commonly given in excess. Nitrogen naturally exists in the air and in living things. Microbes capture atmospheric nitrogen and convert it into a usable form for a plant. Nitrogen is also released from decomposed organic matter via microbial activity. It is easily washed away or evaporated back into the atmosphere, adding to the importance of microbial interaction.
 Image credit: Emily Nelson, Sustainable Plant Solutions LLC
This mobile nutrient helps monitor a plant’s ability to carry out processes used for proper cell development, influences a plant's ability to store, move and transport, and is required for producing amino acids - the building blocks of DNA - as well as nucleic acids, chlorophyll, alkaloids, and enzymes for the plant. Its main contribution involves promoting growth in the leaves and stems, as it is essential for photosynthesis; however, it also helps with structure, determines how big a plant gets, and ultimately how healthy it is. Combined with proper light exposure, nitrogen helps give plants their nice green color.
2.
Phosphorus (Somewhat Mobile): This macronutrient is also found in living things, but can be sourced from inorganic materials like rocks. Although present in many soils, plants need microbes to break phosphorus down for availability. Playing a leading role in energy storage and transfer (ATP), phosphorus is also responsible for stem and root development, carbon metabolism, photosynthesis, respiration, reproductive development, nitrogen fixation, and maintaining overall plant health. It enables water retention and drought tolerance in addition to decreased stomatal sensitivity. It is an essential component of nucleic acids, DNA and RNA, and phospholipids. An important mineral for the construction of cell walls, it is required for cell membrane function and integrity. Once a plant begins to bloom it’s especially important as it’s vital for flower formation. Phosphorus and calcium must be given together in correct ratios during flower to ensure a healthy harvest.
--
3.
Potassium (Very Mobile): Adequate levels of potassium help a plant function in several ways: it helps with the transportation of sugars, increases chlorophyll levels, influences plant growth through cell division, helps store and move carbohydrates, promotes root growth, increases water uptake, builds cellulose, reduces respiration, and increases drought resistance. Extremely important for the metabolism of a plant, it is needed for photosynthesis and protein synthesis, and also improves a plant’s ability to withstand cold temperatures. Enzyme activation, affecting protein and ATP production, also requires potassium. ATP production helps regulate the rate at which a plant can photosynthesize. In addition, it influences the opening and closing of stomata, which controls the movement of anything going in or out of the top of a plant, including water vapor, oxygen, nutrients, carbon dioxide, and waste products. It also aids in a plant’s ability to resist mold and other harmful bacteria.
Secondary Nutrients
Also used in large amounts by a plant, secondary nutrients are essential for proper health and development. The term ‘secondary’ refers to the amount needed, not the importance; a plant must have them. The three secondary nutrients are: calcium (Ca), magnesium (Mg), and sulfur (S). They are commonly found in groundwater, so be careful if you’re growing directly in the ground, and make sure your plants don't get too much of them.
1.
Calcium (Immobile): Cannabis plants need quite a bit of calcium to remain healthy and can easily lack required amounts. Calcium is often referred to as the King or Queen element, as so many other nutrients require its presence for uptake or to work properly.
This immobile nutrient is essential for cell production by helping to maintain membrane permeability. It also helps develop support and structure throughout the entire plant by strengthening cell walls, is responsible for proper cell elongation, and helps protect a plant from heat stress. Calcium is needed for transpiration, photosynthesis, stomata functioning, and root density and growth. Soluble calcium improves soil aggregation and porosity to enhance water permeation. Providing a cannabis plant with enough calcium during the flower cycle will also help produce flowers that are dense and resinous.
2.
Magnesium (Somewhat Mobile): Magnesium is the central core of the chlorophyll molecule, required for a plant to absorb light energy, and necessary for photosynthesis. It allows the proper opening and closing of stomata, and is required for amino acid and protein synthesis. This secondary nutrient also allows a plant to efficiently uptake other nutrients like iron as well as help regulate toxins made by the plant and found in the soil. It helps activate enzyme systems, which modify or break down compounds as a portion of a plant’s normal metabolism. Young root systems have a difficult time absorbing magnesium and should be given enough to keep them healthy.
--
3.
Sulfur (Immobile): Sulfur is another important secondary nutrient and required for a plant to remain healthy. It helps in the structure of a plant, is found in plant cells, is needed for chlorophyll production, is crucial for the formation of proteins, enzymes, and peptides, helps a plant with certain metabolic processes, increases pest and pathogen resistance, and is needed for root development. Soil microbes need sulfur to be able to mineralize carbon and also make sulfur available for plants to uptake.
Trace Elements (Micronutrients)
Don’t let the name throw you off: micronutrients are without question crucial for the health of a plant. Required in tiny amounts, their main purpose is to act as a catalyst for plant development, they are essential for the production of chlorophyll and nitrogen fixation, and they help other nutrients work efficiently and be available for a plant to process. They are also needed for important reactions to take place and allow complex compounds to be produced so a plant is better able to defend itself from pests and disease.
There are eight essential micronutrients, including:
- Iron
- Manganese
- Copper
- Zinc
- Boron
- Chlorine
- Silica
- Molybdenum
Trace elements are most often found in organic soil, tap water, and are included in many bottled, granular, and powdered amendments. Iron, manganese, and zinc are three of the most common deficiencies, micronutrient-wise; however, they are only needed in small quantities as it doesn’t take much to approach toxic levels. Many micronutrients are found in tap water, and if used, makes it less likely that you will encounter deficiencies. Micronutrient deficiencies most often originate with the root system.
Trace elements include:
1.
Iron (Immobile): Found in the soil and only required in small amounts, but absolutely necessary for plant growth, iron is responsible for helping a plant transport nutrients to where they are needed, nitrogen fixation, and enzyme function. It also plays a part in the production of chlorophyll (allowing a plant to maintain that nice green color), and in the production of chloroplasts.
2.
Manganese (Immobile): Many plant processes depend on manganese; for example, photosynthesis, chloroplast formation, respiration, nitrogen assimilation, and the synthesis of enzymes. Manganese also influences pollen tube growth, pollen germination, and is needed to maintain healthy root systems as it is involved in root cell elongation and resistance to pathogens.
3.
Copper (Immobile): Although needed in small amounts, copper is crucial for the proper development of a plant. It plays a leading role in the formation of chlorophyll, influences the synthesis of lignin, and is involved in enzyme activation. Processes like photosynthesis, respiration, and the metabolism of proteins and carbohydrates also depend on the presence of copper.
4.
Zinc (Immobile): Zinc is an important mineral for enzyme function, responsible for metabolic reactions that drive growth. If certain enzymes were absent in plant tissue, development would stop. This micronutrient is important for the activation of many plant processes as it influences the synthesis of proteins. It also helps with carbohydrate and chlorophyll formation, stem elongation, root exudation, enzyme function, the ability to withstand cooler temperatures, and the conversion of starches to sugars. Zinc is important for the stabilization of DNA and RNA in gene-expression.
5.
Boron (Immobile): Working with calcium, boron influences many growth factors of a plant and exists mainly within cell wall components. It contributes to the health of a plant’s overall structure, and strongly influences the development and strength of a plant. It is required for root elongation, accelerates atmospheric nitrogen fixation, cell membrane functions, the regulation of hormones, cell division, and influences the synthesis and transport of sugars made from photosynthesis.
6.
Chlorine (Mobile): Chlorine is taken up by plants in the form of chloride anion (Cl-). It plays a leading role in stomatal regulation, allowing a plant to regulate their internal moisture levels and lower water loss when conditions are dry. It is required for leaf and root cell division and also increases cellular osmotic pressure. In sunlight, it aids in the chemical breakdown of water and is also responsible for the activation of enzyme systems. It allows a plant to adjust to water availability and also helps transport calcium, magnesium, and potassium throughout a plant.
Chlorine is key for other plant processes to occur, such as photosynthesis, hydrolysis, and cation balance. Studies have shown that the presence of chlorine can help reduce the risk and effects of fungal infections as well as other plant diseases. It also changes the availability and distribution of potassium in plant tissue.
7.
Silica (Immobile): A sometimes overlooked but necessary nutrient for high-quality medicinal cannabis is silica. Responsible for increasing the thickness of the cell walls, helping to produce a bigger yield and increasing the plant's ability to withstand extreme heat, drought, and pests by strengthening roots, stalks, flowers; pretty much every part of a plant. It can also reduce internode spacing and increase trichome production. An added advantage: it works to improve a plant’s resistance to fungal disease, like powdery mildew, will boost the efficiency of the plant’s vascular network, and enhances a plant’s ability to uptake other nutrients. It is crucial for maintaining excellent health in the entire plant, which will directly increase the quality of your flowers. In order for a plant to uptake silica, it must also have boron.
8.
Molybdenum (Immobile): Molybdenum is another essential micronutrient needed for plant growth. It is used to help synthesize amino acids, for nitrogen assimilation, to convert inorganic forms of phosphorus into organic forms in the plant, and is a catalyst for enzyme activities. It also helps a plant absorb potassium.
How To Feed A Cannabis Plant For Quality Results
When it comes to growing quality cannabis, there are a few important factors that come into play, including light exposure and intensity, soil health, moisture levels, and proper nutrition. A cannabis plant can survive on a water-only diet as long as you have living soil; however, supplying your plants with extra nutrients will help ensure your plants thrive. The most important component when it comes to feeding - besides the actual recipe - is making sure you have quality ingredients. It’s necessary to incorporate a variety of amendments into recipes, providing both readily available and slow-release forms, so nutrients will be provided throughout the entire life of a plant.
There are a few different ways to feed a cannabis plant. They include:
Teas: A highly recommended technique is to feed with teas, as they provide nutrition, microbial life, and mycorrhizal fungi in addition to improving the health of the soil. Brewing a tea does require some practice, but is well worth the added time and effort. Plants have increased vigor, better immune systems, and exposure to microbes that otherwise might not be present. With teas, several nutrients are in a readily available form, able to be used immediately by a plant. Teas also help increase yields.
Topdressing: Another good option for organic gardeners. While topdressing is relatively straightforward, it requires the gardener to know what ingredients to apply at what time. Because the ingredients are in dry micronized or granular forms, they take longer to become readily available for a plant to uptake. They need to be broken down further before a plant can access the nutrients they contain.
Foliar Feeding: A technique that involves spraying a plant’s leaves with liquid nutrients. The plant is able to absorb the mineral nutrients through its stomata and epidermis (the plant’s outer layer leaf tissue). The nutrients are readily available for the plant to use. Foliar feeding works well when you need to apply certain nutrients that may not be as available once they interact with the soil, or if a plant’s root system has been compromised.
Korean Natural Farming (KNF): If you’re willing to learn, it's also possible to make your own nutrients by fermenting different organic, high-quality fruits and vegetables, a technique known as Korean Natural Farming (KNF). Some ingredients are overripe while others are underripe. This is probably the most affordable way to acquire nutrients, and is the most environmentally responsible, but it is time-consuming and does take some experience to master.
Organic Bottled Nutrients: The easiest way to feed a plant is with bottled nutrients. Bottled brands have already done the work of mixing ingredients together, lowering the amount of steps and ingredients required, which is especially helpful to those who are new to growing cannabis. With bottled nutrients, you don’t have to wait for the mixture to brew, and it is immediately available for a plant to use. Although convenient, it usually doesn't produce the highest quality flower simply because the ingredients aren't in their purest form; other additives are usually included. Beautiful flowers can be grown with bottles, but the effect and flavor will not be the same, and will generally be of lower medicinal quality, often with weaker terpene profiles and cannabinoid content.
Which Method Is Better?
The best way to feed a cannabis plant is, like many gardening techniques, a personal preference. However, as far as the plant and soil are concerned, there are better ways than others. The ideal technique for your garden may be dependent on factors such as your environment, time, experience, and budget; however,
all techniques are capable of producing some amazing flowers. Many gardeners combine different techniques and create their own style.
--
For the best possible results, it's crucial that you get to know what varieties of cannabis you are working with. Each strain has its own personality and likes specific nutrients more than others, uptaking them at slightly different rates. Getting to know the preferences of each strain is learned through trial and error, close observation, and over time.
You may have to adjust your food recipe to keep certain varieties happy; however, too little or excessive amounts of just one nutrient can cause a plant to suffer or even die, so be sure to experiment carefully. Most of the time, you will simply need to increase the amount of a certain nutrient for a specific strain. For example, it’s common for some varieties to prefer more calcium. If that’s the case, you would simply need to add more calcium to your tea or mixture before feeding that particular strain.
Organic Living Teas
Veg and bloom
Week 2 of clone veg, week 4 of seedling veg, and bloom
Feed 1x week if topdressing 1x week
Feed every time soil is dry if topdressing 2x month
It's not uncommon for growers to start off using bottled nutrients, but the more that is learned about plants, soil, and Mother Nature, the more likely a home gardener is to switch to something more natural and sustainable; something that promotes more life.
What does that? Microbial teas.
Benefits: There are several different reasons growers feed teas to their cannabis plants. The number one reason is because teas help increase trichome production, improve terpene profiles, and provide an all around better medicine. Additionally, it’s to maintain healthy living soil, and to obtain flowers that are completely organic.
Another primary goal of feeding with teas is to provide a diversified blend of microbial life to improve the performance of the Soil Food Web. By brewing a tea before you feed your plants, you are jump-starting the process of nutrient breakdown by introducing the ingredients to microbes and water first. Using a tea will allow a plant immediate access to required nutrients and lead to impressive development.
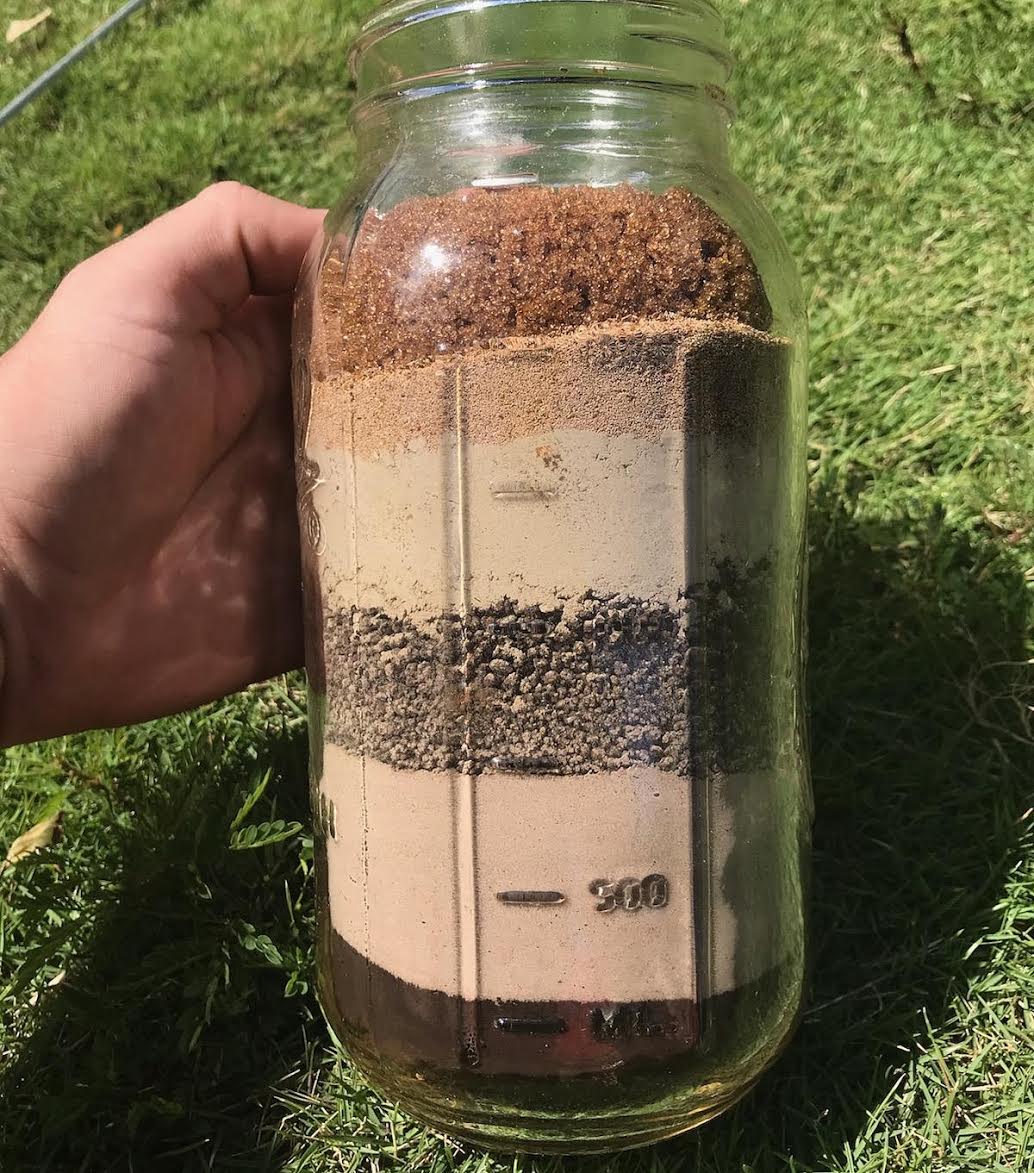 Teas are highly recommended for cannabis plants
Back to top
Making a tea is similar to feeding with bottles in the fact that you simply add ingredients to water and then give them to a plant. They differ because teas need to be brewed and contain microorganisms that need to be kept alive by carbohydrates or sugar.
Tea Recipe
Per 30 gallons of chlorine-free water, veg and bloom
- 1 Cup Hendrikus Complete OR Green Gro Nature's Pride Veg (Veg)
- 1 Cup Hendrikus Bouquet OR Green Gro Nature's Pride Bloom (Bloom)
- 1 Cup Hendrikus Soil Enhancer
- 1 Cup Azomite (Trace Minerals)
- 1 Cup Worm Castings
- 1 Cup Biochar
- ¼ Cup Micronized Greensand
- ¼ Cup Soft Rock Phosphate
- 4 oz Hi Brix Molasses/Cane Sugar (Carbohydrate)
- 4 oz Cold Pressed Liquid Kelp
- 1 oz Pure Humic Acid
- 1 oz Coconut Water
- 1 oz Aloe Vera
Organics Alive Veg Recipe
Per 30 gallons of chlorine-free water, 100% organic
- 2 Tbsp V-N
- 2 Tbsp V-TR
- 2 Tbsp V-PK
- 2 Tbsp V-K
- 20 ml FPF Fulvic Acid
- 20 ml FPT Humic Acid
- 5 oz Photosynthesis Plus (optional)
- 3 oz CAL/MG (Plant Science)
- 3 oz Silica (Plant Science) (Add to water first)
- 3 oz Hi Brix Molasses
- 3 oz EM-1
- Organics Alive Tea Brew (1 part tea: 4 gallon chlorine-free water diluted before mixing) OR 5 Tsp Recharge OR 1 oz Urb Natural
- Earth Juice pH Up or Down (as needed)
Organics Alive Bloom Recipe
Per 30 gallons of chlorine-free water, 100% organic
- 3 Tbsp V-TR
- 3 Tbsp V-PK
- 3 Tbsp V-K
- 25 ml FPF Fulvic Acid
- 25 ml FPT Humic Acid
- 5 oz Yucca Extract OR 1 1/4 Tbsp Quillaja Extract Powder
- 5 oz Photosynthesis Plus
- 3 oz CAL/MG (Plant Science)
- 3 oz Silica (Plant Science) (Add to water first)
- 3 oz Hi Brix Molasses
- 3 oz EM-1
- Organics Alive Tea Brew (1 part tea: 4 gallon chlorine-free water diluted before mixing) OR 5 Tsp Recharge OR 1 oz Urb Natural
- Earth Juice pH Up or Down (as needed)
Veg Recipe
Per 5 gallons chlorine-free water, veg only
- ½ Cup Herculean Harvest Bone Meal (brew)
- 4 Tbs Nature’s Pride Grow (topdress or brew)
- 4 Tbs Azomite (topdress or brew)
- 4 tsp True Silica (topdress or brew) (Add to water first)
- 4 tsp Cold Pressed Liquid Kelp (brew)
- 4 tsp Cal-Mg (brew)
- 3 tsp High Brix Molasses (brew)
- 1 oz Photosynthesis Plus (optional)
- 1 oz EM-1
- 1 tsp URB Natural OR recharge (brew)
- Earth Juice pH Up or Down (as needed)
Bloom Recipe
Per 5 gallons chlorine-free water, bloom only
- 1 Cup Herculean Harvest Bone Meal
- 4 Tbs Nature’s Pride Bloom (topdress)
- 4 Tbs Azomite (topdress)
- 4 Tbs EM-1 (LAB)
- 4 tsp True Silica (Add to water first)
- 4 tsp Cold Pressed Kelp
- 4 tsp Cal-Mg
- 3 tsp High Brix Molasses
- 1 tsp URB Natural OR Recharge
- 1 oz Photosynthesis Plus
- 1 oz EM-1
- Earth Juice pH Up or Down (as needed)
All-In-One Tea Brew
Alternative recipe, per 5 gallons of chlorine-free water, veg and bloom
- 4 Tbs Hendrikus Soil Enhancer OR 1 Cup Herculean Harvest
- 4 Tbs Hendrikus Bouquet OR Nature's Pride Bloom
- 4 Tbs Nature’s Pride Earthshine OR Biochar
- 4 Tbs Azomite
- 4 Tbs EM-1 (LAB)
- 2 Tbs High Brix Molasses
- 4 tsp Cold Pressed Liquid Kelp
- 4 tsp True Cal-Mg
- 4 tsp True Silica (Add to water first)
- 1 tsp Recharge OR URB Natural
- Earth Juice pH Up or pH Down (as needed)
*PPM is influenced by water quality. After mixing, if you find the PPM to be too strong, add water. If it’s not concentrated enough, less water is needed.
The ingredients used in teas vary slightly depending on whether or not a plant is in veg or bloom, and whether you’re introducing microbial or mycorrhizal colonies. When using teas on smaller plants, it’s best to make sure they are rooted and are of proper minimum size (about 1’).
Some common ingredients found in tea recipes include:
Chlorine-Free Water (with a 7.0 pH): Pure water allows nutrients to combine well in addition to promoting their uptake by plant roots. You can either use a chlorine filter and attach it to your water source, or use a vortex brewer or air pump (see Water Preparation).
Aloe Vera: This plant was known by the Egyptians as the Plant of Immortality and as the Wand of Heaven by Native Americans. The Hawaiians have been using it for generations as a skin moisturizer and remedy for sunburn. The Maya valued it and Columbus grew it in pots onboard his armada. With many healing properties, it works well for the human body, both externally and internally. And it also works great for cannabis plants!
Aloe vera can be used throughout all stages of a plant's life cycle, for cloning, vegging, and flowering. Growing it in your yard is one way to ensure you have a constant supply of fresh organic aloe.
It's a superstar ingredient that has the following benefits:
⭐ Contains around 200 biologically active constituents, including amino acids, enzymes, polysaccharides, vitamins, and minerals
⭐ Contains minerals such as magnesium, calcium, copper, zinc, selenium, chromium, potassium, iron, and manganese
⭐ Improves water and nutrient uptake and distribution
⭐ Stimulates plant growth and vigor by accelerating cell division
⭐ Stimulates root growth
⭐ Boosts a plant's immune system and improves its resistance to bacteria, disease, and mold
⭐ Improves a plant's ability to withstand environmental stress, especially high temperatures
There are many ways to use aloe vera in a garden. Add it to your growing regimen for improved plant performance. Plants love it!
Coconut Water: Another excellent natural ingredient, coconut water can be added to teas and nutrient mixtures to boost plant health. It's best to source organic coconut water fresh from a young coconut.
Advantages include:
🥥 Contains numerous minerals including potassium, calcium, and magnesium
🥥 Contains amino acids, the building blocks of protein
🥥 Contains cytokinins, a hormone that helps a plant grow
🥥 Can improve a plant’s ability to respond to stress
Benefitting a plant in numerous ways, coconut water contributes to healthier plants, increased terpenes, larger yields, and higher medicinal value.
Kelp: A type of seaweed, kelp contains high concentrations of minerals that plants need to reach and maintain vigorous growth, making it an important ingredient throughout all stages of a plant’s life.
It provides the following benefits:
🌿 Contains over 60 trace elements, including iron, copper, zinc, molybdenum, boron, and manganese
🌿 Is an excellent source of potash
🌿 Reduces shock from transplanting
🌿 Helps with the development of extensive root systems
🌿 Increases stem strength and flower size, directly increasing yield
🌿 Increases a plant’s tolerance to drought, heat stress, frost, pests, and disease
🌿 Improves soil structure, water retention, aeration, stimulates bacterial colonies, and stabilizes pH levels
Noticeable results make kelp a winning ingredient in any recipe. The best sources of kelp are fresh or cold-pressed liquid kelp. Kelp meal is the least recommended form to give plants because other additives are often included, and it’s not a readily available source anyway.
Worm Castings: Transforming organic waste to the perfect natural fertilizer, the presence of earthworms means your garden is in good shape. Worm castings are odorless with a neutral pH of 7.0. A necessity in any organic soil mixture, they strongly influence the health of both a plant and the soil.
Worm castings provide the following:
🌺 An ideal source of organic matter and nutrients such as nitrogen, phosphorus, potassium, magnesium, and calcium
🌺 Encourages vigor and rapid growth
🌺 A great source of micronutrients, containing carbon, manganese, copper, iron, zinc, cobalt, and borax
🌺 Due to its texture, it enhances water retention in soil
🌺 Improves a plant’s resistance to root rot
🌺 Contains an active biological mixture of enzymes, hormones, and bacteria, and contains high concentrations of water-soluble nutrients, including humus
🌺 Due to the presence of bacteria, it continually neutralizes the soil and promotes microbial activity
Mushrooms: Known as a superfood, mushrooms are a great source of nutrients and increase the diversity of elements available to a cannabis plant and the microbial life in your soil. They’re also recognized as aiding natural healing.
Benefits include:
🍄 Contains trace minerals and nutrients such as selenium, copper, iron, and potassium
🍄 Contains beta-glucans and chitin
🍄 Can enhance a plant's immunity and resistance to disease and invading microbes
🍄 Can improve tolerance to environmental stress
🍄 Are prebiotics, helping nourish and balance good bacteria
Some useable types of mushrooms include:
- Psilocybin Mushrooms
- Golden Oyster
- Lion's Mane
- Maitake
- Oyster
- Reishi
- Pioppino
- Porcini
- Shiitake
- Turkey Tail
The type of mushroom(s) you use will influence what properties your plants will be exposed to. It's best to grind dried mushrooms up into a fine powder and then add to a tea mixture.
Organic Cane Sugar: Sugarcane has been used for centuries in many cultures around the world. While today most humans enjoy consuming it as a healthier alternative to processed sugars, it has also proven to be a great food source for microbial life, which significantly improves the health of a plant and its soil.
Additional benefits include:
- Contains essential minerals such as calcium, potassium, magnesium, manganese, and iron
- Contains essential amino-acids
- It’s easier for microbial life to break down compared to molasses
By adding cane sugar to a tea mixture, you can encourage and even increase the activity of the microbes found inside.
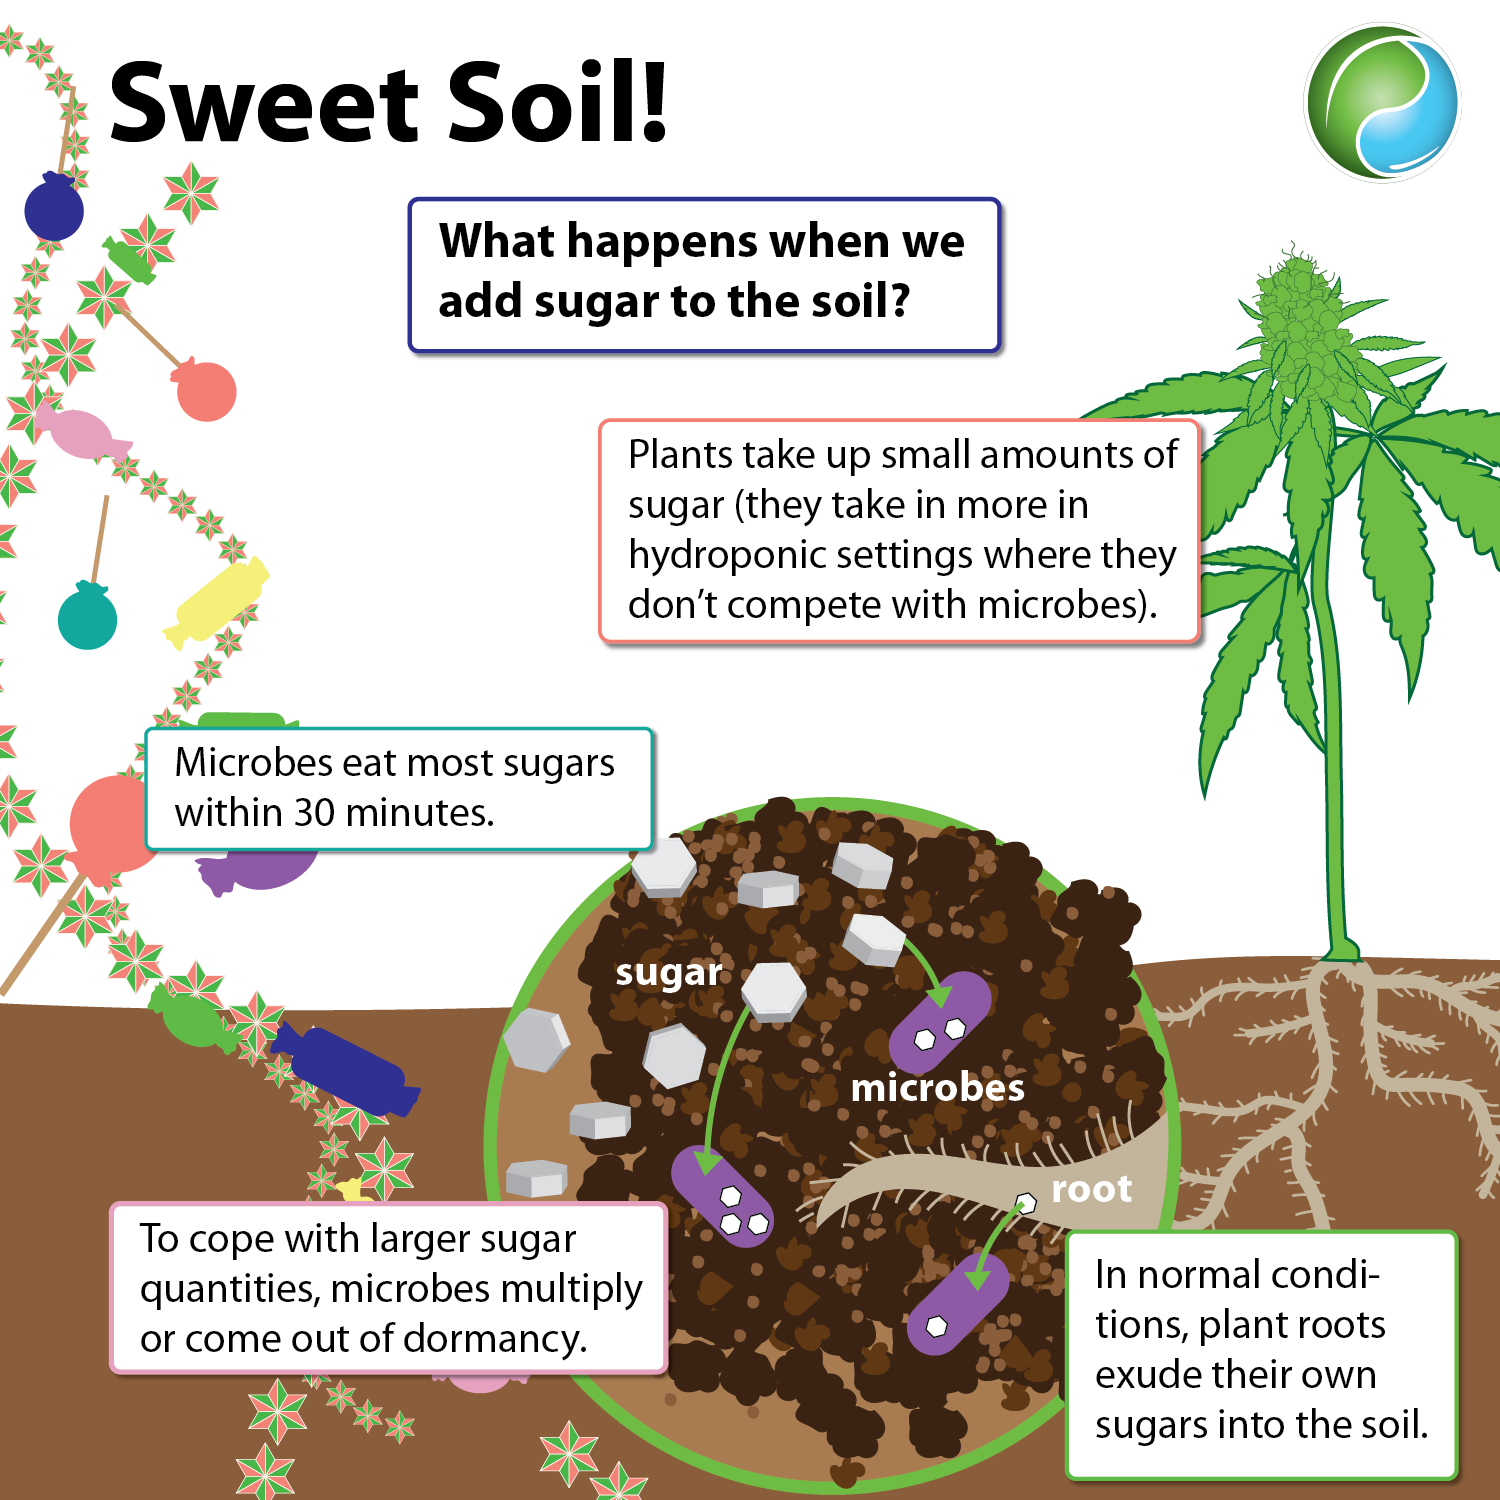 Image credit: Emily Nelson, Sustainable Plant Solutions LLC
Natural Honey
Image credit: Emily Nelson, Sustainable Plant Solutions LLC
Natural Honey: Widely accepted for many centuries as a medicine, honey is another superfood and a great addition to any tea recipe. With almost too many benefits to list, it serves several purposes, including:
🍯 Constituents of honey include vitamins, minerals, amino acids, proteins, antioxidants, and trace minerals
🍯 Contains calcium, phosphorus, potassium, magnesium, copper, iron, manganese, and zinc
🍯 Contains disaccharides, oligosaccharides, and polysaccharides, helping increase energy production and performance
🍯 Contains high amounts of fructose, which feed and nourish microbial life
🍯 Can help improve metabolic activities
When it comes to honey, it is important to use a raw, organic variety. Honey that is darker in color usually offers more beneficial properties. The floral source, number and variety, honey type, concentration, and bee will all provide different advantages. Using locally sourced honey will also contribute to the production of a unique and distinctive cannabis flower.
How To Brew: Brewing a tea requires the correct ingredients, time, and an air lift vortex brewer to aerate the tea. Sometimes air pumps are used for aeration. A microbial tea is made by brewing microorganisms to awaken them from spore to living form, usually taking about 18-36 hours to accomplish. (Teas can also be used simply as a food source for plants, not containing any microbial or fungal spores.) By aerating a tea, you provide oxygen to the living organisms inside the mixture, allowing nutrients to be provided in a readily available form. By definition, the presence of air also prevents a mixture from becoming anaerobic. Because microorganisms are alive, they also need to be fed, requiring a steady supply of carbohydrates for survival (usually given in the form of cane sugar, honey, or molasses).
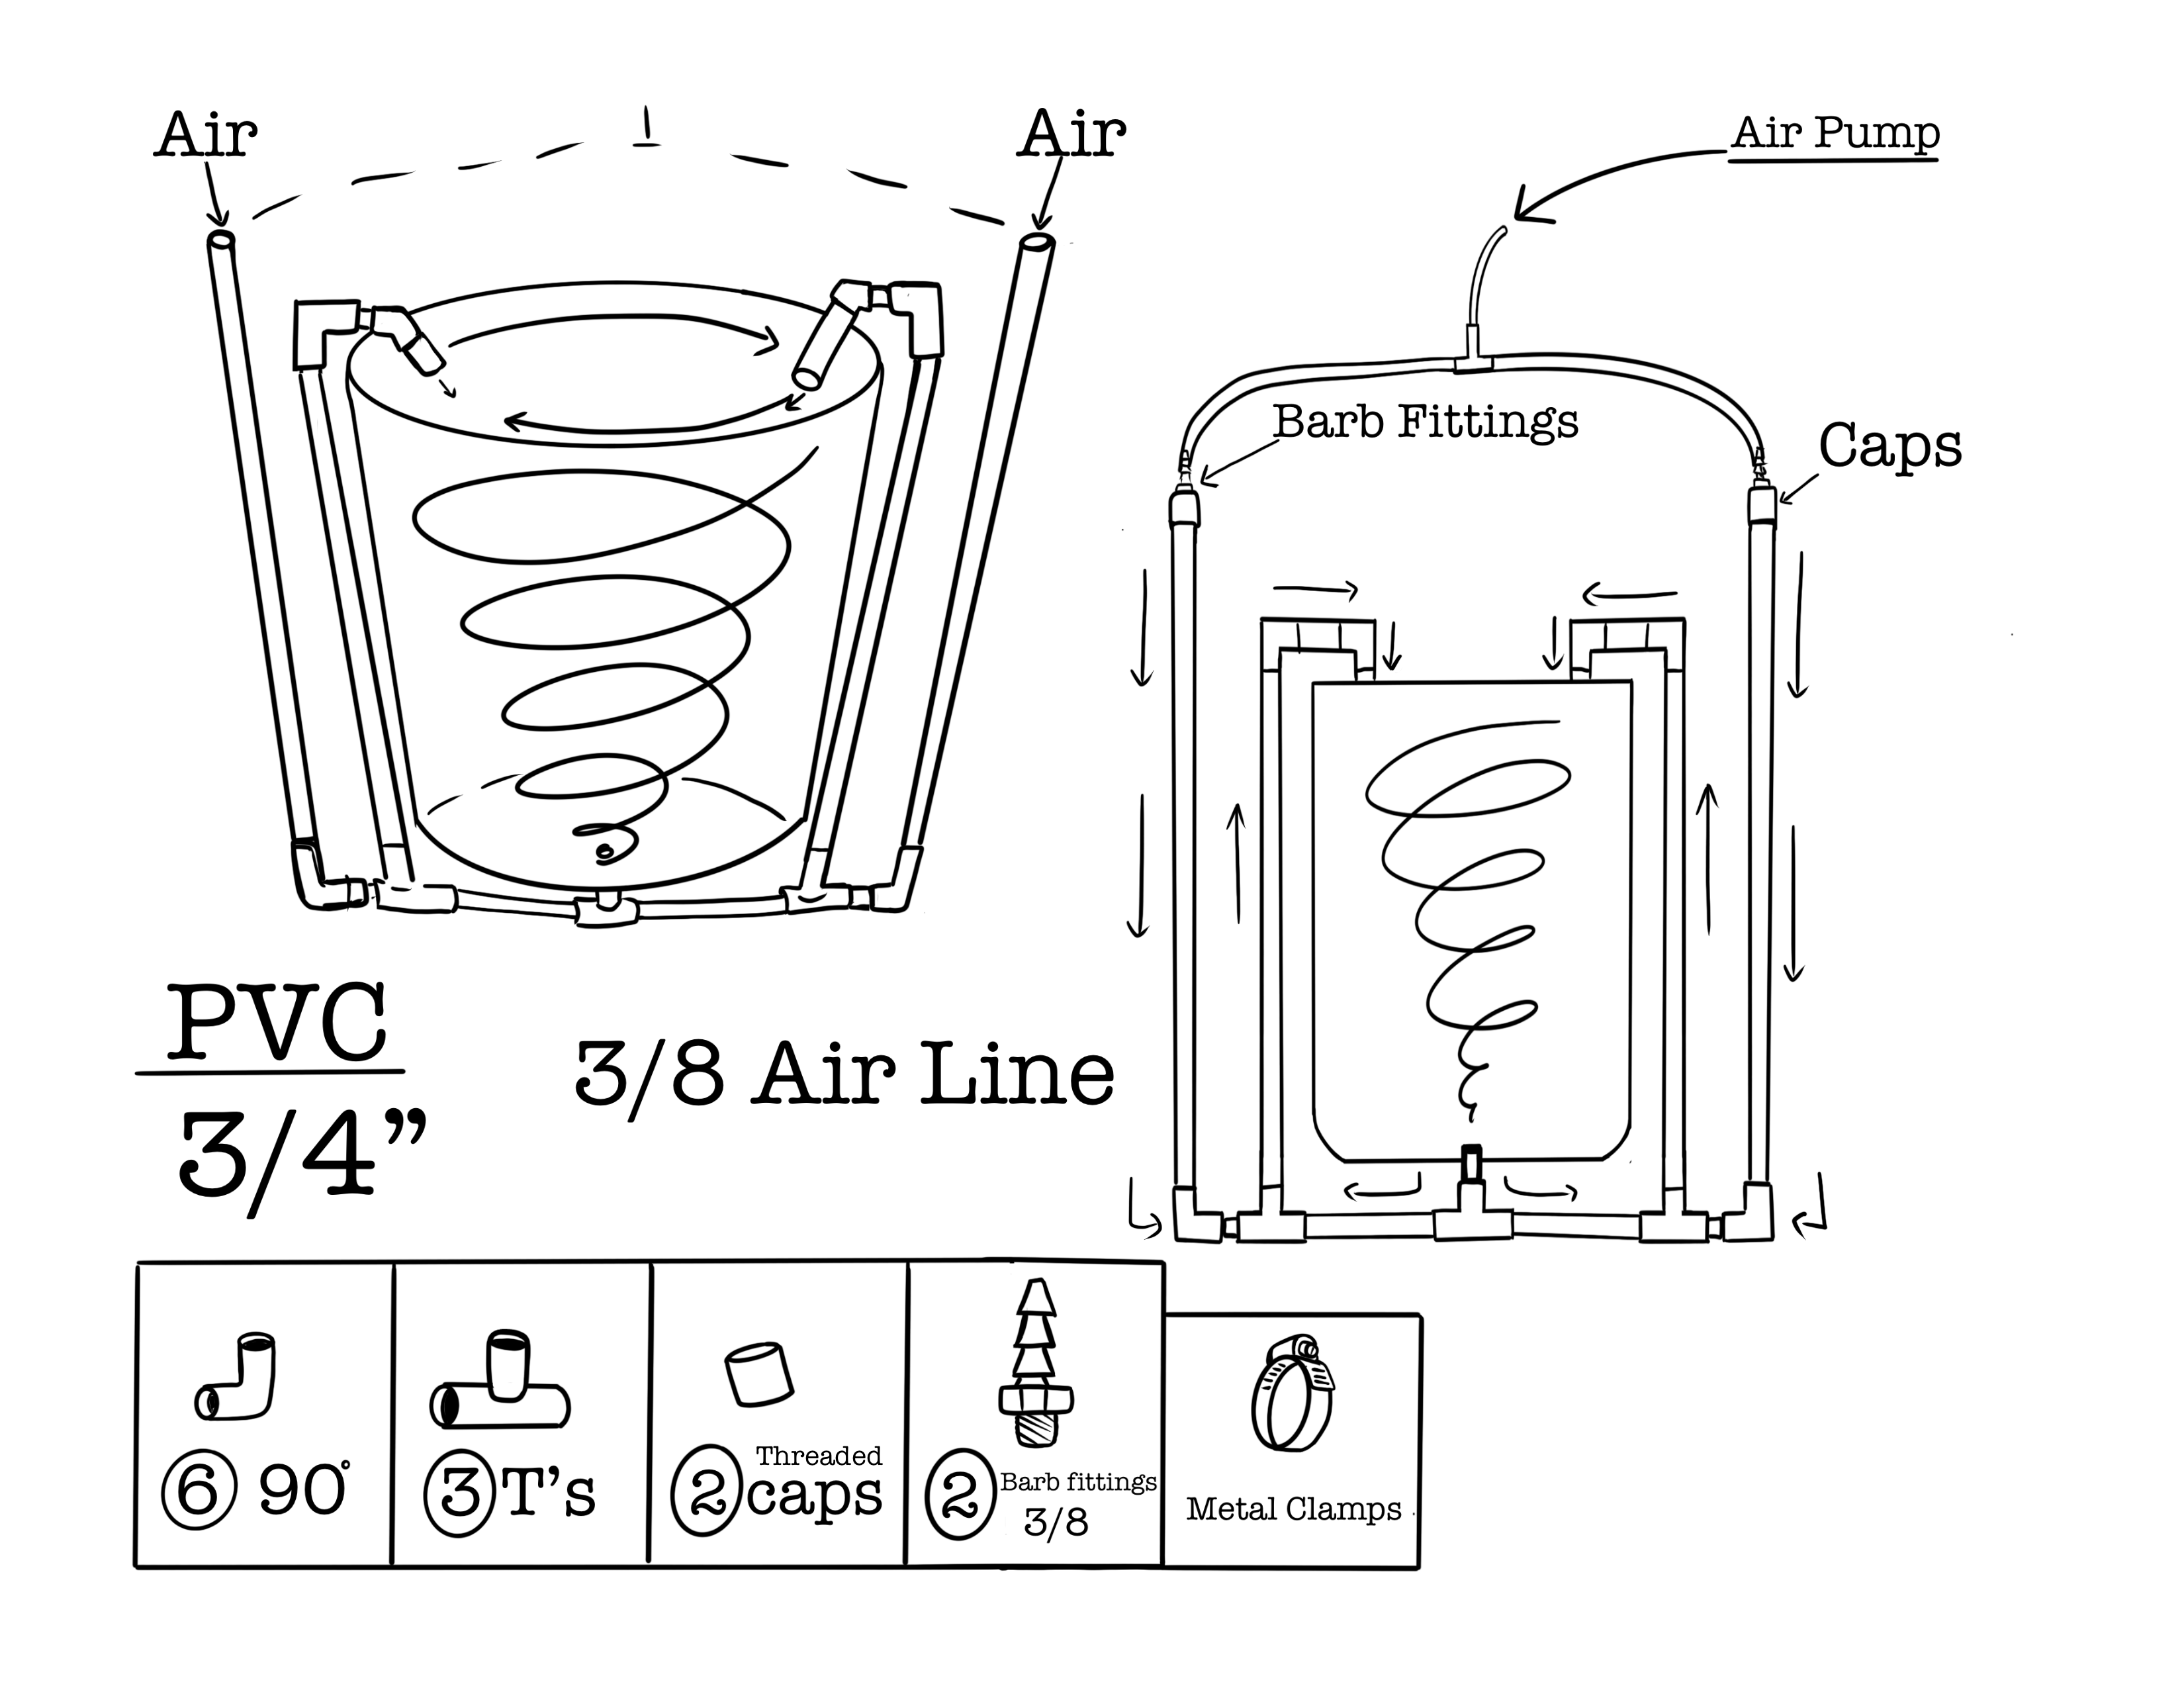 DIY vortex brewer requires a 36-gallon container and air pump, Image Credit: Rylan Kapuy
Directions
DIY vortex brewer requires a 36-gallon container and air pump, Image Credit: Rylan Kapuy
Directions: To brew a tea, complete the following steps:
- Step 1: Fill a 36-gallon container with water (leaving about 6-8” to the top, which is about 30 gallons). Using a vortex brewer or air pump, aerate for 24 hours (see Water Preparation).
- Step 2: After 24 hours, add tea recipe ingredients.
- Step 3: Stir counterclockwise and mix well.
- Step 4: Wait another 18-24 hours; no longer. When a tea is ready to be used, it should look foamy on top; it should look alive. This means it’s aerobic, or contains oxygen.
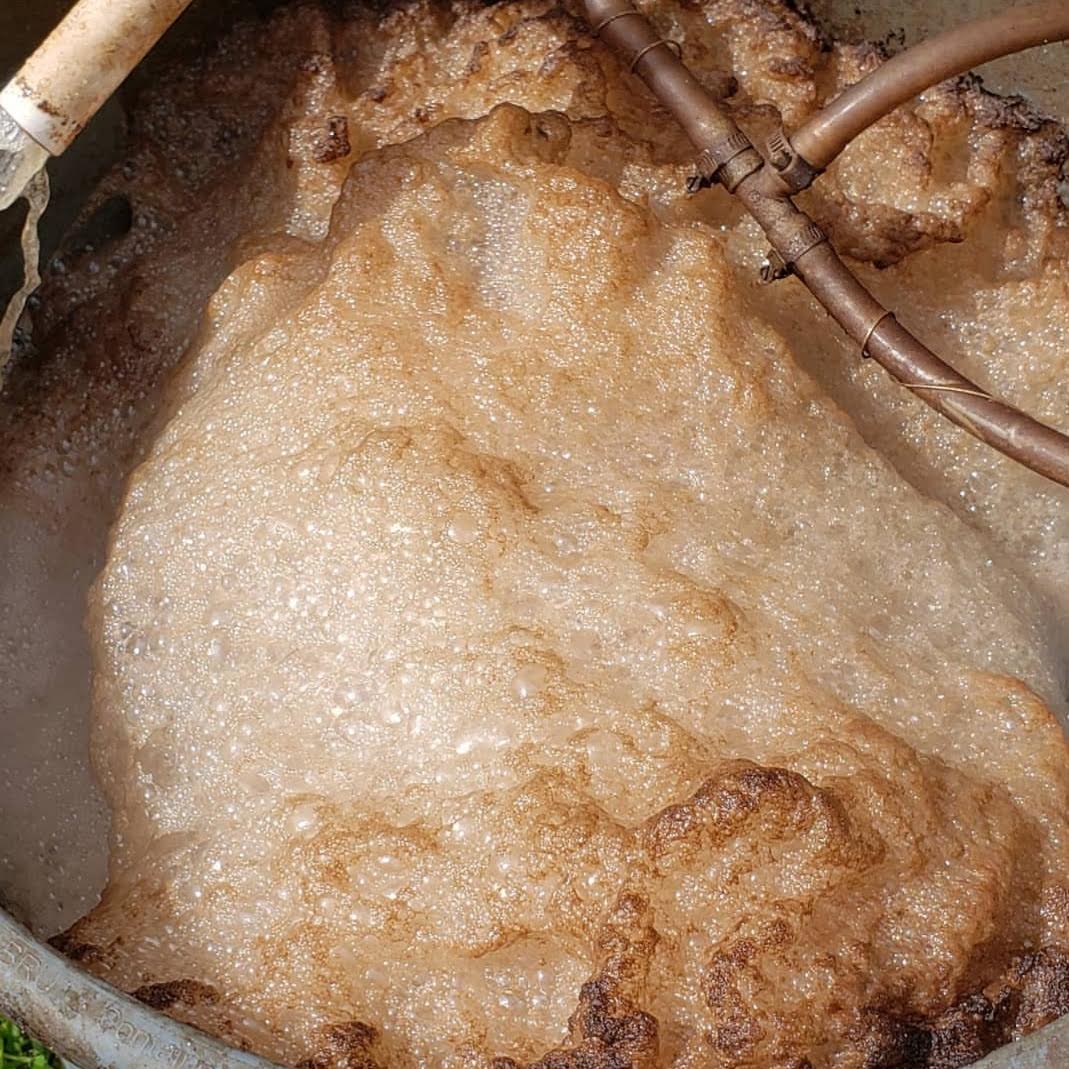 A tea should be foamy and full of life, letting you know it’s ready to use
Tips
A tea should be foamy and full of life, letting you know it’s ready to use
Tips: Some important things to know when it comes to brewing tea:
- If you don’t let your tea brew long enough, you won’t allow enough time for all of the microorganisms to come to life. You can use products such as URB Natural or Recharge to speed up the process.
- If you don’t add enough carbohydrates - the microbe’s food source - the organisms will die before ever reaching the soil, not producing the intended results.
- If you let your tea brew too long, it can encourage harmful results, like the presence of anaerobic bacteria.
- If the tea has been brewing too long, and goes bad, it will develop an unpleasant smell. Make sure to smell your tea directly after making it. This way, you'll know what good tea is supposed to smell like.
- If you do not use a vortex brewer, instead choosing an air pump, you will need to put the ingredients into a tea bag and then submerge it in chlorine-free water.
Make sure your tea brewer is in the shade while a tea is being brewed.
- If you are using Silica and you do not add it to the water first, before the other ingredients, it will not mix together as well. Add the Silica first.
Plant Booster Recipe
Week 4 seedling veg, rooted clones, up until 2 weeks before harvest
Every 2 weeks
🌱 12” organic aloe vera blade
🥥 1 Cup fresh organic coconut water
⚡ ½ Cup organic cane sugar
🍯 2 Tbs organic honey
💜 150 ml of @urbnatural
🌿 20 ml FPF @organicsalive
Directions:
- Step 1: Chop the aloe vera into small pieces.
- Step 2: Blend aloe, coconut water, and cane sugar until it is a smooth consistency.
- Step 3: Pour into a large cup and add Urb Natural and Organics Alive FPF.
- Step 4: Take the mixture and add it directly to your tea or nutrient mixture (15 gallons), stirring it in.
- Step 5: Immediately give to plants.
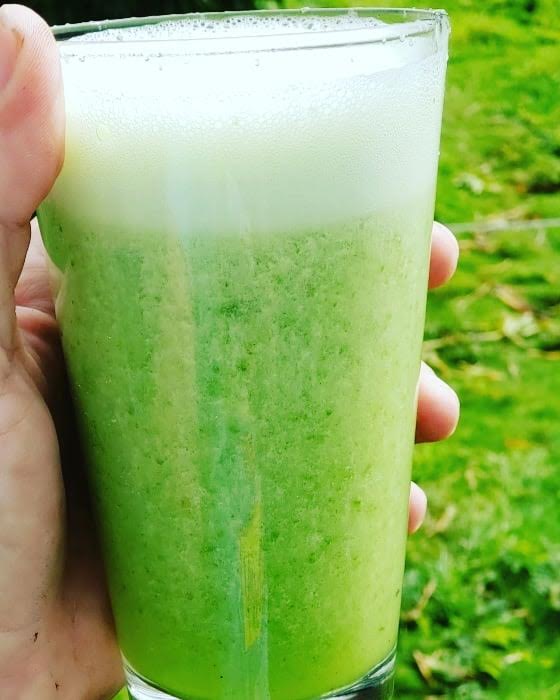 Plant booster ready to be poured into a tea and immediately given to plants
Application
Plant booster ready to be poured into a tea and immediately given to plants
Application: It is important to wait until the soil is in need of hydration before you give a plant any kind of tea. Once microbial life is established in the soil, tea recipes can be altered. If the soil is properly maintained with consistent moisture, the microbial life will flourish on its own. Letting soil dry out one time can decrease microbial activity, requiring additional inoculations.
The following measurements usually satisfy plants (all strains and phenos have different water absorption rates, so a water sensor is important when learning each plant’s needs):
- ¼ gallon for a plant in a 1-gallon pot
- ⅓ gallon for a plant in a 3-gallon pot
- ½ gallon - ¾ gallon for a plant in a 5 or 7-gallon pot
- 1 gallon for a plant in a 10-gallon pot
- 1-1 ½ gallon for a plant in a flower bed (depending on moisture meter reading)
- 3 gallons for a plant in a 30-gallon pot
--
Ideally you give the first bloom tea directly after transplanting to flower, or as soon as a plant's light cycle switches to flower. Feed with teas each time the soil needs liquid after that. For the best crop possible, apply a microbial tea every 2 days. To be able to accomplish this without oversaturating the soil, temperature, humidity, light intensity, and soil medium will need to be spot on. Unless it has a bloom cycle that's more than 10 weeks, discontinue the use of teas at 6-8 weeks of bloom, 2 weeks before harvesting, and use a light tea with just sugar and bone meal for the last 2 weeks of bloom.
Cleaning: Make sure to clean your brewing container after each use to eliminate the likelihood of acquiring any harmful bacteria. Cleaning it immediately after using the tea will provide the easiest, quickest cleaning time. If a container sits empty with tea residue in it, it will become increasingly more difficult to clean. To clean, simply use a scrub brush and environmentally-safe soap like Simple Green, and scrub the vortex brewer. Rinse well.
Tip: If you do not want to make your own vortex tea brewer, buying one from Organics Alive or Vital Garden Supply is recommended.
Topdressing
Veg and bloom
Week 2 of clone veg, week 4 of seedling veg, up until week 6 of bloom (discontinue topdressing at week 4 if it's an 8 week bloom or less)
Topdress every 2 weeks if feeding with teas 1x week
Topdress 2x month if feeding with teas every time the soil is dry
Another popular way gardeners feed their plants is by
topdressing the soil. This technique involves putting dry micronized or granular ingredients directly on top of the soil at the base of a plant. As the plant is watered, nutrients are broken down and released over time, becoming available for a plant to uptake.
To achieve the greatest results, make sure to use quality organic ingredients every time you feed your plants. You want the purest ingredients you can find. A few good brands that make topdressing amendments include Hendrikus Organics, Down to Earth, and Green Grow Nature's Pride.
Topdressing can be given along with the use of microbial teas; however, mastering the correct ingredients to use in each at the correct time is needed. If you will be using a topdressing mixture as the main food source, without teas, it is important to also apply the correct ingredients at the correct times to maintain good plant health. Do not topdress if you are feeding with bottles. Topdressing also shouldn't be used on smaller plants in hot soil.
When to topdress. Topdressing is a multi-purpose technique.
Reasons to topdress a plant include:
- Weekly topdress maintenance feeding
- A certain ingredient wasn’t available or you didn't add it when originally mixing the soil
- You need to correct a deficiency
- The plant is flowering, transplanting is not an option, and you want to boost the immunity of the plant
- You want to increase vigor
- You want to provide the plant and soil with extra nutrition at specific times when you know they need them, learned from previous rounds
- You’re using recycled soil
- To improve the health of a plant and reestablish a living environment after overwatering
Topdressing is effective when attempting to correct deficiencies because nutrients are being applied directly to the top of the root system. When using a topdressing mixture to correct a deficiency, you will need to first make an educated guess on what a plant is lacking, or what else may be wrong with it.
Signs that your soil might require extra nutrients will be noticeable in the health of the plant: yellowing leaves, purple stems (most common sign of a phosphorus deficiency related to a lack of calcium), slow growth, and decreased trichome production. Noticeable signs will also show up in the soil itself: inadequate aeration, absorption difficulties, and changes in overall texture, most likely caused by a diminishing amount of life inside it.
These signs are indicators that your routine and technique need altering for the next round, as a cannabis plant’s health doesn't typically improve once they reach a certain maturity. The younger the plant is, the easier and more likely you will be able to correct a problem.
With cannabis,
timing is everything. Your goal is to maintain peak health in a plant throughout its entire life. The result will give you the highest quality flowers.
Ingredients. The plant is your guide to determine what micronized or granular nutrients should be applied. For example, if you notice pests in your garden, like stem borers or spider mites, applying a topdressing of insect frass will help a plant better fight them off by increasing vigor. Insect frass works by triggering a plant to believe it is being attacked by pests, even though it may not be. This causes the plant to produce compounds that boost its immune system. Neem cake also works well to deter pests.
While applying a mixture of ingredients is common, it is also common to apply one ingredient as needed. Nutrients break down due to decomposition from water and microbial activity. Typically granular nutrients are slow release while micronized forms are immediate release. Slow release is best to use if you want the nutrients given over time
before a plant shows any sign of deficiency while immediate release is best to use when you need fast results, or a plant is
already showing signs of deficiency or distress.
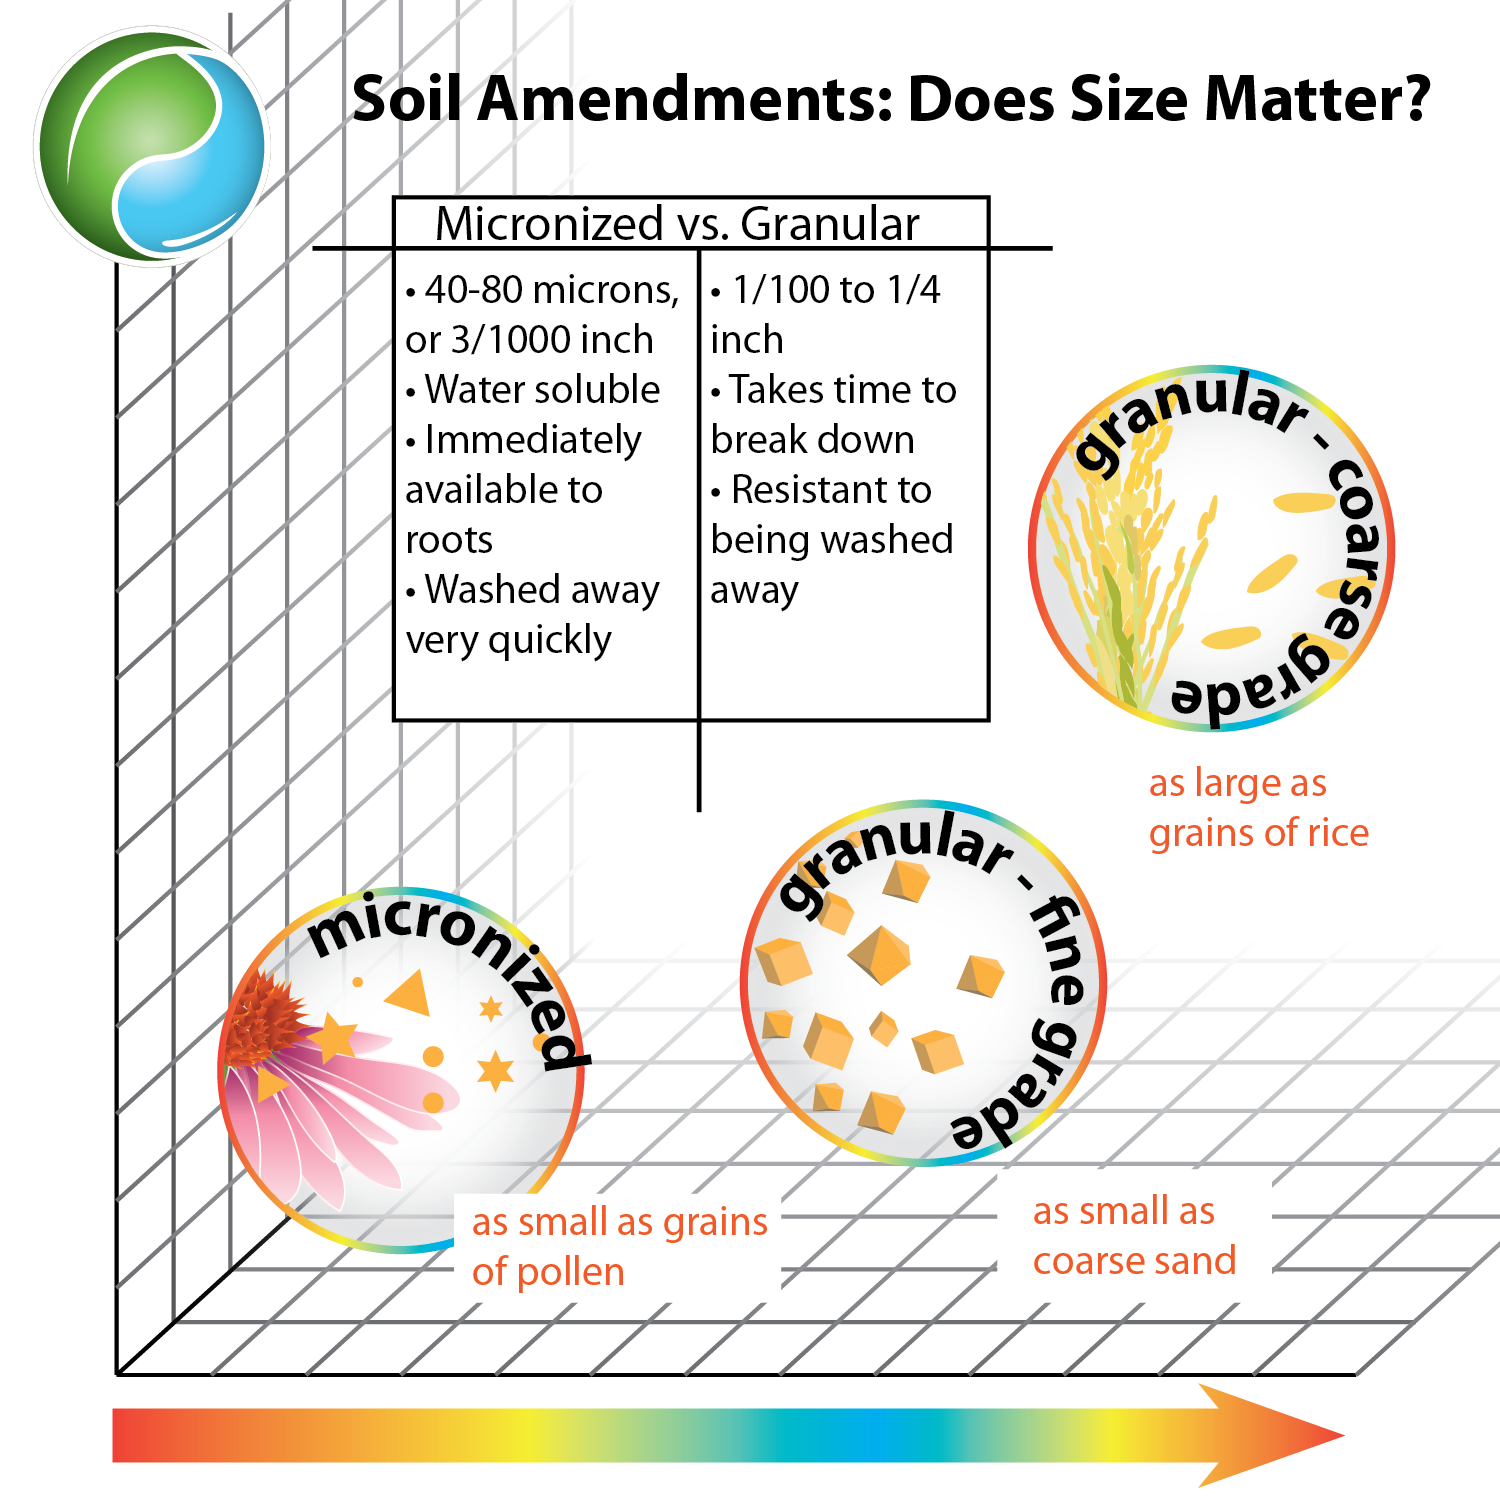 Image credit: Emily Nelson, Sustainable Plant Solutions LLC
Back to top
Ingredients to topdress with include:
- Alfalfa Meal - nitrogen, phosphorus, potassium, amino acids
- Azomite - iron, zinc, 70 trace minerals
- Cal-Mag - calcium, magnesium (for overwatered soil)
- Crab Meal - nitrogen, calcium, phosphorus, magnesium, trace minerals, chitin
- Feather Meal - nitrogen (veg only)
- Fish Bone Meal - calcium, phosphorus
- Glacial Rock Dust - potassium, calcium, iron, magnesium, trace minerals
- Gypsum - calcium, phosphorus, sulfur, overwatered soil
- Hendrikus Complete - macronutrients, micronutrients, microbial life (fungi and bacteria), humic, carbohydrates (for overwatered soil)
- Hendrikus Bouquet - phosphorus, potassium, microbial life (fungi and bacteria), humic, carbohydrates, (for overwatered soil)
- Insect Frass - to increase vigor, deter pests
- Langbeinite - potassium, magnesium, sulfur, chlorine
- Micronized Green Sand - potassium, magnesium, iron, silica, trace minerals
- Nature's Pride Grow - macronutrients, micronutrients (for overwatered soil)
- Nature's Pride Bloom - phosphorus, potassium (for overwatered soil)
- Nectar For The Gods One Shot - all-in-one
- Neem Cake - pest deterrent
- Silica Earth - silica
- Soft Rock Phosphate - phosphorus, calcium, magnesium, trace minerals
- Soil Enhancer - macronutrients, (for overwatered soil)
- Steamed Bone Meal - phosphorus, calcium
Please note: The above ingredients are recommended for correcting specific deficiencies and are not recommended to use all at once, but they can be mixed as needed. For example, Azomite, Nature’s Pride Grow, Soil Enhancer, and Silica Earth is a mixture that can be used to correct a nitrogen, phosphorus, cal-mag, or trace mineral deficiency. Or single ingredients can be used as needed. Cal-mag always helps with uptake in addition to Urb Natural or Recharge when a plant is experiencing a deficiency.
How to apply topdressing. Ideally you topdress a plant right before you need to water it. Simply add a custom mixture of dry micronized or granular ingredients to the top of soil, directly on top of a plant’s roots. Then water it or give it tea. It’s that easy.
Amount. How much of any particular ingredient to use heavily depends on whether or not you’re using amended soil, what size container a plant is in, if you’re feeding with teas, and how often you’re applying it. You can apply several of the ingredients at once or apply certain ones as needed by your plants. If using weekly, discontinuing topdressing 3 weeks or so before harvest to allow the amendments to fully breakdown.
For unamended soil:
- 1-5 Gallon Containers: Apply every other week, 1 Tbs (total) per gallon of soil media
- Beds: Apply every other week, use 1 Cup (total) per gallon of soil media
--
Recipe. If you're applying one mixture, the following recipe is recommended to use in addition to the Supa Soil mixture (
without the use of tea):
- Veg: Hendrikus Complete OR Nature’s Pride Grow + Soil Enhancer (1 Tbs of each per gallon of soil)
- Bloom: Hendrikus Bouquet OR Nature’s Pride Bloom + Soil Enhancer (1 Tbs of each per gallon of soil)
Results. You know if a plant is happy with a topdressing feeding regimen by overall health. To determine if a plant has recovered from a deficiency, check the new leaves and make sure you don’t see an increase in leaves displaying brown spots, yellowing leaves, or other obvious signs of deficiencies. On average, it should take a few days to a week before you see improvements in plant health; you shouldn’t, however, see a plant's health worsen. If a plant is still showing signs of deficiencies 7-14 days after topdressing, it may need to be fed with an organic tea to boost microbial life.
Foliar Feeding
Veg only
Week 2 of clone veg, week 4 of seedling veg, up until 1 week before bloom
Foliar feeding is when a liquid mineral solution is applied to the leaf epidermis (surface). Foliar feeding can be effective at resolving deficiencies if a plant’s roots are unhealthy. Most of the time, it’s used as a way to boost plant health. Kelp, aloe, and cal-mag are more beneficial when applied via a foliar spray. You can foliar feed in addition to giving teas, topdressing, or using bottles. We recommend avoiding foliar feeding during bloom (unless it's Organics Alive) and to discontinue a minimum of 1 week before flowering.
Recipe
Veg only, up until 1 week before flower, spray at dark
2-3 times per week
A great recipe to use for foliar feeding is:
- 1 tsp Aloe
- ¼-½ tsp Organic Cal-Mag
- ¼ tsp Silica
- ¼ tsp Recharge OR 1 tsp Cold Pressed Liquid Kelp
Directions:
For 1 gallon chlorine-free water
--
1. Blend ingredients together
2. Add 1 gallon of chlorine-free water to a pump sprayer or to sprayer of choice
3. Add the blended aloe mixture to the pump sprayer and shake well
3. Spray on all surfaces of a plant’s leaves
4. Avoid spraying plants in light, making sure to keep a close eye on humidity levels
Foliar feeding is not necessary, but a quick way to enhance plant health in veg. Foliar feeding is also a simple way to help increase humidity levels in a greenhouse or grow room if needed. In addition, it can be used as a water source for beneficial predators and spraying prior to releasing those predators (e.g., lady beetles) encourages them to linger. It can also be used to help cool a plant down when temperatures are high.
Korean Natural Farming (KNF)
Korean Natural Farming focuses on using indigenous microorganisms to create healthy soil without the use of pesticides. Utilizing KNF techniques and practices, you can make your own nutrients by fermenting foods, spices, and other ingredients. This method improves soil structure and loaminess, attracting earthworms and beneficial organisms, and thereby improves the health of a plant that’s growing in that soil.
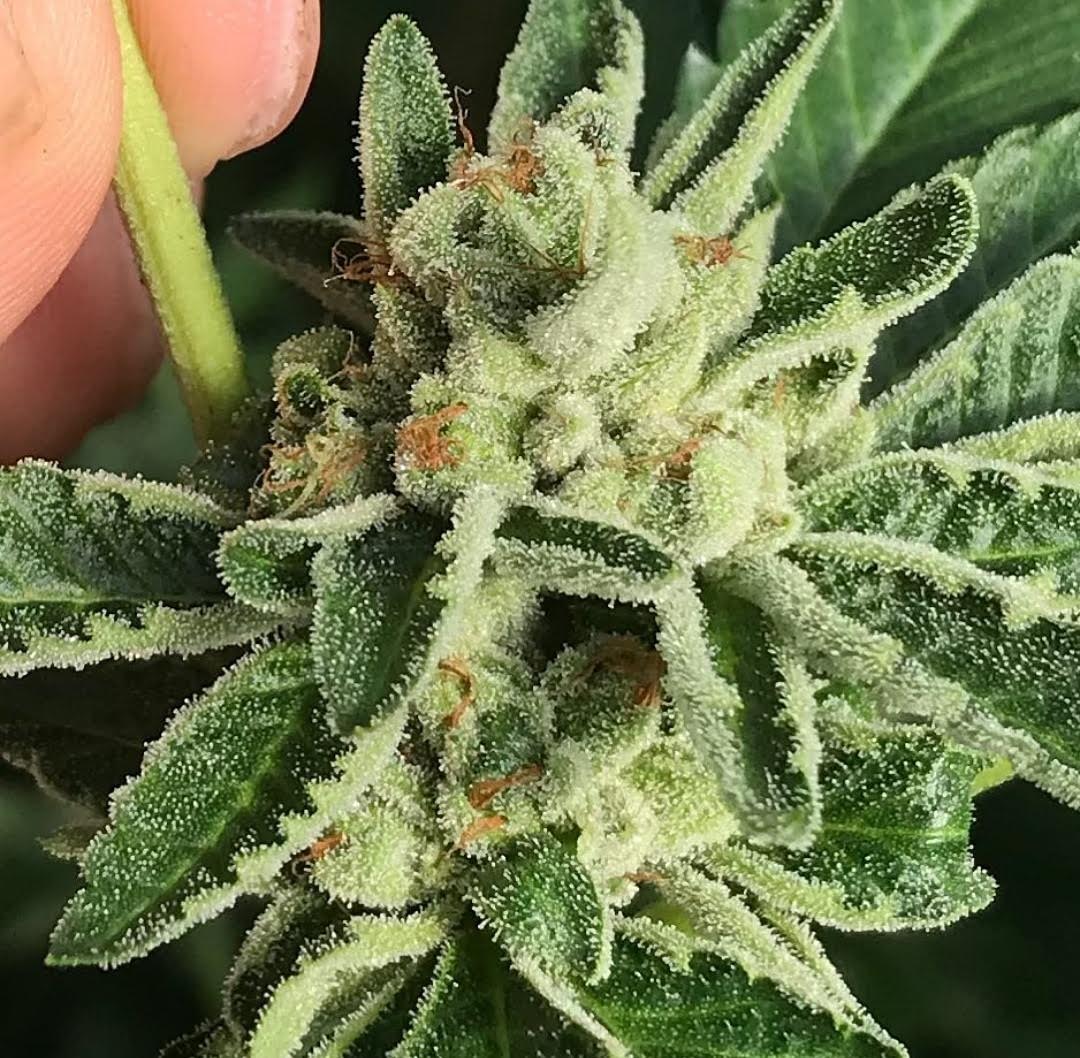 KNF techniques are worth incorporating in any organic garden
Due to the amount of time it takes to combine and ferment nutrients, KNF is not for everyone; however, there are a few techniques that are worth implementing due to the benefits they have on soil and plant health. Based on the teachings of Master Cho, the following KNF farming methods are recommended to incorporate into your garden:
How To Make Lactic Acid Bacteria (LAB)
Recommended for transplanting and veg; do not use too often
Lactic acid bacteria are a type of bacteria that produce lactic acid as a result of the fermentation of carbohydrates. Reasons to use LAB include:
- LAB accelerates the growth and development of root systems especially after transplanting
- LAB improves plant health in veg and bloom
- LAB improves nutrient availability in soil
- LAB improves disease tolerance
- LAB replenishes the composition of soil, making it soft and fluffy
To make LAB, you’ll need:
- 2 glass jars (1 small, 1 large)
- Paper towels
- Rubber band
- 4 Cups brown rice
- 2 Cups water
- Milk (unprocessed, if you can find it)
Step 1: Make rice-washed water. Pour 4 cups of uncooked brown rice into a large bowl with 2 cups of water. For the goodies we’re looking for, stir rice vigorously to thoroughly separate and agitate the grains, then strain the water into a container.
Step 2: Pour rice water into a small jar. Leave the top ⅓ of the jar empty. Cover the jar with a paper towel, securing it with a rubber band.
Step 3: Wait 3-4 days. Place the jar in a cool, dark area for 3-4 days. The environment should be undisturbed and maintain a consistent temperature around 73-77F, 23-25C. At this point, the mixture in the jar should begin smelling sour. After the fermentation period, the mixture will have settled and separated into 3 parts. The middle, clear layer is the part you want. Collect by whatever means is easiest for you.
Step 4: Fill a large jar. Pour a 10:1 milk:rice water ratio of unprocessed milk and rice water into a large jar, filling ⅔ of the jar and let it sit at 73-77F, 23-25C.
Step 5: Wait 5-7 days. After about a week, the mixture should again appear separated, this time into 2 different layers. The top layer is a cheesy substance and the bottom layer is the LAB, which should be light yellow in color.
Step 6: Remove the cheese. You do not need the ‘cheese.’ Simply spoon it off and discard. Once most of the ‘cheese’ has been removed, filter the LAB through a fine-screened strainer or cheesecloth.
Step 7: Store. Keep the LAB in a cool, dark place, with a consistent temperature around 33-59F.
Step 8: Use it. Raise LAB to room temperature. To do that, add an equal part (1:1) of brown sugar and mix with a wooden spoon. Add 3.5 oz of LAB to a 30-gallon (1:1,000/LAB:water) tea mixture directly before feeding plants.
How To Collect Indigenous Microorganisms (IMO)
Best done in warmer months, at least 4 weeks before needing
This is an involved, multi-step process; read through IMO #4 before deciding to commit
Recommended for soil, can replace bokashi
To collect IMO, you will need the following:
- Cedar box (4-6” tall x 12” long x 10” wide) or small basket
- 2-4 Cups steamed and cooled white or brown rice or rye
- Paper towels
- Large rubber band that will fit around the cedar box
- Breathable container (like a large basket)
- Marker to indicate the location (like brightly-colored ribbon)
- Water (if needed)
- Warm water bottles (if needed)
Step 1: Choose an ideal location. A good location to collect IMO is an area that is slightly barren, has little disturbance from people or animals, and receives adequate sunshine. Just inside of a deciduous forest line above farmland (500ft) is ideal. In the summer, southern-facing areas are favorable, while in the winter, northern-facing areas are favorable. Make sure to avoid areas with excessive moisture as this can be home to anaerobic microorganisms.
Please note: If you have a yard filled with plants and trees, you can collect IMO on your property, but it is not ideal. Compost all healthy cannabis leaves and stems with bokashi in a cool, dark location (under a tree protected from the wind). This will naturally attract the beneficial IMO if it’s not indoors or freezing. Other vegetable waste can also be incorporated.
Step 2: Prepare the container. Loosely fill the wooden box or small basket ¾ of the way up with the cooked rice or rye. Then cover the container with a paper towel and secure it with a rubber band.
Step 3: Cover the container with leaves. Place the cedar box or basket by the roots of a plant that makes sugar; for example, bamboo, rice, or lawn grass. It’s best if the plant(s) has recently been harvested. The container will need to be buried in leaves. Selecting a location that has soft soil is recommended. Soft soil is often found under fallen leaves that have been there awhile, providing moisture content and fungal presence. You are looking for a mixture of moist, decomposing, and dry leaves. Place the container on top of the soft soil in a shallow hole and cover it with the fallen leaves, forming a leaf pile on top of the cedar box or basket. The leaves should not be so heavy that they cause the paper towel to touch the rice. Then mark the spot so it is easy to find after a couple of days.
- To discourage animals from digging up the container in search of the rice, place a large basket or breathable container over the top of the buried box or basket and fallen leaves.
- If conditions are extremely dry, wet the ground around the box or basket with water.
- If conditions are extremely cold, the rice will freeze. To discourage freezing, bring fallen leaves into a warmer area, like a greenhouse, and bury the container there. At night, place warm water bottles on the ground around the container and under the fallen leaves.
Step 4: Wait. In the summer months, it can take as little as 2 days, but could take as many as 10 days for microorganisms to appear. The cooler it is, the longer it will take, with winter months taking around 2 weeks.
Step 5: Check the container. After the correct amount of time has passed, uncover and check the container. Check on it 2x a day after day 3. You know you have successfully collected IMO when the container is filled with a white fuzzy substance;
aerobic microorganisms. Do not let an almost full container of IMOs sit in direct sunlight or they will spoil.
Step 6: Take it home. If the container is more than ⅓ of the way full, it is worth taking back to your garden. Often, anaerobic microorganisms will be living in the container, appearing as blue, red, or black areas. It is OK if there are only a few small sections; they can be removed, but if most of the container is covered with them, you’ll have to start over with a fresh container. Once successful, you have what is known as IMO #1. If you do not see much activity, change locations and try again.
How To Make IMO #2
Takes 2 weeks to reach IMO #4
For the next step, you will need the following:
- IMO #1
- Glass or clay jar with lid
- Brown sugar
- Rubber band
- Paper towels
- Rice straw
Step 1: Mix the ingredients. In a 1:1 ratio based on weight, combine the IMO #1 with the brown sugar.
This will need to be made immediately after collecting the microbes, or IMO #1.
Step 2: Place in the jar. Put the mixture into the glass or clay jar, ⅔ of the way full.
Step 3: Cover the jar. Place a paper towel over the jar and secure it with a rubber band.
Step 4: Let it ferment. Place the jar in a location with a temperature of 73-77F, 23-25C. Pay close attention to the temperature during fermentation, aiming for consistency. Cooler seasons and weather will increase the time it takes for successful fermentation. As the mixture ferments, the internal temperature of the jar will rise to 104F, 40C, taking on a thin, oatmeal-like consistency. This will take around 1 week in ideal conditions. If it is spring or fall, it will take a little longer and stirring the mixture once each morning may be needed.
Step 5: Store it. Keep it in a place with a temperature between 33-59F, 1-15C. Make sure there is adequate air circulation. Cover the glass or clay jar with rice straw, on top of the paper towel, and then cover it with a lid. Check the mixture for bubbles during storage.
You do not want to see bubbles. Bubbles indicate that the IMO are becoming less effective.
How To Make IMO #3
For the next step, you will need the following:
- IMO #2
- 5-gallon bucket
- Chlorine-free water (see Water Preparation)
- 50lb bag of wheat bran
- 2-3 teaspoons Organics Alive FPJ OR brown rice vinegar, OR apple cider vinegar
- 2-3 straw mats
Step 1: Find a spot ideal for fermenting. Flat, barren ground is recommended. Make sure the location remains shaded throughout the day and can’t get rained on.
Step 2: Add IMO #2 to water. Take the IMO #2 rice mixture and add it to a 5-gallon bucket filled ¾ of the way up with chlorine-free water.
Step 3: Add IMO #2 water to wheat bran and mix. Find a place to dump the wheat bran out, emptying the bag into a pile. Add the 5-gallon bucket of IMO #2 water and the fermented plant juice (FPJ) to the pile of wheat bran, mixing well with a shovel or your hands.
Step 4: Cover the mixture. Place the straw mats over the pile, making sure the entire pile is covered. If needed, weigh the mats down with rocks or something heavy so they don’t blow off.
Step 5: Wait 5-7 days. Let the mixture sit in the shade for about one week at room temperature, aiming for around 65-70F, 18-21C. You should begin to see white hyphae forming on the pile. Use a shovel to periodically turn the mixture, which should become hot (around 140F, 60C, and then recover it with the straw mats. As the mixture ferments, it will form into clumps, known as IMO #3.
How To Make IMO #4
--
For the next step, you will need the following:
- IMO #3
- Amended soil
Step 1: Mix IMO #3 with soil. To add beneficial microorganisms to a garden, simply take the IMO #3 wheat bran mixture and add it to your amended soil. Once IMO #3 is added to soil and mixed together, it is known as IMO #4, the ultimate goal of this entire operation.
Step 2: Keep the IMO healthy. Keep the microorganisms active by keeping the soil moisture balanced and providing teas.
Back to KNF
Feeding A Plant With Bottled Nutrients
Veg and bloom
Week 2 of clone veg, week 4 of seedling veg, up until 2 weeks before harvest
If you are new to growing cannabis, or don't have a lot of time to dedicate to gardening, using bottles will make things easier. Currently, because many bottled nutrients have additives that have negative effects on the health of the soil - not to mention, contribute to landfill problems - it's not really a good long-term feeding option. If you do decide to feed with bottles, it’s best if they are organic. To ensure it’s an organic brand, make sure to research the source it comes from. Some bottles are labeled organic and actually aren't, while others have no official organic labeling, but might be. Examples of organic certifications are OMRI and CDFA.
Most bottled nutrients have three numbers on the front label, which tells you the percentage (by weight) of nitrogen (N), phosphorus (P), and potassium (K) in the solution. If you buy several products for your recipe, you will need to add the numbers to ensure you’re not including too much of a particular nutrient. For example, if one bottle reads 8-5-4 and another reads 5-3-4, after mixing them together, you would be giving your plants a nutrient solution of 13-8-8. This means you are giving 13% nitrogen, 8% phosphorus, and 8% potassium. The remaining ingredients or percentages are fillers.
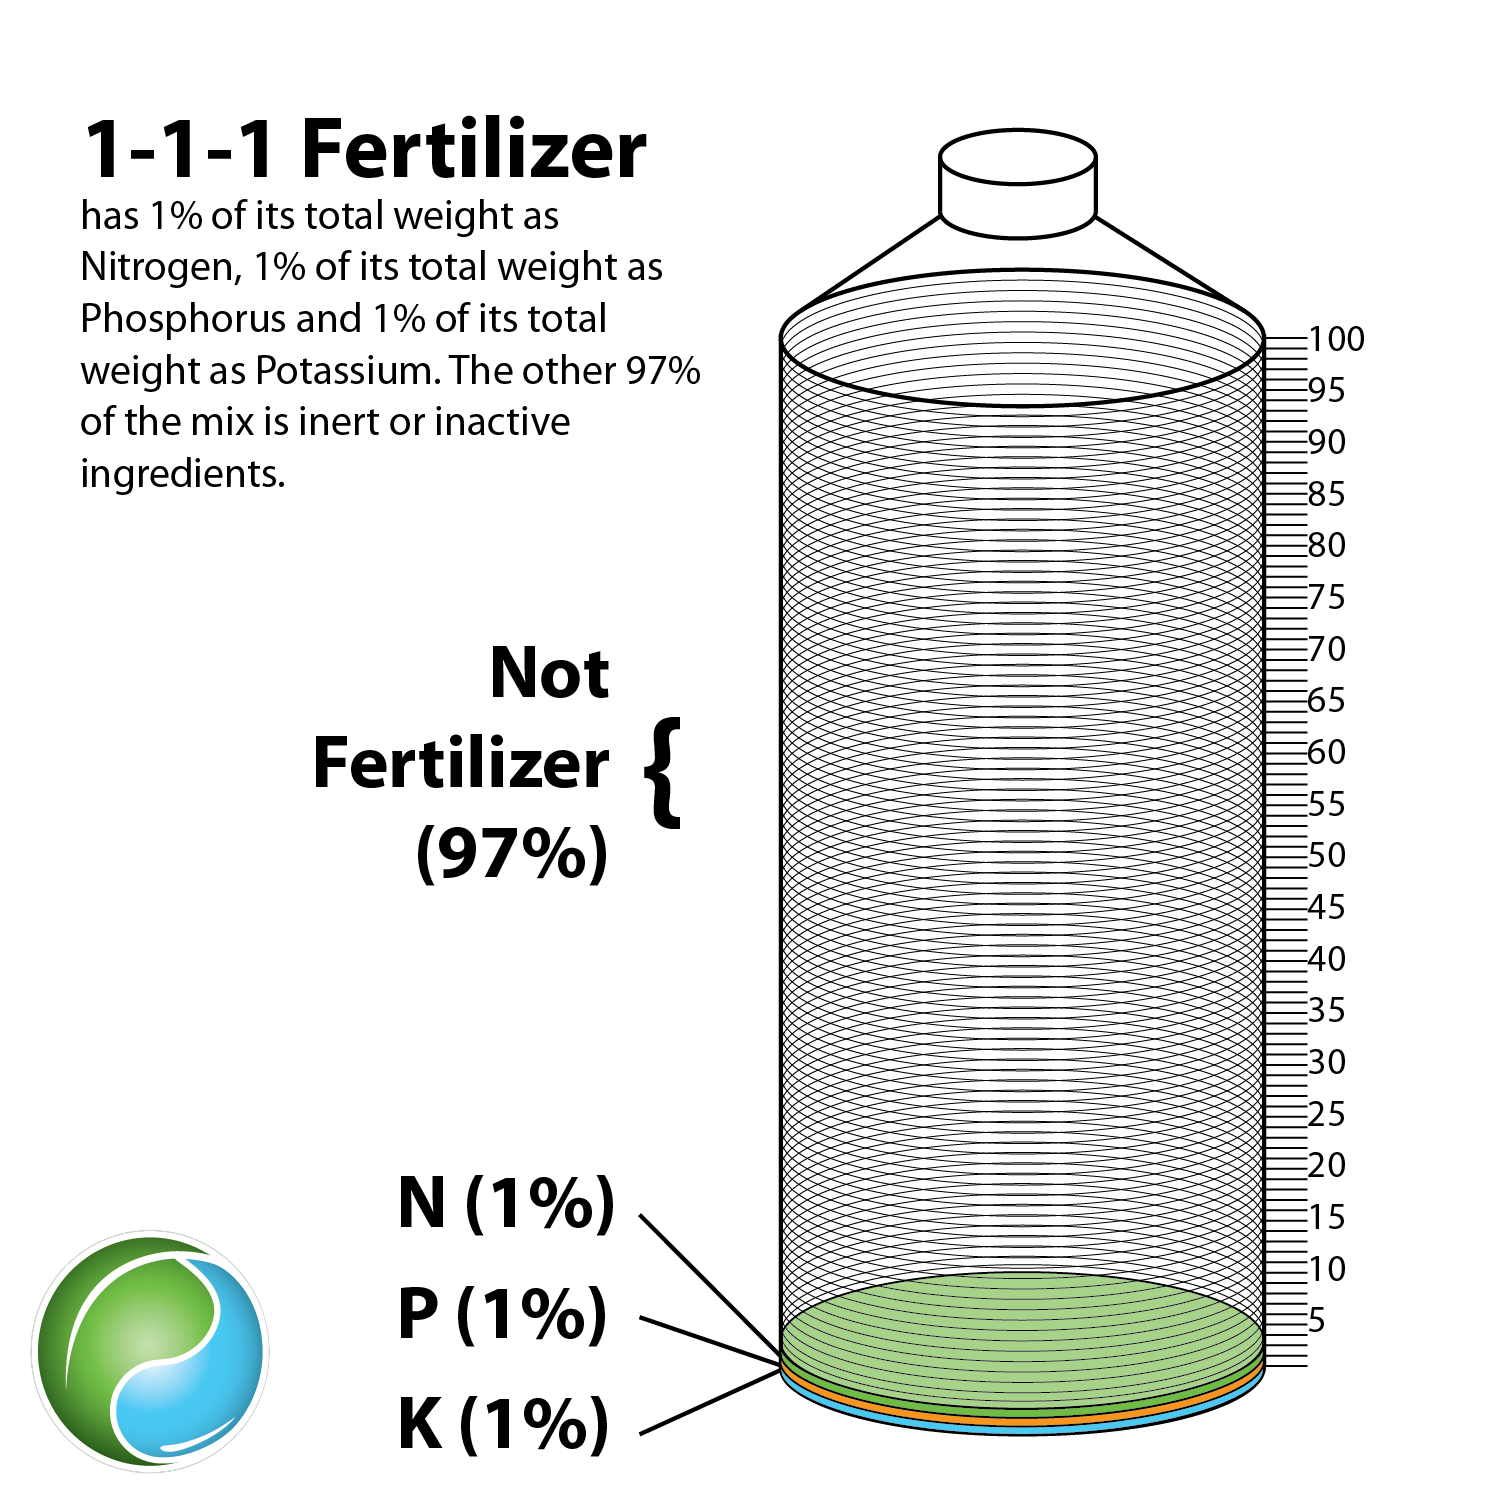 Image credit: Emily Nelson, Sustainable Plant Solutions LLC
Back to top
For organic granular fertilizers, numbers tend to be smaller; for example, 2-2-2. Numbers for these amendments are reflective of immediately available nutrients. Many organic ingredients are not readily available, but will be released over time as soil microbes process and release them. This is a way to slowly give nutrients to your plants, allowing them to have access to nutrients throughout their lifetime.
In veg, you want a higher nitrogen number than in flower. For bloom, the nitrogen number shouldn’t be too high, but a plant should have high enough amounts of potassium and phosphorus. Anything over 22 for any of the nutrients is approaching excessive, with numbers 14(N)- 16(P)-18(K) in the ideal range.
Bottles are typically used with a good soil recipe, without topdressing or teas. Several companies have complete liquid lines of nutrients. Some good organic brands include Roots Organic, BioBizz, Vital Garden Supply, and Nectar For The Gods (derived from organic materials, however, not OMRI certified).
Recipe For Vegging Plants
Week 2 of clone veg, week 4 of seedling veg, up until bloom
When you think about creating or using a food recipe for a young plant, you'll need to consider that it is going through vegetative growth. Nitrogen is needed, as well as other ingredients that encourage proper development of the roots, leaves, and branches.
Here’s a blend of nutrients that satisfies most varieties in veg:
Nectar For The Gods All-In-One Recipe
Per 5 gallons of chlorine-free water, veg and bloom
- 17 Tbs/1 Cup Herculean Harvest
- 4 Tbs Photosynthesis Plus (Microbe Life)
- 4 Tbs Aphrodites Extract
- 4 Tbs Demeter's Destiny
- 4 Tbs Athena's Aminas
- 4 Tbs Pegasus Potion
- 4 Tbs Medusa Magic
- 4 Tbs Triton's Trawl
- 4 Tbs Gaia Mana
- 4 Tbs Kraken
- 2 Tbs SFL 100 or Hygrozyme
- 2 Tbs Zeus
- 4 tsp True Silica
- 1 tsp URB Natural OR Recharge
- Earth Juice pH Up or Down (as needed)
pH: 6.2-6.4
PPM: 600-800 ppm (0.7 - 1.0 ec)
Mixing
Here are the steps for mixing both veg and bloom food to help your garden perform at its best:
1.
Prepare a reservoir: It’s easiest if you have a large clean trash can or container to mix everything in; for smaller gardens use a 5-gallon bucket. With a chlorine filter attached to your water source, fill the container up with water. For 10 plants that are 3-6’ tall in 4’x4’ beds, you'll need about 5-10 gallons per feeding. If you don't have a chlorine filter, aerate the water for 24 hours (see Water Preparation). This ensures your water is chlorine-free.
2.
Add the ingredients: Once your water is ready, add the silica first followed by the nutrients. Just like when you’re baking, you need to pay close attention when measuring the ingredients and make sure you put in exact amounts of each.
3.
Check the pH and PPM: Give your mixture a good stir counterclockwise and then get your meters out. You’ll want to check the pH value (acidity and alkalinity) and the parts per million (how concentrated the mixture is). For all cannabis plants, food mixtures should have a pH of 6.2 to 6.4. For seedlings 7 nodes tall and cuttings, you’re looking for a ppm between 200 and 400. For vegging plants, you’re aiming for a ppm reading of 600 to 800 (0.7-1.0 EC). And for flowering plants, you’re looking for a ppm between 800 to 1,000 (1.5-1.7 EC).
Tip: It’s important to use the food mixture within an hour of mixing it, otherwise, the pH levels are at risk of shifting up or down due to a lack of oxygen. Making certain that your plants are being fed the right nutrients, the right quantities, and at the right times will greatly influence the quality of your flowers.
Feeding/Application
Time of day: For the best results, feed at first light or lights on (indoors), or at least 5-6 hours before sunset or lights off. This will give a plant enough time to uptake and distribute the nutrients as it goes through that day’s light cycle, also allowing the soil to dry out a little before darkness, discouraging mold and harmful fungal growth. The ideal moisture level reads 100 millibars on the Blumat moisture meter.
Amount: Be aware of how much food you give to each plant. While it might seem like feeding a cannabis plant more will increase the flower size and overall yield, this just simply isn’t true. Overfeeding can cause burn, plant abnormalities, and even death. It is another common mistake new growers make. Underfeeding on the other hand, will also hinder their development, lowering quality and yield.
The following measurements usually satisfy plants (all strains and phenos have different water absorption rates so a water sensor is important when learning each plant’s needs):
- ¼ gallon for a plant in a 1-gallon pot
- ⅓ gallon for a plant in a 3-gallon pot
- ½ gallon - ¾ gallon for a plant in a 5 or 7-gallon pot
- 1 gallon for a plant in a 10-gallon pot
- 1-1 ½ gallon for a plant in a flower bed (depending on moisture meter reading)
- 3 gallons for a plant in a 30-gallon pot
Consistence: Plants need food based on how big they are and what stage of life they’re in. Smaller, vegging plants require less nutrients, but may need liquid more often, while bigger, flowering plants require an increased number of nutrients and amounts, but may not need quite as frequent applications. If you are growing more than one plant per container, you may need to feed more frequently as well.
When deciding on how often you should feed your cannabis plants, consider:
- the age of the plant
- how big of a container the plant is in
- what medium is being used
- relative humidity levels, temperature, and air circulation
- the environment and season you’re growing in
Recipe For Flowering Plants
Day 1 of bloom up until 2 weeks before harvest
As soon as your light cycle changes, initiating the flowering cycle, the food recipe should also change. Ideally, your garden should be fed with a premium mixture of organic nutrients a few times a week when the plants are going through the flowering stage.
Ingredients
Feeding a plant in bloom is a little different than when it's in veg. During this time, a plant stops focusing energy on leaf and branch development and begins focusing on flower production. Less nitrogen is required while increased amounts of other nutrients like phosphorus and calcium are needed.
Here’s a blend of nutrients that satisfies most strains that are in the flower cycle:
Nectar For The Gods All-In-One Recipe
Per 5 gallons of chlorine-free water, veg and bloom
- 17 Tbs/1 Cup Herculean Harvest
- 4 Tbs Photosynthesis Plus (Microbe Life)
- 4 Tbs Aphrodites Extract
- 4 Tbs Demeter's Destiny
- 4 Tbs Athena's Aminas
- 4 Tbs Pegasus Potion
- 4 Tbs Medusa Magic
- 4 Tbs Triton's Trawl
- 4 Tbs Gaia Mana
- 4 Tbs Kraken
- 2 Tbs SFL 100 OR Hygrozyme
- 2 Tbs Zeus
- 4 tsp True Silica
- 1 tsp URB Natural OR Recharge
- Earth Juice pH Up or Down (as needed)
pH: 6.0-6.4
PPM: 800-1,000
Feeding/Application
Time of day: Again,
feeding in the morning is best. This gives the plant plenty of time to uptake nutrients as it goes through that day’s light cycle and also limits the chances of mold. If you choose to feed throughout the day, give the last liquid amount at least 5 hours before the dark cycle.
Amount: Taller plants with more leaves and branches have more developed root systems and are in bigger containers when they reach the flower cycle; they will require more liquid at each feeding. (It is dramatically more exciting to check on a flowering plant’s development as you get to see the amazing changes in the flowers you’ll soon be harvesting!)
The following measurements usually satisfy plants (all strains and phenos have different water absorption rates so a water sensor is important when learning each plant’s needs):
- ¼ gallon for a plant in a 1-gallon pot
- ⅓ gallon for a plant in a 3-gallon pot
- ½ gallon - ¾ gallon for a plant in a 5 or 7-gallon pot
- 1 gallon for a plant in a 10-gallon pot
- 1-1 ½ gallon for a plant in a flower bed (depending on moisture meter reading)
- 3 gallons for a plant in a 30-gallon pot
Consistence: Just like vegging plants, the soil will let you know when food is required. Remember to pour the nutrients on the soil evenly and slowly, and be aware of how much food you give to each plant. When deciding on how often you should feed your cannabis plants, be conscious of the variety and environment you’re growing in.
Working with the exceptional soil recipe you mixed, the food should supply the plant with the remaining nutrition it needs to be healthy. Every strain is slightly different, so again, keep an eye out for deficiencies and adjust amendments as needed.
Tip: For improved taste, cannabis plants should be given a light tea or only water, no food, the last 14 days or so before the end of their flower cycle, and be completely deprived of liquid altogether the last 48 hours before harvest. This will enhance both the flavor and aroma of your flowers.
--
Keeping Plants Properly Fed
Properly growing and caring for cannabis is a delicate and somewhat demanding responsibility. There’s a big learning curve and not everyone who attempts growing cannabis succeeds. Many times, the good growers are separated from the mediocre ones simply by the amount of effort they’re willing to put into their gardens. Feeding your plants consistently and properly is one more step towards achieving results you’ll be proud of; it’s one more step towards ensuring that your garden is performing ideally.
Chapter 6: Deficiencies & Excesses
There are a few different ways you can tell if your plants need some extra love. After you grow a particular strain several times, you’ll get to know it better. You’ll learn things about it, like if it’s a quick or slow grower, what it looks like when it’s healthy, and which conditions allow it to truly perform. It’s when you begin noticing these kinds of details that you can begin correctly diagnosing a problem. On average, most cannabis varieties are pretty similar, but some require slightly different care.
Plants show deficiencies and excesses for many different reasons:
- if pH is unbalanced
- if soil moisture levels are unbalanced
- if light exposure isn’t ideal
- if temperature and humidity levels are off
- if they run out of a necessary nutrient
- if they have too much of a particular nutrient(s)
- if they are being attacked by something
Topdressing and teas are extremely effective when attempting to correct deficiencies because nutrients are being delivered directly to a plant's root system. Make sure to always check pH if using tap water as it can fluctuate throughout the year. Many micronutrients are found in tap water, helping prevent deficiencies. Reverse osmosis water, however, is void of all nutrients and can often be the cause of nutrient unavailability.
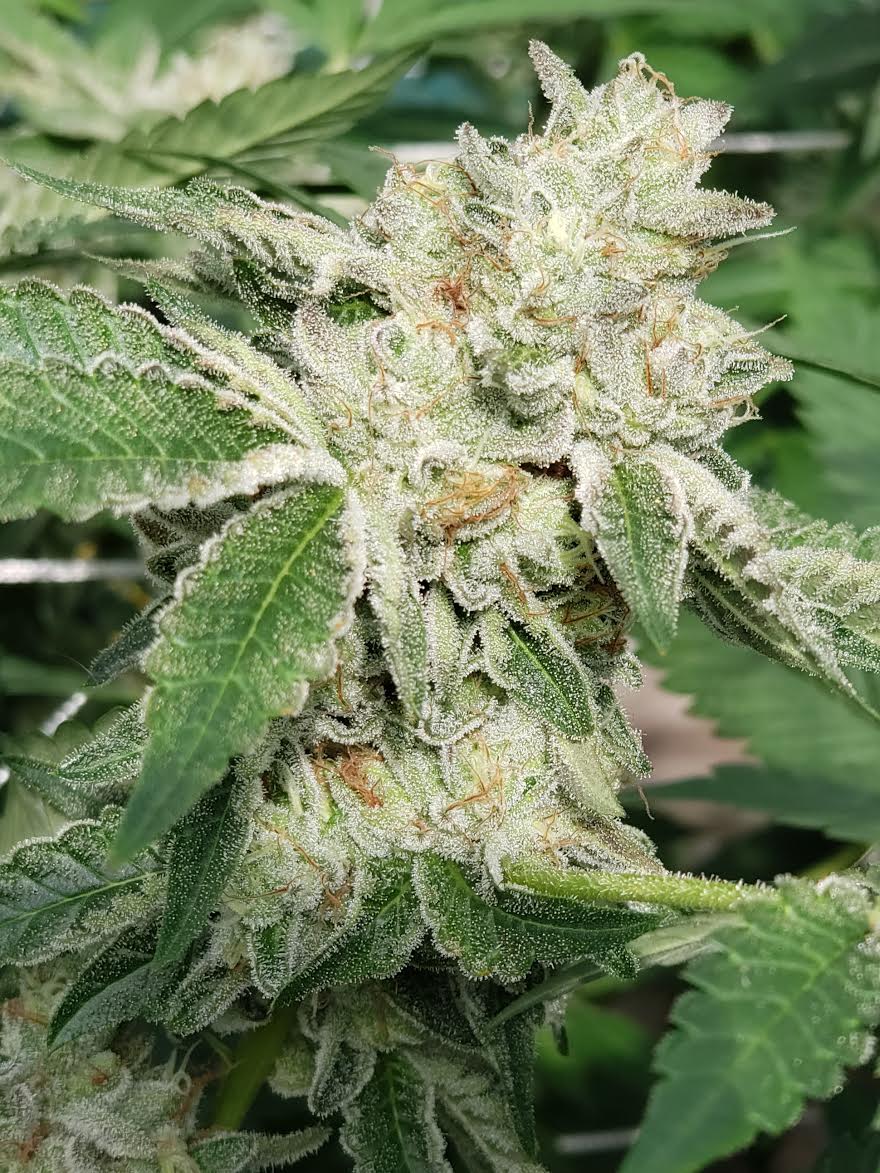 Reading your plants and strains is an art and will develop over time
Back to top
Common Warning Signs
Sometimes it can be challenging to tell exactly what’s missing or needed to keep a plant at full health. Often when
one nutrient gets depleted several others become unavailable to a plant, or don’t continue working as they’re supposed to, causing
multiple deficiencies. You will need to evaluate the overall appearance of a plant, what signs are showing, and make an educated guess on what might be causing the problem. Many times, unbalanced pH or moisture levels are the cause of unbalanced health.
Plants work to balance nutrients between new and old leaves. In addition to paying attention to symptoms seemly originating from higher on the plant (immobile nutrient deficiency), or lower on the plant (mobile nutrient deficiency), common signs of a plant in need include:
Slow growth: On average, but dependent on the variety, healthy cannabis plants grow quickly. They should not only grow in height, but thicken and increase their number of leaves and branches. New leaves sprout from the top of the branches and should be present throughout the vegging cycle. If your plants aren't showing steady growth, something’s off. They could be overwatered, or perhaps lacking nitrogen, especially if in veg.
Under watering, heat stress, light deprivation, or poor air ventilation may also be the problem. Due to the fact that most deficiencies cause stunted growth, ongoing observation is required.
New leaf abnormalities: New leaves are sites where the plant is still growing. Excessive amounts of phosphorus or potassium can show up in new leaves along with unusually thin blades or interveinal chlorosis. If young leaves turn a light green, a plant is likely not being given enough sulfur. Not enough boron, manganese, or zinc will cause new leaves to develop interveinal chlorosis, or grow contorted. And if a plant is deficient in copper or iron, newer leaves can also develop chlorosis, wilt, or even die back.
- Too little sulfur, manganese, iron, copper, boron, zinc, chlorine, or silica
- Too much phosphorus, potassium, calcium, or manganese
Yellowing leaves: One of the most common signs that a cannabis plant is suffering is when its leaves turn yellow. Because so many different things initiate yellowing leaves, it can be difficult to know the cause. Further observation and trying to locate other symptoms will be helpful while determining what is wrong.
If a plant looks healthy, but doesn't have that nice green color, it is most likely in need of more nitrogen, or maybe is not being given enough sulfur. It may also indicate an imbalance of chlorine. Improper light exposure and intensity can prevent a plant from being able to adequately perform photosynthesis and produce chlorophyll.
Many times you’ll notice yellow leaves starting from the bottom up. If a plant has completely yellow leaves at the bottom that begin to fall off the plant, it’s likely a deficiency; however, yellowing leaves can imply a variety of issues, like pest problems or inadequate watering, so look for other clues to properly diagnose the problem.
Do not confuse with fading leaves near harvest, one or two weeks towards the end of the bloom cycle as it can be a genetic trait, in which case, is not harmful for a plant. One of the only times a yellow leaf will recover and go back to being green is after an iron deficiency is corrected.
Dark green leaves: Leaves should be a nice green color; not too dark and not too light. If a plant’s leaves are dark green, it’s most likely from:
- Too much nitrogen, magnesium, or sulfur
Colored leaves: If leaves show unusual colors before the last 2 weeks of flower, the plant may be deficient in one or more nutrients. Some deficiencies cause bluish-purple shades to occur while others can be orange or pink.
- Bluish-purple: Too little phosphorus, calcium, or copper; too much copper
- Reddish-pink: Too little phosphorus, sulfur, or molybdenum
- White: Too little iron or sulfur; too much light intensity
Interveinal chlorosis: Interveinal chlorosis is when a leaf’s veins stay green while the area between the veins turns yellow. The leaves are unable to produce chlorophyll. This can happen with:
- Too little potassium, sulfur, iron, manganese, copper, zinc, boron, molybdenum
- Too much phosphorus, potassium, iron, copper, or chlorine
This may also be the result of high alkalinity, rootbound plants, damaged roots, or poor drainage.
Leaf spotting: Many times, spots will show up on the tops of leaves. Spotting can signal:
- Too little phosphorus, calcium, magnesium, manganese, zinc, boron
- Too much potassium, calcium, iron, or manganese
It can also indicate fungal growth, sometimes from too much water or high humidity.
Twisted or curled leaves: If you notice leaves twisting or curling, there may be:
- Too little phosphorus, calcium, zinc, copper, boron, or molybdenum
Leaves that curl up like a taco may be exposed to too much light or to temperatures too high. Pests like leafhoppers and mites can also be the cause of twisted leaves, usually also accompanied by discoloration and necrosis.
Burned leaves or necrotic leaf margins: Burned leaves can occur when there is:
- Too little potassium, magnesium, sulfur, zinc, or chlorine
- Too much nitrogen, phosphorus, potassium, sulfur, manganese, boron, or chlorine
Burned leaves can also occur when a plant is sprayed with an organic pest spray and then exposed to light, or if a plant is too close to a fan. Pay attention to how much liquid a plant is being given as brown edges can occur if not enough water is available, or if too much water has been applied. Heat stress and pest damage are other possible causes of burned leaf edges and tips.
Dying leaves: If a plant has leaves that wilt, turn brown, and die, make sure moisture levels are balanced. As far as nutrients are concerned, check for:
- Too little nitrogen, magnesium, iron, manganese, copper, or boron
- Too much boron
Inadequate light exposure can also cause leaves to die.
Branch abnormalities: If a strain begins to develop more branches than usual, it’s likely deficient in potassium or zinc. If there is decreased internode spacing, it’s likely being given too much phosphorus or potassium. It may also be exposed to toxic levels of copper.
- Too little potassium or zinc
- Too much phosphorus, potassium, or copper
In addition, light exposure may need adjusting if branch abnormalities occur.
Purple-striped stems and branches: This depends on the strain, as some varieties naturally produce stem color; however, healthy stems and branches are typically green. Purple striping most often signifies a lack of phosphorus, but can sometimes mean a plant is lacking adequate amounts of calcium, required for a plant to use phosphorus. Many times purple stems signify nutrient lock-out, letting you know nutrients aren’t being properly absorbed and distributed; a common occurrence in root bound plants.
- Too little phosphorus or calcium
Weak branches or stems: If your plant does not have sturdy branches, if the plant falls over easily or has trouble standing upright, it’s probably in need of more food, is root bound, or might be under watered. Stems may also be woody or brittle. When this occurs, a plant is most likely being given too much nitrogen or calcium, or not enough potassium, sulfur, or boron. It also may need silica, which strengthens cell walls and aids in development, or conversely, it may have too much of it.
- Too little potassium, sulfur, boron, or silica
- Too much nitrogen, calcium, or silica
Stem borers, aphids, and other pests are also possible sources of this type of distress.
Unhealthy roots: Healthy roots usually mean a plant is properly carrying out all its many responsibilities, increasing the likelihood that your plant will be protected from pests and diseases. If your roots aren’t white, you need to address the problem immediately. First, check and make sure they are getting watered correctly.
Roots tips can die back with too much phosphorus or potassium, or not enough calcium. They can also become excessively thick and stunted when there is not enough chlorine or too much copper. And if there is too little boron being given, roots can become unhealthy and discolored.
- Too little calcium, boron, or chlorine
- Too much phosphorus, potassium, or copper
Unhealthy roots are a major red flag, telling you that you’re not doing something correctly, or aren't providing the plant with everything it needs to remain healthy. If your plant’s root system is too crowded, it has become ‘root bound;’ you didn't transplant in time and need to adjust when you accomplish that task next time (usually determined by the age of the plant). Certain fungal pathogens like pythium could also be causing the problem.
When the root system isn't performing at peak health, it's almost impossible for the plant to be able to do so either.
Improper flower development: If your flowers are producing resin and extra leaves in the beginning weeks of bloom, but remain small when they should be large, check the nitrogen levels. In addition to lowering yield, potency will also decrease.
Cannabis plants need a lot of phosphorus during the flowering cycle, and making sure they have enough will strongly influence flower production. Flower growth is also stunted when a plant is given:
- Too little phosphorus, potassium, calcium, sulfur, copper, or zinc
- Too much nitrogen or silica
Improper flower development could also be a result of improper feeding or watering, excessive exposure to natural elements and pests, or burn from the over application of organic pest sprays.
Improper trichome development: If this problem arises, it’s usually due to poor light exposure, either too much or too little light. It could also be due to improper application of organic pest sprays, not enough food, unbalanced moisture levels in the soil, temperature, or even inexperienced handling of the flowers by the grower. Genetics could also be a factor.
Back to Warning Signs
How To Fix Common Health Issues
When a cannabis plant is deficient, it may need to be given both mobile and immobile nutrients in order to reach full health. Depending on the nutrient(s) it’s lacking, a plant will normally display signs of deficiency common to the issue. It's difficult to resolve a deficiency without observing a plant and knowing what it's being fed and exposed to. The age of a plant and type of deficiency will also determine whether or not it can be improved before harvest. Many times, you will have to wait until the following cycle and adjust your recipe or feeding regimen before you will observe consistent good health.
Deficiencies do not resolve on their own and often stay with a plant for the entirety of its life; especially true the more mature a plant is. If you notice discoloration or improper structure, a plant has probably been deficient for a while as it can take several days or possibly weeks for signs to surface. Certain strains are particular about nutrient ratios and may prefer more or less of a specific nutrient.
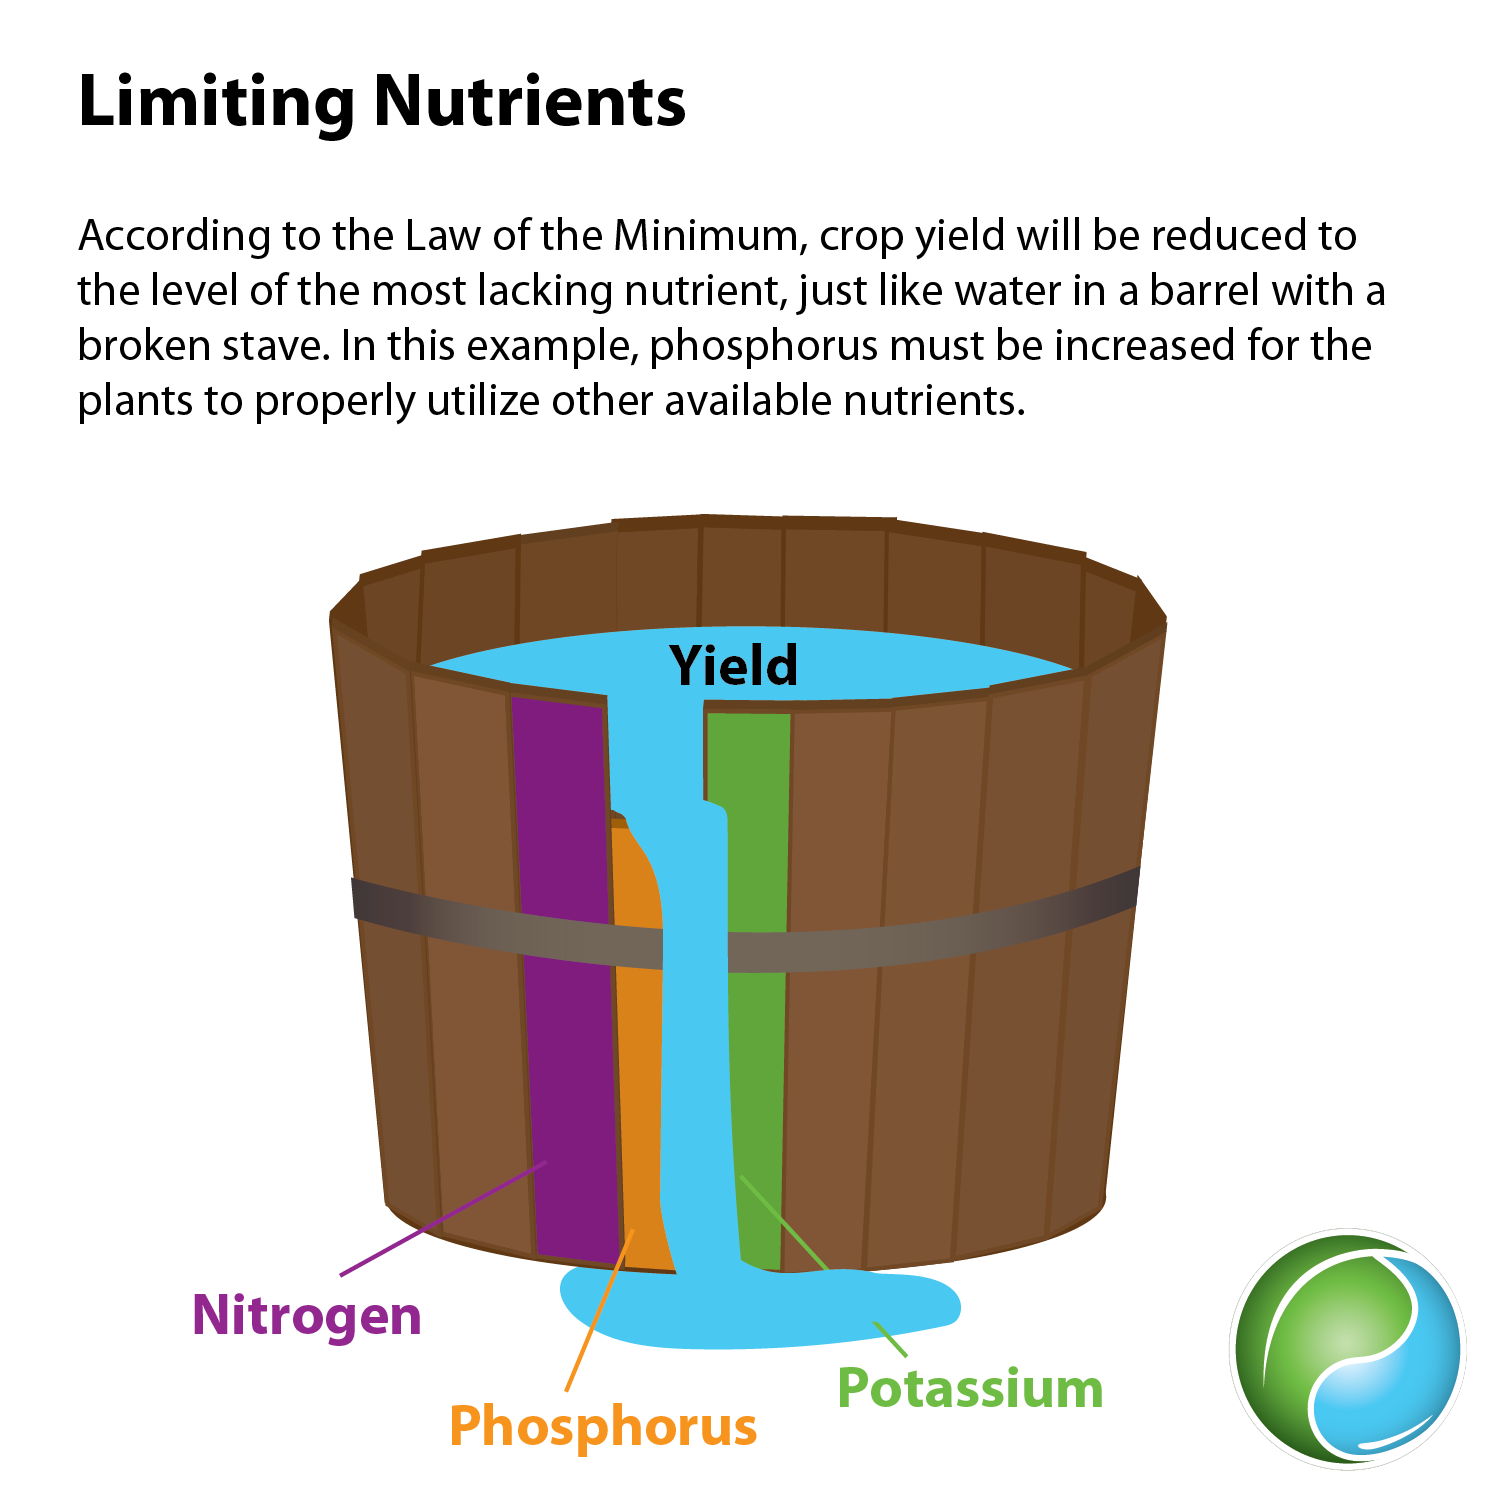 Image credit: Emily Nelson, Sustainable Plant Solutions LLC
Back to top
As soon as you notice any sign of deficiency, you should begin correcting it. If left untreated, they will significantly affect a cannabis plant, leading to smaller yields, decreased terpene profiles, and an overall weaker medicine.
Timing is everything: from transplanting to watering and feedings; it will all affect the outcome.
It’s also good to note that once a leaf shows signs of deficiency, it will almost never correct itself; it will not go back to being completely green with proper structure, and will usually need to be removed from the plant to avoid attracting pests and disease. It will be in the new leaves, and in the overall look and health of the plant where you will determine whether or not a plant is still missing something. If overall a plant looks unhealthy, major correction is needed and you will have to try again the next cycle.
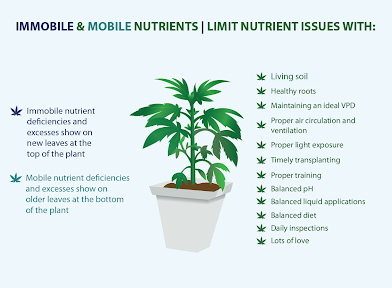
Limit nutrient issues with:
* Living soil
* Beneficial bacteria
* Beneficial fungi
* Healthy roots
* Proper light exposure
* Balanced pH
* Balanced liquid applications
* Balanced diet
* Timely transplanting
* Proper training
* Maintaining an ideal VPD
* Proper air circulation and ventilation
* Daily inspections
* Lots of love
--
Resolve deficiencies by supplying plants with extra nutrients, whether by topdressing, feeding with teas, or by giving them extra organic bottled nutrients. If you are experiencing the opposite, and a plant is showing signs of being given too much of a particular nutrient, simply lower the amount you are giving it, possibly both in the food recipe and in the soil. Make sure your Electrical Conductivity (EC) or Parts Per Million (PPM) levels are acceptable as well; you may need to dilute your nutrient mixture with water.
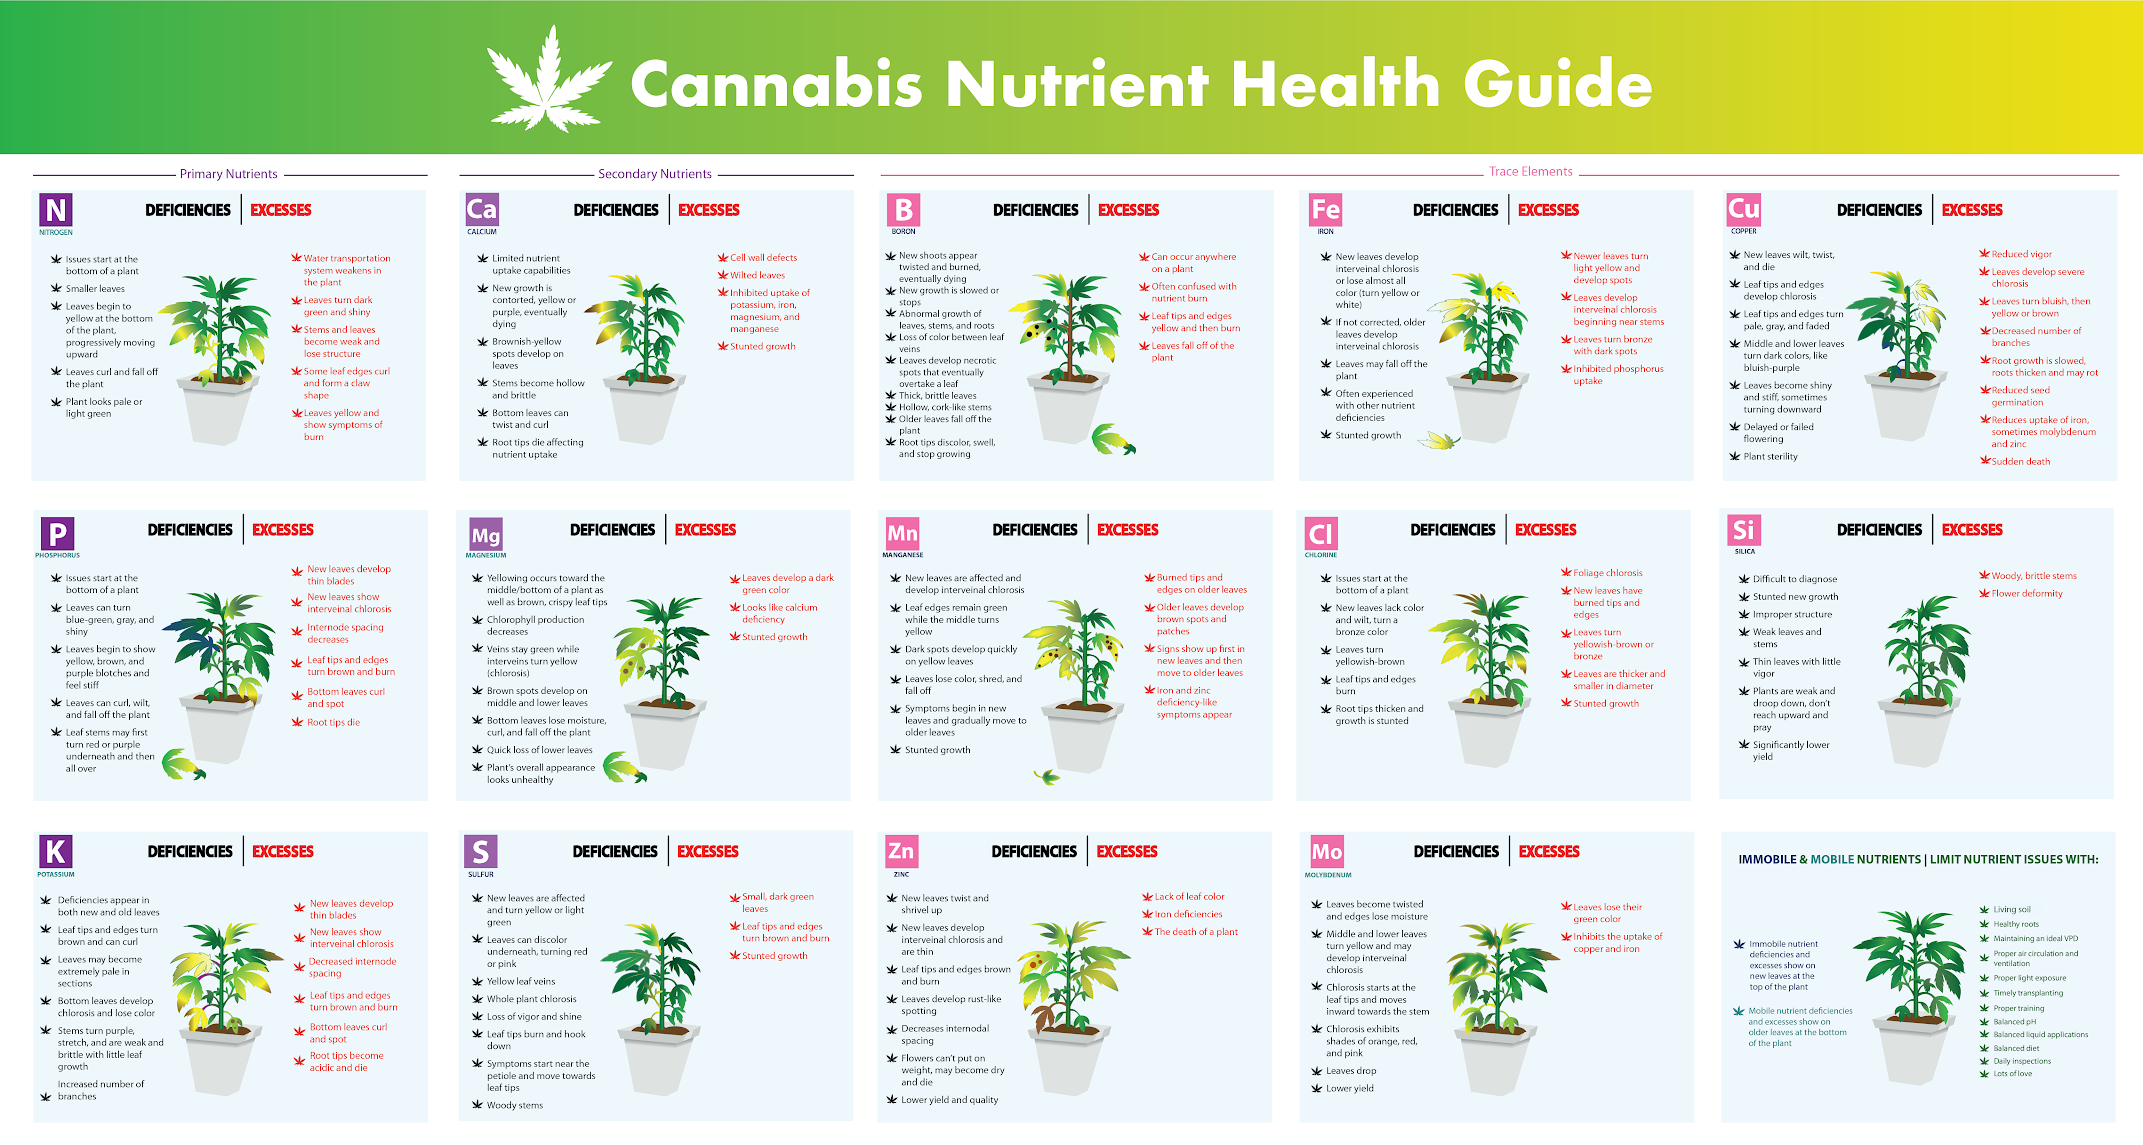 A guide to nutrient deficiencies and excesses
With that in mind, here are signs of several deficiencies and recommendations to correct them:
1. Nitrogen (Mobile)
Too Little: Nitrogen deficiencies are one of the most common deficiencies in a cannabis garden and can result in substantial loss in yield. Veg plants need more nitrogen than flowering ones and are typically at the stage of development when a plant will show clear signs of lack. Symptoms appear as extremely slow growth, older leaves can turn light green, bottom leaves yellow while their veins stay green, an increasing number of leaves yellow, and eventually all of the leaves will yellow and drop off the plant. This is when it's lacking large amounts of nitrogen. If only small amounts are lacking, the plant will simply appear light green, or a faded yellow. Nitrogen deficiencies typically start low and work their way up a plant.
Signs of too little nitrogen include:
A guide to nutrient deficiencies and excesses
With that in mind, here are signs of several deficiencies and recommendations to correct them:
1. Nitrogen (Mobile)
Too Little: Nitrogen deficiencies are one of the most common deficiencies in a cannabis garden and can result in substantial loss in yield. Veg plants need more nitrogen than flowering ones and are typically at the stage of development when a plant will show clear signs of lack. Symptoms appear as extremely slow growth, older leaves can turn light green, bottom leaves yellow while their veins stay green, an increasing number of leaves yellow, and eventually all of the leaves will yellow and drop off the plant. This is when it's lacking large amounts of nitrogen. If only small amounts are lacking, the plant will simply appear light green, or a faded yellow. Nitrogen deficiencies typically start low and work their way up a plant.
Signs of too little nitrogen include:
- Issues start at the bottom of a plant
- Stunted growth
- Smaller leaves
- Leaves lose shine
- Leaves begin to yellow at the bottom of the plant, progressively moving upward
- Leaves curl and fall off the plant
- Plant looks pale or light green
- Early flower formation and lower yield
Treatment: Make sure pH levels aren’t too low, which can lock up nitrogen. To correct a lack of nitrogen, you can topdress with Hendrikus Spring Mix, feather meal (preferred for veg only), alfalfa meal, blood meal, or nitrogen-rich bat guano. Once treated, you should notice the problem improve in about 10 days. Cover crops like alfalfa and clover can also help with nitrogen fixation in organic soil.
 Too Much
: Because nitrogen is such an important nutrient, many people end up giving their plant too much of it. The #1 sign of nitrogen toxicity is when a plant has extremely dark green leaves in addition to sporadic claw-shaped leaves that begin to yellow. The plant’s leaves become soft and are easily attacked by pests and disease. Postponed root growth, weak stems that easily bend, browning leaves, and smaller, fewer flowers are also common. Nitrogen toxicity is more likely to occur during bloom, as amounts of nitrogen needed during flower are lower.
Signs of
too much nitrogen include:
- Water transportation system weakens in the plant
- Leaves turn dark green and shiny
- Stems and leaves become weak and lose structure
- Some leaf edges curl and form a claw shape
- Leaves yellow and show symptoms of burn
- Flowers don’t develop properly and taste like grass
- Terpene profile is compromised
Treatment: Make sure you know how much nitrogen your plants are being given. It’s important to note that many nutrients come with added nitrogen in them, and with nitrogen being one of the most common nutrients found in soil, it’s easy to have too much of it. To treat a plant that has been given too much nitrogen, reduce the amount you give in feedings. Leaves that show signs of damage will likely not recover, but leaf health should not continue to worsen.
Image credit: Emily Nelson, Sustainable Plant Solutions LLC
2.
Phosphorus (Mobile)
Too Little: Phosphorus deficiencies are also fairly common. Acidic and clay-like mediums and excessively wet soil can influence and promote phosphorus deficiencies. Phosphorus can't be readily absorbed by a plant if there are high amounts of iron or zinc.
Symptoms are indicated by smaller leaf and overall plant size, bluish-colored leaves, and dark, brownish patches on the leaves. Older bottom leaves will curl downward and take on a darker color at the tips, discolored leaves eventually fall off, there’s an increased susceptibility to insect attacks, and deficiencies can cause flowering to start later than usual. Leaf surfaces exposed to the light tend to show symptoms first. Signs also appear towards the bottom of a plant.
Signs of
too little phosphorus include:
- Issues most common during bloom
- Issues start at the bottom of a plant
- Leaves can turn blue-green, gray, and shiny
- Leaves begin to show yellow, brown, and purple blotches and feel stiff
- Leaves can curl, wilt, and fall off the plant
- Leaf stems may first turn red or purple underneath and then all over
- Plant loses vigor and is easily attacked by pests and pathogens
- Stunted growth
Treatment: Phosphorus is commonly found in organic soil, living organisms, minerals, and water. In order to be available for uptake, microbes must break it down. Test the pH of your soil as most phosphorus deficiencies begin with an unbalanced environment around the root system. Moisture content, lack of oxygen and organic material, and temperature also influences availability.
Because calcium helps carry phosphorus throughout a plant, it can be beneficial to combine and give together. Topdress with Hendrikus Soil Enhancer, Hendrikus Bouquet (bloom only), soft rock phosphate (vegan), fish bone meal, or steamed bone meal. Bone meal and gypsum work well when combined and topdressed. Worm castings (tea) or phosphorus-rich bat guano can also be used. For faster uptake of nutrients, give through a tea. Once treated, you should notice the problem improve shortly with a tea and a little longer with topdressing.
Note: It is important to know that plants can only use phosphorus in the form of phosphate (PO43), not phosphite (PO33), which is basically a salt.
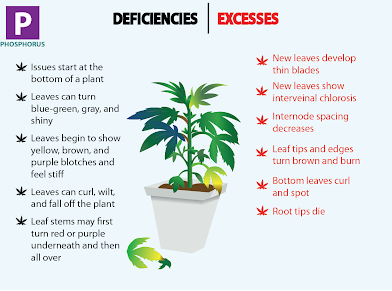 Too Much
: Too much phosphorus decreases a plant’s ability to correctly intake nutrients like calcium, zinc, iron, and magnesium.
Signs of
too much phosphorus include:
- New leaves develop thin blades
- New leaves show interveinal chlorosis
- Internode spacing decreases
- Leaf tips and edges turn brown and burn
- Bottom leaves curl and spot
- Root tips die
- Causes zinc, iron, calcium, and magnesium deficiencies
Treatment: To treat a plant that has been given too much phosphorus, reduce the amount your plants are exposed to. Affected leaves will not recover much, if at all; it will be in the new growth where improvements can be seen.
3.
Potassium (Mobile)
Too Little: Due to its strong role in regulating osmotic pressure and homeostasis, without potassium internal leaf temperatures rise, eventually causing them to burn and turn brown around the edges. Potassium deficiencies often resemble nutrient burn. If potassium is absent, a plant’s ability to hold water is dramatically compromised, causing weakness and stunted growth. High salt levels in the soil cause potassium to lock up and not be readily absorbed by a plant.
Symptoms appear as curled leaves, yellow with brown lower leaves, leaf rot, weak stems and branches, decreased flower production, and increased disease susceptibility. Overwatering will likely cause symptoms to worsen.
Signs of
too little potassium include:
- Deficiencies appear in both new and old leaves
- Leaf tips and edges turn brown and can curl
- Leaves may become extremely pale in sections
- Bottom leaves develop chlorosis and lose color
- Stems stretch, and are weak and brittle with little leaf growth
- Increased number of branches
- Flowers can’t put on weight and are small in size
Treatment: Potassium deficiencies can be difficult to diagnose. Make sure pH levels are acceptable (not too high), light and temperature are balanced, moisture content is ideal, there is adequate soil aeration, and you limit other sources of stress. Unbalanced quantities of calcium and nitrogen can cause potassium to become unavailable.
Soil testing provides the most accurate reading of potassium levels in an organic medium.
To correct a lack of potassium, topdress a plant with langbeinite or Hendrikus Essential. Once treated, you should notice the problem resolve over time, but damaged foliage will not regain vigor or color.
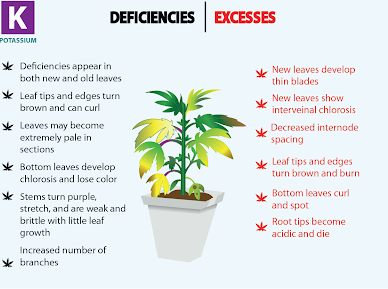 Too Much
: Excessive amounts of potassium cause slow plant growth, wilting, leaf burn, affect how a plant intakes manganese, magnesium, iron, and zinc, and will show similar signs to those nutrient deficiencies.
Signs of
too much potassium include:
- New leaves develop thin blades
- New leafs show interveinal chlorosis
- Leaf tips and edges turn brown and burn
- Decreased internode spacing
- Bottom leaves curl and spot
- Root tips become acidic and die
- Causes zinc, iron, calcium, and magnesium deficiencies
Treatment: To treat a plant that has been given too much potassium, reduce the amount your plants are exposed to. It’s recommended that you discontinue feeding potassium for at least 7 days and observe the plant.
4.
Calcium (Immobile)Back to Health Guide
Too Little: Symptoms first appear in young top leaves and will cause a leaf to become contorted, exhibit yellow and purple colors, and eventually die. Stunted growth is common. Leaf surfaces exposed to light typically show the first signs of a calcium deficiency in the form of yellow or brown spotting. A plant’s defense system is also weakened without calcium, making it more prone to pest attack.
Signs of
too little calcium include:
- Issues start at the top of a plant (stunted growth)
- New growth is contorted, yellow or purple, eventually dying
- Brownish-yellow spots develop on leaves
- Stems become hollow and brittle
- Bottom leaves can twist and curl
- Flowers develop slowly, lower yield
- Root tips die affecting nutrient uptake
- Limited nutrient uptake capabilities
- Drought tolerance decreases
Treatment: To correct a lack of calcium, topdress with crab meal, fish bone meal, glacial rock dust, gypsum, soft rock phosphate, or Korean Natural Farming eggshell extraction. Or give a Cal-Mag amendment. For faster uptake of nutrients, give through a tea. Once treated, you should notice the problem improve in as little as 4 days with a tea and a little longer with topdressing. Make sure the pH levels are balanced as calcium becomes locked up when pH is too low (acidic). Calcium can also become unavailable if too much potassium is being given to a plant. Calcium and magnesium deficiencies commonly occur together, so applying a Cal-Mag amendment is recommended.
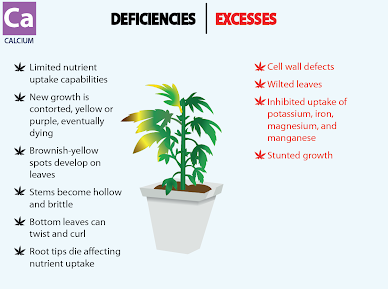 Too Much
: Plants usually use and like a lot of calcium, so giving too much of this nutrient is uncommon; however, it can affect how other nutrients are used by a plant if too much is given. It also causes magnesium, potassium, iron, and manganese to become unavailable, and can cause sulfur deficiencies.
Signs of
too much calcium include:
- Stunted growth
- Wilted leaves
- Cell wall defects
- Inhibited uptake of potassium, iron, magnesium, and manganese
Treatment: To treat a plant that has been given too much calcium, reduce the amount your plants are exposed to. Whenever you think a plant has been given too much of a certain nutrient, it’s best to discontinue feeding that nutrient for roughly 7 days, observing to see if a plant’s health improves. Once you have determined the health is getting better, you can incorporate the nutrient back into your feeding regimen, but should give less than you previously were to avoid additional issues.
5.
Magnesium (Mobile)
Too Little: Magnesium is essential for plant growth and a substantial lack should not be overlooked. Only when a plant is significantly deficient in magnesium does it begin to show symptoms, and can cause discoloration of an entire plant in only a few weeks. Deficiencies occur usually around the age of 4 or 5 weeks and affect middle and lower areas of the plant first, causing brown leaf edges, leaf tips to curl upwards, and green leaf veins with yellow discoloration in between them. Progressing from the bottom up, young top leaves will eventually show brown spots and yellowing between veins.
Signs of
too little magnesium include:
- Deficiencies show up several weeks after present
- Issues start at the bottom of a plant
- Chlorophyll production decreases
- Yellowing occurs toward the middle/bottom of a plant as well as brown, crispy leaf tips
- Veins stay green while interveins turn yellow (chlorosis)
- Brown spots develop on middle and lower leaves
- Bottom leaves lose moisture, curl, and fall off the plant
- Quick loss of lower leaves
- Plant’s overall appearance looks unhealthy
Treatment: Magnesium is often found in a variety of minerals and is held on the surface of organic matter. It becomes available to a plant as minerals are weathered and broken down over time. As with most deficiencies, be sure to check the pH levels, making sure they’re not too acidic, and if you’re under/overwatering. Too much potassium, calcium, nitrogen, and sodium can leave a plant unable to absorb magnesium in the soil, but can also become unavailable if the soil is too wet, acidic, or temperatures are too low.
When determining levels of a magnesium deficiency, soil testing and plant analysis are recommended to get a more accurate assessment.
To correct a lack of magnesium, you can incorporate an organic amendment like langbeinite, glacial rock dust, soft rock phosphate, or dolomite lime; although mixing it into soil prior to planting is best. Dolomite lime will somewhat affect the pH of the soil, so take that into consideration, and only use it if you don’t have other amendments. Irrigation water also contains good amounts of magnesium.
For faster uptake of nutrients, give a cal-mag amendment through a tea. Once treated, you should notice the problem resolve in as little as a few days with a tea and up to 7 days with topdressing. Yellowed leaves will likely not regain their green color; it will be in new growth and overall appearance that you will notice improvement.
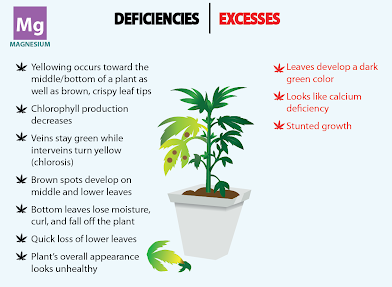 Too Much
: Magnesium toxicity isn’t common.
Signs of
too much magnesium include:
- Looks like calcium deficiency
- Leaves develop a dark green color
- Stunted growth
Treatment: To treat a plant that has been given too much magnesium, reduce the amount your plants are exposed to. Wait a few days to a week to see improvements.
6.
Sulfur (Immobile)
Too Little: Much of a plant’s required sulfur levels are used while in veg. Deficiencies appear in newer leaves, with a loss of color starting near the stem and progressing outward to the fingers of the leaves. Leaf stems may also turn purple. Symptoms appear as light green and yellow leaves, yellowing between green leaf veins, thin leaves, leaves that curl downward, and brown leaf tips. Deficiencies can first appear anywhere on a plant, but usually begin on newer leaves. It can be confused with a nitrogen deficiency as leaves eventually turn light yellow and continue down the entire plant. Sulfur deficiencies are rare.
Signs of
too little sulfur include:
- Issues start at the top of a plant
- New leaves are affected and turn yellow or light green
- Leaves can discolor underneath, turning red or pink
- Yellow leaf veins
- Whole plant chlorosis
- Loss of vigor and shine
- Leaf tips burn and hook down
- Symptoms start near the petiole and move towards leaf tips
- Woody stems
- Stunted growth
- Reduction of protein formation
- Slow flower development or death of flowers
Treatment: The main sources of sulfur are organic matter, soil minerals, the atmosphere, and irrigation water. Make sure pH levels are balanced and a plant is being properly fed and watered. Because sulfur is mobile in soil, it can easily be leached, and is also removed by crop uptake. Sulfur deficiencies are more likely to occur in older, unamended soils.
To correct a lack of sulfur, it’s best to topdress with langbeinite. Gypsum, neem cake, and potassium sulfate can also help to correct deficiencies, but is best if it’s mixed into the soil prior to planting. Once treated, you should notice the problem improve in about 10 days.
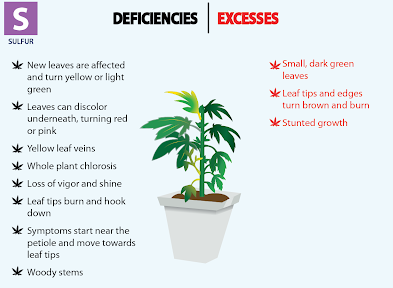 Too Much
: Sulfur toxicity causes other nutrients not to be readily absorbed, stunted plant growth, leaves that get progressively smaller from the top to the bottom and take on a darker shade of green, and brown leaf tips.
Signs of
too much sulfur include:
- Small, dark green leaves
- Leaf tips and edges turn brown and burn
- Stunted growth
Treatment: To correct a plant with toxic levels of sulfur, check pH levels and nutrient percentages. Reduce the amount your plants are exposed to.
7.
Iron (immobile)
Too Little: In organic growing, trace mineral deficiencies are unlikely, but can occur due to overwatering. Excessive amounts of calcium can also cause iron to become unavailable.
Signs of
too little iron include:
- Issues start at the top of a plant
- New leaves develop interveinal chlorosis or lose almost all color (turn yellow or white)
- If not corrected, older leaves develop interveinal chlorosis
- Leaves may fall off the plant
- Often experienced with other nutrient deficiencies
- Stunted growth
Treatment: Most of the time, iron deficiencies occur due to unbalanced pH levels (too high) or stress due to intense light exposure. Often, a plant can grow out of it as long as conditions improve and stress levels are lowered. Prune affected leaves and sections to help a plant more easily recover.
To correct a lack of iron, you can topdress with azomite or glacial rock dust, but you may want to wait as a plant usually doesn't need high amounts of iron and can recover once properly cared for.
Once treated, you should notice the problem improve in about 10 days. One way you know your plant has experienced an iron deficiency is that the new yellow leaves will grow into nice green leaves. While, typically, cannabis leaves do not recover from yellowing, they can if it's because of a lack of iron.
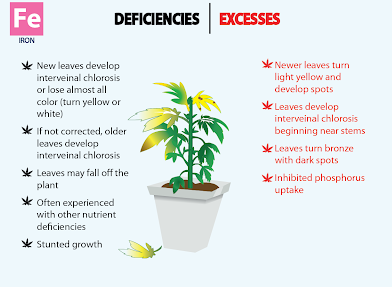 Too Much
: Excessive amounts of iron can render a plant unable to uptake manganese, which when absent, also can cause leaves to turn yellow. Toxic levels of iron is rarely an issue unless guanos are used or it’s applied as a foliar spray.
Signs of
too much iron include:
- Newer leaves turn light yellow and develop spots
- Leaves develop interveinal chlorosis beginning near stems
- Leaves turn bronze with dark spots
- Inhibited phosphorus uptake
Treatment: To treat a plant that has been given too much iron, reduce the amount your plants are exposed to. Iron is commonly found in tap water, and often in Cal-Mag amendments.
8.
Manganese (Immobile)Back to Health Guide
Too Little: If a plant is deficient in this trace mineral, new leaves begin to yellow and develop interveinal chlorosis. Often, plants deficient in manganese will show similar symptoms to those deficient in iron. Toxic levels of iron can cause a plant to become deficient in manganese. Deficiencies are uncommon, but do happen on occasion.
Signs of
too little manganese include:
- Start at the top of a plant
- Symptoms begin in new leaves and gradually move to older leaves
- New leaves are affected and develop interveinal chlorosis
- Leaf edges remain green while the middle turns yellow
- Dark spots develop quickly on yellow leaves
- Leaves lose color, shred, and fall off
- Stunted growth
Treatment: Start by removing any affected foliage; it will not recover and could become home to problematic pests and diseases. To correct a lack of manganese, make sure the pH levels are not too high. Also check EC or PPM. You can topdress an amendment that contains trace minerals, like azomite or glacial rock dust. Once treated, you should notice the problem improve in about 10 days.
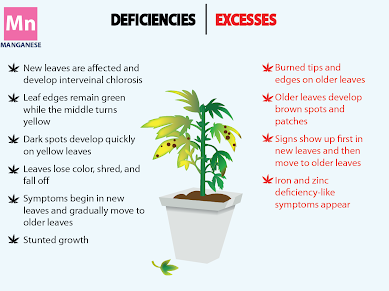 Too Much:
 Signs of
too much manganese include:
- Signs show up first in new leaves and then move to older leaves
- Iron and zinc deficiency-like symptoms appear
- Older leaves have burned tips and edges
- Older leaves develop brown spots and patches
Treatment: To treat a plant that has been given too much manganese, reduce the amount your plants are exposed to. Also make sure to check the pH as toxicity can occur in mediums with a pH lower than 5.5.
9.
Copper (Immobile)
Too Little: Copper deficiencies can be problematic in organic, peaty soils. You can perform both soil tests and plant tissue tests to determine copper levels. Deficiencies appear in new leaves, causing chlorosis, smaller leaf size, reduced number of branches, and shorter stems. A plant in need of more copper can also suffer from delayed flowering and plant sterility. Symptoms first show in leaves directly under lights or areas exposed to light. Copper deficiencies commonly take on the appearance of burn, but tips and edges remain yellow instead of turning brown. Sometimes this deficiency is confused for natural fading towards the end of bloom; however, if a plant begins to color-fade before the last two weeks of flower, it’s most likely due to a lack of copper.
Signs of
too little copper include:
- Issues start at the top of a plant
- New leaves wilt, twist, and die
- Leaf tips and edges develop chlorosis
- Leaf tips and edges turn pale, gray, and faded
- Middle and lower leaves turn dark colors, like bluish-purple
- Leaves become shiny and stiff, sometimes turning downward
- Stunted growth
- Delayed or failed flowering
- Lower yield
- Plant sterility
Treatment: Most copper deficiencies are due to unbalanced pH levels, affecting how a plant can uptake the nutrient. If pH levels are on the high side, copper is likely to become unavailable. Excessive amounts of phosphorus or potassium can also prevent a plant from uptaking copper. Copper is needed in such small amounts that, if a plant is being fed properly and is in good soil, it is unlikely to be much of a problem. Tap water often contains suitable amounts of copper, so avoid using reverse osmosis (RO) water if experiencing a deficiency. If you do use an amendment, like azomite, glacial rock dust, or neem cake, to improve copper levels, water-soluble, micronized forms are recommended.
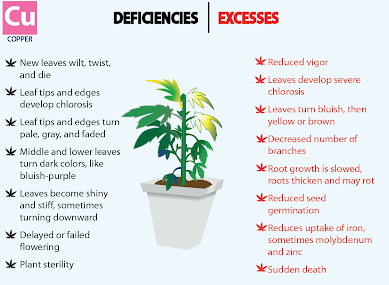 Too Much
: There is a fine line between copper deficiency and toxicity. Signs of
too much copper include:
- Reduced vigor
- Leaves develop severe chlorosis
- Leaves turn bluish, then yellow or brown
- Decreased number of branches
- Root growth is slowed, roots thicken and may rot
- Reduced seed germination
- Reduces uptake of iron, sometimes molybdenum and zinc
- Sudden death
Treatment: To treat a plant that has been given too much copper, reduce the amount your plants are exposed to.
10.
Zinc (Immobile)
Too Little: Mineral soils that are high in organic matter usually contain satisfactory quantities of zinc. Zinc deficiencies do not commonly occur in cannabis unless a plant is deficient in another nutrient, causing zinc to become unavailable.
Deficiencies can occur when soil temperatures are too low, or in waterlogged, anaerobic soils. Phosphorus-induced deficiencies can occur when phosphorus levels are too high. Zinc deficiencies can be difficult to diagnose, but often cause iron to become unavailable, which is a little easier to recognize. Signs first show up at the top of a plant. Not enough zinc will cause both lower yield and quality, sometimes happening without the plant ever showing any sign of deficiency.
Signs of
too little zinc include:
- Issues start at the top of a plant
- New leaves twist and shrivel up
- New leaves develop interveinal chlorosis and are thin
- Leaf tips and edges brown and burn
- Leaves develop rust-like spotting
- Decreases internodal spacing
- Stunted growth
- Flowers can’t put on weight, may become dry and die
- Lowers yield and quality
Treatment: High pH levels in water is the most common cause of plant deficiencies like zinc. To correct a lack of zinc, topdress with an organic amendment such as azomite or neem cake. It’s recommended these amendments get added to a soil mixture prior to planting for best results. Once treated, you should notice the problem improve in about 10 days.
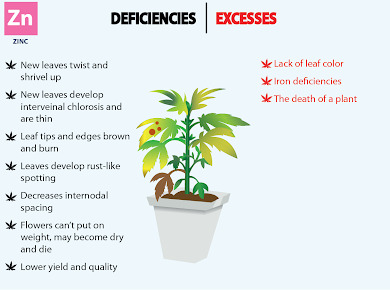 Too Much
: Plants can typically handle higher levels of zinc, so a plant having too much is rare.
Signs include:
- Lack of leaf color
- Iron deficiencies
- The death of a plant
Treatment: If savable, to treat a plant that has been given too much, reduce the amount your plants are exposed to. Make sure to check the pH level of your water source to make sure it is at an acceptable reading. EC or PPM should also be checked.
11.
Boron (Immobile)
Too Little: An absence of this trace element leaves a plant struggling to create linkages in cell walls in addition to decreasing the overall fertility of a plant. Failure to meet a plant’s need for boron affects vegetative growth as well, dramatically decreasing the health of a plant and the eventual quality of flowers. In order for a plant to uptake silica, it must also have boron readily available. A lack of boron will make it harder for a plant to use calcium, potassium, and nitrogen, causing symptoms accompanied with those deficiencies.
Signs of
too little boron include:
- Issues start at the top of a plant
- New shoots appear twisted and burned, eventually dying
- New growth is slowed or stops
- Loss of vigor
- Abnormal growth of leaves, stems, and roots
- Loss of color between leaf veins
- Leaves develop necrotic spots that eventually overtake a leaf
- Thick, brittle leaves
- Hollow, cork-like stems
- Older leaves fall off the plant
- Root tips discolor, swell, and stop growing
- Usually deficient along with calcium
Treatment: It is uncommon for a plant to only be deficient in boron. It is also uncommon to occur in organic gardening due to the fact that boron is mainly found in organic matter. As organic matter decomposes, boron becomes readily available for absorption. Tap water can also contain boron quantities that satisfy plants, so unless you’re using reverse osmosis water, boron shouldn’t become an issue unless it’s unable to uptake due to overfertilization.
Low humidity levels can cause problems with boron availability. In addition, boron is difficult for a plant to absorb in dry conditions due to the slowing of organic matter’s decomposition, so make sure soil is properly saturated. Overly saturated soils can cause boron to be leached out due to the fact that it is a neutral molecule that is not attracted to organic matter or soil particles. To accurately test boron levels, a soil or tissue test will need to be completed.
When trying to correct a lack of boron, make sure pH levels are balanced as high levels can cause boron to become unavailable. Be sure to also check EC or PPM levels. You can topdress with azomite, phosphate, or potash fertilizers because quantities required are low, but ideally they should be mixed into a soil recipe to avoid toxicity problems. Often, boron deficiencies will improve on their own as long as a plant and the soil starts receiving proper attention and care.
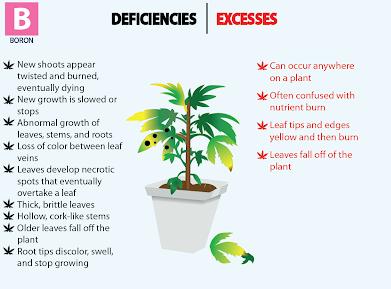 Too Much
: Boron toxicity can become a problem when trying to correct a deficiency. Signs of
too much boron include:
- Can occur anywhere on a plant
- Often confused with nutrient burn
- Leaf tips and edges yellow and then burn
- Leaves fall off of the plant
Treatment: To treat a plant that has been given too much boron, reduce the amount your plants are exposed to. Because boron is easily leached from soil, adequate watering can relieve plants exposed to too much boron.
12.
Chlorine (Mobile)Back to Health Guide
Too Little: Signs of
too little chlorine include:
- Issues start at the bottom of a plant
- New leaves lack color and wilt, turn a bronze color
- Leaves turn yellowish-brown
- Leaf tips and edges burn
- Root tips thicken and growth is stunted
Treatment: To correct a lack of chlorine, topdress with langbeinite. Once treated, you should notice the problem improve in about 10 days.
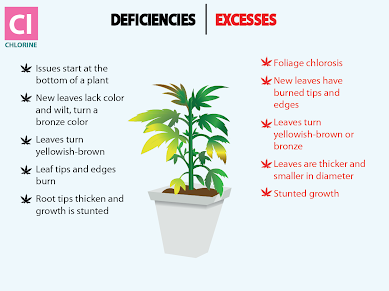 Too Much
: Chloride, nitrate, sulfate, molybdenum, and boron are all anions (negatively charged ions), and excessive levels of any one of these can affect how a plant is able to uptake the others.
Signs of
too much chlorine include:
- Foliage chlorosis
- New leaves have burned tips and edges
- Leaves turn yellowish-brown or bronze
- Leaves are thicker and smaller in diameter
- Stunted growth
Treatment: Excess levels of chlorine is more concerning than deficiencies. Most tap water contains chlorine, sometimes toxic levels, which kills beneficial microbes in the soil and lowers plant health. Make sure to filter or aerate water before giving it to plants, or using it in a food mixture. Chlorine levels can be reduced with gypsum. Be sure to check the pH of the soil, as unbalanced levels can affect how a plant uptakes nutrients.
13.
Silica (Immobile)
Too Little: Silica deficiencies are rare. Signs of
too little silica include:
- Difficult to diagnose
- Starts at the top of a plant
- Stunted new growth
- Improper structure
- Weak leaves and stems
- Thin leaves with little vigor
- Plants are weak and droop down, don’t reach upward and pray
- Increased susceptibility to attack from pests and disease
- Significantly lower yield
Treatment: To correct a lack of silica, topdress with Silica Earth. Once treated, you should notice the problem improve in as little as 4 days with a tea and up to 10 days with topdressing.
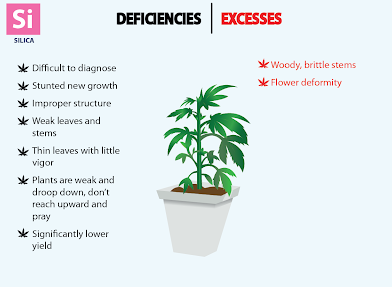 Too Much
: Excessive amounts of silica is an extremely rare issue. Signs of
too much silica include:
- Woody, brittle stems
- Flower deformity
Treatment: To treat a plant that has been given too much silica, reduce the amount you give in feedings. You may have to prune affected flowers, but if issues are caught early enough, a plant will improve over time.
14.
Molybdenum (Mobile)
Too Little: Symptoms of too little molybdenum resemble nitrogen deficiencies and show up on middle and older leaves. Rare and difficult to diagnose, molybdenum deficiencies are also often confused for calcium or magnesium deficiencies.
Signs of
too little molybdenum include:
- Issues start at the bottom of a plant
- Leaves become twisted and edges lose moisture
- Middle and lower leaves turn yellow and may develop interveinal chlorosis
- Chlorosis starts at the leaf tips and moves inward towards the stem
- Chlorosis exhibits shades of orange, red, and pink
- Leaves drop
- Stunted growth
- Lower yield
Treatment: Unbalanced pH levels is a common way a plant will become deficient in molybdenum. Check the EC or PPM. Start by pruning the affected areas, which often suffer from necrosis and can attract pests and diseases. To correct a lack of molybdenum, topdress with an amendment that is high in trace minerals, like azomite or glacial rock dust. For faster uptake of nutrients, give through a tea. Once treated, you should notice the problem improve in 14 to 21 days. Be sure to check the soil pH as this nutrient can become unavailable as the pH level decreases.
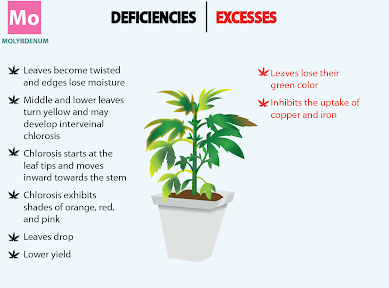 Too Much
: Molybdenum toxicity is extremely rare. Signs of
too much molybdenum include:
- Leaves lose their green color
- Inhibits the uptake of copper and iron
Treatment: To treat a plant that has been given too much molybdenum, reduce the amount your plants are exposed to.
Back to Health Guide
The Answer Is In The Details
--
Keeping your plants thriving leans heavily on providing the correct nutrients for your plants at the correct times. Attentiveness and observation are usually required for a grower to correctly diagnose a deficiency in a cannabis plant. Deficiencies can be challenging to correctly diagnose because of the fact that the lack of one nutrient often causes others not to be available to a plant. This is where getting to know your genetics, what you are feeding your plants, and what kind of environment your plants are exposed to really pays off. Reading your plants and strains is an art and will develop over time.
--
Many times, deficiencies can arise due to stress, overwatering, and grower error. Living soils and organic gardening practices promote processes and nutrient production that can help provide the plant with what it needs, brilliantly, when the grower may not be able to. Health issues are decoded in the details, so make sure you take the time to carefully inspect each plant on a daily basis and also pay attention to the amount of nutrients each one is getting.
Chapter 7: Training & Maintenance
Regardless of whether you’re caring for a vegging or a flowering plant, in addition to regularly monitoring your garden for pests and deficiencies, you’ll need to also keep your plants trained and manicured so they thrive throughout all stages of development.
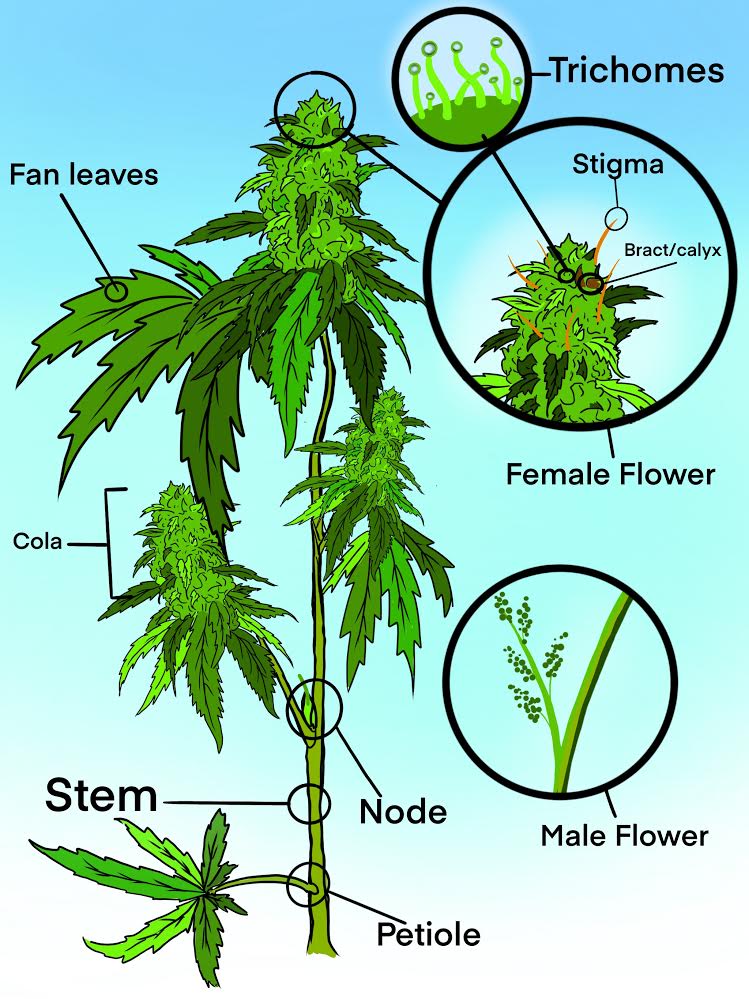 The parts of a cannabis plant, Image Credit: Rylan Kapuy
How To Train A Cannabis Plant
Complete at 2-3’ tall, week 1 of flower
Training a cannabis plant means encouraging it to grow in the desired direction and helping support its branches and flowers by giving it something to lean against. There are several ways to accomplish this, including:
- Metal or fiberglass stakes
- Tomato cages
- Trellis nets
- Homemade support/other
In addition to personal preference, the size and age of your plants will often determine which option works best. It’s recommended that you use stakes for vegging plants and a trellis net for flowering plants.
Vegging plants usually do well with stakes simply because they do not have the extra weight of flowers and can often support their branches on their own. The main stem is what usually needs a little support; typically once a plant reaches a height of 2’ or so. As they grow, young plants naturally tend to lean more in a certain direction, influenced by the number of branches or their length. Observe which way the plant naturally leans and place a stake(s) in the soil to help support it. The goal is to have the main stem standing straight up. If you will be flowering indoors, trellis netting your plants in veg will provide better light exposure to the lower branches and increase yields. If you decide to only use stakes in veg, remove larger leaves that may be shading lower flower sites to encourage more even growth.
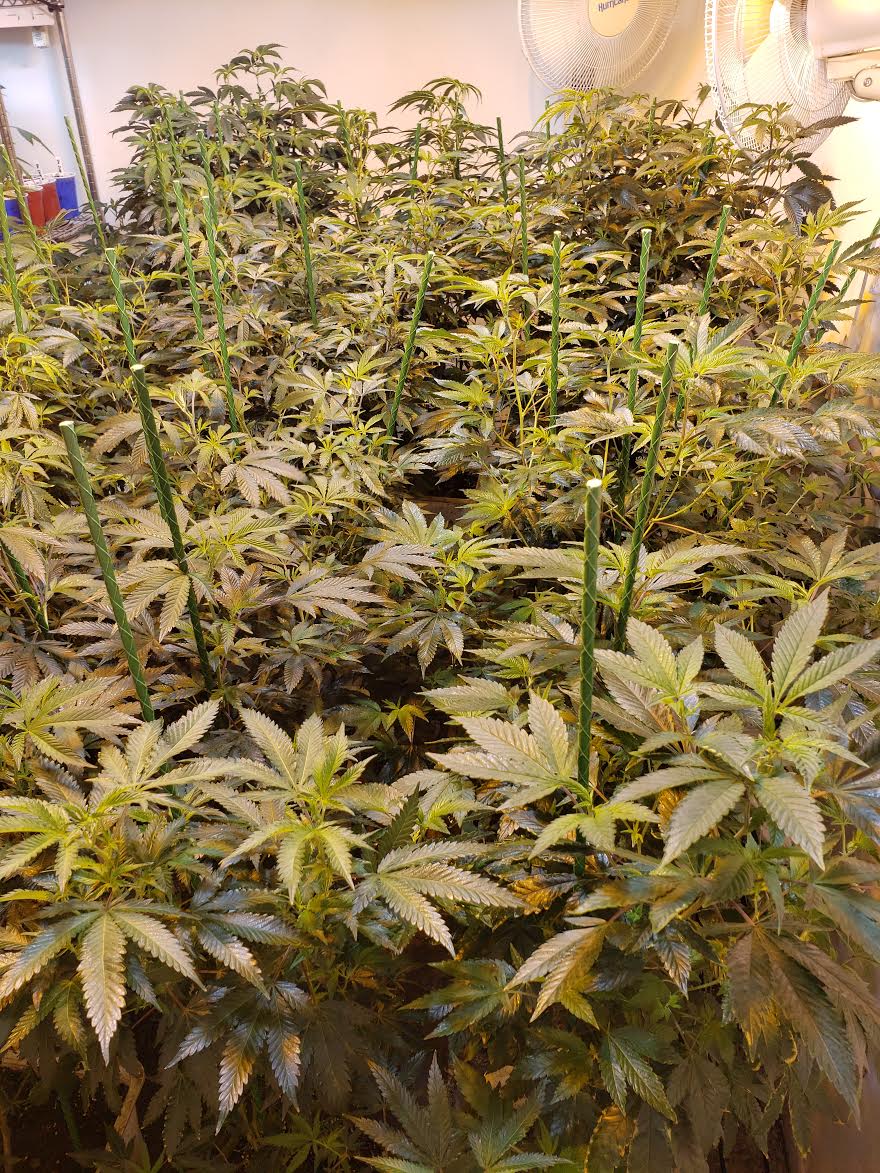 If you will only be vegging indoors, stakes work well to support plants
Back to top
Flowering plants do well with a trellis net, simply because it can support all of the branches as they become weighed with flowers. As a plant’s flowers grow, they get heavier, causing the branches to lean and bend. If not supported, tops can fall over, making them more susceptible to being crushed, targeted by pests and disease, or simply being shaded from the light.
Once a plant gets moved into a flower bed, or into the bloom stage, it’s best to train it with a trellis net. It’s important to accomplish this
before a plant strengthens its branches, so you can bend and maneuver them more easily. Stakes can be used for support while the plants are adjusting. Ideally, let the plant adjust to being transplanted for a day or so, then trellis net. However, if needed, the plants can be netted immediately after transplanting.
 Train your plants with a trellis net for extra support and light exposure
Trellis netting
Train your plants with a trellis net for extra support and light exposure
Trellis netting plants is a technique called
low stress training (LST). Benefits include better support, a more uniform canopy, and less work throughout flowering. It does take longer to harvest though. Netting can be purchased at the local hardware store or gardening store, and comes in different sizes. It’s recommended to use netting with squares that are 4-6” in diameter. This usually takes at least two people to accomplish.
Here’s how it’s done:
- First, you’ll need something to tie the netting to. If the flower beds are small enough, pvc framing works well. For bigger beds, rebar or posts are commonly used. The height of the framing will be dependent on how tall the plants are, but should be about 10-12” below the top of plants.
- Make sure the netting is pulled tight. Attaching it to a square pvc frame can be helpful if using a pvc support.
- Place the netting over the plants, letting it push the top 10” or so of each plant down and over. Be extremely careful not to break the tops. Go slowly. Several of the tops should be laying down sideways when the netting is secured.
- Secure the netting to the frame or posts. Zip Ties work great, however, string, nails, and other materials can be used also.
- Next, spread out the branches to allow sunlight to reach the middle parts of the plant. The goal is to open the plant up, pulling the branches out and away from the main stem, to allow sunlight in.
- Weave the tops in and out of the netting squares, making sure the netting doesn’t get caught on any nodes.
- Pay attention to each and every flower site to make sure that, at one point during the day, each one gets sun exposure.
- Wait 2-3 days for the plant to stand up and grow towards the light. Because this technique does put the plants under some stress, it’s best to wait until you see them standing back up before pruning any leaves or lollipopping any branches.
- After 1-2 weeks, the plants will have grown in height. A second trellis net layer should be added, this time with the squares being a little bit larger in size. The distance between the two trellis layers will be dependent on how healthy the plants are, and how tall they grow, but should be roughly 8-10” apart. Do not bend the tops or branches this time. The netting is there simply to support the tallest tops. Carefully guide tops into the squares, separating any that are too close to each other. Continue layering trellis nets as needed.
- As a plant grows, if any side or lower branches grow into the frame, gently reposition them in order to avoid squished or shaded flowers. If any flowers or leaves get stuck on the netting, gently move them out of the way.
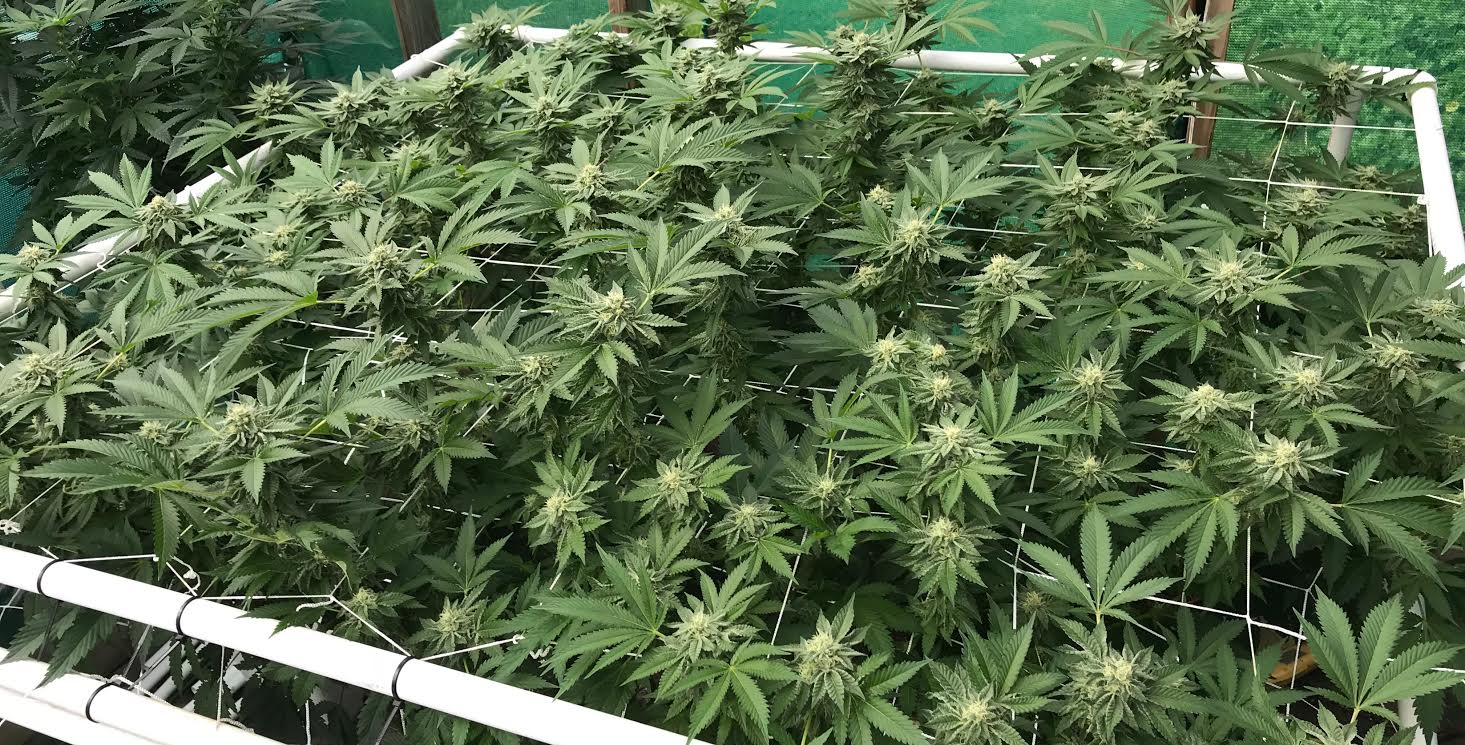 Trellis nets offer better support, a more uniform canopy, and less work throughout flowering
Fiberglass stakes
Trellis nets offer better support, a more uniform canopy, and less work throughout flowering
Fiberglass stakes are easy to use in veg, but can also be used in bloom. If you use stakes, you will need several for each plant. Stakes typically come in different sizes; 4’ and 6’ are recommended.
Here’s how to stake a plant:
- Position the stakes by the main stem and largest tops, making sure the stems and branches are standing up straight. Stakes work well when placed just inside and around the circumference of the pot to allow branches the most separation as possible.
- Gently position the branches at a 45 degree angle from the ground (if possible; first gently test to see the branch pliability as you don’t want to break them), which will help achieve a more uniform canopy. Branch positioning may need to be adjusted once the plants reach for the lights. Typically you will know after 1 week of initial training.
- Securely clip the branches to the stakes before branches become heavy from flower development, which can cause them to break. If using wires, do not make the wire too tight, as the plant will still be growing in height and width. (Lever Loop gripper clips are better.) If the tops of the branches are sticking straight out, they will bend and grow towards the light, which you will see after 3-5 days.
- Securing hanging branches should be done several weeks in, as the flowers develop. Tying multiple branches to one stake may be needed. If tying more than one branch per stake, make sure to give them enough space and not overcrowd an area. Too many leaves in one area will encourage pests and disease to settle.
- As flowers increase in size, it may cause the stake to lean, in which case, it needs to be straightened. Extra wiring may also be needed in severe weather or with a tall plant. If the soil becomes too dry, it can also cause stakes to shift. Make sure to check them from time to time to ensure proper functioning.
How To Train A Plant For A Uniform Canopy
Start at 7-8” tall in veg, stop 2-3 weeks before flowering
A plant’s branches grow at different speeds, with the main top stem usually the longest or tallest and then each branch progressively getting shorter as you move down toward the bottom of the plant. Especially depending on the strain, individual plants grow at different speeds. Even plants of the same strain will grow at different rates depending on the health of the plant, position under a light source, and location in a room. When you put several different strains or plants next to each other, you can run into the problem of having tall plants shading shorter plants. The goal is to have a uniform canopy. A uniform canopy allows plants to get more balanced light exposure, increasing the size of the flowers and directly increasing yield.
The following steps will help you achieve a uniform canopy:
Step 1: Start training plants when they’re in veg, roughly 7-8” in height. You want to begin doing this when a plant is young so you influence where a plant directs its energy and how it grows.
Step 2: Pinch off the tops of the branches where you see new leaves forming. These will be the small shoots growing from the tops of the branches. They will be lighter green in color. Only the very tops of the branches needs pinching. The goal is to remove a concentrated source of a plant hormone called auxin, which is found in the tops of a plant. Auxin is responsible for apical dominance, which is a plant’s natural tendency to grow stems upward vs. branch out laterally. Without high levels of auxin in the top suppressing lateral growth, the little side shoots will be able to develop further, creating more stems and flowers.
Step 3: Let the plant grow for 10-14 days. Again strain dependent, most plants will grow 2-3 new leaf shoots where the single shoot was removed.
Step 4: If you notice one of the leaf shoots growing faster and longer than the other(s) next to it, gently flatten the stem with your fingertips directly under the longer leaf shoot (without removing the shoot) to direct energy to the other leaf shoot(s). This helps slow down the growth of the taller shoot and allows the other shoot(s) to catch up in size. As you do this for each plant, be sure to make the other plants next to it a similar height, enabling an entire garden to be a similar size.
Step 5: Continue to do this throughout veg, discontinuing at least 2 weeks before bloom. If you do this too close to the bloom cycle, you will decrease the size of your tops, which is not the intended result.
The goal of this technique is to not only get plants bushier and increase your yield, but to encourage a uniform canopy, which also decreases the likelihood of acquiring diseases and allows you to more easily treat and maintain plants from pest attacks.
How To Lollipop
Complete as a plant matures, stopping around week 2 of flower
Commonly known as
lollipopping, removing the bottom branches of a cannabis plant is essential for healthy plants, higher quality flowers, and a better harvest. On top of the visual appeal, lollipopping a plant has the following benefits:
- Improves plant performance and health
- Increases the size of the tops
- Promotes airflow
- Limits the smaller branches that are harder to protect against pest and pathogen attacks and harder to trim once dried
- Limits herm issues due to bottom branches being shaded, thus stressed, and is often the first place a plant will herm (strain dependent; typically only an issue when growing a strain for the first or second time, before you get to know it)
Because cannabis plants each have their own personality and appearance, the branches you cut will vary from plant to plant. The goal of lollipopping, though, is to help direct where a plant focuses its energy.
Here are some pointers on how to correctly complete this task:
Consider the size of the plant. Lollipop clones (bottom leaves). Lollipop vegging plants. Lollipop flowering plants. It’s a continuous process, and will change as a plant develops.
As a general rule of thumb, it’s best to conservatively lollipop smaller vegging plants, and make more significant cuts once a plant is in its first week or so of bloom. Sometimes you have to let a plant grow a little before you can determine whether or not a branch should be removed. Leaves do allow the plant to produce its own food and maintain proper health, after all.
However, regardless of size, you should always clean up a cannabis plant with careful pruning to encourage energy efficiency and distribution.
Remove the branches that don’t serve much of a purpose. As soon as a plant begins to rapidly develop, remove any tiny branches at the bottom that take precious nutrients from the tops. Those should be the first to go, followed by the ones that just don’t look like they’ll develop into what you want, often found in the middle, inner parts of a plant. When looking at a plant’s branches, if the words ‘small,’ ‘thin,’ or ‘unavoidably shaded’ come to mind, you should strongly consider removing the branch (sometimes more of a bud site than an actual branch). Many growers remove lower branches that don't reach the thickness of a pencil before week 2 of bloom.
How much you lollipop will also be dependent on the variety. Not all varieties grow the same. Some grow bushier than others; some have branches that grow up instead of out. Pay attention to how a plant grows. If you notice bud sites completely shaded, and perhaps somewhat stunted, you should consider removing the smaller, shaded branch (not the bigger branch that’s causing the shade).
At first, it may feel as though you are removing a lot of plant material, which can bring on the feeling that you’re lowering your future yield; however, the energy will be directed into growing your tops bigger, frostier, and higher quality - well worth the trade - and
effective as long as it gets done at the correct time.
Don’t forget: measure twice, cut once. Using a razor, sharp scissors, or pruning shears, be sure you cut the branch off cleanly, close to the main stem, but not cutting into the main stem. You don’t want to leave a big wound in the stem, which is likely to attract pests and pathogens. Remove any and all tiny branches growing halfway up the plant starting from the bottom.
It’s recommended this gets completed a 1-2 times as the plant matures in veg; however, a thorough lollipopping should be done the first and second week of bloom to allow as much energy as possible to be focused on top-of-the-plant flower production. Remove a majority of the lower branches a few days after the plants get put into flower, after they stand up from being trained with a trellis net. Then allow the plant to develop for 7-10 days and check it again to make sure all of the smallest branches have been removed.
You should be extremely conscious of each and every cut you make on a cannabis plant. Remember, you can always remove a branch or leaf - you can never add it back. You want the plant to have enough leaves and branches to help with food production and normal functions, but not too much that the plant gets shaded or has too many places to waste energy on.
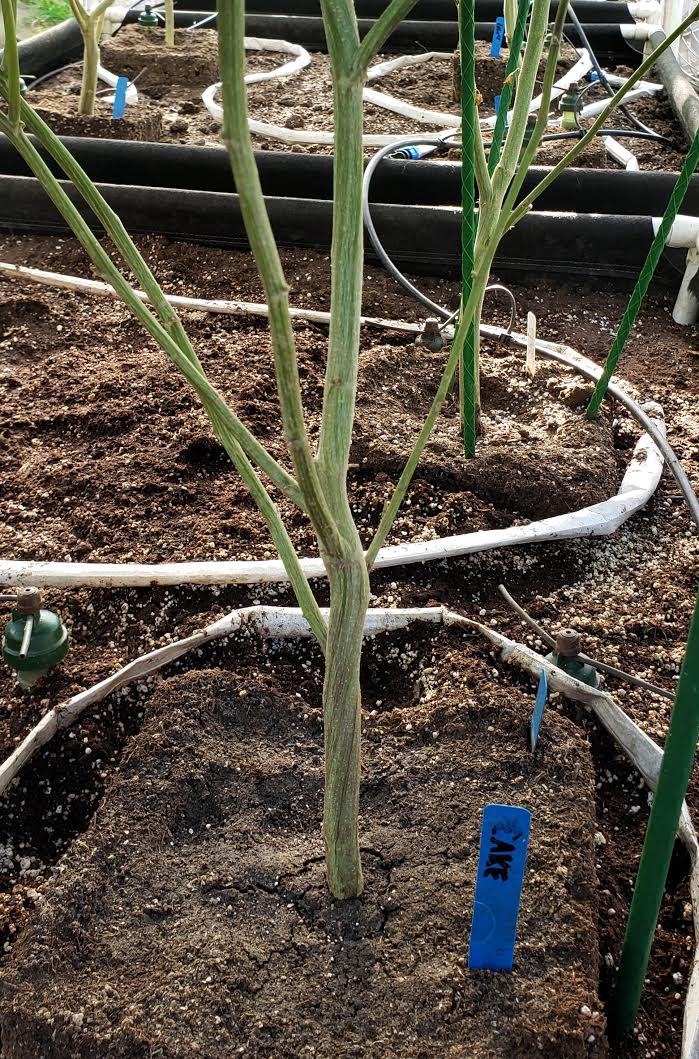 The goal of lollipopping is to help direct where a plant focuses its energy
As you remove branches, be sure to stand back and look at the plant you’re training. Did you leave enough branches and leaves for the plant to make food? Have you removed enough branches? Does the plant look healthy? Happy? A plant shouldn’t look scraggly. It should be full and leafy, with tops pointing up, adequate airflow throughout the branches, and shade hard to find at flower sites.
--
Lollipopping is important for cannabis plants. And to get good at it, all you need to do is simply observe, practice, and repeat.
And maybe trim.
When done correctly, not only will your plants look beautiful, but when it does come time to trim your harvest, you’ll be thanking yourself for lollipopping. Lollipopping not only saves you the headache (or loss) of having to deal with those smaller branches, but rewards you with bigger, frostier tops.
It’s an easy way to improve the quality of your flowers and the health of your plants and garden.
Back to top
How To Prune A Cannabis Plant
Complete throughout all stages of a plant’s life (1’+ tall)
Pruning a cannabis plant allows you to influence where it focuses its energy. Consider the space you have for the plant and how that particular strain grows to efficiently complete this task and maximize a plant’s potential. While overall this process is a simple one, there are a few things you should know about plants in order to correctly determine how to best manicure one.
Leaves are essential. Leaves provide many benefits for a cannabis plant, and knowing which ones to keep and which ones to remove can greatly influence the health of a plant. Leaves allow a gardener to more accurately read the health of a plant since they display signs of distress (as well as vigor) first. Leaves are like multi-purpose solar panels for a plant; they’re used to help with photosynthesis, to help make food, to regulate temperatures, to control water movement, and to help get rid of waste, so plants need a lot of their leaves left on to accomplish those tasks efficiently.
Leaves also help plants in many other ways. The small openings on the underside of leaves (stomata) allow carbon dioxide in the air to be absorbed by a plant. Additionally, the openings let oxygen back out. Moisture is also able to leave the leaf through these same openings (which can be challenging in cooler climates), often carrying waste material with it. These are reasons why a plant’s leaves need to be clean, free of dirt and debris, and properly maintained, so they can perform all the functions needed for a plant to maintain good health.
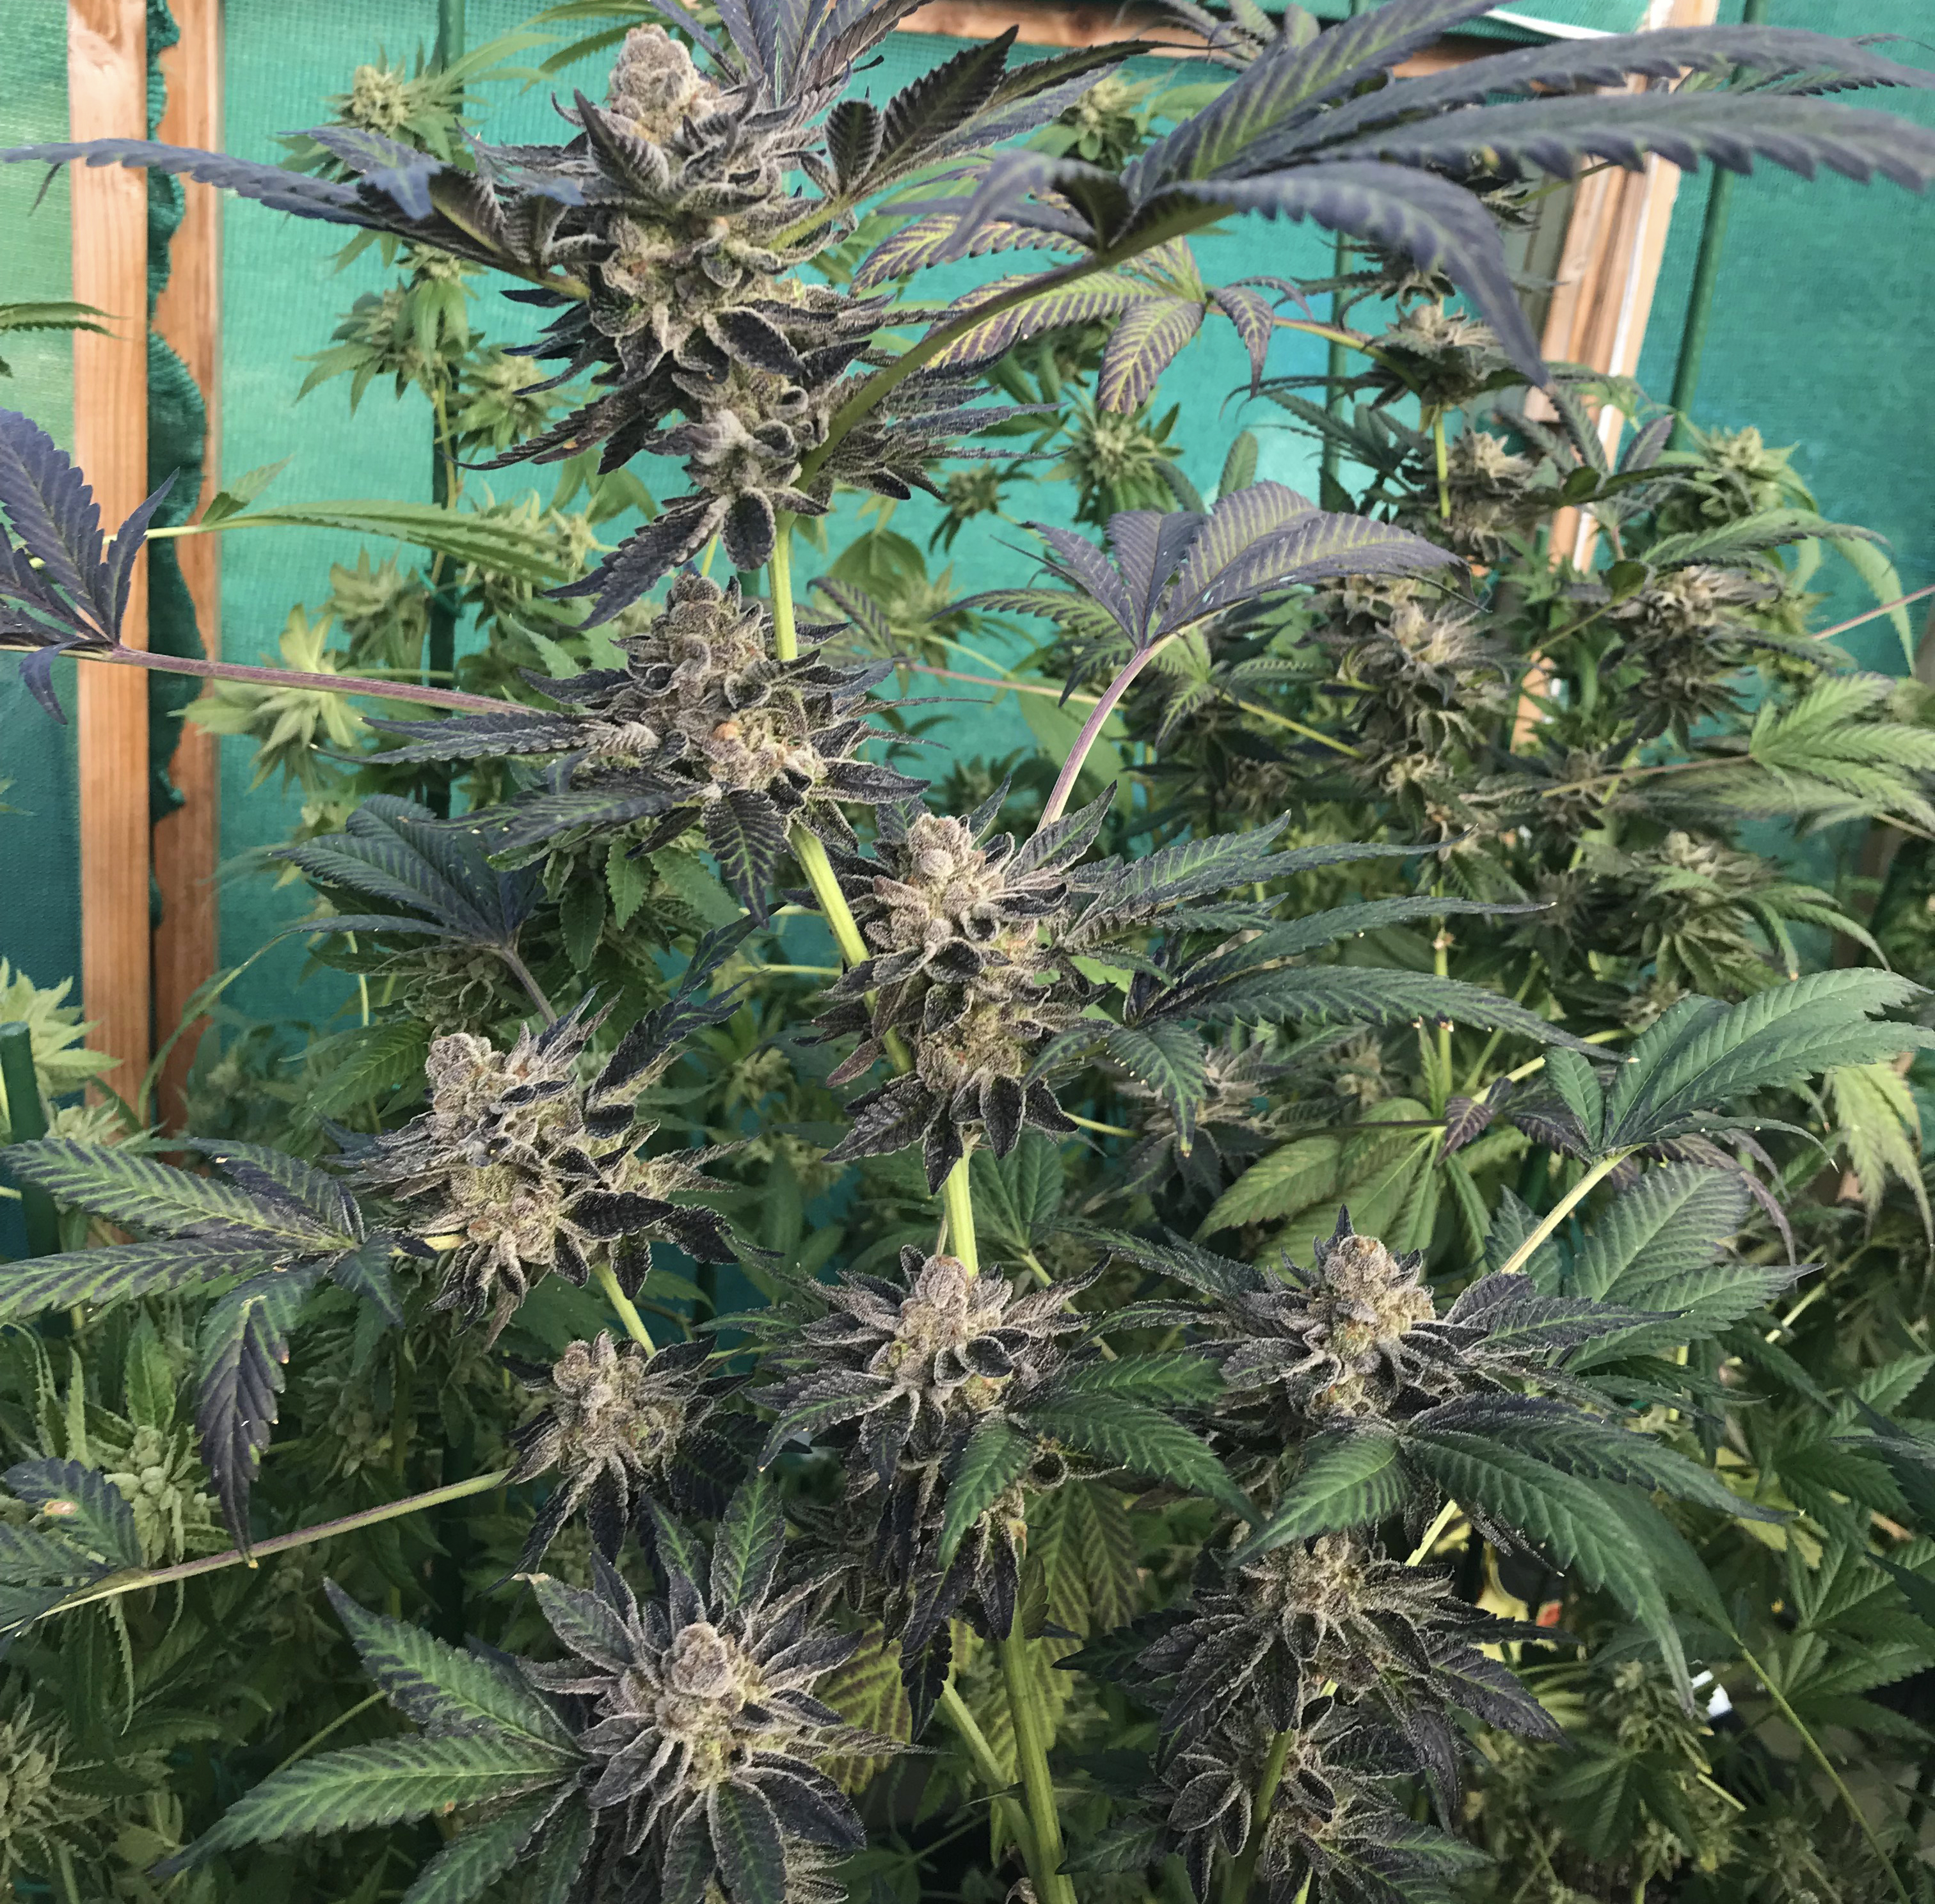 Knowing which leaves to keep and which ones to remove can greatly influence plant health
Leaves should be healthy and green from stem to leaf tips. They should hold proper shape and look strong and vibrant. For most strains, a healthy leaf doesn’t curl on the edges or tips, and it maintains a consistent green (or purple) color.
However, not all leaves are needed on the plant. Yellow and brown leaves, bug-inhabited leaves, and leaves that look wilted or are not properly holding their shape should be removed. It's important to remove these leaves because they make easy targets for pests and pathogens. If a plant is at the end of the bloom cycle, close to harvest, the leaves will naturally begin to fade to different colors depending on the variety and temperatures; these
don’t need to be removed.
When it comes to trimming leaves off a cannabis plant, you should strive to keep as many as you can, only removing leaves if they appear more sick than healthy, which means they’re unable to help the plant as intended. If you are having to remove a lot of leaves, it's a good indicator that something is off, and needs to be corrected the next round. Removing too many leaves will result in a lower quality flower and yield.
Outdoor plants or those in an unsealed greenhouse should have more leaves left on than indoor plants simply because of the increased pest pressure that will be encountered. Expect several leaves to be lost to pests. Indoors, pests should not be as much of an issue, but light intensity or exposure will likely be, so removing more leaves to encourage more light exposure is recommended. Issues like PM can also be problematic indoors, so more leaves are typically removed compared to outdoor plants for this reason as well.
To remove a leaf, make sure you cut low on the stem, as close to the branch as possible, with a razor or clean, sharp scissors. You do not want to strip any fibers off the branch during removal, which can happen if pruning scissors are dull or sticky.
Leaf removal will need to be done throughout the lifetime of the plant, whenever the plant lets you know it’s time to let one go. Each leaf should have its own space, not touching another leaf or flower, or growing abnormally.
Each leaf should have its own space, not touching another leaf or flower, or growing abnormally. Leaves that rub against or heavily shade a flower site also need to be removed, even if completely healthy. If possible, try to reposition a healthy leaf before cutting it off.
Branches provide support. A plant’s branches serve as highways for the movement of nutrients and water to various parts of the plant, and also help support the leaves and flowers. In vegging plants, you should notice steady growth in the length and number of branches. In flowering plants, you’ll see notable growth more in thickness and length of the branches.
The size of the branches contribute to the stability of the plant and can be good indicators of how healthy a plant is (depending on the strain). After 2 or so weeks into bloom, branches stop increasing in size as energy is directed into flower production.
Only thin bottom branches and smaller inner branches need to be removed, which is why a plant should be lollipopped. If you remove a branch, try to complete the task before the end of week 1 of bloom, before significant energy and resources start surging.
Flowers need a lot of attention. The flowers of a cannabis plant are extremely delicate. The first sign of flower formation is the presence of a tiny hair, or
pistil. As the flowers develop, they begin to produce bracts, which is where the trichomes are found. The trichomes of the plant contain the terpenes and cannabinoids, which give each strain its unique smell, flavor, and medicinal value. While a plant will produce trichomes as soon as bracts are present, the majority of them develop in the last week or two of bloom. Because a large majority of them are found in the trichomes of a flower, cannabinoids and terpenes also ripen and reach their full potential during the last 2 weeks or so of bloom.
It is important to be very gentle with this part of the plant, and if possible, never touch it. The only time you should touch a cannabis flower is if you need to remove mold, caterpillars, or other pests, which will leave you no other option but to touch part of the flower. As tempting as it may be, you should never squeeze a flower and should be extremely careful not to brush against or bump into them. It’s best to move slowly and cautiously throughout your garden, especially as plants get further into bloom.
The last 3 weeks of bloom will require more attention than any other time during a cannabis plant’s life. You’ll need to allow more time to be in the garden, looking over and tending to each flower during your daily inspection.
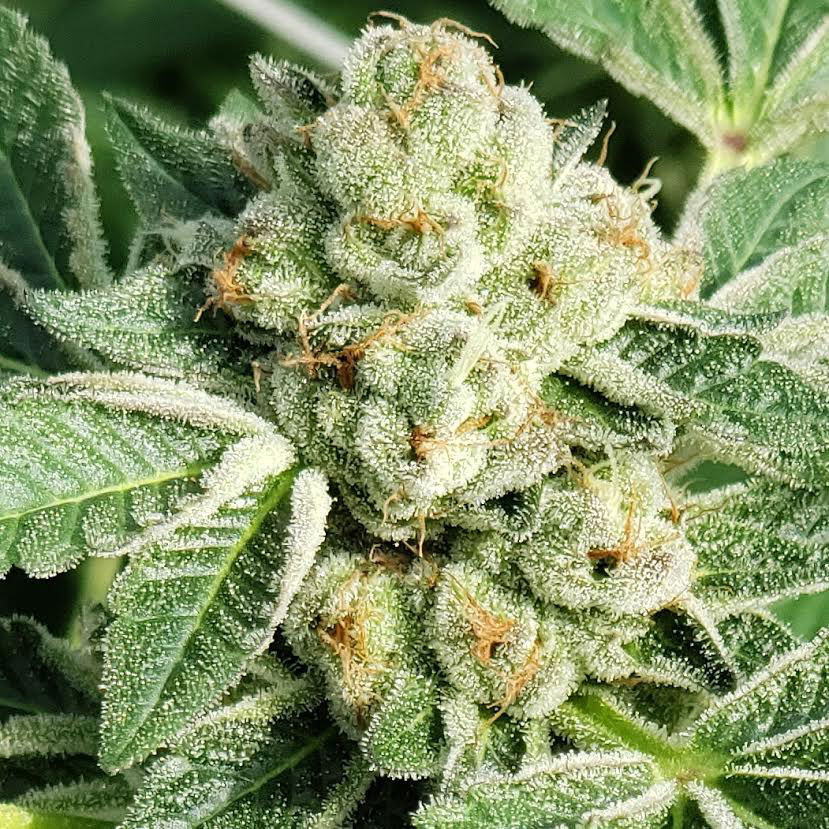 Be very gentle with flowers, and if possible, never touch them
--
Be very gentle with flowers, and if possible, never touch them
--
Your judgment will again be put to the test when it comes to manicuring a cannabis plant. The overall look of a plant should invoke descriptive words like ‘strong,’ ‘healthy,’ ‘green,’ ‘vibrant,’ ‘happy,’ ‘manicured,’ etc. The overall feel of one plant should be similar to the others in your garden, contributing to the look and feel of your entire crop, so make sure each and every plant is looking its best.
Training and maintaining a cannabis plant is by far the most tedious task you’ll have when taking care of your garden. While manicuring a single plant may seem easy enough, when you have an entire garden to look after, it can be time-consuming. Putting aside time to make sure your plants are properly manicured will be extremely beneficial to the health of your garden and the quality of your entire crop.
Chapter 8: Vegging
18 daylight hours, 6 hours of darkness, typically takes 4-8+ weeks
After a seedling develops roots and grows its first 3 or so sets of true leaves, usually reaching a height of about 8-12“ and an age of 4-5 weeks, it’s considered to be in the vegging stage. Cuttings reach this stage sooner, and are officially called vegging plants as soon as they have an established root system and do not require being under a dome.
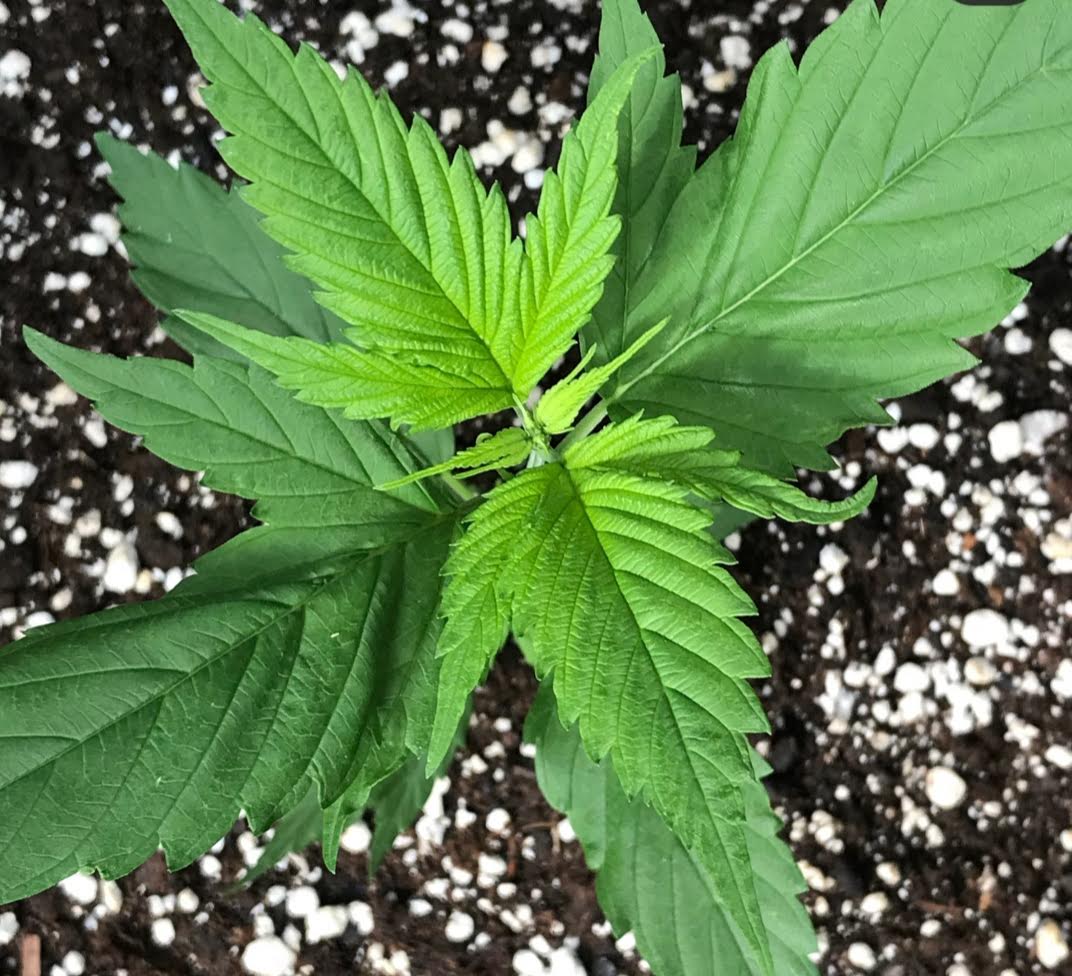 Vegging plants allows them to increase in size now for a bigger yield later
Back to top
When planning to flower outdoors, to have better control of light exposure, to keep a young plant as healthy as possible, to grow it bigger, and to increase the amount of flowers at harvest, many growers will choose to veg plants inside; however, vegging outside in a greenhouse with string lights is a technique that is also popular and effective, and allows you to grow plants bigger than you might be able to accomplish with ambient light under a standard roof.
The vegging stage can last a few weeks to a few years. There are some important things to know when it comes to vegging a cannabis plant, including:
Make sure vegging plants get enough light exposure. Vegging is accomplished by exposing a plant to light for longer hours in a day than it would naturally get.
The goal is to prevent the plant from flowering. You do not want to see any white hairs; it’s meant to be a time for a plant to develop a strong root system, grow branches and leaves, thicken up, and increase in size. We recommend to veg on a schedule of 18/6 (light for 18 hours a day and darkness for 6).
Vegging plants also thrive when they’re kept at the correct distance from the light source, so investing in a good grow light and setting up your room based on the light(s) you get is highly recommended. Depending on the strength of the light, be conscious of either how high off the ground your plants are, or how low your light is suspended above them.
The stronger and hotter the light, the further away a plant should be.
The following lights are recommended:
- Seedlings and clones: T5 fluorescents
- Vegging plants: LED or CMH
In addition, be careful with how many plants are in a grow space. If plants do not receive enough light exposure, air circulation and room to grow, they will likely lack vigor. Crowding plants together can create perfect conditions for mold, rot, and pest populations. To make it harder for pests and pathogens to settle on plants, resting plants on a table or platform to keep them off the floor is recommended.
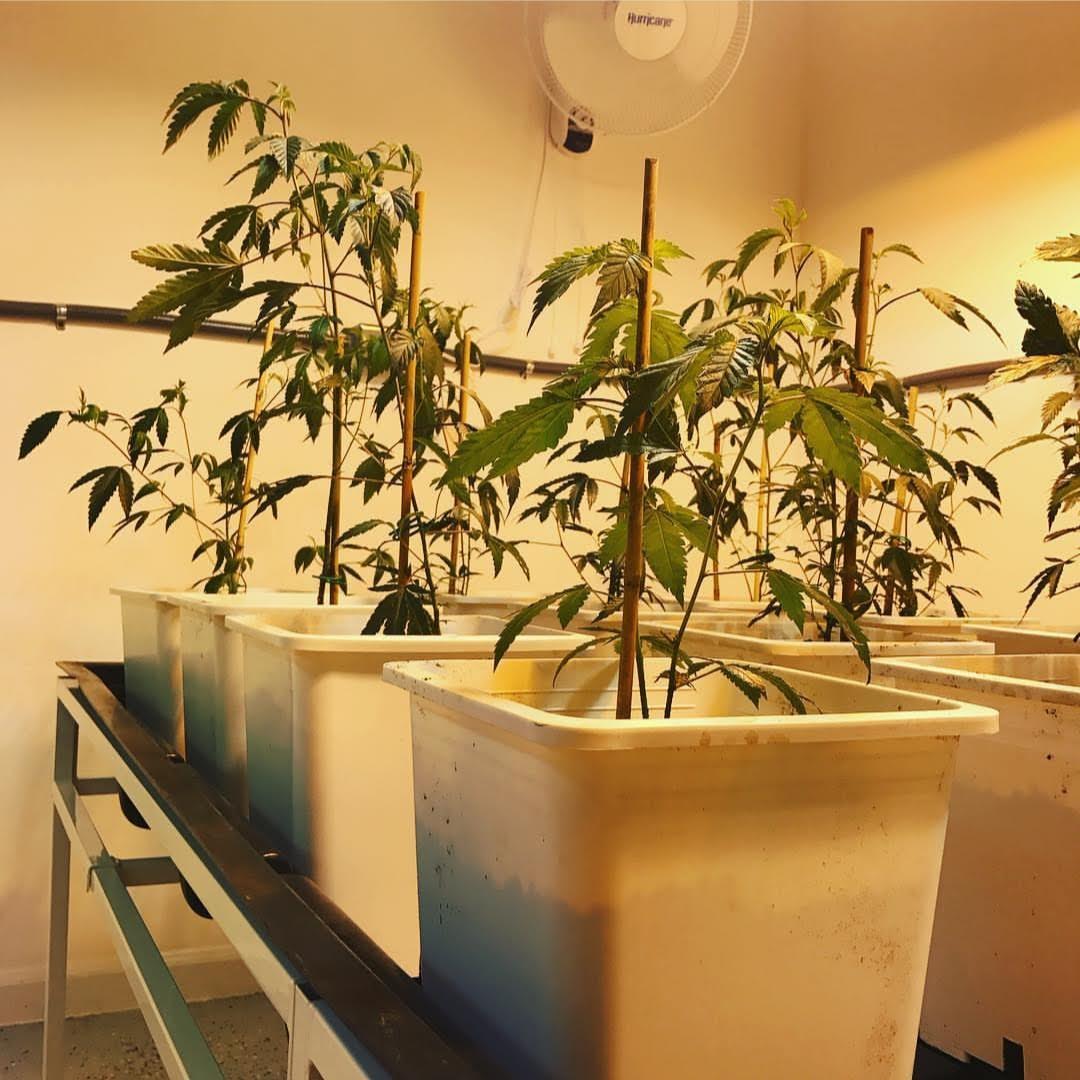 The health of vegging plants will determine the health of flowering plants
Keep them properly hydrated
The health of vegging plants will determine the health of flowering plants
Keep them properly hydrated. Because vegging plants are typically grown indoors, they are usually kept in smaller pots for efficiency. A smaller pot size means there will be less soil, quickly allowing a plant to dry out or become overwatered. Vegging plants also transpire at an increased rate; careful and frequent attention is required. Because it is easy to overwater vegging plants, applying water with a hand pump sprayer (with wand) is recommended for plants 1’ and under. Add ½ tsp of Recharge, ½ tsp of a wetting agent like Q, and 2 tsp of EM-1 per 2 gallons of water for noticeable improvement in plant health. Constantly checking on plants is necessary until you learn their requirements for food and hydration. Moisture meters also help as they can tell you exactly how much liquid is in the soil.
Watch for growth. When plants are tiny, a seedling or fresh cutting, they do well with being given water-only (+ Recharge, Q, & EM-1) until their root systems are better established. The organic matter and microbial life in the soil should help supplement them with nutrients they need to grow. You can use rooting products like Mykos or Urb Natural when transplanting to give them a little bit of an extra head start.
Young plants also need to be transplanted at the correct times. As a plant increases in size above ground, its root system is also increasing in size beneath the soil. Transplanting before a plant becomes root bound will help maintain peak health, influencing quality and yield.
As a plant matures, make sure you keep an eye on how tall it gets. If plants are allowed to get too close to the light source, they will become hot and stressed, likely causing leaf burn. If left too close to the light for extended periods of time, the tops will burn, damaging the most desirable part of a cannabis plant. If you will be flowering indoors, trellis nets can help keep vegging plants manageable in confined spaces like tents or rooms with low ceilings (see Chapter 9: Transplanting).
For a plant that’s getting too close to the light, if you don’t have the space to make adjustments, you can top or clone the plant (see Chapter 4) and trim the side branches, increasing the amount of tops you’ll harvest while simultaneously keeping the plant’s size manageable for the confined area. If you need to top a plant and don’t have the space or desire to root the cuttings, you might want to consider juicing, composting, or repurposing them, or simply throw them away. As always, make sure you don’t trim too much off of a plant, or health and life may be compromised.
You can also ‘pinch’ plants. This involves squeezing the main stem with the tip of your finger until it flattens, several inches below the top, usually around 4-5”. You want to
be careful to not use your fingernail to avoid cutting into the plant and damaging it. The goal is to have the top couple inches of the plant fall over, decreasing its height, but able to survive. You should notice it standing back up on its own within 2 days or so.
For rapid growth, provide vegging plants with these conditions:
Light: T5, LED, or CMH
Distance From Light: 10-12" (T5), 6-8” (LED single strip), 2-3’ (CMH), 1-3’ (8 bar LED)
Light Exposure: 18 light hours/6 dark hours
Humidity: 70-75%
Temperature: 76-78F, 24-25C; 68F, 20C (soil)
pH: 6.5 soil, 6.2 - 6.4 food and tea, 7.0 water
PPM: 400-800 (0.6-1.0 EC)
CO2: 1,200-1,500 ppm
Keep an eye on your garden’s temperature and humidity. Also important, the temperature and humidity need to be monitored and kept at acceptable levels. Young cannabis plants prefer temperatures around 76-78F, 24-25C and a humidity level around 70%. Air conditioning units help in this department, but you’ll also need to incorporate several fans for circulation. Make sure you have appropriately sized fans and that they are pointing in a favorable direction, oscillating if needed, eliminating stagnant areas and promoting proper airflow throughout the garden. Experiment with your growing space to determine ideal levels. Mounting fans on the wall or from the ceiling may be needed.
Keep vegging plants as healthy as possible. Vegging plants should look vigorous, stable, and rich in green color. They should be modestly lollipopped with tiny lower branches removed, but enough leaves left on to help the plant make food. A veg plant that has deficiencies could take several weeks to return to good health. Deficiencies that are acquired and not resolved during this time will continue into flower, and dramatically affect the quality.
On average, for a healthy plant to reach a decent size, 3-4’ (strain dependent), it needs to veg for roughly 8-12 weeks before it will be ready to go into bloom if starting from a seed. The longer you let a plant veg, and the more you top it, the bigger and bushier it will get.
Should you keep a Mother? It’s quite common for cannabis farmers to keep what is known as a
Mother plant. This is a plant that is vegged longer than usual to keep a particular strain around. Instead of flowering a Mother, cuttings are regularly taken from it, grown out, and then flowered.
Some growers will keep Mothers for a year or longer. Relying on this technique is risky. A gardener has to be well seasoned in order to be able to keep a Mother at peak health for long periods of time.
--
In order to keep the strain healthy, it is recommended that you replace Mothers every 6 months. Once a plant reaches about 6 months, and you’re certain you have clones of it rooted and thriving, put the Mother out to flower and replace it with one of the clones. That way you’ll be able to keep the strain in your garden while increasing the likelihood that it will maintain exceptional health.
It’s vitally important that you take proper care of cannabis plants from start to finish. Plenty of time and attention are required for quality results. Healthy plants are the result of a healthy environment. The reward, not surprisingly, is that healthy cannabis plants are easier to take care of, produce nicer flowers, and bigger yields. Everything you do, and don’t do, will show in the end. While keeping a cannabis plant alive may not require too much time or effort, encouraging a cannabis plant to truly thrive requires adequate amounts of each.
Don’t slack on the care while a plant’s in veg just because there aren’t any flowers. Ensuring plants stay happy and healthy during this time is necessary if you want to produce quality organic flowers.
Chapter 9: Transplanting
Veg only, transplant a total of 2-3 times
Typically, young cannabis plants are kept in small pots and put under lights to veg until they are a desired size. However, after a few weeks of development, a plant’s root system will run out of space, requiring it to be transplanted.
Transplanting is an essential part of taking care of cannabis plants, and is one of the most stressful things a plant goes through besides cloning. Like most tasks concerning cannabis, timing is everything when it comes to correctly accomplishing this. If you transplant too soon, you’ll end up transplanting more often than needed, causing unneeded stress on a plant, possibly affecting flower quality. If you don’t transplant soon enough, the root system can quickly overtake the pot or container, running out of soil and nutrients, and seriously jeopardizing the health of a plant.
It's important to transplant with Mykos and Azos before the plant’s optimal health is compromised. To time this, you can simply pop the entire root ball out of a container if the plant has been growing for at least 4 weeks. Keep notes on how a strain or pheno grows and what each likes from the start until after you harvest.
Overall, transplanting is a fairly simple process. For the average healthy cannabis plant, plan to transplant it a total of 2-3 times throughout its life, all during the vegetative stage. Thinking about your garden and its requirements, and making an educated decision on how many times your plant(s) should be transplanted and into what size pots, will ensure the best results.
Before you attempt to transplant cannabis at any stage of its growth cycle, there are a few things you should know:
1. Time of Day Matters
Timing is everything when you’re caring for cannabis, and there are better times of the day to transplant. Certain varieties are more sensitive than others, and keeping their stress levels low is incredibly important. Transplant anything outside in the late afternoon and anything inside about 15-30 minutes before the lights go off. This allows a plant to adjust to its new environment without being exposed to heat for too long. You can also put plants under an 80/20 shade cloth for a few days, if not for the entire bloom cycle if you’re in a hot climate, to help reduce heat stress. By being conscious of a plant’s exposure to light, you can keep the plant comfortable, which is especially important since it just had to undergo the transplanting process.
2. Selecting the Perfect Pot
At some point in a plant’s lifetime, if not for all of its lifetime, it will probably spend some time in a pot. It may seem like a minor detail, but pots do play a role in determining the health and viability of your cannabis plants.
Three factors that contribute to a preferred pot include:
Size: Pot size will influence the size of your plant’s root system. If a container is too small, you’ll risk having to transplant more often, or risk having a plant become rootbound. Small pots also increase the likelihood of a plant becoming under watered or overwatered. The best size will be heavily dependent on how big the plant is, how big your gardening space is, and what your gardening goals are. To establish a fungal network, transplanting a rooted cutting one time into a large container (the container you will flower in) is the best option although you will also need to plant a cover crop and maintain the soil prior to planting.
Recommended pot sizes for vegging cannabis plants are dependent on plant size, but commonly used sizes include:
- Seedlings: Solo cup with 3-4 cut out drainage holes at the bottom, or small 3-inch pot
- Rooted clones: 1-gallon for space efficiency, or 5-gallon
- Vegging plant: 5-gallon for space efficiency, or 7-gallon
- Flowering plant: 4’x4’x12” flower bed, or at least a 30-gallon pot
Whatever your space and budget, it's always best to go with a bigger container, as it allows a plant to have as much space as it wants and lessens the need for transplanting. The more space a plant’s root system has, the more likely it will develop nice big flowers. Keep in mind, a bigger container will require more soil, which can be costly, so selecting the correct size container is important.
Bottom line: when it comes to the size of a container, make sure the pot is an appropriate size for the plant that will go in it. The bigger the plant, the bigger pot it will need.
Type: Which one is better, a fabric pot or a plastic pot? It’s largely a matter of personal preference.
- Soft fabric pots are an ideal choice because they allow the root system and soil to have increased exposure to air. They also let roots grow through the sides and bottom of the pot itself, a process known as air-pruning, which encourages denser root hair formations and increased root branching, allowing a plant to more readily absorb nutrients and develop at a faster rate. However, fabric pots can be challenging to move around and take up more real estate than a plastic pot with the same dimensions. They also make it a little harder to remove a plant when transplanting due to the roots grabbing hold of the fabric. Fabric pots can also leak liquid out of the sides which can be messy indoors; this is a good indicator that the soil was allowed to dry up a little too much causing the soil to contract and form a space around the perimeter.
- Plastic pots are commonly used for vegging plants and plants kept indoors since they’re easier to move around and save space. They make transplanting a little easier as well due to how they influence root architecture; roots do not hold on to the plastic container and “fall” out of the pot more smoothly. They can become an issue for the root system, however, causing it to coil as it runs out of space. Plastic pots also become brittle after some time, making fabric pots a better option as far as reusability and longevity are concerned. Vegging plants and plants kept indoors are commonly kept in plastic pots since they’re easier to move and save space. Plastic pots also tend to absorb more heat, which could be problematic for the root system and microbial life in the soil, especially outdoors.
If you do have the option and space, fabric pots are best for plant health. Regardless of the type of pot you choose,
it must be able to drain water. Make sure to inspect the ground throughout the grow cycle to determine if you need to raise pots up if water exposure is an issue as potted soil can absorb water on the ground, causing a plant to become overwatered. Adding small rocks or gravel under fabric pots can help with drainage. Wooden pallets with coated metal roofing on top of them are also effective at raising pots off the ground to prevent overwatering. Indoors, it’s recommended you use saucers underneath pots to avoid overflow from spilling onto the floors and making a mess.
Color: For both outdoor and indoor gardens, light-colored pots have some advantages over dark-colored ones. Tan and white pots help reduce the chance of a pot absorbing any additional heat that the sun or grow lights generate. Lighter colored pots can lower temperatures slightly, but make sure you check the side of the pot to really know if it’s getting too hot for the roots. For some gardeners, black pots and beds are preferred, as the material the containers are made from flexes slightly and tends to be favored for that reason.
By thinking about the size, type, and color of your pots, you are ensuring your plant’s root system, one of the most important parts of the plant, is happy and healthy.
3. Pots, Flower Beds, Or In The Ground?
As a plant matures, you’ll want to start thinking about where it will spend the rest of its life. Young vegging plants are typically kept in pots while more mature flowering plants are commonly grown in flower beds or directly in the ground. There are different benefits to each method.
Pots. A major benefit to using pots is that you can control nutrient amounts and pH levels more easily, and move the plants around if needed; however, you are confined to the size of the pot as far as root expansion is concerned. Due to their smaller size, they also tend to require more watering than flower beds. A positive, pots enable you to care for each plant separately, allowing you to more easily learn how each strain grows and what each one needs. If you do decide to grow in pots, make sure you select the right size, type, and color for your plants.
Raised flower beds. Beds are a popular choice for cannabis growers. You receive benefits similar to growing in the ground, increased root space and microbial life, and have the advantage of more easily controlling the nutrient and pH levels, same as when you use pots. There is also more soil volume, making it likely that plants will dry out less often. For a flower bed that’s 4’x4’ (10-16” deep), you should put no more than 4 plants that are around 3’-6’ tall. You can build your own, or buy fabric beds. If you have the space in your garden, and don’t need to move your plants around, flower beds are highly recommended to grow in to increase microbial activity and enhance plant communication. Resting the beds on small rocks or wood pallets can help with drainage if the ground beneath a fabric bed has been weathered or is susceptible to flooding. Raised beds also give added protection to soil and plants against harmful nematodes and other pests migrating from the ground.
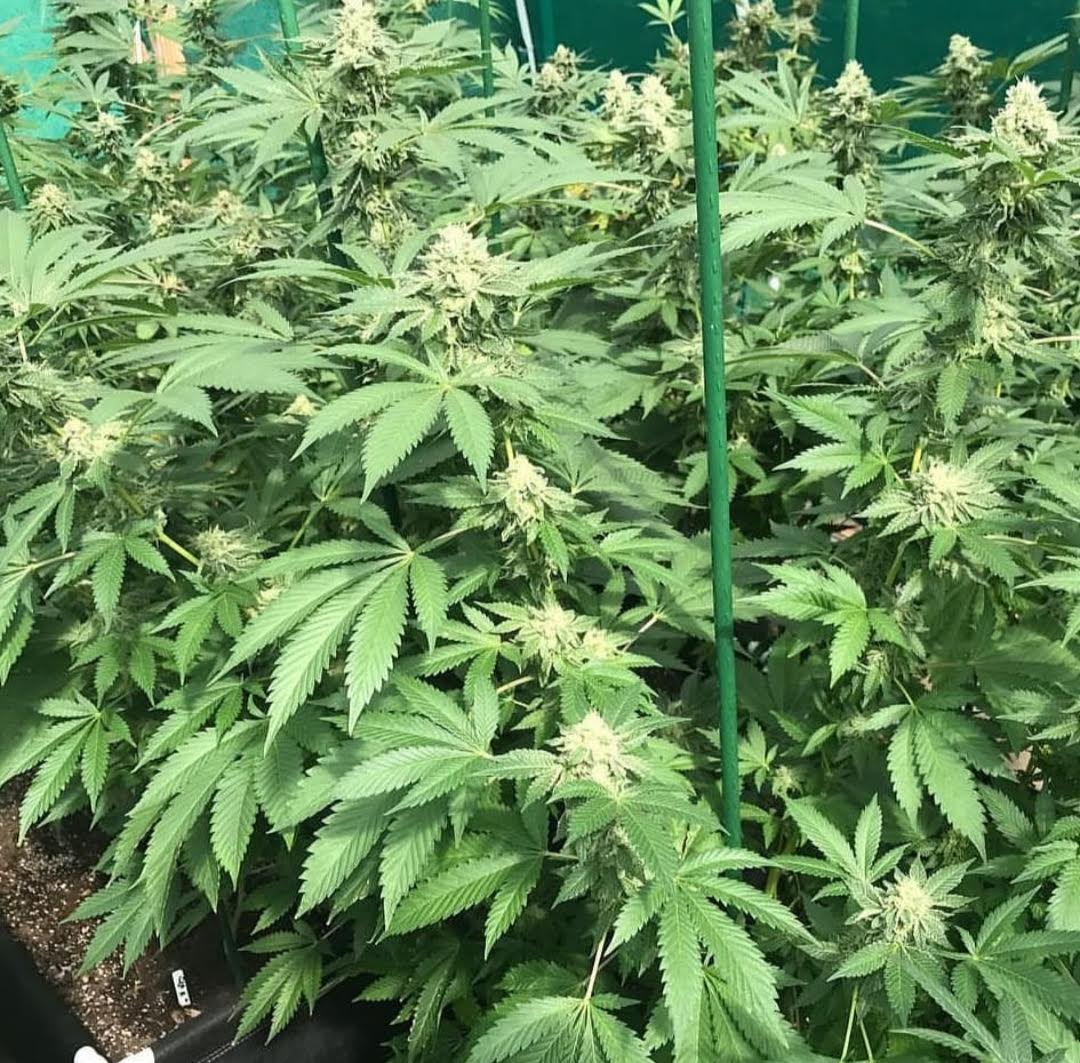 Raised flower beds are recommended for flowering plants
Back to top
Ground. Some of the benefits of planting straight into the ground, assuming you have high-quality soil, is that you are able to provide your plants with organic matter and desirable organisms that they might not be exposed to otherwise. The plant’s root system also has the freedom to branch off in any direction it pleases, able to go deeper and wider than if it was in a container. If you decide to grow directly in the ground, you will need to check for unwanted pests and tree roots, and stabilize pH levels. While it may seem more affordable, it may cost you in plant health, quality, and yield if the soil is not a favorable medium for cannabis. Getting soil samples lab tested will help you learn exactly what kind of amendments you may need and what kind of soil you are working with.
When deciding on what your plants will grow in, be sure to consider your garden’s climate and square footage. Many organic cannabis growers use pots or flower beds to grow in for the entire life of a plant because of the increased control and peace of mind when it comes to what's in the soil. Regardless of choice, for optimized results, expertly dial in your techniques and garden to best suit the environment it's in.
4. Acclimate Your Plants
When changing light fixture settings, or moving plants from your veg room to your outdoor garden, you may need to let plants adjust to the increased light intensity for a short period of time. This is mostly recommended for plants that aren’t at peak health, or for sensitive varieties.
For indoor plants that are being exposed to new light fixtures or settings, start with the power turned down and gradually increase it until you find the right setting. If you’re moving a plant outside or into your greenhouse, leave it in the shade or under shade cloth for an afternoon, or bring it out in the evening because the sun’s light is so much more intense than artificial light. Remember, you want your plant to be comfortable and under as little stress as possible. Choosing an overcast day to accomplish this task is also helpful.
Avoid pruning or lollipopping for a couple of days, until the leaves are standing up and maintaining proper structure.
Tip: Make sure if you will be moving the plant, you wait to feed or water it until after you’ve moved it. This way, the plant will be lighter and easier to carry and transplant.
5. Planting Cannabis In Soil
When planting cannabis in soil, there are different techniques to achieving success depending on what stage of life the plant is in.
Seeds: It’s recommended that you sprout seeds before planting them, and avoid ever planting them directly in the ground.
- Once a seed has sprouted, fill up a small 3” pot or a plastic cup with soil. Make sure the bottom of the pot has holes to allow excess water to drain out as needed.
- When filling a small pot up with soil, only fill it ¾ of the way to the top. Leave about ½ -1” of space at the top to allow liquid to be momentarily held while watering.
- Before planting a germinated seed, moderately wet the soil. You should see water coming out of the bottom of the pot, but not for too long.
- Use your finger to make a small indent around ½-1” deep in the center of the pot.
- Gently place the seedling in the hole, with the sprout side (tail) pointing down and the seed (head) toward the top, and cover it with a small amount of soil. You want the top of the seedling tucked in with the top cotyledon leaves exposed. Try to stand the seedling up as straight as possible, pressing lightly around the base to help hold it in place.
- Be sure to only mist with water once it’s planted to avoid drowning or disturbing the seedling from establishing its taproot.
Cuttings: To plant a rooted cutting:
- Fill a 3-5-gallon pot or container almost all the way up to the top, leaving about 3-4” or so of space.
- Wet the soil.
- Make an indent in the soil, in the center of the pot, about 2” x 2” in size, or just bigger than the root cube/root system.
- Sprinkle Azos and Mykos in the space where the cutting will be planted.
- Gently place the root cube or root system in the hole.
- Cover the top of the cube or roots with a sufficient amount of soil after you place your cutting in the space.
- Place your hands on the soil around the base of the plant and lightly press down to ensure it is integrated with the soil.
- Even out the soil so the top is flat, adding more soil as needed, and the plant looks tucked in and secure. The soil line should be about 1” from the top of the pot or container.
- Once the soil becomes dry, water as needed.
Young Plants:
- If attempting to transplant a young plant, it’s easiest if you first fill a 5-7-gallon (or the next size up) pot about halfway with fresh soil.
- Wet the soil.
- Sprinkle Mykos on top of the soil.
- Pick the chosen plant up. Place one hand at the base of the plant, right on the roots, main stem, and soil line, with the main stem in between your fingers.
- Gently hold the plant's main stalk, turn the plant upside down, and carefully encourage the plant out of the pot.
- Squeeze the pot (usually only applies to smaller pots) while gently pulling on the main stem to get the plant out of the pot. The soil and roots should come out in the shape of the pot. Be careful to keep the root ball intact.
- As soon as it drops out of the container, carefully place the plant upright in the prepared pot, making sure to support the main stalk and top of plant.
- Fill in the remaining area with soil. Leave about 1-2” of space at the top to allow liquid to momentarily be held when feeding or watering.
- Once completed, lightly press down on top of the soil, directly around the stalk of the plant. If you notice the container could use some more soil after pressing down around the rootball, add some.
- Lightly water or give food.
Mature Plants: Once a vegging plant reaches a desired size, it needs to be moved outside or into bloom. Unless there’s some kind of serious issue,
flowering plants do not get transplanted. When a cannabis plant is ready to bloom, it should be planted in a space that will satisfy it for the remainder of its life.
When planting in a flower bed:
- Fill the bed up with soil. A 4’ x 4’ x 12” bed will require roughly 100 lbs of soil.
- Have the plants that are going into the bed close by.
- Decide on the placement of each plant.
- Using a clean shovel, dig a square hole the size of the 3 or 5-gallon pot in width, or about the size of the pot that it's in, but slightly more shallow. You want the plant to be slightly raised in the bed. This allows liquid to drain better and also helps create what are known as air roots; the top roots are exposed to air. This helps strengthen the root system and increases the health of a plant.
- Once the hole is ready, sprinkle Mykos all over it, allowing it to cover the bottom and sides.
- Pick up the chosen plant. Place your hand at the base of the plant, right on the roots, main stem, and soil line.
- Gently hold the plant's main stalk, turn the plant upside down, and carefully encourage the plant out of the pot.
- Squeeze the pot while gently pulling on the main stem to get the plant out of the pot. The soil and roots should come out in the shape of the pot.
- As soon as it drops out of the pot, carefully place the plant upright in the prepared hole, making sure to support the main stalk. Make sure to also support the tops if the plant is big.
- Fill in any space on the sides of the rootball with soil.
- Once all plants are placed in the bed, spread the soil out evenly to create a flat, tidy bed. If done efficiently, the soil in the bed will be neatly level with each plant's root ball slightly raised out of the soil, about 1"-1.5” or so.
Remember to tag each plant with the correct strain name.
6. Encourage Air Roots
It's beneficial for a cannabis plant if you let air roots form. This strengthens the root system, strengthens the plant, and promotes excellent health. Air roots form when a plant's root system is slightly raised out of the soil. You accomplish this when you transplant from veg to bloom.
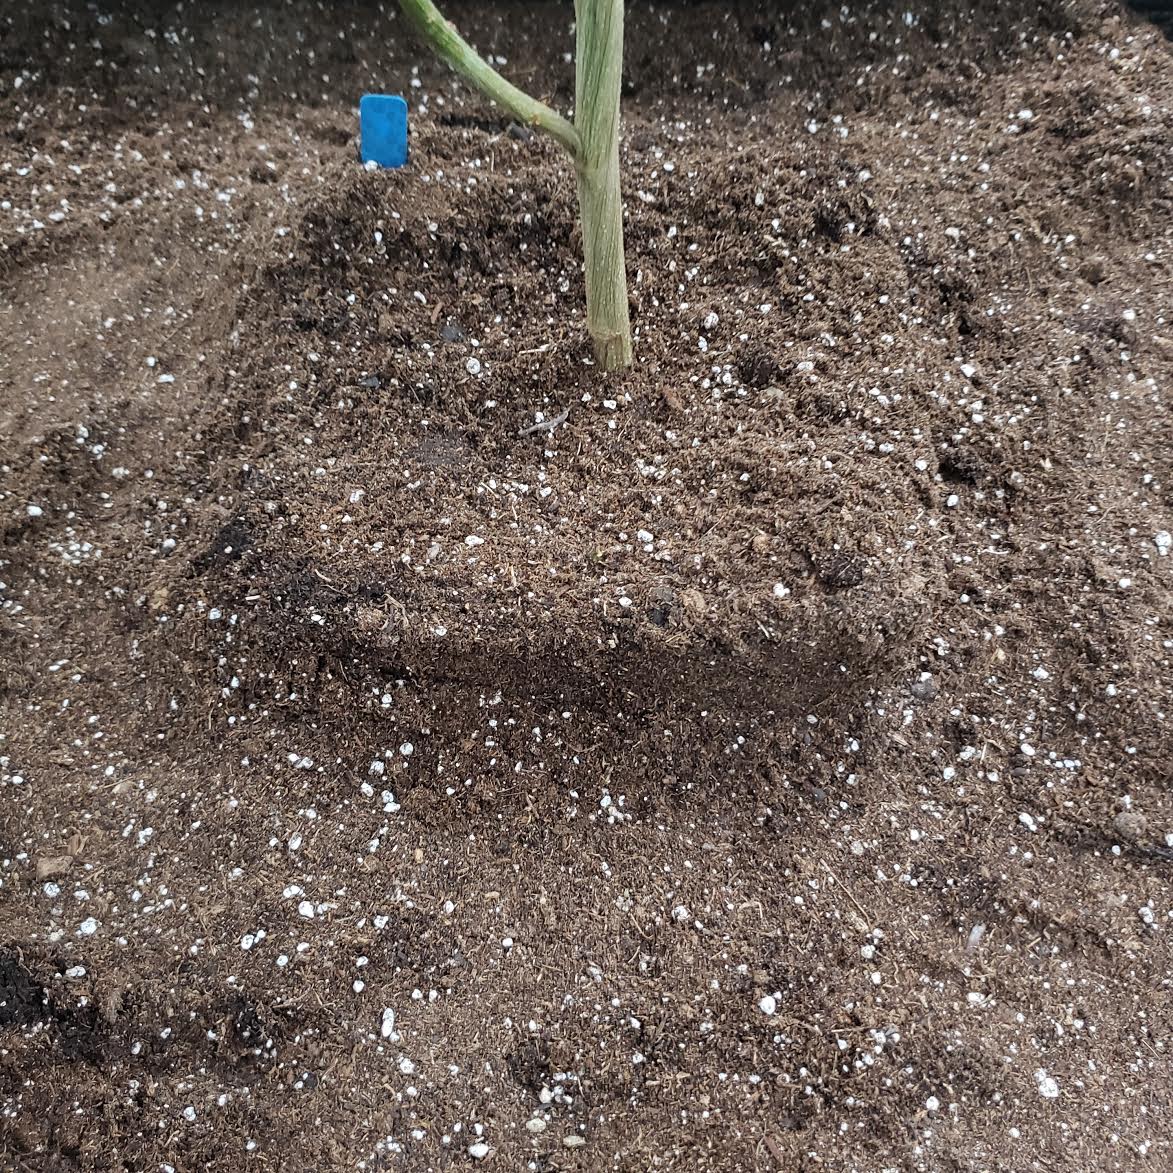 Raise plants slightly above the soil line when transplanting to beds
Simply dig a square hole in a flower bed or large container that is slightly shallower than the depth of the root ball, allowing about an 1”-1.5” to stick up out of the soil. As you apply water to the soil over the course of several weeks, some of the root system will become exposed and form air roots. Do not expose too many of the roots. You only want the top 1”-1.5” of a root ball from a 5 or 7-gallon container exposed.
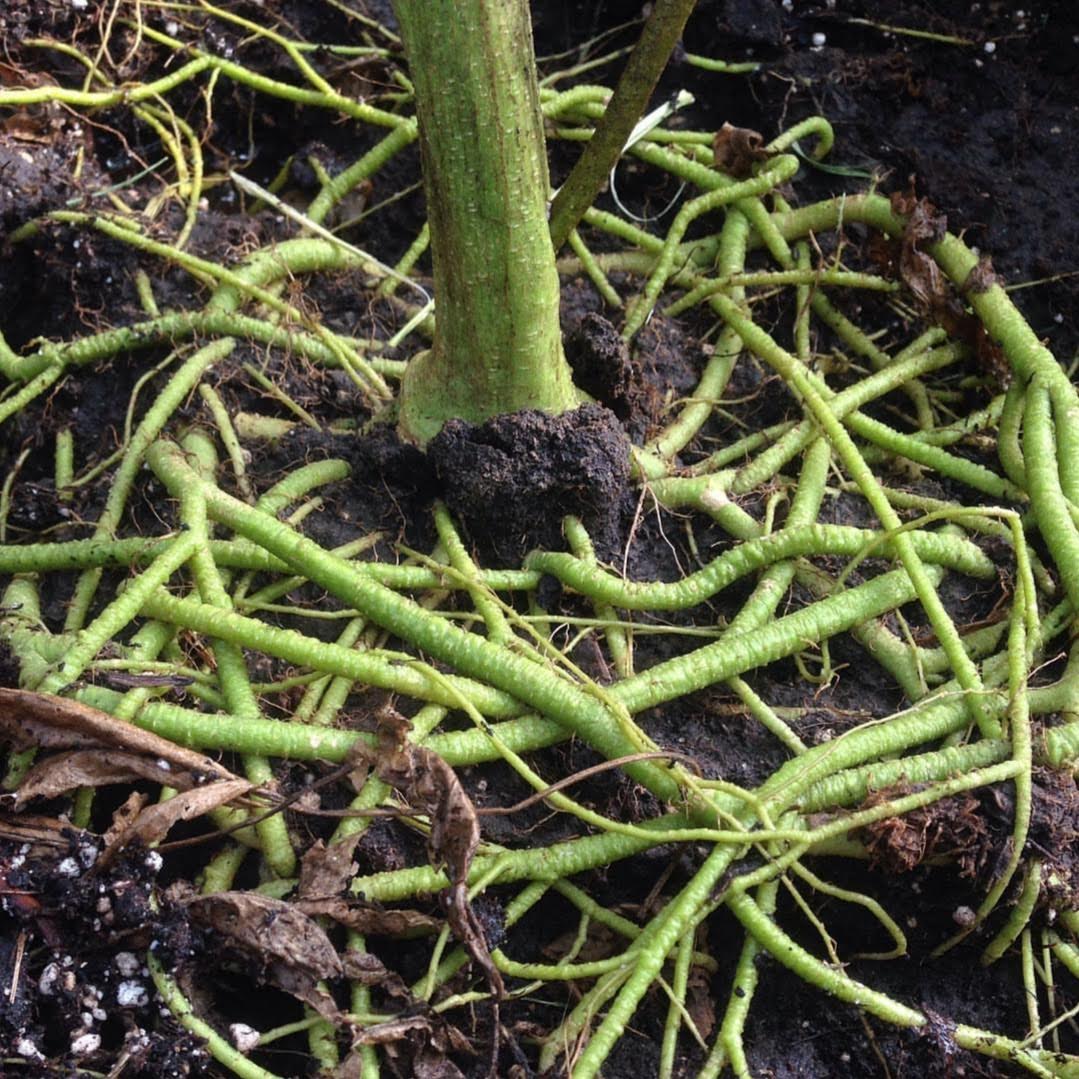 Air roots strengthen a plant and promote excellent health
7. Feed After Transplanting
Air roots strengthen a plant and promote excellent health
7. Feed After Transplanting
If your ingredients are fresh out of a bag, the soil is going to be dry. You’ll want to feed or water your plant(s) immediately after transplanting or your plant will likely wilt and possibly die. For seeds and cuttings, misting with water is best, but for more mature plants, you can feed or water them normally.
8. Repeat
Remember, the size of the plant won’t be the only thing that lets you know when a plant should be transplanted, the roots will too. Pay attention to the roots when you remove the plant from its pot or container. Do they look healthy? Can you see a lot of them branching out in all directions? Do you see lots of fuzzy hair formations? In addition to the top of the plant looking vibrant, green, and vigorous, examining the roots is how you’ll truly learn if you’re taking proper care of the plant. Record your observations, and if changes are needed, apply them to the next cycle.
Remember, in a plant’s lifetime, depending on the desired size, you’ll probably end up transplanting a single plant 2-3 times.
Seeds and Cuttings. After a seed sprouts, it does well if grown in a small pot or plastic cup until it reaches a height around 10”-1’, when it will be ready to move into a gallon-size pot. It takes about 10-14 days before a cutting will typically root and be ready to be put in the same size pot, where both plants should have enough space to thrive for about 3-4 weeks.
Vegging Plants. Transplanting mainly takes place when cannabis plants are young and vegging, as this is when they go through the most growth. After about a month in soil, cuttings will mature into stable ‘adolescent’ plants and will need to be transplanted again, this time into a 3 to 5-gallon pot, depending on your garden space, where they should be happy for another 4-6 weeks.
Ready-to-Flower Plants. Chances are, you’re only going to need to transplant a mature plant once. It is usually the most challenging transplant, not surprisingly, because of its bigger size. When moving up in pot size from a 5-7 gallon pot, it is ideal that the next size be a 30-gallon pot or larger, or that the plant be put in a flower bed. At this point, the plant will be in its bloom cycle, and you can start counting down the weeks until harvest, usually about 8-12 weeks away.
Perpetual Harvest. By strategically planning when to take clones, when to flower, and when to harvest, you can have a perpetual harvest, meaning you’ll never run out of flowers, or medicine. Normally, year-round sungrown flowers can only be grown in tropical settings. Dedication and the correct equipment are required for indoor. Growing year-round allows a gardener to harvest several crops per year.
--
Succession planting is when you begin flowering each bed at slightly different times and in different locations in your garden. You will first need to figure out the earliest and latest dates you can plant each crop. You also may need to germinate seeds and veg indoors first, in addition to selecting the correct varieties. To help determine how big your plants should be, estimate what kind of yield you want based on how much each plant/strain can produce.
If you have a 16-plant garden, 4 flower beds with 4 plants each, you will need to decide when to plant each bed, staggering the time you start each one. Planting the beds 2-4 weeks apart will allow enough time to dry and cure them before the next bed is chopped down. It will also alleviate trimming responsibilities, as trimming the harvest of several plants can be overwhelming for one person to efficiently accomplish.
Chapter 10: Flowering
11 light hours, 13 dark hours, typically takes 8-16 weeks
When a vegging cannabis plant reaches a certain age or size; 6-8 weeks or so and ideally around 3-4’ tall (ideally with at least 10 tops), it can be moved outside to bloom, moved to a different room, or be exposed to a light cycle that influences flowering.
Unless it's an autoflowering variety, cannabis plants begin to bloom when they receive less than 12 hours of light a day, and are exposed to the dark for an equal or longer period of time. Before moving a plant outside, make sure the light cycles are favorable for bloom. 11 hours of light is preferred, but 12 hours of light can be used. 13 dark hours are beneficial because plants form tighter flowers and finish up to 5-7 days faster.
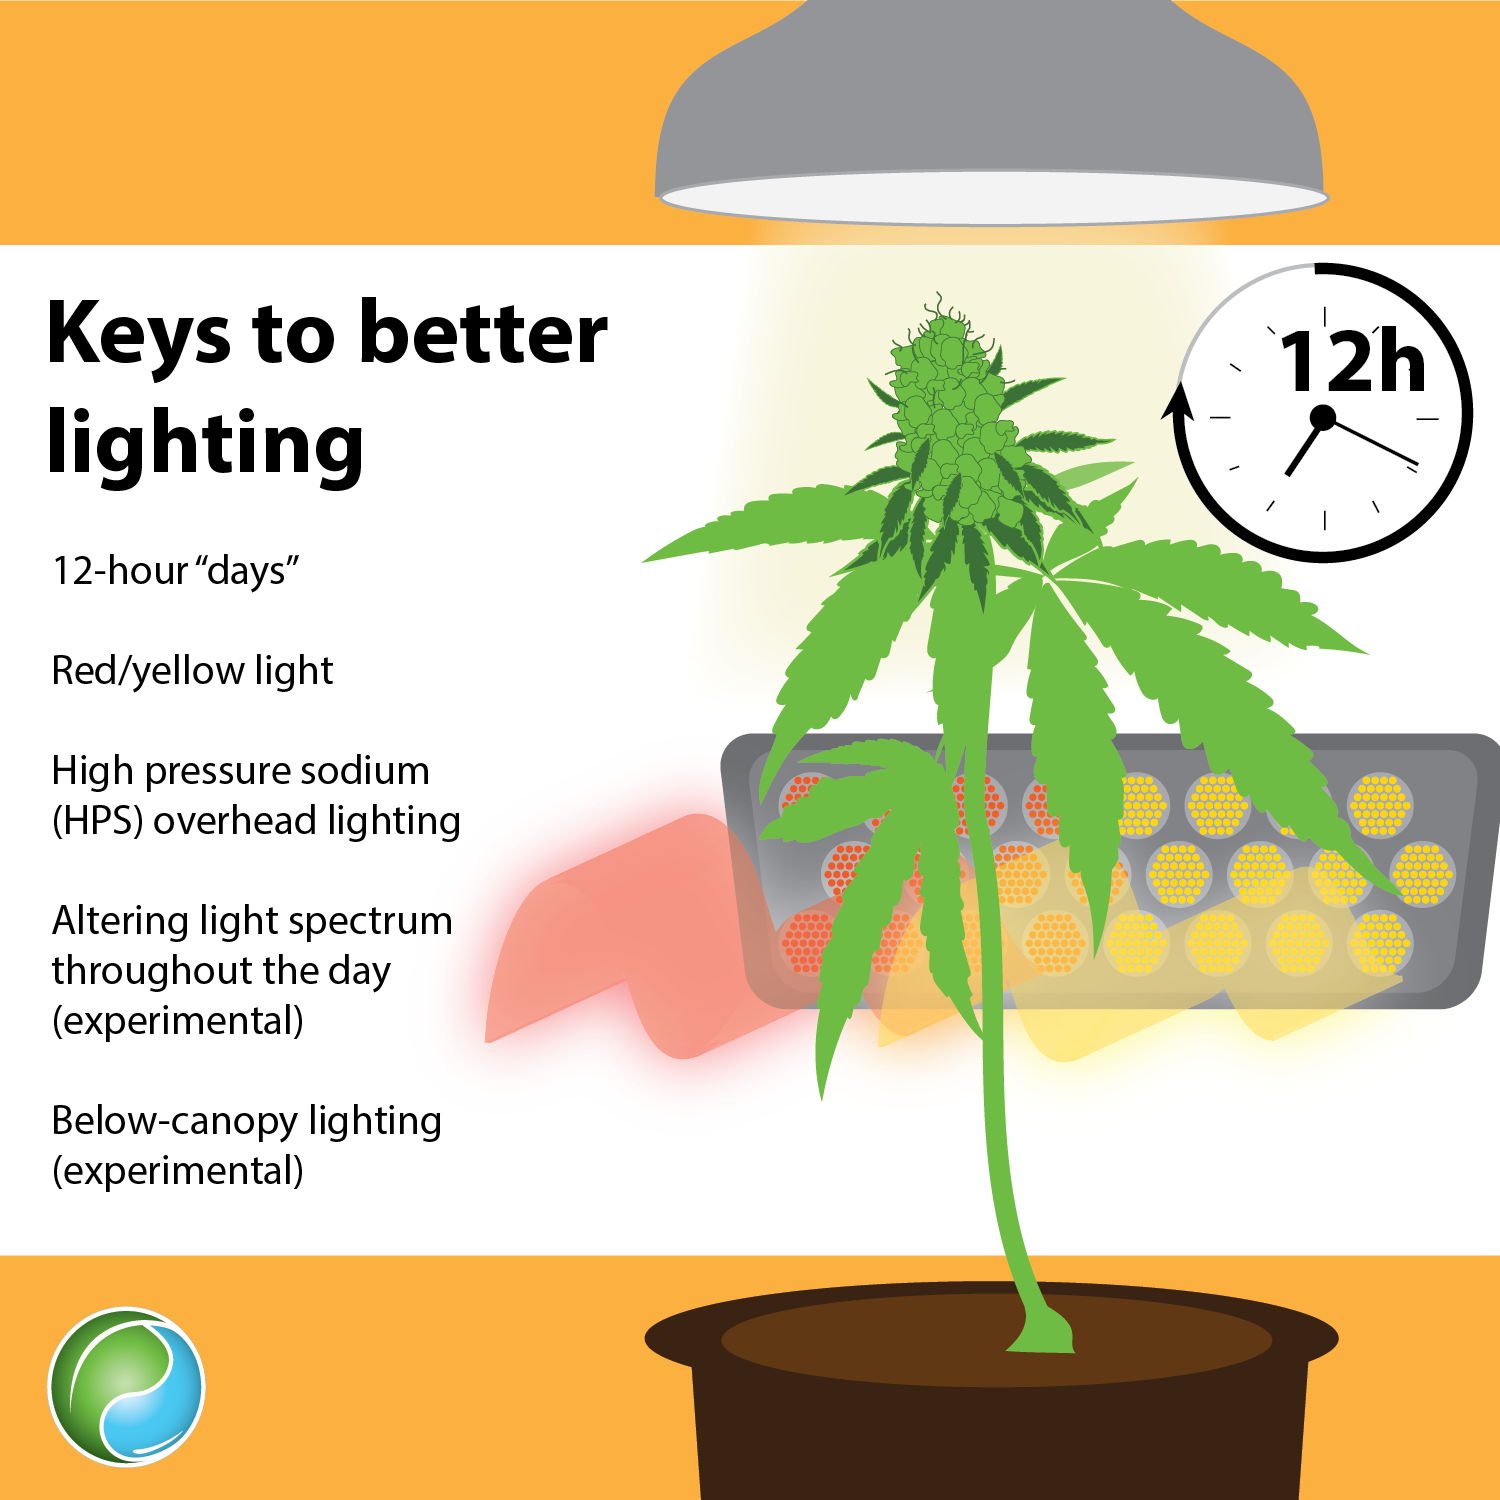 Image credit: Emily Nelson, Sustainable Plant Solutions LLC
Back to top
The bloom stage of a cannabis plant’s life cycle is perhaps the most exciting because this is when the plant goes through the most noticeable change, producing flowers, trichomes, terpenes, noticeable aroma, and sometimes color changes. This stage typically lasts 8-16 weeks depending on the variety.
The most important variables when it comes to flower quality include:
- Finding the ideal VPD
- Light exposure
- Training and maintenance
- Providing the right amount of required nutrients
- Maintaining soil composition, microbial life, and moisture levels
Just like vegging plants, flowering plants need water, food, light, good soil, ideal temperatures, and air for survival. Ensuring your plants are healthy and get adequate amounts of those basic components will result in better flavor, bigger yield, and more potent medicine. (Goals, right?)
For the most beautiful, medicinally-effective flowers possible, limit the amount you handle them, striving to preserve the shape and structure of not only the flowers themselves, but the individual trichomes as well.
Here are a few tried-and-true techniques when it comes to taking care of flowering cannabis plants:
Gender identification. This is an important time to pay close attention to your garden. If you’re starting from a non-feminized seed, this is when you’ll be able to determine if you have a male or female plant.
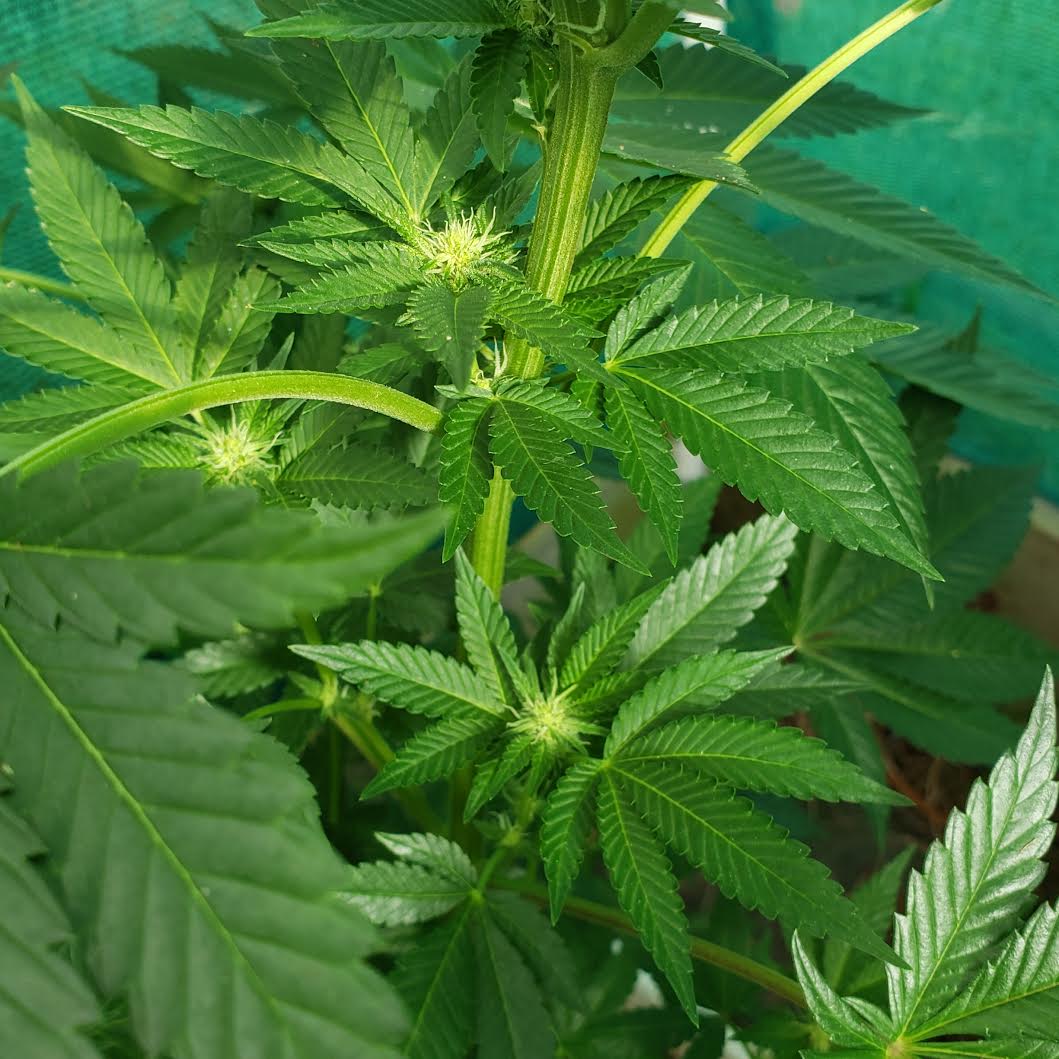 A female plant just beginning to bloom; notice the hairs which are the start of flower formations
You can usually see gender characteristics during week 1-2 of flower. Characteristics of a flowering female include white wispy hairs (pistils) on the top of the branch joints. Male plants lack the white hairs, instead producing tiny pollen sacs, which will eventually open into tiny flowers with pollen inside.
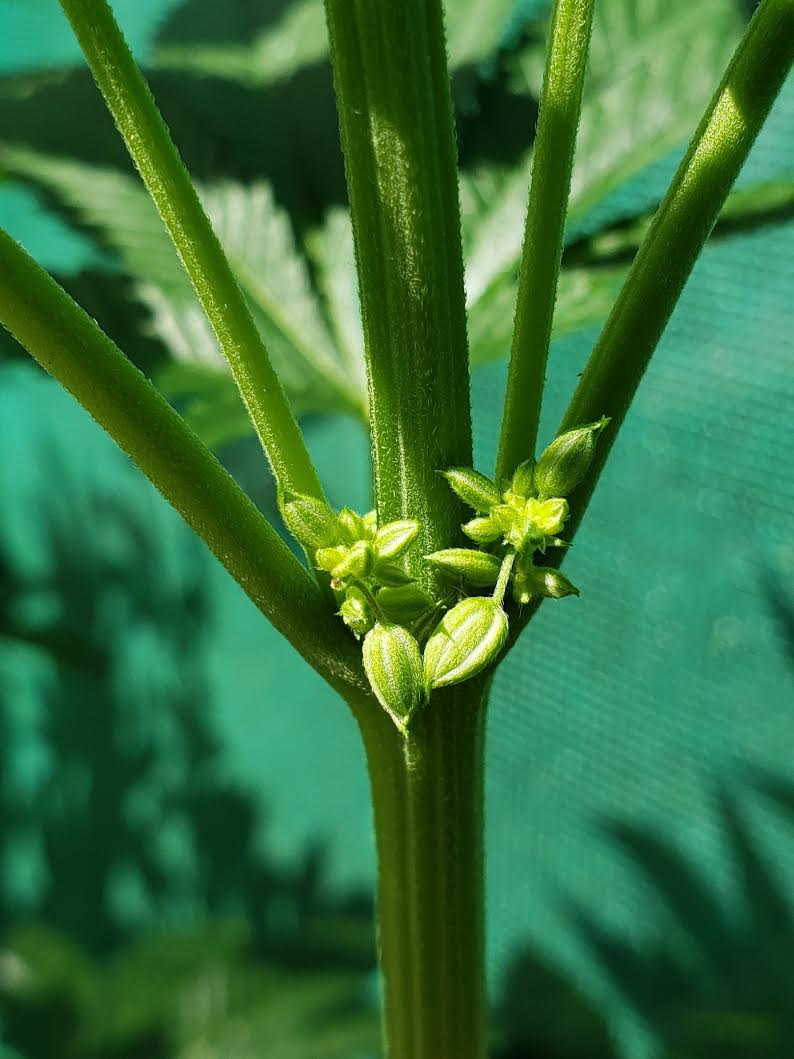 A male plant just beginning to bloom; notice the pollen sacs forming and getting ready to open
Females are the plants that produce medicinal flowers, so unless you plan on pollinating and making seeds, male plants should be immediately removed from the area the moment they are identified. Pollen sacs develop and open quickly, and just a tiny amount of pollen can seed a nearby plant or crop.
Removing a male before any pollen sacs open is important when it comes to maintaining quality.
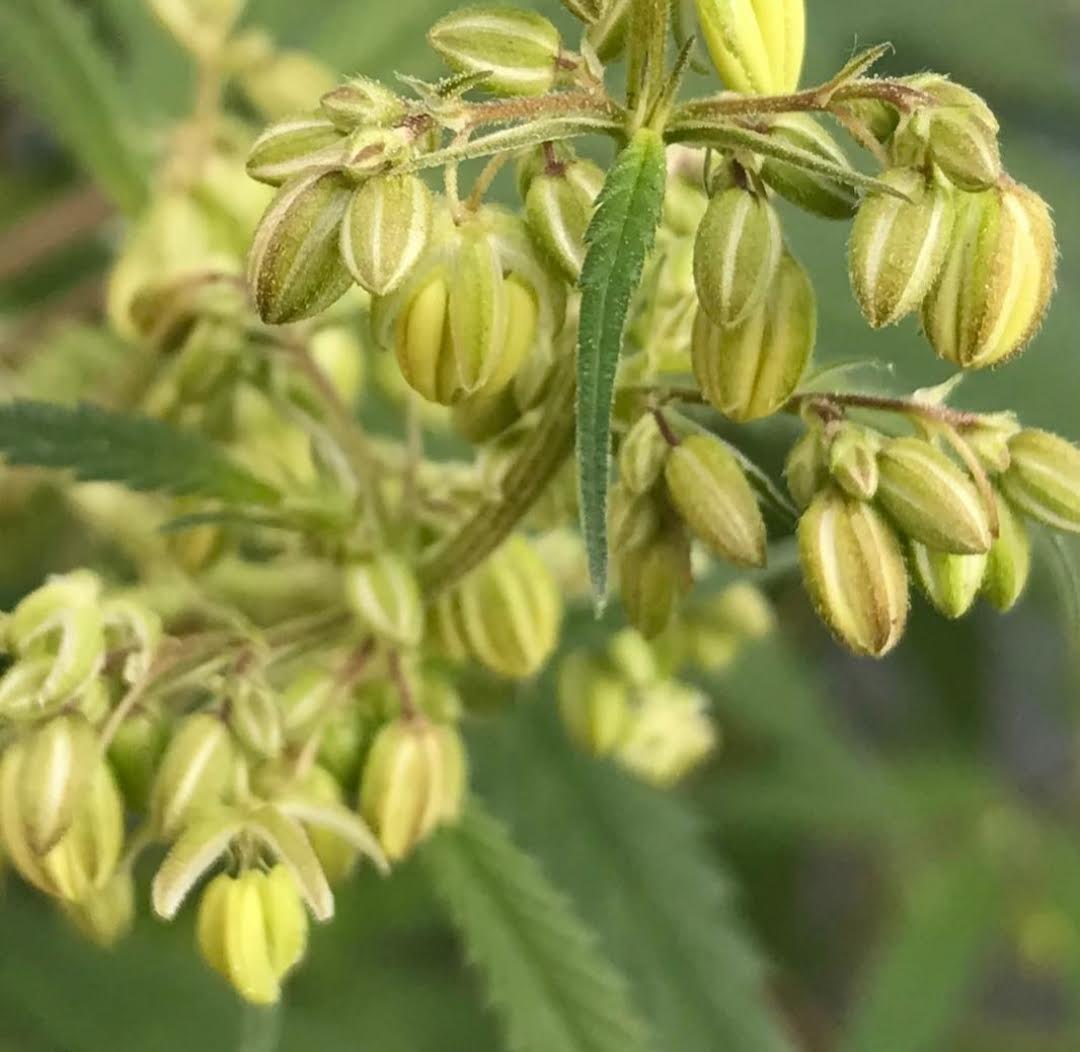 Pollen sacs develop and open quickly; just a tiny amount of pollen can seed a nearby crop
In some cases, a plant will produce both male and female characteristics; it is known as a hermaphrodite, or herm. This can be caused by genetic traits, but can also happen when a plant is stressed.
Plants can become stressed from:
- Being root bound
- Improper light exposure (too intense, not enough)
- Unfavorable temperatures, or temperature swings
- Unfavorable VPD
- Under watering/overwatering
- Nutrient deficiencies or excesses
- Pests or pathogens
- Excessive defoliation
- Changing environments (outdoor to indoor, garden to garden)
The most important time to check for herms is when you grow a strain for the first time, or when you’re starting from seed, as it’s a pheno that nobody has grown before. Diligently checking plants in the first 1-3 weeks of bloom is the most crucial time for detecting any instability as this is when the unwanted male flower will be developing and dropping pollen. You want to remove it
before the male flower opens.
For plants that mildly herm, it’s common for male parts to show up on a female flower site only on the lower branches. The pollen sac(s) can appear near branch joints or in the actual flowers. If there aren't too many male pollen sacs, they can easily be removed by simply pulling them off (tweezers can be used). The rest of the plant should bloom normally, but may not be a good candidate to keep if it's herming due to genetic traits. If most of the plant produces male characteristics, it's probably better to toss it.
If it’s a strain you really like, you can adjust the environment and see if the plant stabilizes before tossing it. If it doesn’t stabilize after 3 times of flowering it, it most likely won’t stabilize at all. Even the best award-winning strains can herm if in an unfavorable environment, so be sure to take that into consideration before getting rid of a strain you like because of herming. Although not true in every scenario, it can often be corrected.
It’s important to note that if a plant is allowed to herm, meaning even a single male flower opens and pollinates, the entire garden is at risk of being seeded with unstable genetics; not something you want. If this happens, flowers will be seeded and the seeds will not be worth growing out due to their genetic instability. Lollipopping and training plants often eliminates this problem altogether as you’re removing the most vulnerable part of the plant before any sign of herming.
A helpful tip, when male cannabis pollen comes in contact with water it becomes sterile. Applying a foliar spray or simply carrying a misting spray bottle with you during garden inspections is helpful if you do happen to see any pollen sacs; this way you can spray the area to ensure pollen doesn’t seed a flower. If you see seeds, the flower was pollinated several weeks prior and there’s not much that can be done.
Light exposure. For the best results, a flowering cannabis plant should receive 11 hours of light and 13 hours of darkness, ideally getting full exposure to sunlight during the brightest hours of the day (7:00 am - 5:00 pm). That schedule will produce the tightest, densest flower possible with a shorter maturity time.
Largely dependent on the season, when you’re growing outside you want to be conscious of how much light your plants are being exposed to each day and keep it as close to the recommended time as possible in order to harvest flowers that are tight, dense, resinous, and top quality.
Because outdoor cannabis is grown in full spectrum light, and often exposed to the elements, it’s believed that you get more of a medicinal effect - a stronger flower - than with indoor. In any case, you definitely can tell a difference between the two as they each produce slightly different characteristics and effects.
Light contamination. Light leaks from other rooms, light from flood lights, street lights, or for that matter, any light source that keeps your plant from experiencing darkness will affect the stability and structure of the plant.
Complete darkness is recommended.
Temperature. Flowering plants also prefer temperatures that are a little cooler, ideally around 65-75F/18-24C, and a humidity level around 70-75%. If your plants are kept in a greenhouse, it’s good to include several fans as this will keep temperatures cool while simultaneously moving the air around, which helps prevent flowers from molding. Cooler temperatures encourage better trichome production, density, color, and aroma as well.
Time. The average Indica-dominant strain takes about 8-12 weeks to completely go through the bloom cycle and be ready for harvest while Sativa-dominant strains can average 16 weeks or longer. It's important to let a plant finish its particular flowering time, as most of the trichome and terpene production takes place the last 2 weeks or so.
For exceptional resin production and tight, dense flowers, provide plants with these conditions in the flower cycle:
Light: Sunlight, CMH, LED, or HPS
Distance From Light: 2-3’ (CMH), 2-3’ (8 bar LED at 40% power), 3-6’ (HPS)
Light Exposure: 11 light/13 dark (Supa tech) or 12 light/12 dark (conventional)
Humidity: 770-75% (day), 55-65% (night)
Temperature: 76-78F, 24-25C (day), 70-75F, 21-24C (night)
Time: 8-16 weeks (strain dependent)
pH: 6.5 soil, 6.2 - 6.4 food and tea, 7.0 water
PPM: 800-1,000 (1.0-1.2 EC)
CO2: 1,200-1,500 ppm
Cannabinoids. Playing a leading role in what makes cannabis medicinal are
cannabinoids. What are they? Cannabinoids are chemical compounds naturally found in the cannabis plant, located in the trichomes that grow on its flowers. Once consumed, they bind to receptors in the
endocannabinoid system to help regulate problems, maintain homeostasis, and keep our bodies working properly. The cannabis plant contains over 100 different cannabinoids, the most well-known being:
- tetrahydrocannabinol (THC)
- cannabidiol (CBD)
- tetrahydrocannabivarin (THCV)
- cannabinol (CBN)
- cannabigerol (CBG)
While the plant contains many different cannabinoids, two of the most common are tetrahydrocannabinol (THC) and cannabidiol (CBD). Many people have heard of THC, but it wasn’t until much later that CBD was brought into the spotlight, thanks to all of the medicinal benefits it brings to the table.
An interesting fact is that both THC and CBD have the exact same molecular formula: 21 carbon atoms, 30 hydrogen atoms, and 2 oxygen atoms. It’s how the atoms are arranged that influences how each one uniquely affects the mind and body. And while they actually help treat several of the same symptoms, the biggest distinction between them is that THC is psychoactive, while CBD is not.
Typically, cannabis strains are either THC-dominant or CBD-dominant, but as genetic breeding progresses, so do the ratios of cannabinoids. If you want to use cannabis as a treatment option, it's good to know what each one is used for and how they interact with each other, and then decide how to proceed.
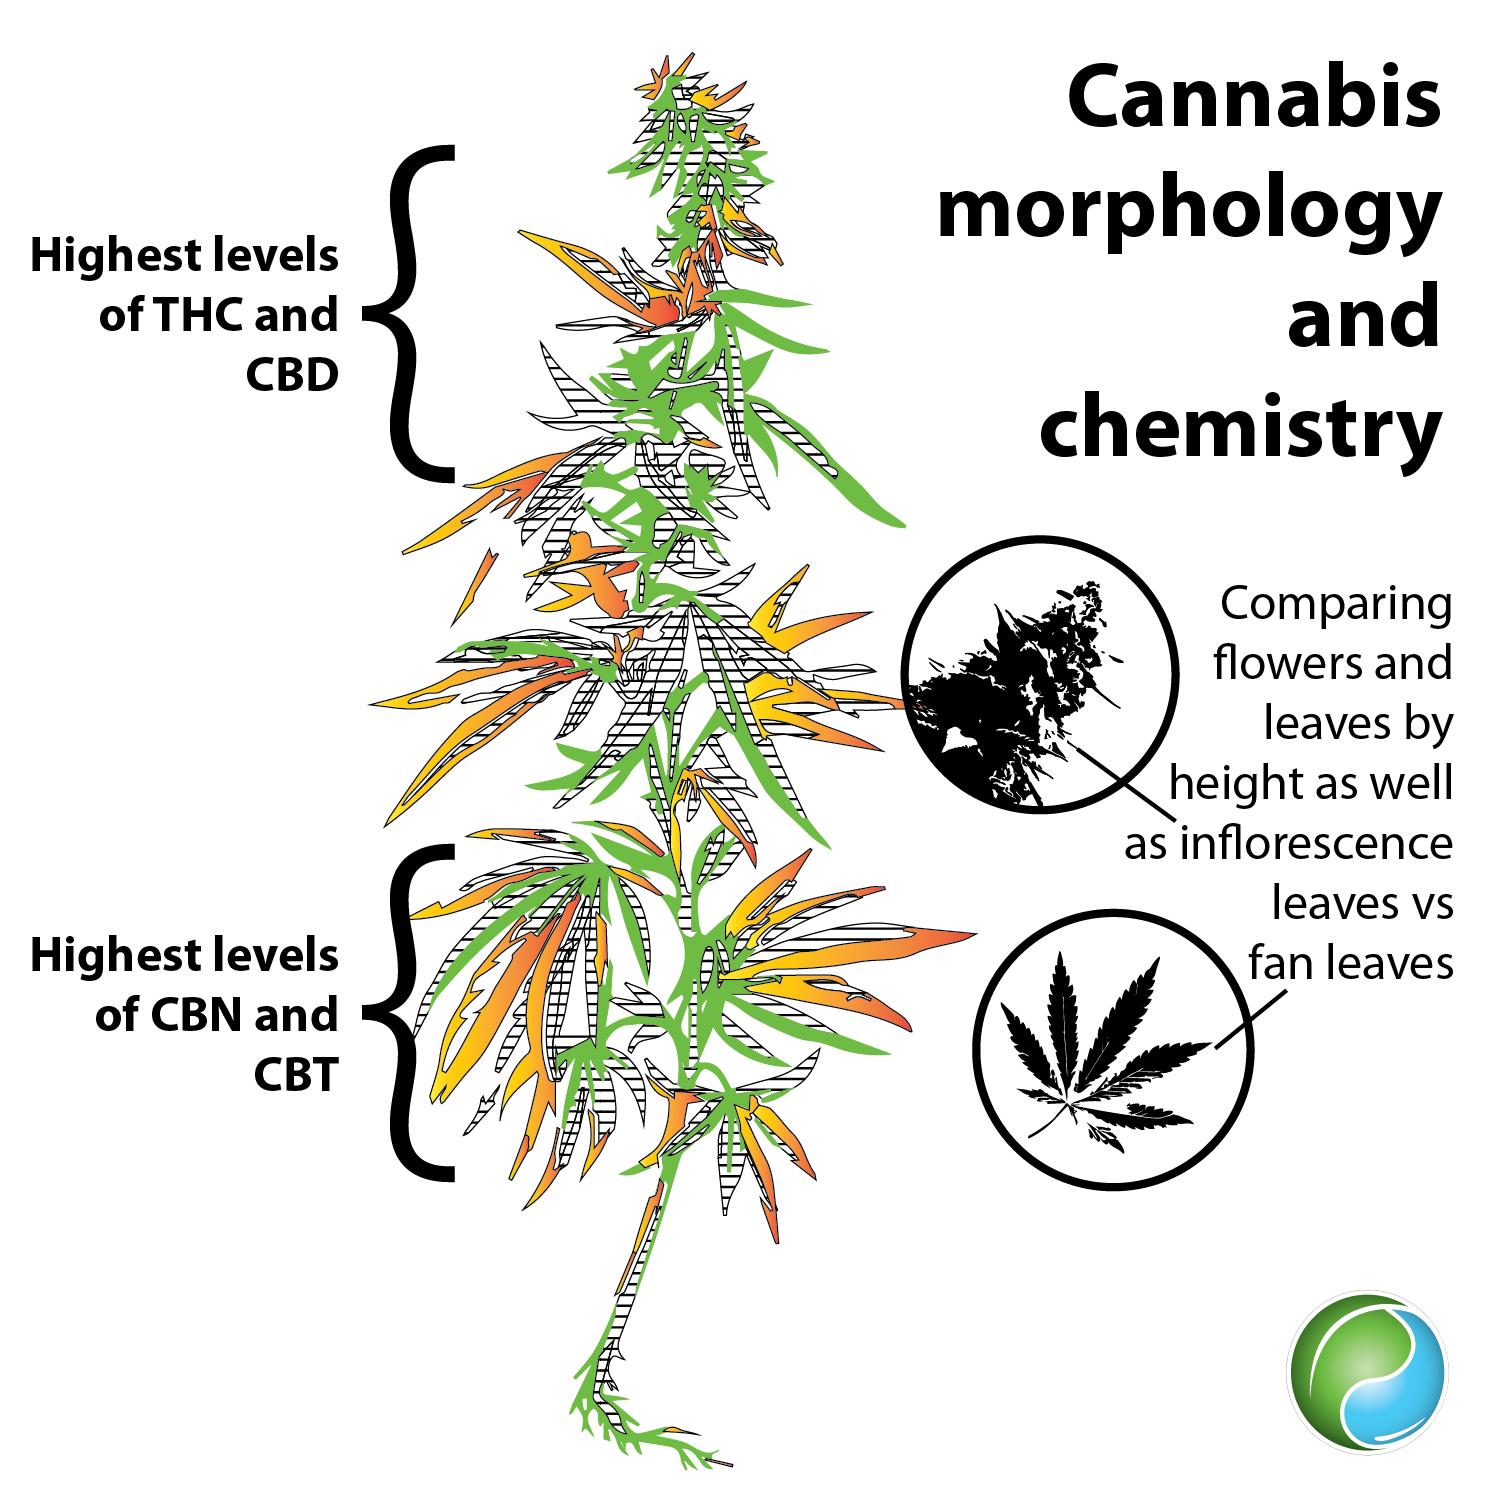 Image credit: Emily Nelson, Sustainable Plant Solutions LLC
Terpenes
Image credit: Emily Nelson, Sustainable Plant Solutions LLC
Terpenes. Costarring with cannabinoids in what makes cannabis medicinal are
terpenes. Terpenes are the different aromas naturally produced and given off by cannabis plants, also found in the trichomes on the flowers. Operating as part of the plant’s defense mechanism, over 100 terpenes occur in the cannabis plant, with production influenced by factors such as light intensity, humidity, and temperature.
Why are terpenes important?
In addition to producing aroma, terpenes also help determine what a flower will taste like. When you hear someone say a flower smells like citrus, or tastes like vanilla, they’re describing the plant’s terpene profile. The terpene profile can help guide you in finding a strain that will work well for your unique endocannabinoid system. In other words, if you like the smell and flavor of a certain strain, you are more likely to benefit from it medicinally.
On their own, different terpenes have distinct effects on the mind and body. For example, certain ones can hinder the uptake of serotonin while others may increase dopamine levels. When looking to treat an illness with cannabis, it's crucial that you understand which terpenes and cannabinoids are present in each strain, and how the particular strain will work with your mind and body.
Terpenes also work to help cannabinoids like THC and CBD pass through the bloodstream more easily. Depending on the terpene, they will either make the effects of each one stronger or milder. The way terpenes interact with cannabinoids is known as the
entourage effect; cannabinoids and terpenes produce better results when paired together as opposed to using them on their own.
Some well-known cannabis terpenes include:
- Caryophyllene (peppery, spicy): Found in spices like cinnamon and black pepper, it is effective as an anti-inflammatory, and helps treat depression and anxiety.
- Humulene (hoppy, earthy): Found in spices like coriander and cloves, it’s known to help with inflammation. It is also extremely effective at suppressing appetite.
- Limonene (citrus): Has a similar aroma to fruits like lemons, limes, and grapefruit. It is helpful for depression as it is a mood booster and stress reliever.
- Linalool (floral, spicy): Found in flowers like lavender and spices like coriander, it’s commonly used to help treat depression and anxiety. It also helps balance out side effects of THC and works to improve the immune system.
- Myrcene (earthy, musky, fruity): The most common terpene in cannabis, it can compose up to half of the terpenes occurring in a plant. Most often found in Indica-dominant strains, it is also found in plants such as hops and basil. It’s helpful for muscle spasticity and to promote relaxation.
- Pinene (piney): Found in plants like orange peels and pine needles, it is the most common terpene on the planet. Known for anti-inflammatory properties, it helps with asthma, memory loss from THC, and also increases awareness.
- Terpinolene (smokey, woodsy): Found in plants such as rosemary and sage, it is known for its antibacterial and antioxidant properties. It can also help lower anxiety and help with insomnia.
In summary, terpenes have a lot of jobs to do, including:
- Producing aroma and taste
- Helping cannabinoids like THC and CBD pass through the bloodstream
- Helping increase or decrease chemicals in the human body that may need regulating
Terpenes and cannabinoids are both found in the trichomes, most of which are found on flowers. Like fruit, cannabis flowers need to ripen before their full terpene profiles and cannabinoid content are expressed. Trichomes develop quickly during weeks 4-8 of bloom on the average 10 week variety, and heavily grow and ripen during the last 2 weeks of bloom. Allowing a plant to finish, giving it enough time to develop, really influences whether or not it will reach its full potential and medicinal value.
--
Practice Makes Perfect
When flowering cannabis plants, your gardening skills will need to be sharp and constantly exercised. It doesn’t take long for cannabis to suffer from deficiencies, or take on additional stress from the elements. Because of this, it’s
essential to give your garden the time it needs if you’re looking to pull off consistent, exceptional harvests. Mold will often be inescapable outdoors, but can be kept under control if properly monitored and removed. Pests are also more attracted to flowering plants, challenging the gardener’s dedication and awareness. As long as you put in the time, flowering is likely to be the most rewarding part of growing; the point of the entire exercise.
Chapter 11: Cannabis-Loving Pests & Diseases
If you have an organic cannabis garden, you’re going to deal with pests every once in a while, if not constantly. The first time you encounter them you may be overly worried, or you might not think twice about it, but after enough time, you’ll learn that
bugs are the most challenging part of gardening and have the capability to seriously affect the quality of your flowers and health of your genetics.
Bugs will target all parts of a cannabis plant, from the flowers to the roots. Some show up on vegging plants while others wait until the plants are in bloom. Some pests are visible to the naked eye while others can only be seen under a microscope. Knowing what each species is and how to correctly eliminate them will greatly influence the health of your garden.
Obvious signs that your plants may be under attack include: yellowing leaves, spotted leaves, chewed leaves, movement in the soil, and seeing actual bugs. Subtle signs include browning stems at the branch joints and severely stunted growth.
There are several ways to protect cannabis plants from being overtaken by bugs, with the most effective technique being
prevention. Many pests can and do develop resistance against insecticides, so not being dependent on them is recommended.
Some additional tips include:
- keep everything as clean as you can
- pretreat pots and tools
- know where you're sourcing your ingredients from
- incorporate beneficial predators
- consider companion planting
- regularly use organic sprays for common pests
- perform thorough daily inspections
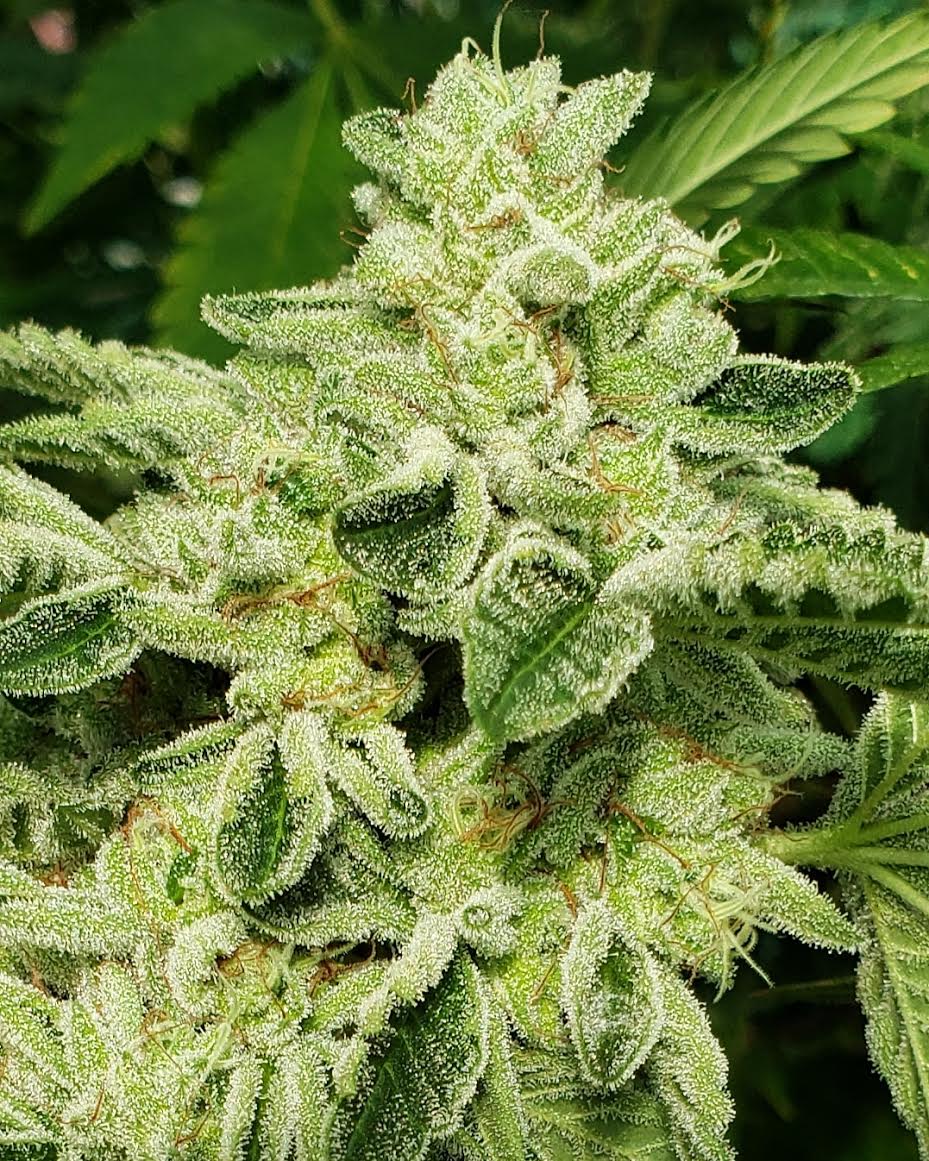 Pests have the capability to seriously affect the quality and health of your genetics
Back to top
Be aware of the foliage around your garden as well, making sure to maintain it also. If you spend a lot of time around other untreated plants, in places like a vegetable garden, hiking trail, or neighborhood park, you (or your guests) could be carrying bugs directly into your cannabis garden if you’re not careful. Between spores, pollen, and bugs, it’s wise to always shower and change into clean clothes before tending to your plants.
--
If you are bringing in clones or plants from another garden, it’s recommended that you quarantine them in a separate area for at least 6-8 weeks. Certain pests and diseases can lay dormant or take awhile to noticeably reproduce.
If you do notice pests or pest damage in your garden, identify what they are and try to make conditions unfavorable for them. It might work best to remove plants from your garden or harvest early if you are struggling with eradication. It’s always helpful to have genetics backed up in seed form in case you find yourself needing to completely start over. The longer you wait to eradicate, and the bigger the population is, the longer it will take to get rid of a pest colony.
Common Pests
The most common types of pests you’ll find in an organic cannabis garden include:
--
Most pests are seasonal. Learning thier preferred time of year and their life cycles will help when it comes to prevention, preparation, and elimination. Knowing how to fight each pest before you encounter them will also improve your chances of success.
Aphids
Identification: Aphids are a common pest found in cannabis gardens. There are around 1,350 species of aphids and they come in many colors including yellow, green, red, and black. They can have wings (adults) or no wings, and are generally oblong in shape. Although tiny, they are easy to see and live on the underside of leaves, often in large groups or clusters.
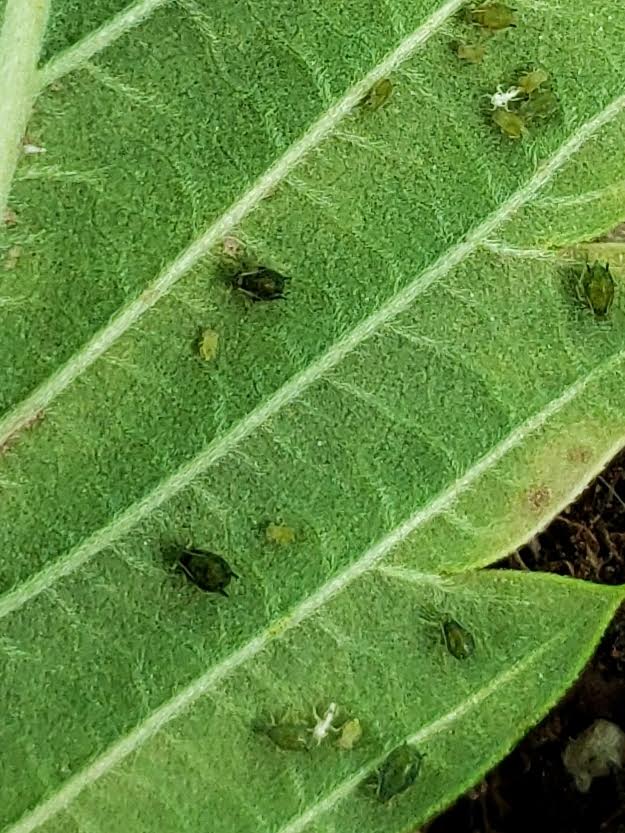 Aphids can reproduce quickly without males or eggs
A distinguishing characteristic of an aphid are two tiny tubelike structures attached to their rear. These structures are known as
cornicles, and they allow an aphid to excrete a sticky substance called
honeydew, coating plant surfaces and attracting ants. If you see ants moving up and down a plant, it’s a good indicator that there may be an aphid population close by. Ants work to protect the aphids from natural predators because the aphids’ honeydew is a food source for them. It’s important to eliminate the ants when trying to eliminate aphids.
Damage: Aphids do not chew plants. Instead, they suck out the juice of the leaves and flowers. They are most often found on leaves, but also target and destroy flower pistils, and can be seen on branches. Large infestations can devastate a garden in as little as a few days.
The damage from aphids shows up in the form of stunted growth, spotted leaves, curled leaves, yellowing, browning, wilting, overall decreased plant health, and lower yields. Due to their feeding habits, they often carry diseases with them also. Their sticky secretions can harbor fungal diseases like powdery mildew and black mold.
Life Cycle: Aphid reproduction is unique. Some reproduce sexually, some asexually, and some use both methods. The method used is based on species and environment.
- Egg: Some females lay eggs which can overwinter and hatch in spring. The hatched aphid is a wingless female which will start cloning itself, creating more baby females; usually around 10-20 per day, up to 80 per week. These cloned females will then create males and females, which will mate and create eggs. Eggs can hatch in as little as one week and aphids that hatch from eggs can fully mature within a couple of days.
- Clone: Without the help of males, females can create live clones. Some of the females have wings, some do not. These clones are wingless and can survive the winter then go on to create more clones and continue the cycle.
- Nymph: Nymphs will molt about 4 times before becoming a mature adult. This stage can take as little as 1 week to complete.
- Adult: As the population increases, some of the females develop wings, allowing them to fly from plant to plant. If the colony is allowed to thrive, during late summer and fall, sexual forms of the pest develop through asexual reproduction, introducing males, which mate with the females to produce the eggs that will survive the winter.
Because of their quick reproduction rates, it’s important to control the population as soon as you notice any signs of them. It’s good to also note that females can reproduce many young within a relatively short time, not needing males or eggs for reproduction.
Removal: Although some aphids have wings, they do not fly well, and typically stay on the underside of a leaf or on stems, making them easy to control with manual removal. One way to identify aphids is that they do not move much when disturbed.
To get rid of aphids in your garden, if their presence is caught early on, in both population size and stage of the plant, simply turn a plant on its side, laying it on the ground (clean cement is preferred), and hose it down with water, making sure to support the branches. A nozzle on the “flat” setting works well for this task. With the plant being on its side, aphids are less likely to fall into the soil and the soil is less likely to get overwatered. Spin the plant to ensure all sides and leaves have been exposed to water. Gently shake excess water off once complete. Repeat daily until you notice them gone. Not recommended past week 4 of bloom.
Indoors, if you are having trouble with eradication while the plants are still in veg, you can also use a Doktor Doom Total Release Fogger. Place the fogger in the room and turn the lights off. For best results, make sure the plants are manicured and spaced apart. Lights must be off and the room undisturbed for 2 hours after the fogger goes off. Do not breathe in the fog. Once complete, air out the room for 10 minutes or so by leaving the door open.
Use a powered sprayer to coat the underneath of leaves, in the middle of beds, and the entire plant with Kangen 2.5 Acid Water + Green Cleaner or Safer Soap. Make sure to thoroughly coat infected areas, but also non-infected areas as a means of prevention. Gently shake the base of each plant or individual branch to remove excess liquid when you are done spraying
For treatment, spray every day until you notice the population contained, about 1-2 weeks. If you notice a leaf that has more than 50% damage from aphids, manually remove it. Do not use after week 4 of bloom or you risk encouraging mold. If they show up after week 4 of bloom, manual removal is the best option for treatment and containment. Gently wiping aphids off of branches with a damp paper towel works well to remove them when plants are well into bloom.
You can also shake or gently wipe leaves and branches over a 5-gallon bucket of soapy water, causing them to fall into the soapy water and die. Controlling them with the use of fungi is also an option. Lecanicillium lecanii and Beauveria bassiana are some pathogens that help to eliminate aphid populations.
If they show up after week 4 of flower, manual removal is the best option for treatment and containment. Gently wiping aphids off of branches with a damp paper towel works well to remove aphids when plants are well into bloom.
--
- Season: Spring and summer
- Spray: Kangen 2.5 Acid Water, Amazing Doctor Zymes, Green Cleaner, Grow Safe, Insecticidal Soaps, Safer Soap, Organocide (veg only), Neem Oil, Doktor Doom Total Release Fogger (veg only)
- Beneficial Predator: Aphidius Colemani, A. ervi, Lacewings/chrysoperla (15 per plant), lady beetles (50 per plant), parasitoid wasps, praying mantis, spiders
- Essential Oils: Cedarwood, citrus, clove, eucalyptus, lavender, peppermint, rosemary, spearmint, thyme
- Estimated Time For Removal: 2-4 weeks
Back to Common Pests
Broad Mites
Identification: Broad mites are a type of arthropod and have 8 legs. These mites are extremely small in size and can only be seen under a 60-100x microscope, making them somewhat difficult to control. They are light yellow or clear in color, often with white spots. Once located, they can be observed moving around quickly. Due to their small size, instead of seeing them on leaves, you’ll first notice the damage they do.
Damage: Broad mites like to target newer leaves, injecting a toxic growth regulator into foliage causing them to stipple, twist, and lose vigor. This toxin can remain inside a leaf for some time, even after the mites are dead. Leaf finger edges will curl up and form a taco shape, or cup down, leaves will discolor, hair tips will be destroyed, and flowers will appear deformed or decrease in yield.
Life Cycle: Broad mites reproduce quickly in warm 70-80F, 21-26C temperatures and go through the following growth stages:
- Egg: Eggs are translucent, oblong in shape, and commonly laid in large clusters underneath leaves. Eggs can hatch in 2-3 days.
- Larvae: Lasting only one day, this stage appears as white, slow moving bodies with three legs.
- Nymph: Appearing pointed on both ends and translucent, this stage also only lasts for one day. Males can be observed carrying females around, which is how a population increasingly covers a surface area; however, other pests, like whiteflies, can also carry mites from plant to plant.
- Adult: Females are shaped like an oval, with swollen limbs, and can live up to 2 weeks. They lay about 5 eggs per day, laying up to 40-50 total. Males are similarly shaped, however, have skinnier, longer limbs and can only live up to 9 days.
Removal: The first thing you’ll want to do is locate the epicenter, or the place where there is the greatest number of them, typically found in shaded areas on a plant.
Once you locate the epicenter, spray with Grow Safe mixed into Kangen 2.5 Acid Water every day for 21 days. If needed, on alternating days use one 325mg aspirin, and 1 tsp silica per gallon of water.
Another option is to use micronized sulfur to get rid of them. A good micronized sulfur brand is Microthiol Disperss. Use 2 Tablespoons per gallon of water. Apply 2 times spaced 4 days apart. Then go to the OG Biowar foliar pack at 20 grams per gallon of water. After that, release predators called Amblyseius Swirskii Cucameris. Continue to release predators every 4-5 days, at least 3-4 times. Follow with normal foliar procedure for 1 week then revert to prevention mode.
(Do not use sulfur and oils of any type within 7 days of each other.)
Heat treatments of 150F, 65C are also recommended once you harvest (usually indoor only), so you can crank up the temperature without harming plants. Turn the air conditioner off, the dehumidifier on, and the lights up, making sure to monitor the room closely. You can also briefly increase the CO2 to 10,000 ppm.
Any kind of mite can build resistance to sprays, making predatory mites the most effective for removal. Broad mites are fairly easy to get rid of if you catch them early and don’t slack off on a treatment routine. If treated correctly, you should notice them gone in few weeks’ time.
--
- Season: Spring and summer
- Spray: Kangen 2.5 Acid Water, Grow Safe, Micronized Sulfur, Green Cleaner, Neem Oil, Organocide (veg only), Safer Soap, Doktor Doom Total Release Fogger (veg only)
- Beneficial Predator: Predatory mites, Amblyseius Swirskii Cucameris, Neoseiulus Californicus
- Essential Oil: Clove, cinnamon, citrus, eucalyptus, peppermint, rosemary, thyme
- Heat Treatment: 150F, 65C for 30+ minutes
- CO2 Treatment: 10,000 ppm
- Estimated Time For Removal: About 2-4 weeks
Back to Common Pests
Caterpillars
Identification: These pests are one of the largest pests you will encounter in a cannabis garden. With over 21,000 different species, they can be a pain. They start off tiny and come in a variety of colors, green being the hardest to spot as they blend in well, and they like to walk along the veins underneath leaves. They also like to hide between the flowers and the stem, on the inside of the plant, where they are harder to spot and can easily chew on developing plants. They quickly grow in size due to constant eating.
Damage: The easiest way to spot them is by their waste; they excrete small brown balls that litter the tops of leaves and get stuck in flowers. Another obvious sign of their presence is missing portions of a leaf, where the caterpillar has chewed away plant material. Sticky, white webbing in the flowers is also a sign of caterpillars; they will often use webbing on leaves, causing the leaves to curl up and twist.
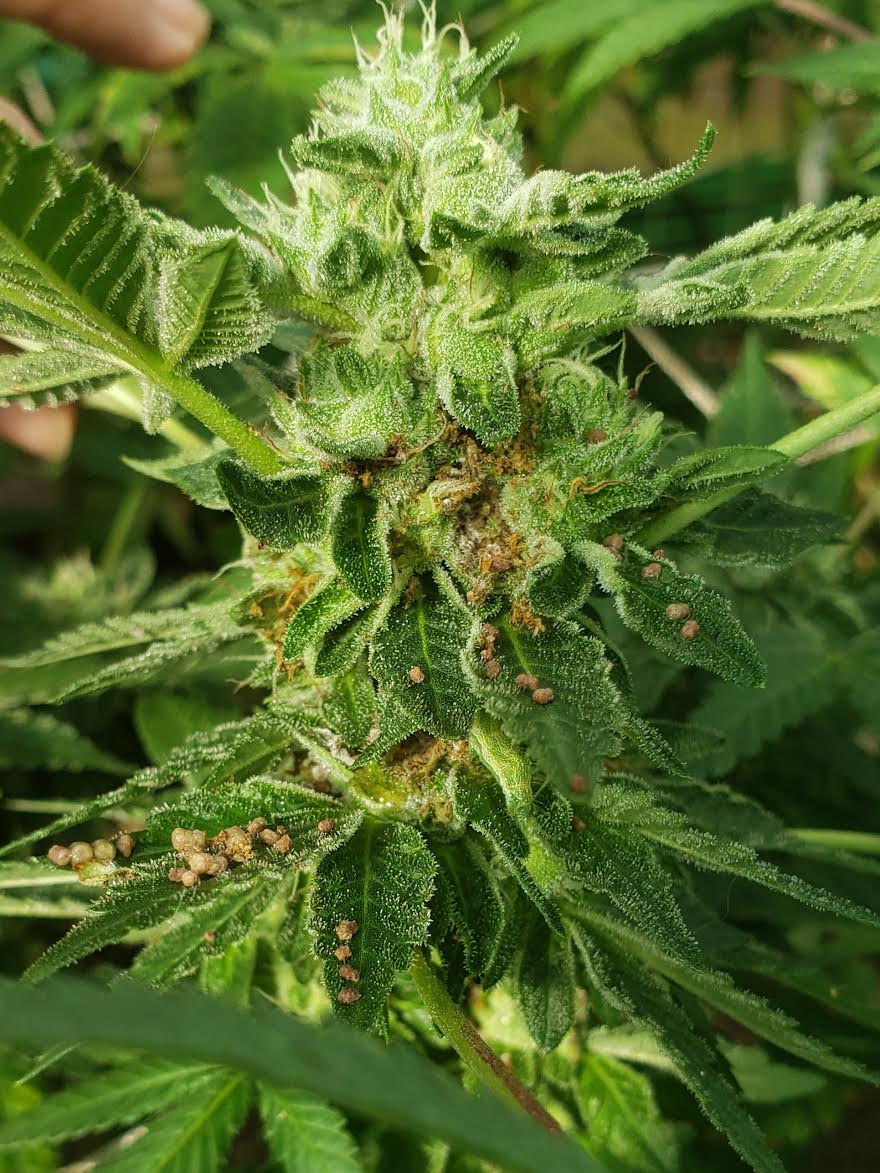 Caterpillars blend in well; can you spot the caterpillar in this picture?
If you see any of these signs, search the area and try to locate one. Take note of what size it is. The smaller they are the better, as you know they haven't had much time to eat. It is uncommon to only have a single caterpillar in the garden, so if you find one, be sure to check for others. Caterpillars will eat pretty much any part of a cannabis plant; however, they seem to prefer leaves and young flower pistils (hairs). If they begin eating the pistils, the flower will not develop properly; yields will suffer.
Due to their excessive munching, they often leave sections of flowers in chopped pieces, which die and quickly encourage mold. If you notice brown hairs on flower tips, carefully remove them. They should come off fairly easily.
Life Cycle: The life cycle of a caterpillar includes the following stages:
- Egg: Eggs are tiny in size and are usually laid in clusters towards the top of a plant. They range in shape from round to cylindrical to oval and are yellow or white in color. It usually takes 2-3 weeks for eggs to hatch.
- Larvae: This is the stage that causes the most damage, as this is when they are caterpillars moving around and eating.
- Pupa (Chrysalis): Caterpillars will eventually eat enough to form a cocoon around themselves in which they will go through metamorphosis and turn into an adult moth or butterfly.
- Adult: Moths and butterflies are adult forms of a caterpillar. Moths in particular can be extremely hard to capture or eliminate. As soon as both emerge from their chrysalis, they will search for a mate and then look for a leaf to lay their eggs on, and start the life cycle all over again. In total, depending on species, the life cycle can take as little as 1 month or last an entire year.
Removal: Caterpillars are extremely destructive to cannabis plants. They usually come in contact with plants from their parents, butterflies or moths, who lay their eggs on the top or bottom of leaves. Some barely visible to the eye, if you notice any, remove the finger of the leaf they are on, if possible, or the entire leaf if needed. Some species bore into stems to deposit eggs, in which case you will notice a hole in the stem with brown discoloration surrounding it.
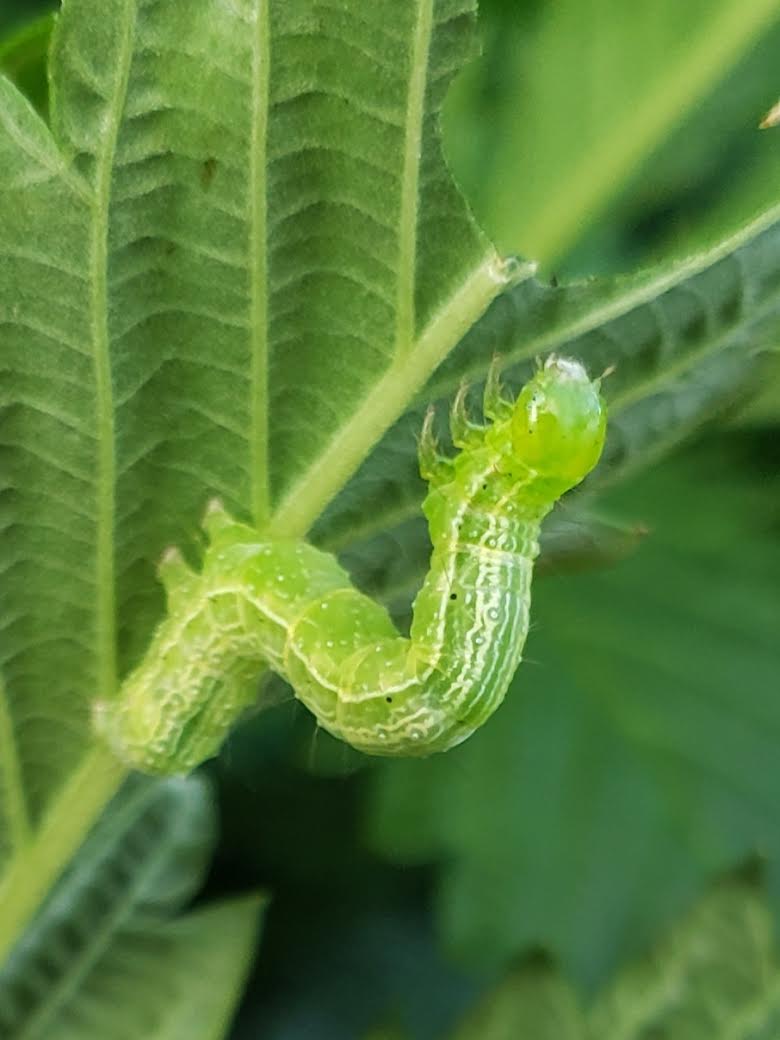 Caterpillars just keep eating and eating and eating
The kind way to remove caterpillars from your garden is to search your plants one by one and manually remove any you find. If they sense you, they can suddenly twist, squirm, and fall off their leaf, suspended by a piece of webbing, so moving quickly once you spot one is encouraged. Put them in a bucket and release them far, far away from your yard and garden. Even if you decide to spray, manual removal is still encouraged.
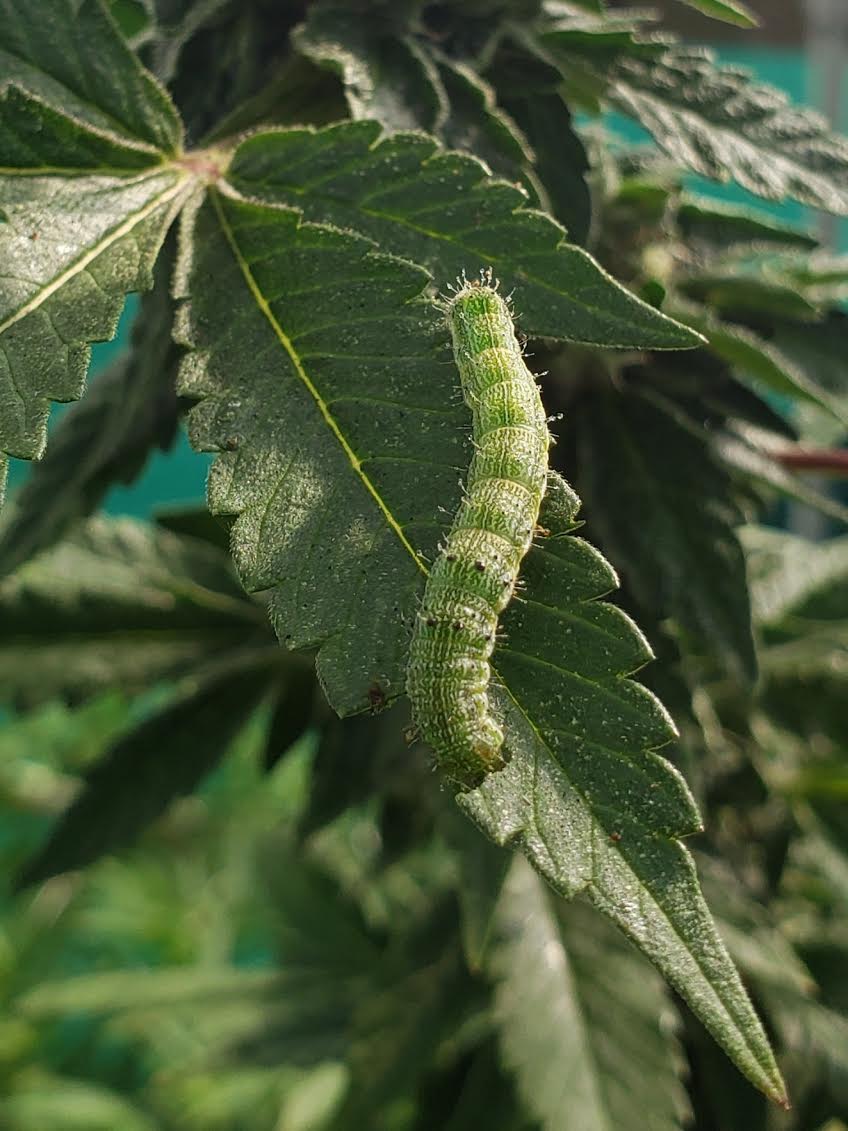 Large caterpillars usually mean seriously damaged plants
For treatment, spray your plants with Kangen 2.5 Acid Water + Spinosad after the sun goes down. Spinosad is an organically approved bacterium that works immediately to kill pests like caterpillars. While not so nice for the caterpillars, it is safe for plants, works right away, and is highly effective. One treatment should do the trick; however, spray for 2-3 days until you can't detect any more signs of them. It’s recommended to spray for a few days to ensure you eliminate any new caterpillars that may have recently hatched from eggs. You know the treatment is working if you see them change from a green color to yellow to a final color of brown. Do not inhale the spray. Wearing a mask while treating your garden is recommended.
You can also spray strong 2.5 Acid Water from a Kangen machine, which will kill caterpillars after 1-2 applications. It’s recommended to spray for a few days to ensure you eliminate any new caterpillars that may have recently hatched from eggs.
--
- Season: Summer, or year-round in tropical climates
- Spray: Spinosad (not bee friendly) + Kangen 2.5 Acid Water
- Beneficial Predator: Birds, lacewings, parasitoid wasps, praying mantis
- Essential Oil: Rosemary, spearmint
- Estimated Time For Removal: About one week
Back to Common Pests
Fungus Gnats
Identification: Mosquito-like and delicate in appearance, these pests are quite common in greenhouses and cannabis gardens as they prefer warm, damp conditions and organic matter. They are usually gray or black with clear wings. They also like CO2, which is why they’ll often fly right at you. Fungus gnats are attracted to light and don’t cover much distance when flying, preferring to stay near pots or soil. They often can be detected by the slime trails the larvae leave on the soil's surface. It is common to find them in large colonies as it doesn't take long for them to reproduce.
 Image credit: Emily Nelson, Sustainable Plant Solutions LLC
Damage
Image credit: Emily Nelson, Sustainable Plant Solutions LLC
Damage: The larva stage is what causes the most damage to plants. As the worm-like larvae feed on root tips, leaves turn yellow, wilt, and lose vigor. Adults can also carry diseases around, which can quickly spread throughout a garden.
Life Cycle: Fungus gnats go through 4 growth stages, lasting about 1 month in total, depending on conditions:
- Egg: Fungus gnats lay their eggs in the soil. It’s common to find eggs in large clusters. It takes about 3-5 days for an egg to hatch and an additional 14 days for it to develop into a mature adult, in which case, it quickly reproduces and starts the cycle over.
- Larvae: Larvae have shiny dark heads and a whitish-clear body. This stage causes the most damage. During this time, usually lasting about 10 days, the larvae feed on organic matter, including soil, root hairs, and fungi.
- Pupae: This stage lasts for roughly 3 days, during which the young gnats crawl through the soil towards the surface.
- Adult: Adult fungus gnats do not damage cannabis plants; however, they can survive for as long as 7 days, during which, they typically lay around 300 eggs.
Removal: The best way to prevent these insects from appearing in your garden is to be careful where you source your soil from and avoid overwatering. Adults can be easily contained with sticky traps; however, it’s best to target larvae. Be sure to hang traps right above the soil line, and check and replace them regularly.
You can also layer ¼-½” of diatomaceous earth on top of the soil to prevent them from being able to leave. It works by creating a cap like broken glass that will shred the gnats as they try to move through it toward the surface. Due to quick reproduction times, multiple treatments are likely needed to ensure there are no surviving eggs. Spraying can be a quick way to gain control over an infestation; Amazing Doctor Zymes and Neem Oil work well to eliminate large colonies. In addition, chitin and neem cake work as a natural deterrent for fungus gnats; mixing them in the soil before planting is encouraged.
--
- Season: Summer
- Population Control: Yellow sticky traps, chitin, diatomaceous earth, carnivorous companion plants, low humidity, not overwatering, allowing top inch or two of soil to dry up before watering
- Spray: Amazing Doctor Zymes, Neem Oil, Organocide (veg only), Doktor Doom Total Release Fogger (veg only)
- Beneficial Predator: Nemattack, predatory mites (H. miles), beneficial nematodes, spiders
- Essential Oil: Spearmint
- Estimated Time For Removal: One month plus
Back to Common Pests
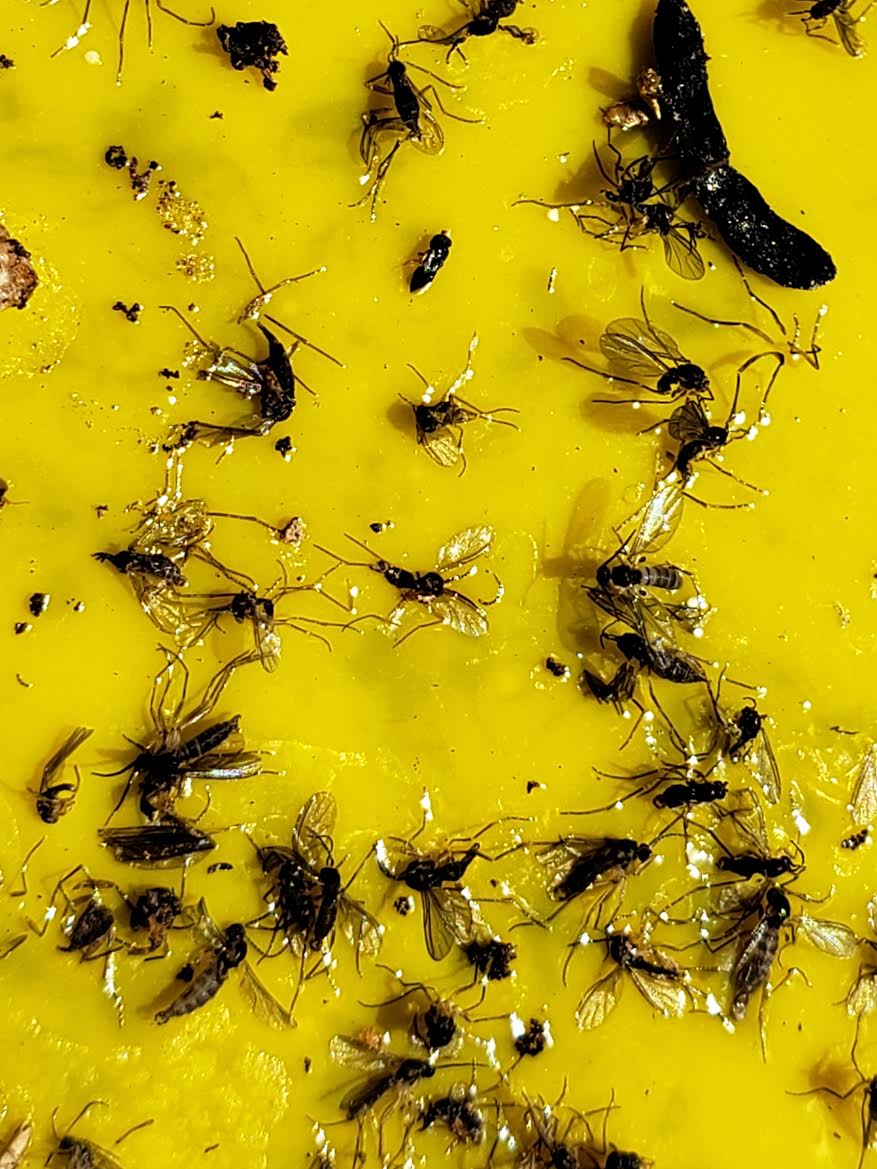 Yellow sticky traps are satisfyingly effective at reducing pest populations
Japanese Beetles
Identification: Adult Japanese Beetles are large pests about ½ inch in length with metallic green or dark colored bodies, brown/copper wings, and tiny white hairs that line each side of their body. They are easily spotted on leaves and flowers where they can be found feasting on fruit and shade trees, shrubs, vegetables, and ornamental plants. Like caterpillars, they will instinctively drop off of plants if they are disturbed, so be sure to check on the ground too. They commonly jump or fly when disturbed as well.
Beetles in the larval stage appear as “c-shaped” white grubs with 6 legs. The easiest way to find them is by taking soil samples, especially after you harvest to see if they were directly below your plants. They are quite large and hard to miss if thoroughly searched for.
Japanese Beetles are invasive species first introduced to the US in the early 1900s. Originally only found in Japan, it is believed they made their way over in grub form in the soil of Japanese plants that were imported to New Jersey. They quickly made their way from the East Coast to the West Coast.
The following plants are common targets of Japanese Beetles:
- American Linden
- Fruit Trees - Apple, Apricot, Cherry, Peach, Plum
- Beans
- Birch
- Crab Apple
- Crape Myrtle
- Grape Vines
- Hibiscus
- Japanese Myrtle
- Maple Trees
- Pin Oak
- Raspberry
- Roses (A favorite)
Damage: Japanese Beetles do a lot of damage to cannabis plants. If they are not removed in a timely manner, they will consume large parts of most of a plant’s leaves, leaving it with the inability to photosynthesize. Signs that you may have them in your garden include lacelike and skeletonized leaves where only the veins of a leaf remain. They typically are not far from damaged foliage, so be sure to look around and see if you can find any as you want to remove them at their earliest arrival as possible. Another sign you have them is when you see yellowing or browning patches on healthy plants, even on the grass around plants, as the grubs feed on the root system inside the soil, damaging the plant above. If you see damaged grass, it will typically uproot with a gentle pull.
Life Cycle:
Beetles have 2 life cycles per season. The stages include:
- Egg: In June, eggs are laid in moist soil.
- Nymph: The eggs hatch into “c-shaped” white grubs with 6 legs. They can stay in soil and overwinter for 10 months.
- Adult: After 10 months, usually in June, adults emerge from the soil and begin feeding on plant material. They are attracted to most plants, with their favorite being roses. Adults typically live for about 40 days.
Removal: Prevention is the easiest way to deal with these pests as they can become difficult to control when a population is large. Keeping your plants healthy, incorporating companion plants, and removing beetles as soon as you see them is encouraged.
Manual Removal: Although time-consuming, the easiest and most effective way to remove adult beetles is manually. As you collect them, place them in a bucket of Kangen 2.5 Acid Water (or hot water) with 1 Tablespoon liquid dishwashing detergent. You can also place them in a jar, sealing it until they die. They are an invasive species in the United States, so trying to relocate them is not recommended. You can also put row covers over your plants to discourage them from settling.
Traps: There are some aromatic plant extracts that successfully attract beetles (eugenol and geraniol) and are used in traps as bait. These are only recommended if you have large enough acreage to where you can put the traps far away from your garden as the aroma will increase the population of beetles in a particular area. A more recommended trap would be made from a fermented container of fruit cocktail. Simply open it and leave it out for 5-7 days. After a week or so, place it in a shallow bucket that’s filled with Kangen 2.5 Acid Water and liquid dishwashing detergent to just under the top of the fruit container. You want to avoid having water flow into the fruit cocktail container. Place the bucket about 25-30 feet from your garden. The beetles will be attracted to the smell of the fruit cocktail, entering the pail, and will drown in the water. Regularly inspect and remove dead beetles from the bucket.
Geraniums: This companion plant works by attracting Japanese Beetles, however, they also can attract aphids, mites, whiteflies, and caterpillars, so use with caution and be sure to regularly inspect or treat these companions. Placing them far from a garden is recommended if trying to lure Japanese Beetles away. You may also want to keep them in pots so you can relocate the plants once the pests are successfully eliminated. Once a Japanese Beetle consumes the flowers of a geranium, they become disoriented and fall off of a flower to the ground, allowing you to easily collect and dispose of them, or make easy snacks for birds.
Parasitic Nematodes: Parasitic nematodes (Heterorhabditis) are also effective at eliminating Japanese Beetle larvae when the grubs are small in size. For best results, water before and after nematodes are introduced.
Milky Spore: This is a fungal disease that destroys grubs shortly after it is consumed. To be effective, a large area must be treated with Milky Spore, about ¾ of a mile around a garden. An area also needs to be treated for 12-24 months before successfully colonization; however, spores will stay in the ground for a long time after introduction helping to effectively control the beetles before they reach adulthood.
--
- Season: June, summer
- Spray: Spinosad (not pollinator friendly) + Kangen 2.5 Acid Water/hot water, Organocide (veg only), Neem oil
- Beneficial Predator: Parasitic wasps (Tiphia vernalis or T. popilliavora), beneficial nematodes (Heterorhabditis), Assassin bugs, birds, spiders
- Companion Plants: Garlic, Chives, Rue, Tansy, Evening Primrose
- Essential Oil: Wintergreen, Gaultheria Oil, Teaberry Oil, Peppermint Oil, Neem Oil, Wormwood Oil, Juniper Berry Oil
- Estimated Time For Removal: Varies
Lace Bugs
Identification: Lace bugs are small, elaborately sculpted insects that are whitish-gray or dark-colored. Their bodies are made of semitransparent cells, giving them a lacelike appearance. They can be found on the underside of leaves, where you will also find eggs and nymphs; sometimes you’ll find them on top of leaves.
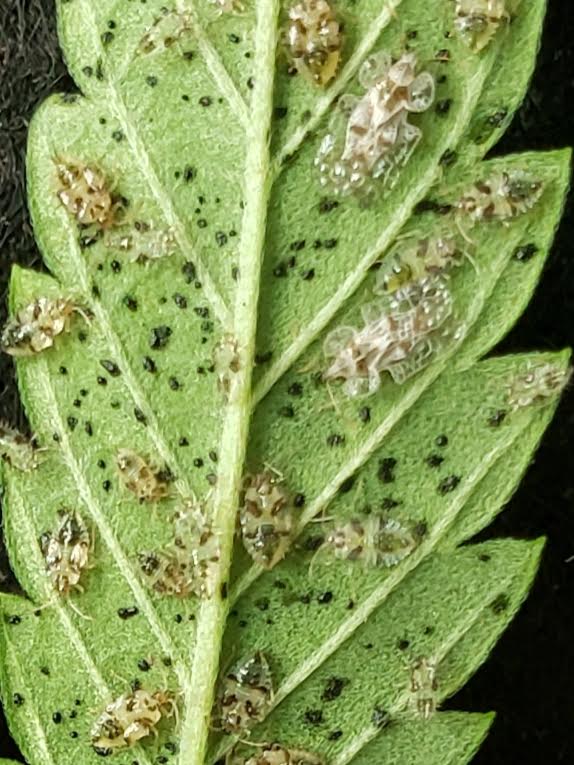 Lace bugs reproduce quickly; you can often find adults and nymphs on one leaf
Damage
Lace bugs reproduce quickly; you can often find adults and nymphs on one leaf
Damage: Lace bugs suck the juices from the underside of leaves, mainly causing unsightly damage, but if allowed to flourish, they can lower yields. Damage appears on the tops and undersides of leaves as tiny whitish-yellow speckles but can also be reddish-orange in color; the damage is sometimes confused for thrips or mites. Although they have wings, they do not fly around too much and will usually stay on the leaf even as it is removed.
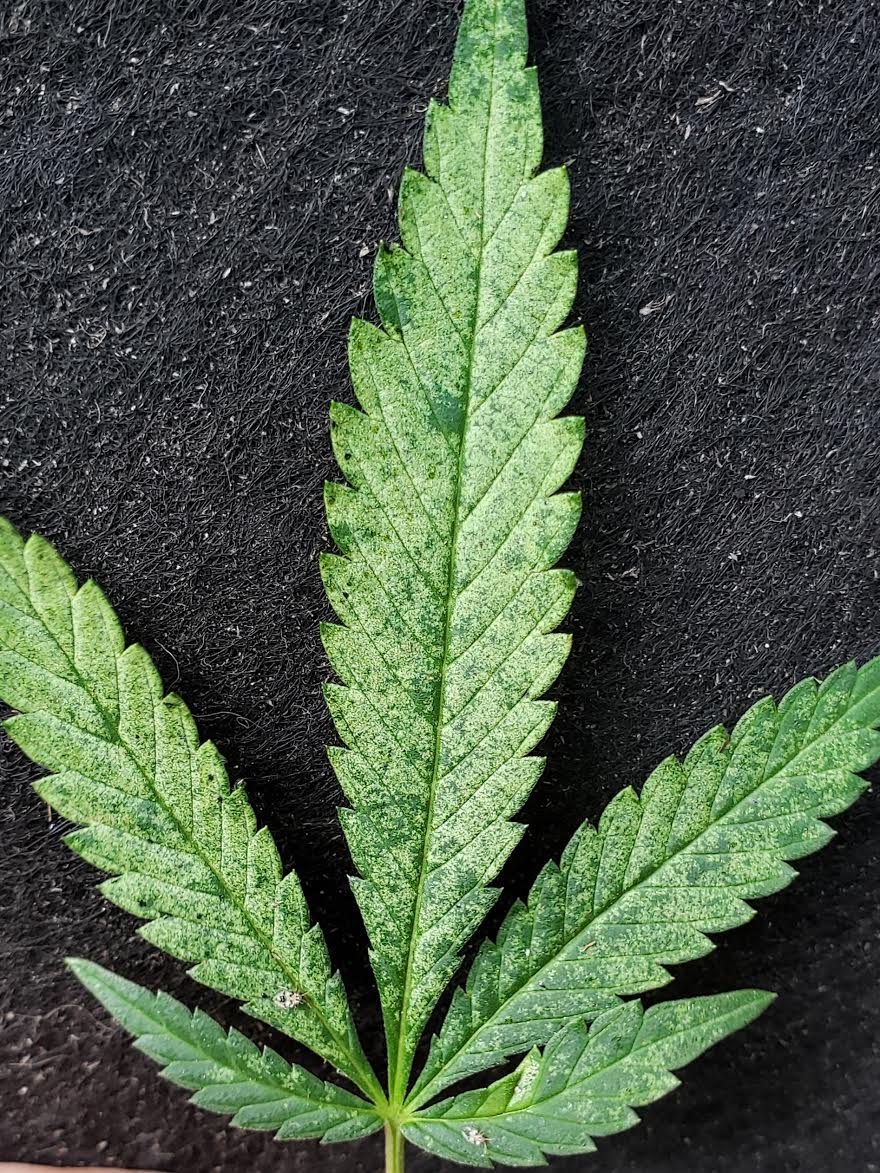 Lace bug damage
Life Cycle
Lace bug damage
Life Cycle: Lace bugs go through 3 stages with a complete life cycle lasting only 30-40 days. Stages include:
- Egg: Tiny oblong eggs are inserted into leaf tissue by female lace bugs and then covered with a dark excrement, visible to the naked eye. Eggs can overwinter in leaf tissue where they will hatch when temperatures get warm.
- Nymph: Dark, wingless, and small with spines on their bodies, nymphs go through about 5 growth stages, progressively getting larger as they mature.
- Adult: About ⅛” in length, adults are the easiest to spot and are usually found next to nymphs. They can overwinter in warmer regions under leaves or bark on plants that remain green. Reproducing quickly, there can be several generations of lace bugs in a single year.
Removal: If there are only one or two lace bugs on a leaf, smashing them is effective and will allow the leaf to be spared. However, if damage is severe and there are a lot, removal of the leaf is best. Discard in a bucket and dispose of immediately.
To remove them from your garden, use a sprayer (right before dark or lights off) to coat the underside of leaves, in the middle of beds, and the entire plant with Spinosad mixed with Kangen 2.5 Acid Water. You can also try an insecticidal soap or Safer Soap. Make sure to thoroughly coat infected areas, but also non-infected areas as a means of prevention. Gently shake the base of each plant or individual branch to remove excess liquid when you are done spraying.
For treatment, spray once a day until you notice the population contained. Take a break every three days. Do not use after week 4 of flower or you risk starting mold. If you notice a leaf that has more than 50% damage from lace bugs, manually remove it. If they show up after week 4 of bloom, manual removal is the best option for treatment and containment.
--
- Season: Year-round, abundant in spring and summer
- Spray: Kangen 2.5 Acid Water, Spinosad, Insecticidal Soap, Neem Oil, Safer Soap, Doktor Doom Total Release Fogger (veg only)
- Beneficial Predator: Predatory mites, assassin bugs, lacewing larvae, lady beetle, pirate beetles, praying mantis
- Essential Oil: Lavender
- Estimated Time For Removal: About 2-4 weeks
Back to Common Pests
Leafhoppers
Identification: Leafhoppers are small, wedge-shaped flying insects that come in a variety of colors, including green, yellow, and brown, and can also have colorful markings. There are more leafhopper species in the world than mammals and birds combined. They can be found on the underside of leaves and are easy to spot in a garden; when a branch or leaf is disturbed near them, they take flight, flying erratically.
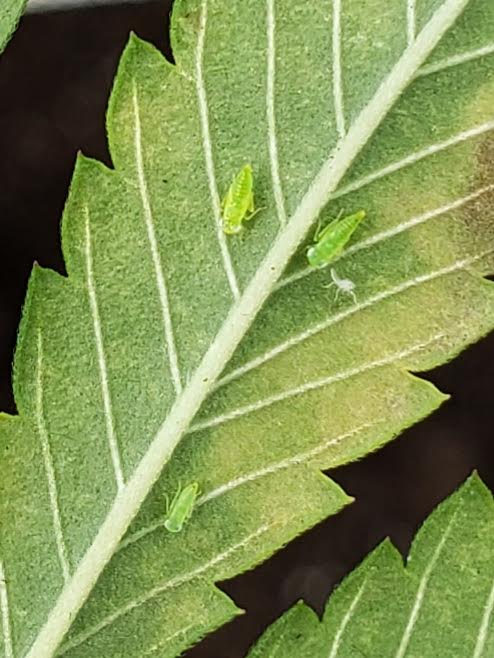 Leafhopper nymphs stay on the underside of leaves in groups
Damage
Leafhopper nymphs stay on the underside of leaves in groups
Damage: Leafhoppers damage a plant by sucking the juices out of the leaves. They have toxic saliva that causes yellow stippling on leaves, twisting, and stunted growth. Areas of browning or necrosis can occur. If left unchecked, a plant will lose vigor and lushness, and flowers will not develop properly.
Life Cycle: Leafhoppers reproduce and complete their life cycle quickly, taking about 3-6 weeks to go from egg to adult.
- Egg: Females lay eggs in the leaf stem and veins, able to lay about 5 eggs per day. After about 1 week, eggs hatch into nymphs.
- Nymph: A leafhopper goes through 5 nymphal stages, molting their skin as they mature. White skins are often left on the underneath of leaves.
- Adult: Leafhoppers reach adulthood quickly and continue to feed on leaves. Adults can overwinter in fallen leaves close to gardens, waiting for spring to arrive.
Removal: Make sure to clear surrounding areas of a garden, removing fallen leaves and debris. Food-grade diatomaceous earth works to discourage colonization. Sticky traps are also highly effective for leafhopper eradication; hang sticky traps under, above, and next to a plant, and then shake the plant to encourage the leafhoppers to take flight. If strategically placed, many will get stuck in the sticky traps.
For treatment, use 11.5 alkaline water mixed with an insecticidal soap. Spray every day until you notice the population is eliminated. Beneficial predators also work well to control leafhopper populations, but should be used prior to week 4 of bloom.
--
- Season: Year-round; abundant in spring and summer
- Control: Sticky traps, Diatomaceous earth, removing old foliage and debris
- Spray: Kangen 2.5 Acid Water, Amazing Doctor Zymes, Insecticidal Soap, Safer Soap
- Beneficial Predator: Assassin bug, lacewing larvae, lady beetle, pirate beetles
- Essential Oil: Basil, cinnamon, geranium, lavender, rosemary
- Estimated Time For Removal: 2-4 weeks
Back to Common Pests
Leafminers
Identification: There are many different kinds of adult leafminers, including beetles, moths, and flies. A common species found in tropical regions is a yellow and black fly with striping and translucent wings. It is not the adult, but its larvae, that does the damage to a plant. Larvae are flattened and small in size.
Damage: Common in greenhouses, leafminer larvae damage leaves by tunneling through the tissue inside of the leaf, allowing the bug to be protected and remain unseen. You’ll be able to identify these in your garden by the whitish-yellow tunnel outlines zigzagging on the surface of the leaves, damage which also encourages disease. You can tell you have a large population - or at least several miners - when you see multiple tunnels merging together. Although not fatal to a plant, if left untreated, they can slow plant growth, cause leaf drop, chlorosis, necrosis, and lower yield.
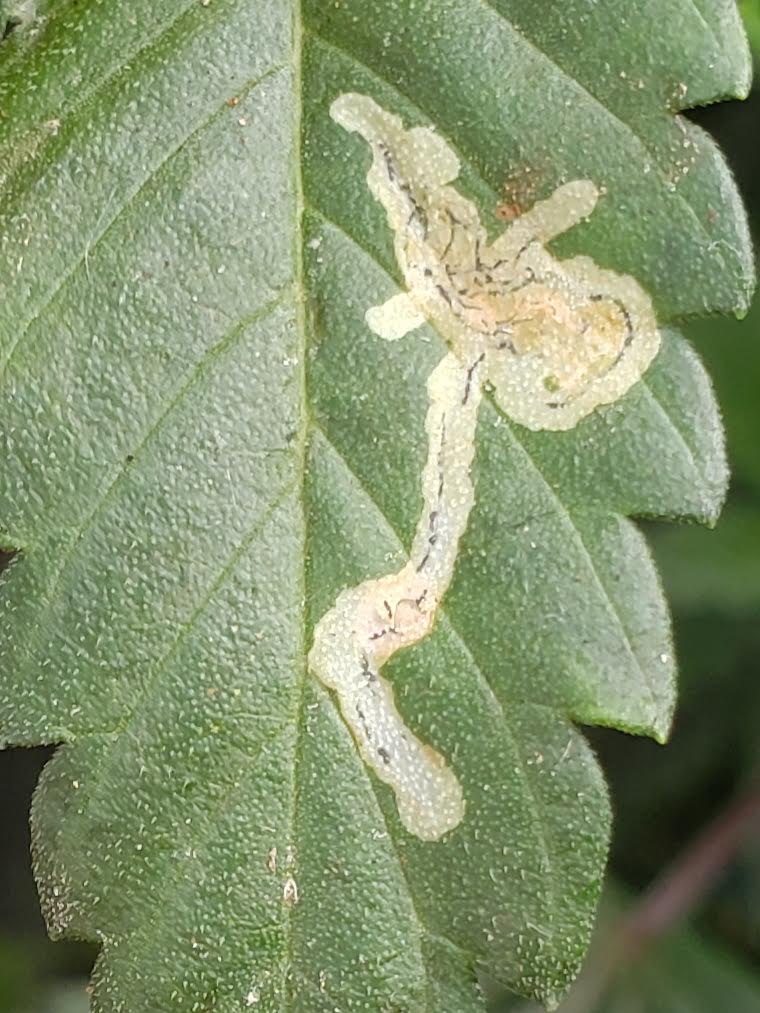 Leafminers eat the internal parts of a leaf, leaving a tell-tale tunnel on top
Life Cycle
Leafminers eat the internal parts of a leaf, leaving a tell-tale tunnel on top
Life Cycle: The four stages of a leafminer include:
- Egg: Females lay white eggs under the leaf epidermis. It takes as little as 3-5 days for the eggs to hatch and they reach adulthood in as little as 15 days.
- Larvae: Small, legless, maggot-like larvae start out pale in color and as they mature turn green and then yellow. They tunnel through the middle of leaves, not visible due to feasting on the inside. This stage causes the most damage. If infested, one leaf may contain up to 5-6 larvae. This stage contains 3 instars (successive molts) and lasts for about 10 days, then the larva cuts a semicircular slit from its mine and drops to the soil where it digs down about a couple centimeters to pupate.
- Pupae: Pupariums appear reddish-brown in color and develop in the soil. This stage lasts for about 10 days; after, they crawl back to the surface and emerge as small flies (or other insect).
- Adult: Adults emerge from a puparium in the early morning, and are usually yellow and black, with females larger than males. They feed on plant secretions and natural exudates on leaf tips and margins. Several generations can occur in a single year, taking only 30-40 days to complete a life cycle.
Removal: To treat, simply remove affected leaves and hang sticky traps to capture adults. Spraying with Amazing Doctor Zymes or Neem Oil is also effective. Immediately dispose of leaves to ensure containment.
--
- Season: Spring and summer
- Population Control: Yellow or blue sticky traps, leaf removal
- Spray: Amazing Doctor Zymes, Neem Oil, Spinosad
- Beneficial Predator: Parasitoid wasps (Opius pallipes), branchid wasp (Dacnusa sibirica), chalcid wasp (Diglyphus isaea)
- Essential Oil: Lavender
- Estimated Time For Removal: 2 weeks
Back to Common Pests
Mealybugs
Identification: Mealybugs are small, oblong, insects with segmented bodies that are covered in a white cottony material which helps protect it from extreme temperatures and moisture loss. They have legs but not wings and can move around as they please. Found on their own or in colonies, they prefer to wedge themselves in between and around branch joints, on stems, and underneath leaves. Like aphids, they are also known to produce a sticky honeydew substance that can attract ants and diseases.
Damage: Mealybugs feed on the sap of a plant’s tissue by inserting a needle-like mouthpart into the stem, branch, or root. Damage appears as yellowing leaves, chlorosis, defoliation, wilting leaves, smaller flowers, and poor plant health.
It’s difficult to detect mealybugs that target the roots; however, white cotton-like masses can be spotted around drainage holes in pots. Often, detection is only confirmed by taking the root ball out of the pot and inspecting for their presence. The white material they surround themselves with could be confused for whitefly, cottony cushion scales, or wooly aphids, but closer inspection will reveal what it is.
Life Cycle: The main stages of the mealybug life cycle includes:
- Egg: Females can lay around 200-500 eggs in their lifetime, which appear yellow and covered in small, white, cotton-like clusters underneath leaves. Some species bear live young. It takes up to 3 weeks for eggs to hatch, but may occur after only 1 week if conditions are favorable. Females can lay eggs for about 5-14 days, after which they die.
- Nymph: Nymphs are small and yellow, orange, or pink. Males will settle in one spot while the females are in constant motion searching around a plant for the best place to feed.
- Adult: As nymphs feed and grow, they produce a wax-like coating that covers their bodies. Once a feeding site is selected, adults are fairly immobile.
Removal: To remove them, simply spray or wipe them off. Because they prefer to wedge themselves into small spaces, regular inspection and removal are required.
--
- Season: Early spring and fall
- Population Control: Spray or wipe off
- Spray: Amazing Doctor Zymes, Green Cleaner, Grow Safe, Neem Oil, Organocide (veg only), Safer Soap, Doktor Doom Total Release Fogger (veg only)
- Beneficial Predator: Cryptolaemus montrouzieri lady beetle (5-10 per plant), green lacewing (5-10 per plant), parasitoid wasps, spiders, pirate bugs
- Essential Oil: Lavender
- Estimated Time For Removal: Almost immediately if manually removing them or a few weeks if using beneficial predators
Back to Common Pests
Rodents
Identification: Mice and rats are furry rodents that run on four legs. Characteristics like ear size, color, tail length, and body size vary among species. Mice are typically smaller (around 4” or less in length), while rats are larger (around 4-18” in length).
Damage: Rodents can cause significant damage to cannabis plants. Because their teeth constantly grow, they must continually chew and gnaw. They like to chew on freshly sprouted seedlings, usually eating the entire plant.
Keeping seedlings up off the floor and protected from rodents is encouraged. Mice and rats also like to chew on the main stalks of plants; they are capable of standing on their back two legs to climb up pots and flower beds. Chewed stalks and branches can attract diseases and cause stress on a plant. The seeds of a plant also attract rodents; they will eat the inside of the seed and only leave the shell behind.
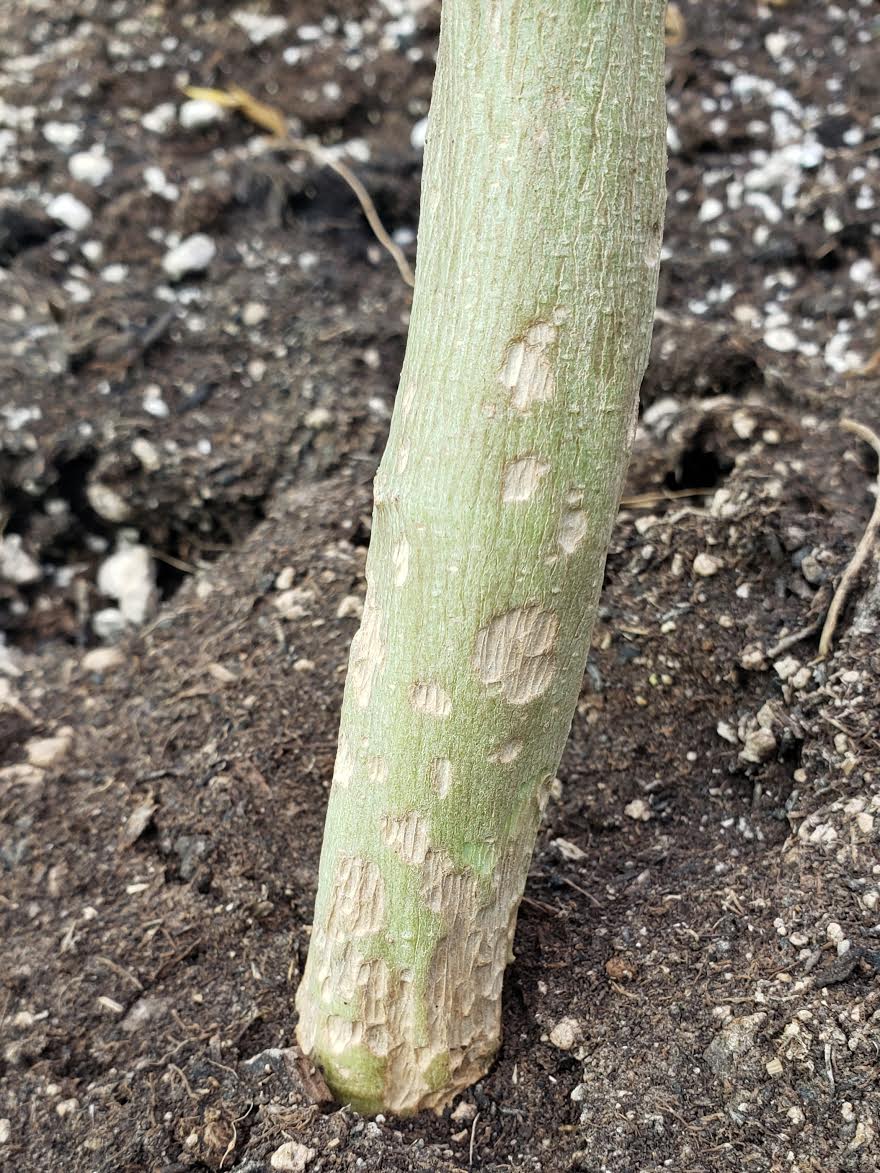 Rodents like to chew on everything from seeds to plant stalks
Life Cycle
Rodents like to chew on everything from seeds to plant stalks
Life Cycle: Rodents reproduce quickly. Mice go through the following life cycle:
- Babies: Small mice mature fast. At 6 days, a baby develops fur and can move around; and after 18 days, they are ready to leave the nest and begin their life foraging for food and finding a place to call home.
- Adults: A female mouse can start having babies when it reaches 6 weeks in age, and is only pregnant for 3 weeks before giving birth to a litter of up to 14 babies; they are able to have up to 10 litters per year.
Rats have a similar life cycle, however, babies take a few more weeks to fully mature.
Removal: There are several ways to discourage rodents from coming into your garden. Make sure the area is clean and you don’t leave food out. Some companion plants or nearby fruit trees can attract rodents, so be selective with these kinds of plants if rodents are an issue. Most rodents don’t like strong herbal smells, so planting companion plants that deter rodents is an effective way to discourage them from coming around. Look for holes or areas of rodent activity and seal them up. If you have a large population, setting traps with peanut butter or dried shrimp as bait may be your best option. Or you can get a good cat to help out. Rats are smart, can adapt to their environment, and are great at avoiding capture. Live traps are effective at trapping them, from which you can then release or eliminate them.
--
- Season: Year-round
- Population control: Live traps, snap traps, cats
- Essential Oil: Peppermint, spearmint
- Companion plants: Basil, catnip, echinacea, garlic, thyme
- Estimated time for removal: Varies
Back to Common Pests
Root Aphids
Identification: Often confused for mealybugs, root aphids are another common pest found in a cannabis garden. Pear-shaped and tiny, they are difficult to see and live at or above the soil line where they feed on a plant’s roots. They can come in many colors, but most often are white or brown, the color of the soil, making it even more challenging to locate them. Like other aphids, they also have cornicles.
Many times, root aphids come in with the soil, either in nymph form or as mature insects. Carefully sourcing and inspecting the soil you use is highly recommended in order to avoid exposing your plants to this insect, as many commercial soils regularly contain root aphids. Root aphids can also hitch rides on ants into a garden where they can be carried from plant to plant. They can also be seen attached to the sides of grow containers, so check your containers if you suspect an infestation.
Damage: The easiest way to spot them is by the chalky substance they secrete, which builds up on top of and throughout the soil. If left untreated, they will cause yellowing leaves, curled leaves, reduced plant vigor, lower yield and quality, root rot, and also increase a plant’s susceptibility to disease. It is common for gardeners to mistake root aphid damage for nutrient deficiencies, especially iron or magnesium deficiencies.
Life Cycle: Root aphids can reproduce asexually. Stages include:
- Egg: Eggs are commonly found directly above the soil line attached to the leaves and stems of a plant, but can also be found in soil where they remain dormant for several months. As soon as they hatch, they fall to the ground where they bury themselves in the soil in search of roots.
- Nymph: At this stage, nymphs are wingless and crawl around in search of food.
- Adult: As soon as root aphids find a plant’s roots, they bore into them, creating scars that can leave a plant susceptible to diseases and other pathogenic attacks. As an infestation worsens, wingless aphids will crawl up the main stem where they will continue to feed. As a plant nears complete destruction, some of the aphids develop wings; now they can easily relocate to a new plant. During fall, males and females mate and produce more eggs. If populations increase to an infestation, winged insects can emerge.
Removal: As soon as you notice root aphids, begin treating them. Use a sprayer to carefully coat the top of damp soil with Amazing Doctor Zymes or Safer Soap. Make sure to thoroughly spray infected areas, but also non-infected areas as a means of prevention. For treatment, spray every other day until you notice the population contained. Hanging sticky traps directly above the soil can help to reduce the population. If a plant has been greatly affected, consider removing it completely from a garden and disposing of it. Root aphids thrive in dry mediums, so keeping soil moist is helpful at controlling their population. Diatomaceous earth is also effective at eliminating aphid populations.
--
- Season: Summer; year-round in the tropics
- Population Control: Yellow sticky traps, not spilling soil
- Spray: Amazing Doctor Zymes, Green Cleaner, Safer Soap, Neem Oil, Organocide (veg only)
- Beneficial Predator: Beneficial nematodes, lacewings (15 per plant), lady beetles (50 per plant), parasitoid wasps, birds
- Essential Oil: Cedarwood, citrus, eucalyptus, peppermint, rosemary
- Estimated Time For Removal: 2-4 weeks
Back to Common Pests
Russet Mites
Identification:
Russet mites are one of the most damaging pests to have in your garden. Bigger than broad mites but smaller than spider mites, russet mites can only be seen under a 30x microscope. They are wedge-shaped with only two sets of legs and are translucent in color. Preferring warm, dry, still, and humid conditions, females will settle inside stems and at the joints of branches, and can also be found inside of flowers. They are easily distinguished from other mite species due to a lack of web production.
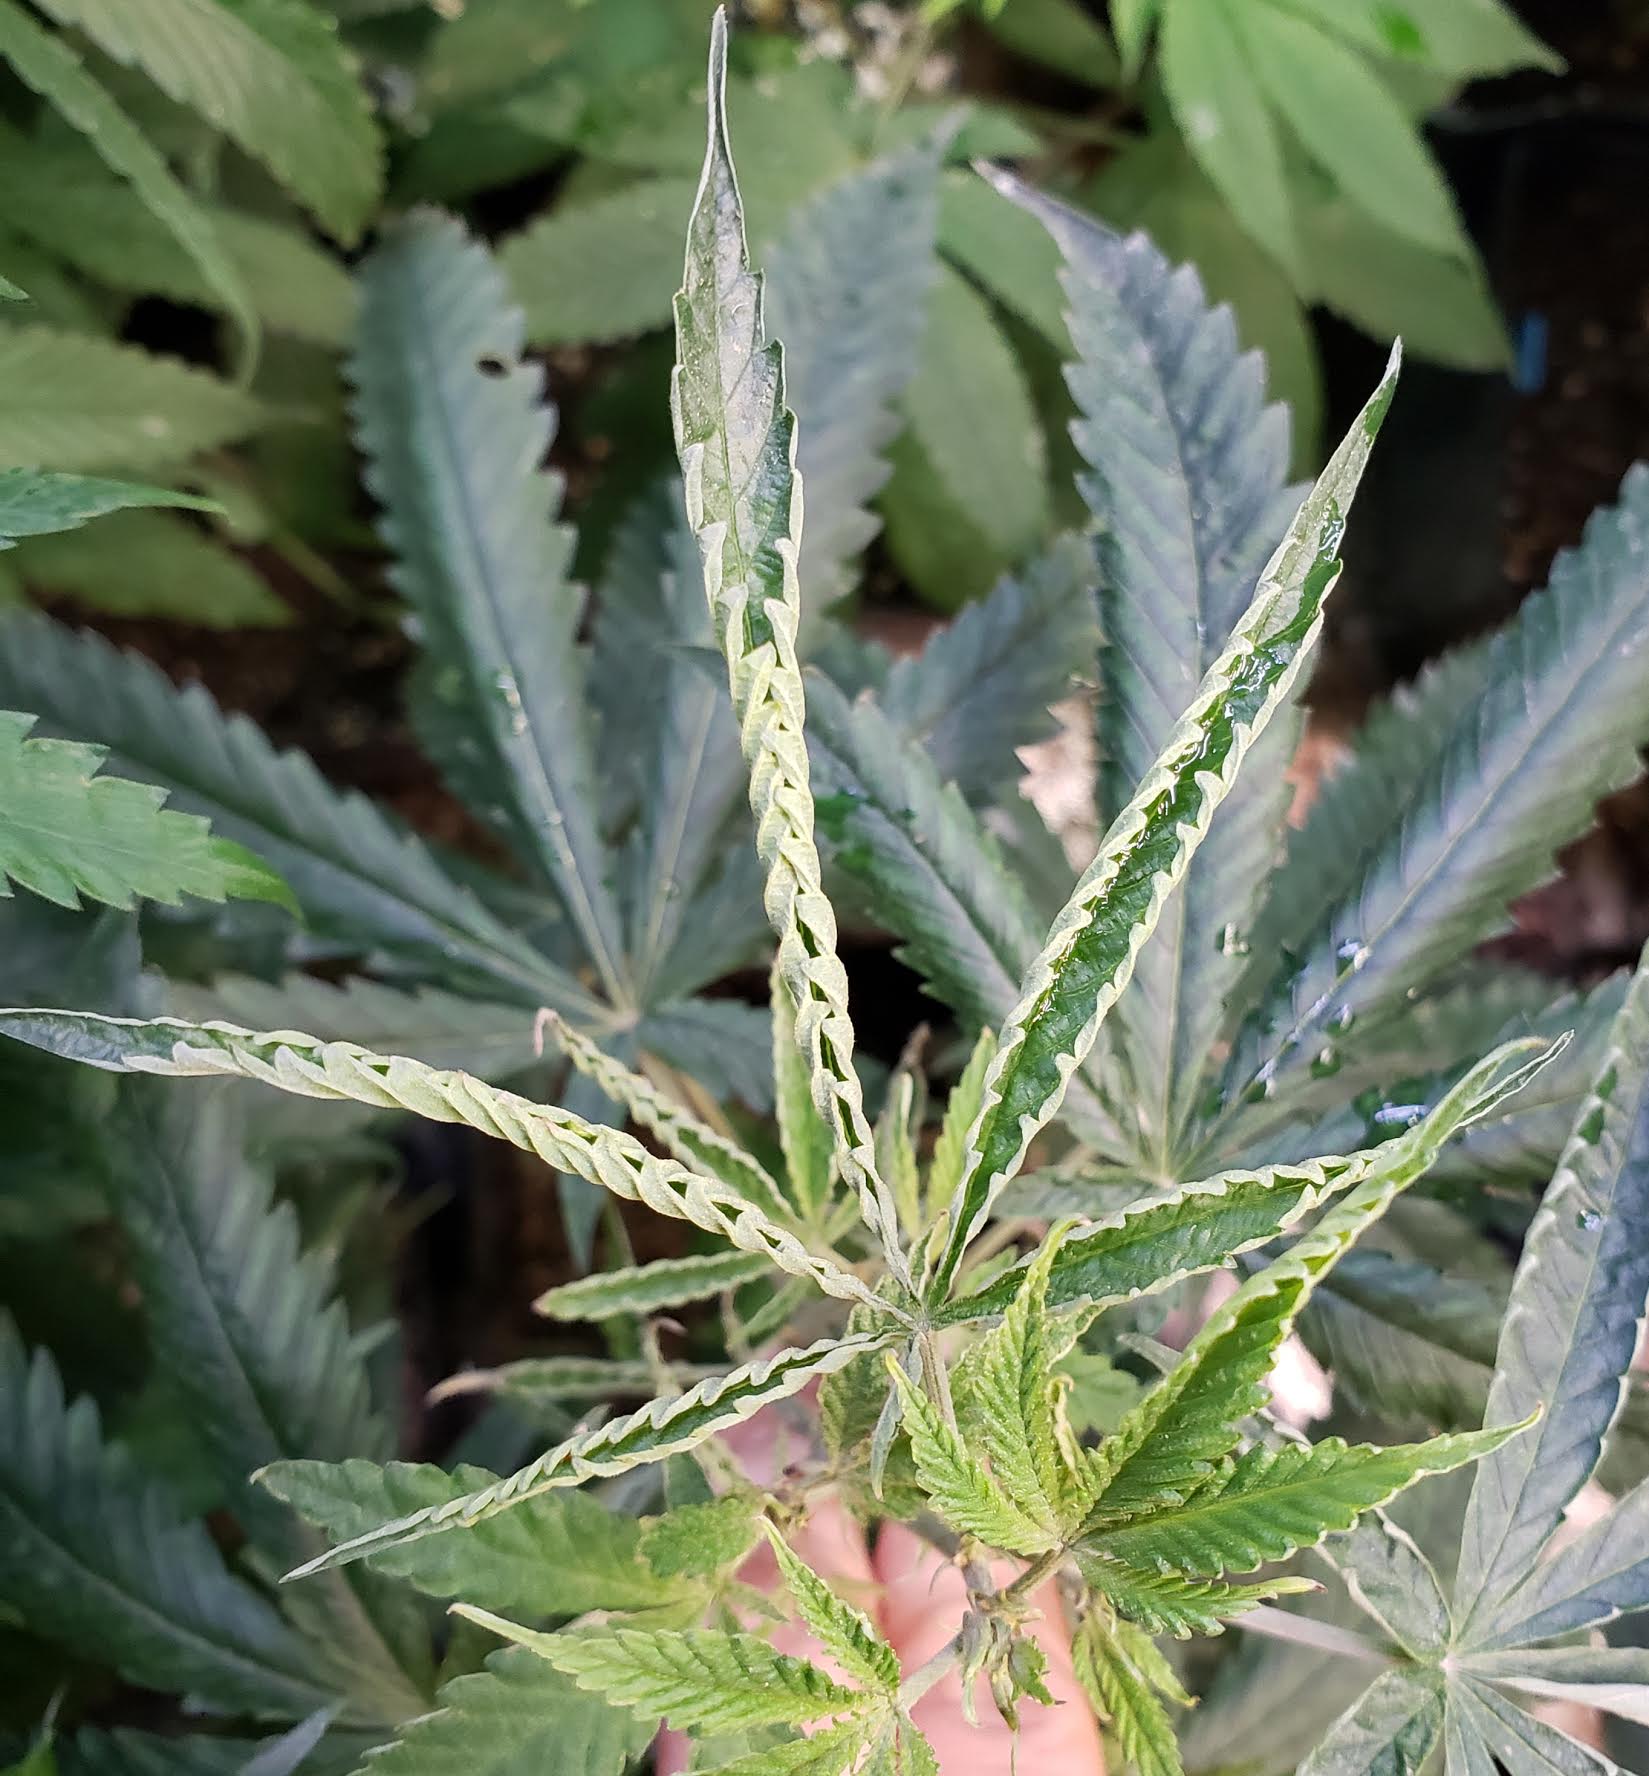 A common sign that russet mites are present
Damage
A common sign that russet mites are present
Damage: Russet mites are easily carried into gardens on clothing, by the wind, or even on other pests (like aphids or whiteflies), and will often go unnoticed until their population is a considerable size. Instead of seeing them, you’ll first notice the damage they do. They feed by sucking the sap out of a plant on a cellular level. Russet mites will usually appear first at the top or bottom of a plant and progressively move up or down the plant. Leaf finger edges will curl up, forming a taco shape, and turn yellow, hair tips will be destroyed, new growth will be slowed or stopped completely, and areas of the plant, usually at new leaf sites, will turn a bronze color. A russet mite infestation is often confused for deficiencies of iron and magnesium.
Life Cycle: Russet mites have a short life cycle, only taking about 1 week to mature into adults capable of reproducing; compared to other mites, they do not reproduce quickly.
The stages include:
- Egg: Females can be found surviving through winter inside of a plant’s joints and stems. There they lay clear eggs about the size of an adult russet mite, which hatch quickly.
- Nymph: A russet mite goes through two nymphal stages, although each stage closely resembles an adult.
- Adult: Under the right conditions, it only takes about one week for a russet mite to fully mature into an adult. An adult will usually live for around 3 weeks.
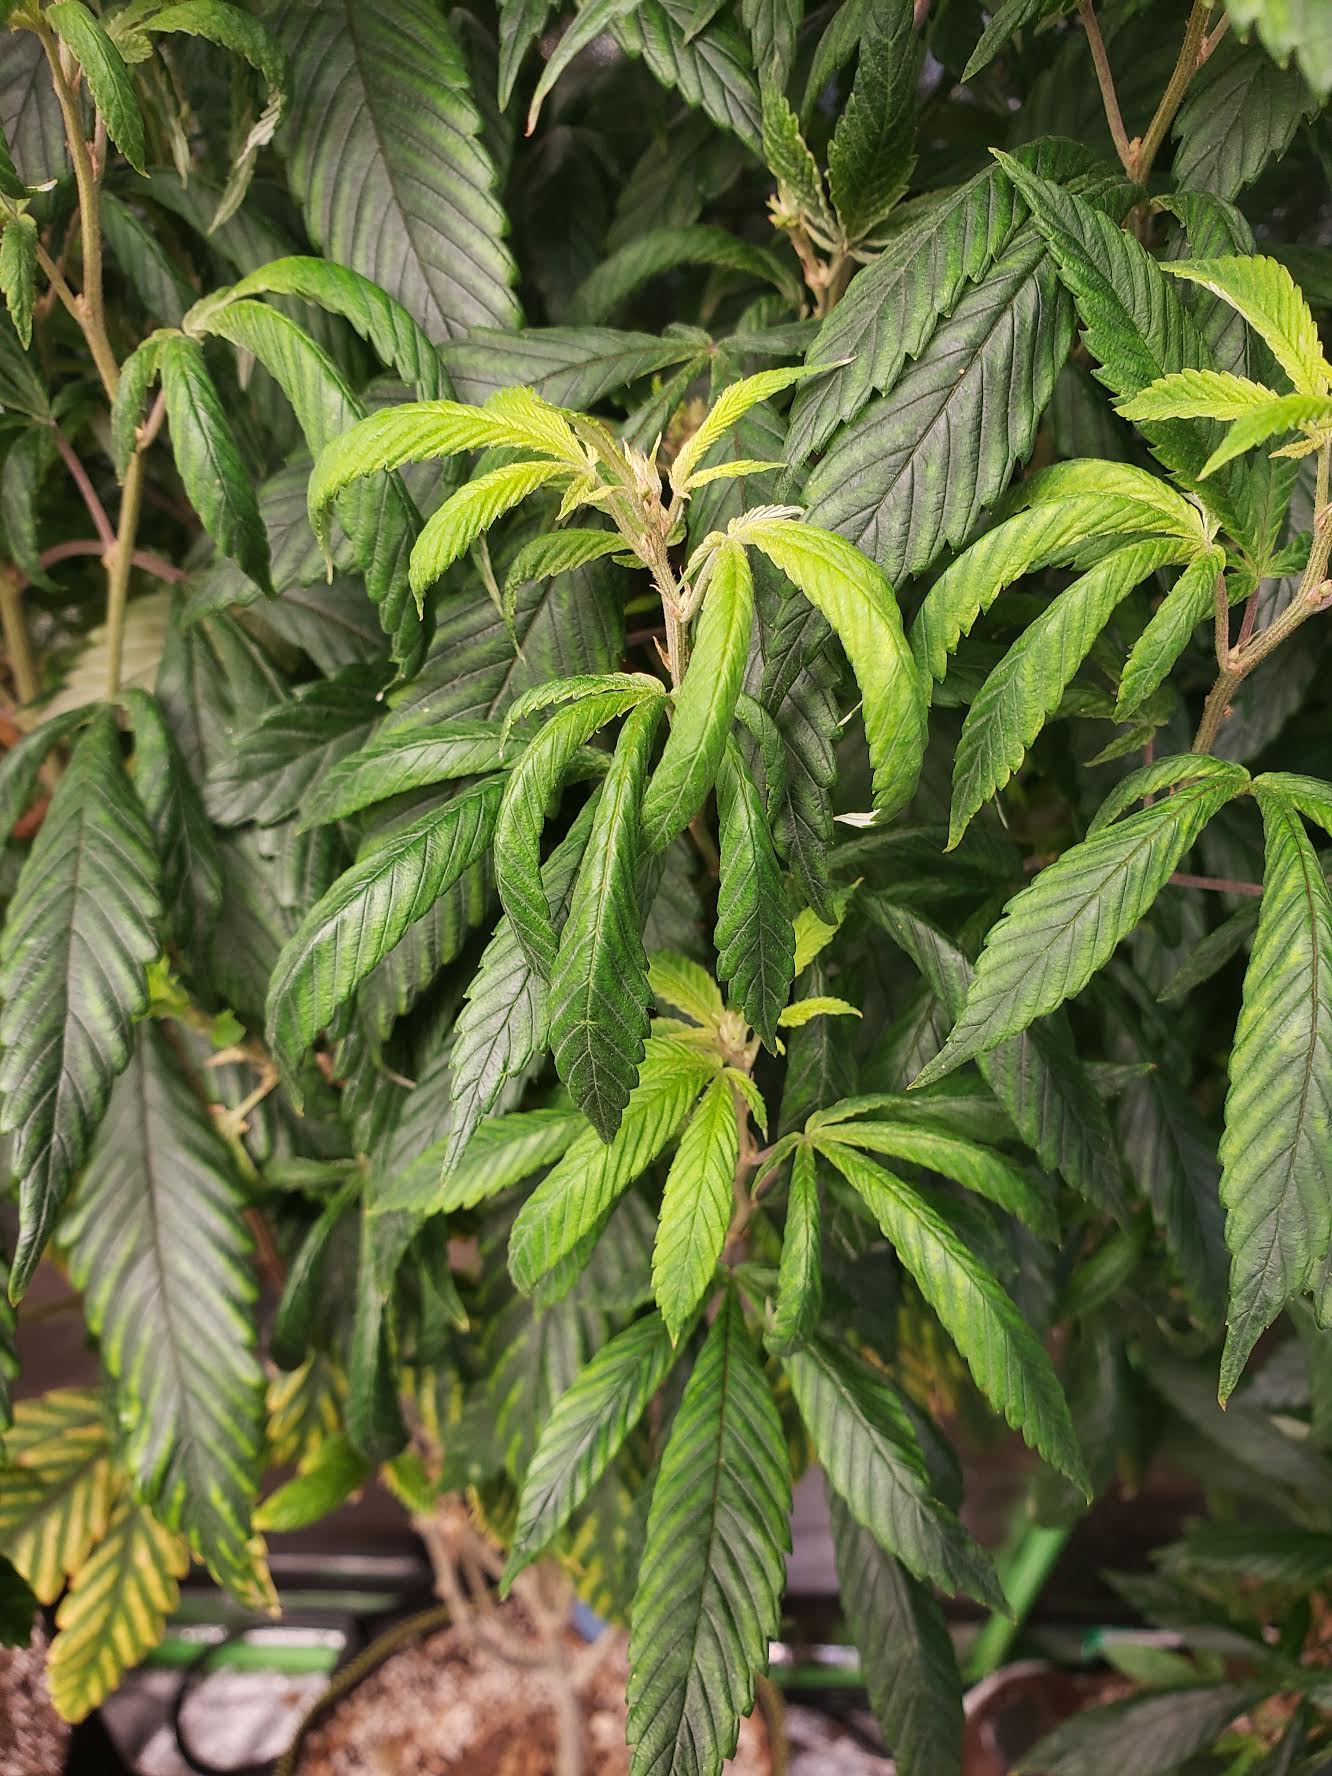 Russet mites cause new growth to take on a rusty brown appearance and leaves to curl up or down
Removal
Russet mites cause new growth to take on a rusty brown appearance and leaves to curl up or down
Removal: If it’s a plant that you have another clean cutting of, simply discard the infected plant immediately. It’s not worth the risk of possibly contaminating other plants or your entire garden. You can also remove it to a quarantine area for treatment.
If neither of those are an option, the first thing you’ll want to do is try to locate the epicenter, or the place where there is the greatest number of them. Once you locate them, spray with Kangen 2.5 Acid Water mixed with Grow Safe and Q (wetting agent) every day for 21 days. If needed, on alternating days use one 325mg aspirin and 1 tsp silica per gallon of water. They can successfully be eliminated with the use of Kangen 2.5 Acid Water and Grow Safe if religiously treated for the 3 week time period.
Another option is to use micronized sulfur to get rid of them. A good micronized sulfur brand is Microthiol Disperss. Use 2 Tablespoons per gallon of water. Apply 2 times spaced 4 days apart. Then go to the OG Biowar foliar pack at 20 grams per gallon of water. After that, release predators called Amblyseius Swirskii Cucameris. Continue to release predators every 4-5 days, at least 3-4 times. Follow with normal foliar procedure for 1 week then revert to prevention mode. (Do not use sulfur and oils of any type within 7 days of each other.)
Avoid overfeeding plants with nitrogen, as they are attracted to green growth. Effective heat treatments of 150F, 65C are also recommended once you harvest (usually indoor only), so you can crank up the temperature without harming plants. Turn the air conditioner off, the dehumidifier on, and the lights up, making sure to monitor the room closely. You can also briefly increase the CO2 to 10,000 ppm after harvesting.
Any kind of mite can build resistance to insecticides, making predatory mites the most effective for removal. Russet mites are fairly easy to get rid of if you catch them early on and don’t slack off on a treatment routine. If treated correctly, you should notice them gone in about one month’s time.
--
- Season: Late spring, summer
- Spray: Grow Safe + Kangen 2.5 Acid Water, Micronized Sulfur (veg), Green Cleaner, Grow Safe, Organocide (veg only), Safer Soap
- Beneficial Predator: Predatory mites, beneficial nematodes, Amblyseius swirskii cucameris
- Essential Oil: Cinnamon, clove, citrus, eucalyptus, peppermint, rosemary, thyme
- Heat Treatment: 150F, 65C for 30+ minutes
- CO2 Treatment: 10,000 ppm
- Estimated Time For Removal: About 2-4 weeks
Back to Common Pests
Scales
Identification: A relative of the mealybug, scales are diverse in size, shape, and color. They have no wings, visible legs, or antennae, and sometimes excrete a sticky honeydew substance, which attracts ants. Slow-moving, scales are typically found on or around branch joints, and in colonies. They tend to start from the base of the plant, often coming from the soil, and work their way up to the top. With around 8,000 species, they resemble shell-like creatures as opposed to an insect. The male is hardly seen and appears as a white gnat without mouthparts or the ability to feed.
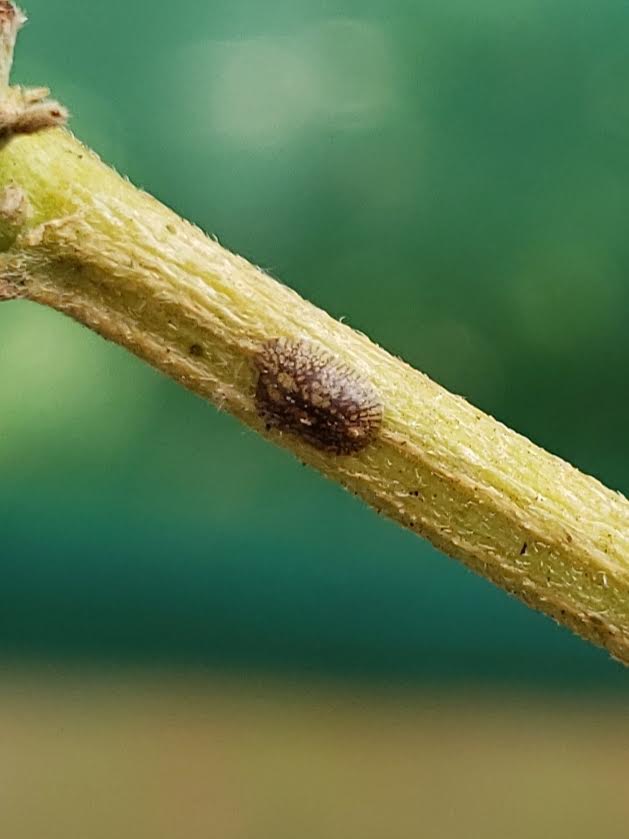 Scales hang out on stems and branches, rarely move, and are easy to get rid of
Damage
Scales hang out on stems and branches, rarely move, and are easy to get rid of
Damage: Often going unnoticed until the population is large enough, their presence can result in poor vigor, stunted growth, and yellowing leaves. They like to wedge themselves in between branch joints, which are slowly destroyed and become brittle, eventually causing the entire branch to break and fall off of the plant.
There are two types of scales:
Hard: Have a hard protective covering over their bodies, which is not attached to the shell/their body. They are stationary on a plant, staying where they choose to feed, and do not produce any sticky substance.
Soft: Are able to move about a plant slowly, however, rarely do. They have a soft, wax-like covering over them, which is part of their body. They come in a variety of shapes, most circular or oblong, and secrete large amounts of honeydew.
Life Cycle: Scales go through the following stages during development:
- Egg: Scales reproduce asexually. Eggs are laid under the female’s protective shell, and can hatch in as little as 1 week, sometimes taking up to 3 weeks.
- Crawler: Search a plant for a suitable place to feed, where they begin sucking the sap of a plant, develop a covering, and transform into adults.
- Adult: Adults are immobile and stay where they choose to feed, usually on stems and branches. Males are rarely seen, but have wings and resemble gnats.
Removal: Easy to remove; gently scrape scales off of a plant with a toothbrush or similar tool, and discard in a bucket or trash can.
--
- Season: Late winter to early summer
- Population Control: Scrape off
- Spray: Amazing Doctor Zymes, Green Cleaner, Neem Oil, Organocide (veg only), Safer Soap, Doktor Doom Total Release Fogger (veg only)
- Beneficial Predator: Lady beetles, parasitoid wasps
- Essential Oil: Lavender
- Estimated Time For Removal: Almost immediately. A few days.
Back to Common Pests
Snails and Slugs
Identification: Snails are soft-bodied pests that live in a round shell that they carry on their back and are without legs. They have two antennae-like parts called tentacles protruding from their head, the tip of each one the location of an eye. Slugs have a similar appearance; however, slugs lack a shell. Both snails and slugs are noticeably slimy.
 Snails are relentless and can climb up pots, walls, and almost any surface
Damage
Snails are relentless and can climb up pots, walls, and almost any surface
Damage: Snails and slugs like to chew the leaves of a plant, removing precious surface area the plant needs to maintain good health. They will chew all of the soft tissue, leaving nothing but the bones of a leaf. They can and will climb pots, walls, etc., to reach all areas of a plant. One snail can eat several leaves per day.
The slime they leave behind can also be toxic, often carrying diseases that can harm both the plant and the gardener (if ingested).
Fortunately, both snails and slugs are easy to spot, and due to their slow movement, take a few days to do significant damage (depending on how many there are).
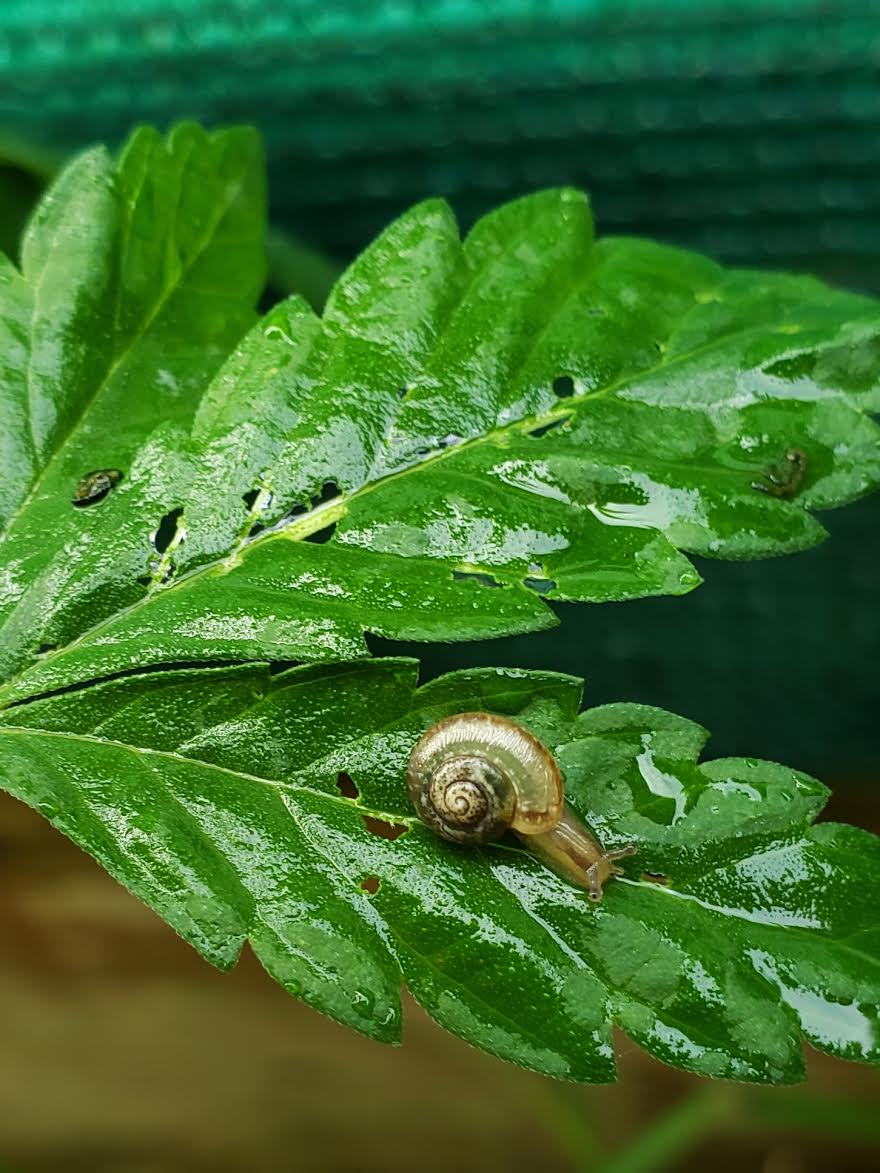 Snail eggs hatch in as little as 2 weeks and babies immediately start eating
Life Cycle
Snail eggs hatch in as little as 2 weeks and babies immediately start eating
Life Cycle: Snails go through the following life cycle:
- Mating: Snails cannot hear, and so do not make noise when seeking a partner. Instead, they court through smell and touch. Snails are hermaphrodites, having both female and male parts; however, they almost always mate rather than self-fertilize. After a few hours of mating, both partners will produce eggs.
- Egg: Snails lay small, white, round eggs in damp soil, sometimes digging a 2-4” deep hole to place them in. One snail can lay around 80 eggs at a time, around 400 per year, which take 2-4 weeks to hatch.
- Young: As soon as a snail hatches, it has its shell, although it’s soft and not fully developed. They need calcium to aid in their development and start off by eating their own eggshell and sometimes the unhatched eggs of their brothers and sisters.
- Adult: Adult snails can lay eggs once a month, and are capable of storing sperm from previous partners for several years. Snails can live 2-7 years depending on the species.
Removal: Both are easy to remove. To prevent them from climbing up pots and beds, sprinkle diatomaceous earth or crushed eggshells around the perimeter of pots or on a garden floor.
You can also bury a cup, making the top level with the ground. Fill the cup up halfway with flat beer, which attracts slugs and snails, causing them to fall inside and drown. Make sure to check daily and clean.
For a more snail-friendly solution, you can sprinkle coffee grounds - which they do not like - around your plants. Or find them hiding in cool, dark, damp places and relocate them to a place where they will be happy and non-invasive.
--
- Season: Springtime
- Population Control: Manual removal
- Spray: Neem Oil
- Preventative: Food-grade diatomaceous earth, beer trap, eggshells, coffee grounds
- Beneficial Predator: Birds, toads, turtles, praying mantis
- Essential Oil: Cedarwood
- Estimated Time For Removal: Almost immediately. A few days.
Back to Common Pests
Spider Mites
Identification: Found everywhere, including indoor gardens,
spider mites are one of the most common pests in a cannabis garden. A spider mite is a tiny arachnid, related to ticks and scorpions, and is often hard to recognize with the naked eye; however, they are easy to prevent and get rid of. They come in a variety of colors including red, yellow, brown, and black. They thrive in the summer months, when it's warm and dry, but can be found year-round in tropical climates. As soon as you notice them, begin treatment as they reproduce quickly and can cause major damage.
 Spider mites are one of the most common pests and reproduce quickly
Damage
Spider mites are one of the most common pests and reproduce quickly
Damage: Spider mites feed by sucking fluids from plant tissue. Signs you may have spider mites include tiny yellowish-white spots on the leaf surface, tiny black or red spider-like pests on the underneath of the leaf, small translucent eggs underneath the leaves, webbing, and eventual yellowing of a plant. If left unchecked, leaves will die and fall off.
Life Cycle: A spider mite’s life cycle is largely dependent on the temperature, and if conditions are ideal, an entire generation can be completed in about one week. With
the quickest reproduction rates compared to broad and russet mites, spider mites go through the following stages:
- Egg: Over the course of several weeks, females can produce and lay up to 20 eggs per day after mating, laying around 100 eggs in their lifetime. Eggs are found in clusters on the underneath of leaves, and can hatch in as little as 3 days.
- Larvae: Tiny with 6 legs. They begin lightly feeding on leaves and then find a place to molt into the nymphal stage, which lasts for a few days.
- Nymph: Spider mites go through two nymphal stages, where they develop eight legs, and fully mature. During this stage, they look almost like mature adults; however, they are somewhat smaller and cannot reproduce.
- Adult: Adult spider mites can reproduce in as little as 5 days if conditions are favorable. They typically feed on leaves, and once a plant has suffered enough damage, like to relocate. A common way for their migration is by catching a ride with the wind, possible due to their small size, and by using their webbing as something to hold onto. They also catch rides on pets, clothing, and even other pests.
Removal: To help control their population, you can use spray and beneficial predators. A single predatory mite can eat about 25 eggs or 5 adult spider mites per day. Or you can use lady beetles. A single lady bug can consume up to 100 mites per day. On average, if needing to introduce them, use 25-30 per plant if the population isn’t too large. If you are dealing with a large infestation, sprays will be your best option as predators will probably not be able to contain them quickly enough.
Just before dark, coat the underneath of leaves, in the middle of beds, and the entire plant with Grow Safe and Q mixed with Kangen 2.5 Acid Water. Organocide can also be used, however, should only be used during veg as it is a fish emulsion spray and will leave a fish-like smell on flowers. Veg plants respond well to it, but Organocide is not something you want on flowering plants. Treat infected areas, but also non-infected areas as a means of prevention. Gently shake the base of each plant or individual branch to remove excess liquid when you are done spraying.
Outdoors, treat 2x per week for prevention. For treatment, spray every day until you notice the population no longer spreading (2-3 weeks). Do not use after week 4 of flower or you risk starting mold. If you notice a leaf that has more than 50% damage from spider mites, manually remove it. If they show up after week 4 of flower, manual removal is the best option for treatment and containment. Any kind of mite can build resistance to insecticides, making predatory mites the most effective for removal.
--
- Season: Late spring through summer; year-round in the tropics
- Population Control: Leaf removal
- Spray: Kangen 2.5 Acid Water, Grow Safe, Green Cleaner, Safer Soap, Supa cold-pressed sesame oil, Organocide (veg only), Doktor Doom Total Release Fogger (veg only)
- Beneficial Predator: Green lacewings, lady beetles, pirate beetles, predatory mites, Amblyseius swirskii, and N. californicus
- Essential Oil: Cinnamon, clove, citrus, eucalyptus
- Heat Treatment: 150F, 65C for 30+ minutes
- C02 Treatment: 10,000 ppm
- Estimated Time For Removal: 2-4 weeks
Back to Common Pests
Spotted Mites
Identification: Spotted mites are similar to spider mites. They have tiny oval bodies that are rounded at the rear end, with 2 black spots on both sides, have 8 legs, and are usually yellow or yellow-green.
 Spotted mites quickly damage leaves from underneath, speckling the tops
Damage
Spotted mites quickly damage leaves from underneath, speckling the tops
Damage: Spotted mites feed on a plant one cell at a time. With a large infestation, leaves can quickly become damaged. Signs you may have spotted mites include tiny yellowish-white spots on the leaf surface, tiny yellow or black spiders on the underside of the leaf, small clearish-white eggs underneath the leaves, webbing under the leaves and on the stems, and eventual yellowing of a plant. Damage from spotted mites results in decreased photosynthetic ability, transpiration, and vigor.
Like spider mites, spotted mites like to hang out underneath leaves where they suck out the juices, leaving only yellow cells and an overall bronzing/crispiness. Eventually, a plant will die.
Life Cycle: A spotted mite can complete a full life cycle in as little as 1 week if temperatures are high and humidity levels are low. This allows all stages to be found together.
- Egg: Eggs are tiny and spherical, usually found underneath leaves, and can hatch in as little as 3-4 days.
- Larva: Larva have 6 legs and are colorless and molt to become a nymph. They can mature into adults in as little as 4 days, sometimes taking 2 weeks.
- Protonymph and Deutonymph: Nymphs have 8 legs and resemble adults, but are smaller and not able to reproduce. Nymphs produce webbing all over the leaves and flowers where they live.
- Adult: A spotted mite can go from egg to adult in 1-3 weeks. Adults also create white webbing. Females are larger than males and can lay 10-20 eggs per day. Spotted mites typically live for about 3 weeks.
Removal: When trying to identify mites, it’s helpful to shake a plant or leaves over a sheet of white paper. For spotted mites,
sulfur treatment doesn’t work and may actually increase reproduction. Instead, use Grow Safe and Q (wetting agent) mixed with Kangen 2.5 Acid Water. Spray every day for 2-3 weeks until you notice plant health improve. Green Cleaner and Supa cold-pressed sesame oil can also be effective. Organocide can be used in veg.
If possible, treat the garden space with heat, usually only possible indoors and after harvest: 150F, 65C for 30+ minutes. Turn the air conditioner off, the dehumidifier on, and the lights up, making sure to monitor the room closely. It’s also good to manage surrounding foliage if you notice their presence in a garden. Briefly increasing CO2 to 10,000 ppm after harvesting is also effective. It’s also good to manage surrounding foliage if you notice their presence in a garden.
Any kind of mite can build resistance to insecticides, making predatory mites the most effective for removal.
--
- Season: Spring and summer
- Spray: Kangen 2.5 Acid Water, Grow Safe, Green Cleaner, Safer Soap, Supa cold-pressed sesame oil, Organocide (veg only), Doktor Doom Total Release Fogger (veg only)
- Beneficial Predator: Lady beetles, pirate beetles, predatory mites
- Essential Oil: Cinnamon, ctrus, clove, eucalyptus, peppermint, rosemary
- Heat Treatment: 150F, 65C for 30+ minutes
- C02 Treatment: 10,000 ppm
- Estimated Time For Removal: About 2-4 weeks
Back to Common Pests
Stem Borers
Identification: Stem borers are small grub-like pests that target the stems and branches of a plant. They come in colors like pink, white, light brown, or gray. Adults are moths (sometimes planthoppers or beetles) with wings, and can fly in random, quick motions.
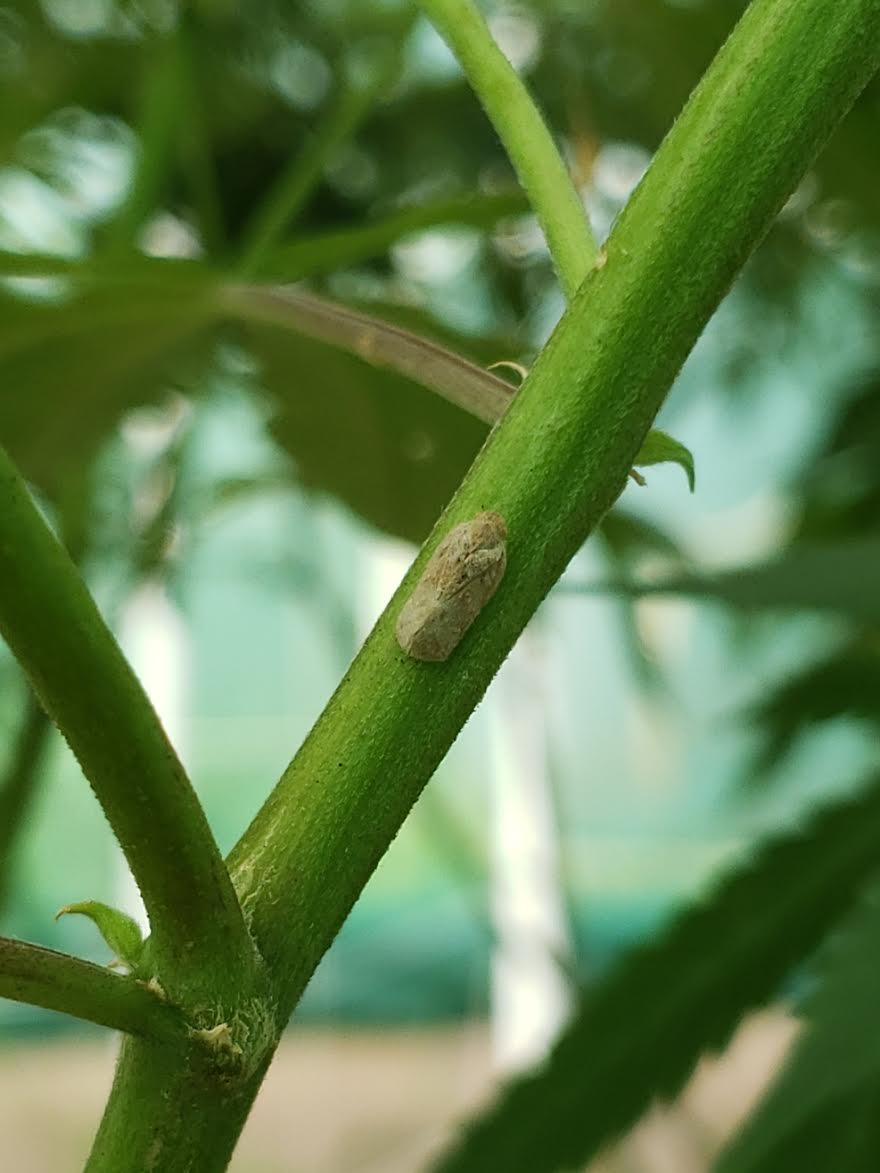 Stem borers can damage an entire plant in as little as a few days
Damage
Stem borers can damage an entire plant in as little as a few days
Damage:
Stem borers can probably be called a cannabis plant's most dangerous pest threat. They can damage anywhere from 5-100% of the entire plant in a matter of days. The larva enters a branch or stem from a tiny opening it chews and then begins to eat the internal tissues. Some species hatch from eggs that have been deposited inside of a branch or stem by an adult. You'll notice the section turn white or lose its green color; it can even begin to mold and take on a spotted blackish coloring. As the larva eats and develops, it typically moves downward, damaging the inside of the stem, and usually destroying any section of a plant above where it is located. Leaves wilt and the death of the branch or plant shortly follows.
Life Cycle: Stem borers go through four stages of growth, with their entire life cycle taking about 1 month to complete depending on the climate and where you live:
- Egg: Found on leaves, usually towards the top of a branch, females lay eggs in clusters. Sometimes eggs are laid directly inside of a stem or branch. Eggs are typically round and pale, appearing as yellow or light green. Depending on environmental conditions, they usually hatch in about 1 week.
- Larva: After hatching, the larva moves around for a few hours looking for a point of entry on a plant. They like to enter a plant at a node; the point of the plant where a branch grows out of the main stem, but will enter pretty much anywhere on a stem or branch. Larvae are somewhat translucent or pink with a darkly colored head, and have no stripes. Once inside, they feed on internal plant tissue, causing severe destruction to a plant. A larvae will go through 6 different stages, which takes around 1 month to complete.
- Pupae: Inside of a plant, the mature larva pupates and forms a white cocoon around itself that changes to a dark brown once mature. Pupae don’t eat. This typically lasts for just over 1 week.
- Adult: An adult moth (or other insect) exits a plant from a small hole that was made during pre-pupation. Once emerged, moths can be found anywhere on a plant, usually on the branches. They are most active at night, when they breed and lay eggs. Their lives are short; they die a few days after laying eggs.
Maintenance: If damage to a plant has been done, there is not much you can do for the branch. As soon as the leaves drop, the branch should be removed as there's no chance of saving it. Certain strains have thicker branches and can sometimes survive an attack, especially depending on how long a larvae stays in a branch and how much damage it does, so wait until the leaves drop before cutting the branch off unless infestation is heavy and you want to remove the pest. Remember to cut a little below the discolored section to remove the larvae that's inside to prevent it from moving further down the plant and causing more damage.
Once the branch has been cut, look at the inside of it. If there are still signs of damage, like a dry, hollow space or black coloring, remove
more of the branch. You do not want to remove the branch while leaving the larva in the plant. Your goal is to remove the larva, no matter how much of the branch needs to be sacrificed. If left inside, it will continue damaging the plant, and if it reaches the main stem toward the bottom of a plant, could kill the entire thing.
During daily inspections of your garden, keep an eye out for adults. If you can smash them, do so. They (planthoppers) don't move much while on the stem, but if they sense you, they will fly in unpredictable movements, sometimes right at you. Often, you can watch them land on a nearby branch, leaf, or stem.
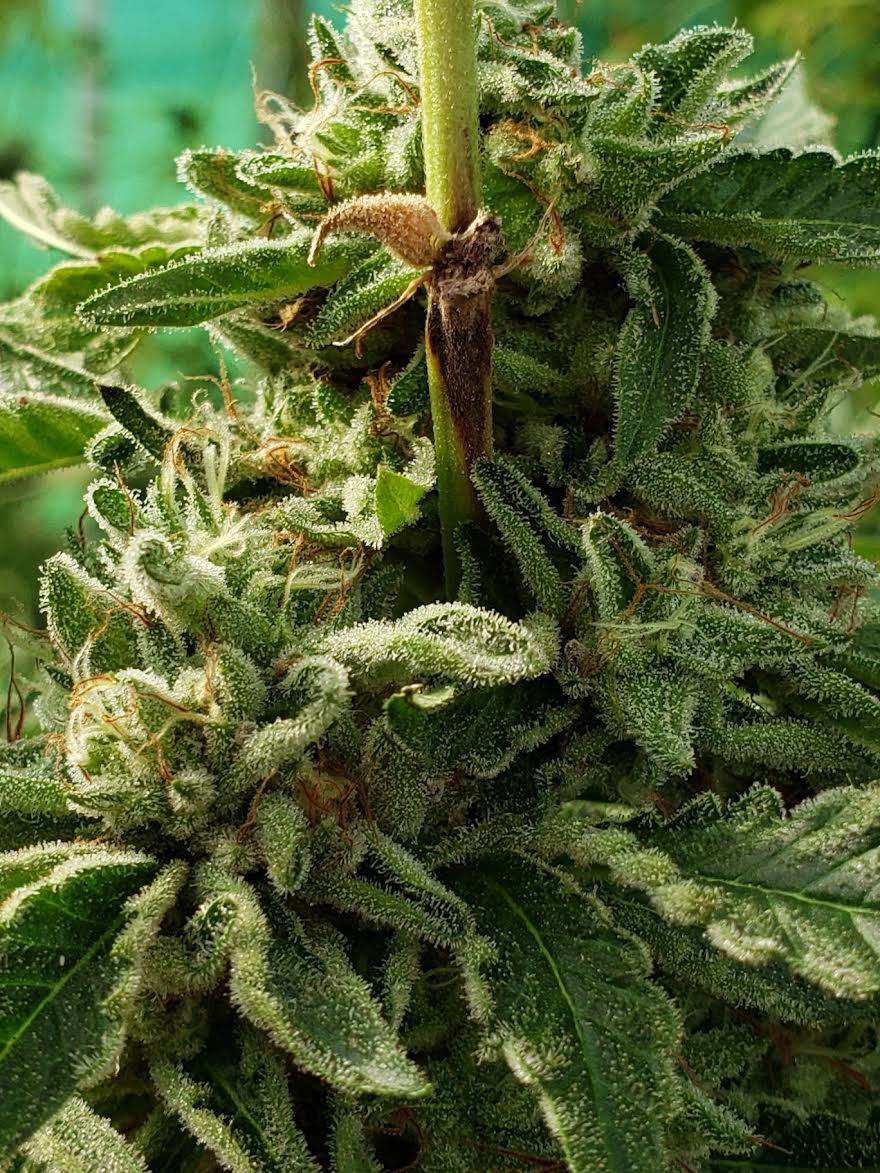 Stem borer damage
Removal
Stem borer damage
Removal: There are a few ways to keep these pests in check:
1.
Egg: This is the easiest time to get rid of them due to non-movement. Found on the top of leaves, simply remove the finger or entire leaf that the eggs are located on.
2.
Larva: Look like tiny legless caterpillars, and are hard to find. This is the stage of the stem borer that does the most damage; they are the ones that eat the plant. Usually, you can only remove them after they have done their damage. Once you see the whitish-brown stem section, and all the leaves above that point drop, cut a little below it and remove it. They can suspend themselves from a plant from a small silk thread and use the wind to travel to other areas of a garden. If you happen to see this, catch and kill the larva.
3.
Pupae: Found inside of the stems, but only after damage has been done to a plant. During this stage, they are preparing to emerge from a plant as a mature moth (or other pest).
4.
Adult moth: This stage is probably the easiest to spot due to their size and ability to fly, and should be smashed on the spot. You want to catch them while they are still on the branch as they are difficult to catch once they take flight. Yellow sticky traps can be used, although unless the population is big enough, they rarely get caught in them. Pheromone traps are also used to capture adult moths.
Elimination Tools: Traps and predators for the stem borer include:
- Yellow sticky traps
- Homemade ethanol traps
- Beneficial predators
- Bug zapping lights
- Manual removal
When you are aware of these pests and actively work on eradicating them from your garden, they can be manageable, but if you grow outdoors, especially in tropical climates, you will most likely have to fight them throughout the entire life cycle and will most likely lose a percentage of your crop to them.
--
- Season: Year-round in the tropics
- Population Control: Yellow sticky traps, ethanol traps, bug zapping lights, pheromone traps
- Spray: Spinosad + Kangen 2.5 Acid Water, Neem Oil
- Beneficial Predator: Parasitoid wasps, dragonflies, praying mantis, lizards, birds, spiders
- Essential Oil: Cedarwood, lavender, peppermint, spearmint
- Estimated Time For Removal: Varies
Back to Common Pests
Thrips
Identification: There are somewhere between 4,000-6,000 species of thrips. These slender, tiny insects have asymmetrical, piercing-sucking mouthparts, move quickly, and often appear in large numbers. Only adult thrips have wings. They are easy to spot and usually come in different colors, including white, green, yellow, gray, brown, and black.
Damage: Thrips’ asymmetrical mouthparts are formed with the right mandible absent or reduced in size compared to the left side. They use their existing mandible to cut into a plant and then insert their mouthpart; a process called
rasping. This causes a distinct silvery or bronze marking on plant surfaces. It can also cause new leaves to curl and become distorted. Damage is most commonly found where stems attach to leaves, but are also found inside flowers and on leaves. Preferring to herd together on the underside of leaves, you can sometimes see them by gently shaking a branch, in which case, adults take flight. Damage on leaves appears as whitish-yellow speckles and the leaves become brittle. They are known to spread diseases, so their removal is important in a cannabis garden. Some species also bite humans.
Life Cycle: Thrips go through five stages, with the full cycle taking as little as 16 days and up to 45 days to complete:
- Egg: Female thrips can lay up to 10 eggs per day. Eggs are laid directly in the leaf, stem and flower tissue so the larva have food and protection as soon as they hatch. It only takes a few days for eggs to hatch in warm weather, but could take months in cooler weather.
- Larva: Thrips in the larval stage consume a lot of plant material and like to target newer leaves. They are usually green or yellow. After feeding, they drop to the soil where they pupate.
- Prepupae and Pupae: Thrips in this stage mature into wingless nymphs. This stage can take around 2 weeks to complete.
- Adult: After molting two times, the nymphs then develop wings, crawl out of the soil, fly back to the plant, and prepare to mate; however, they do not need to mate to reproduce.
Removal: For treatment, spray Kangen 2.5 Acid Water + Green Cleaner or Amazing Doctor Zymes, or if populations are large, use Spinosad. For vegging plants, Organocide can be used. Spray every day until you notice the population eliminated. Do not use after week 4 of flower or you risk starting mold. If you notice a leaf that has more than 50% damage, manually remove it. If they show up after week 4 of bloom, sticky traps and manual removal are the best options for treatment and containment.
--
- Season: Spring and summer
- Population Control: Cleanliness, removing plant debris near soil, blue or pink sticky traps, regular inspections
- Spray: Kangen 2.5 Acid Water, Amazing Doctor Zymes, Green Cleaner, Organocide (veg only), Spinosad (large colonies), Doktor Doom Total Release Fogger (veg only)
- Beneficial Predator: Predatory mites (Amblyseius cucumeris, Amblyseius barkeri, Neoseiulus cucumeris), beneficial nematodes, green lacewing, parasitoid wasps, pirate bugs (Orius species)
- Essential Oil: Clove
- Estimated Time For Removal: About 2-4 weeks
Back to Common Pests
Whiteflies
Identification: A whitefly is a tiny white insect that looks like a fly or tiny moth with two antennae on its head. They are related to aphids, scales, and mealybugs. Adults have powdery white wings; younger ones do not. They prefer to hide underneath the leaves in large colonies where they will lay their eggs in clusters, appearing as a white, cotton-like substance.
Damage: Whiteflies suck the juices out of plants and cause stunted growth, yellowing leaves, increased susceptibility to pests and pathogens, decreased vigor, and lower yields. Whiteflies also secrete a honeydew substance, which attracts black mold and causes leaves to become sticky. Whiteflies will become aerial if their chosen leaf is gently shaken, and are easy to spot flying around a garden above plants.
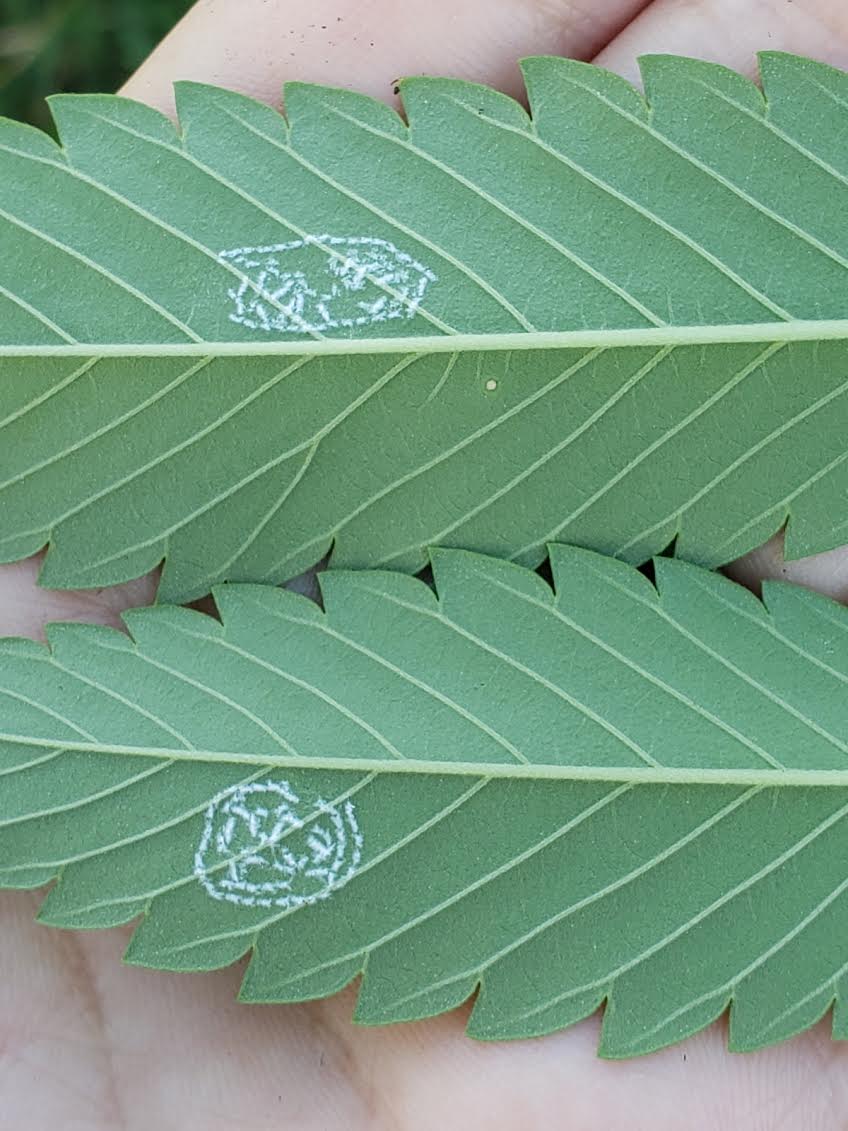 Whitefly eggs, which can hatch in as little as 5 days
Life Cycle
Whitefly eggs, which can hatch in as little as 5 days
Life Cycle: The life cycle of a whitefly includes several stages, including:
- Egg: Females use the upper leaves of a plant to lay up to 300-400 eggs (in their lifetime) on the undersides, which can hatch in as little as 5 days. Eggs are usually laid in circular patterns.
- Nymph: Whiteflies go through 4 nymphal stages (instars). Nymphs are flat, oblong in appearance, are attached to the leaves where they feed, and rarely move. During these stages, whiteflies appear translucent in color and blend in well with the leaves.
- Pupae: The pupae stage lasts for up to 1 week and is a time when the insect doesn’t feed. After the pupal stage, adults emerge and repeat the cycle.
- Adult: It only takes 16-25 days for an egg to mature into an adult whitefly. Adults can live for up to 2 months.
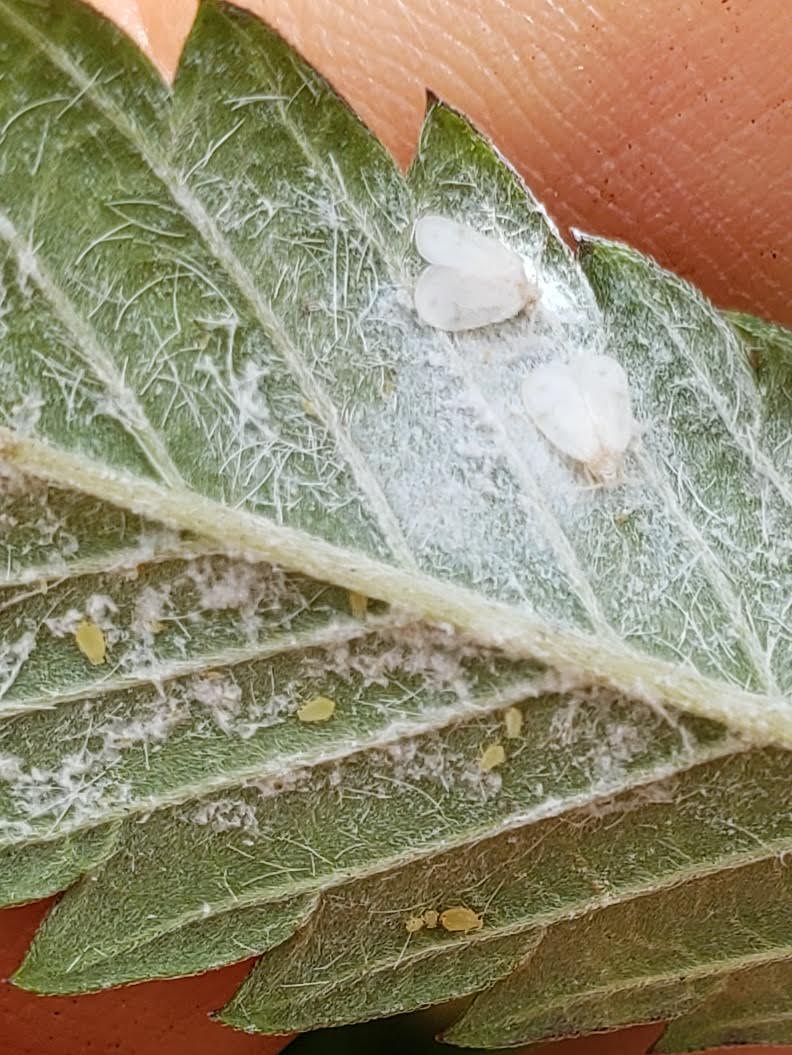 Adult whiteflies on the leaf of a plant
Removal
Adult whiteflies on the leaf of a plant
Removal: Because they are attracted to the color yellow, sticky traps work well to help identify and eliminate the population. Whiteflies are challenging to manually remove due to their quick and sporadic flying patterns.
Again, a sprayer works well to help control pest populations like whiteflies. Just before dark, coat the underside of leaves, in the middle of beds, and the entire plant with Safer Soap, Grow Safe, or Amazing Doctor Zymes. Make sure to thoroughly coat infected areas, but also non-infected areas for prevention. Gently shake the base of each plant or individual branch to remove excess liquid when you are done spraying.
For treatment, spray every day until you notice the population is eliminated. Do not use after week 4 of bloom or you risk starting mold. If you notice a leaf that has more than 50% damage, manually remove it. If they show up after week 4 of bloom, sticky traps and manual removal are the best options for treatment and containment.
When attempting to remove whitefly populations,
make sure to also inspect for ants, as they are attracted to the sticky honeydew that is produced and will defend the whiteflies against their natural predators.
- Season: Late spring to early fall; year-round in the tropics
- Population control: Yellow sticky traps
- Spray: Kangen 2.5 Acid Water, Organocide (veg only), Green Cleaner, Grow Safe, Safer Soap, Amazing Doctor Zymes, Neem Oil, Doktor Doom Total Release Fogger (veg only)
- Beneficial Predator: Lady beetles, lacewing larvae, praying mantis, parasitoid wasps/Encarsia formosa
- Essential Oil: Eucalyptus, peppermint, rosemary
- Estimated Time For Removal: 2-4 weeks
Back to Common Pests
How To Know If You Have A Sick Cannabis Plant
Pests aren’t the only things that will attack a cannabis plant; disease and inadequate care are also big players in the game when it comes to proper health and development. The more stress a plant experiences the more likely it is to succumb to sickness.
Common factors that cause stress to a cannabis plant include:
--
- Cutting/Cloning
- Under/Overwatering
- Improper Light Exposure
- Pests/Pathogens
- Hot/Cold Temperatures
- Being Root Bound
- Transplanting
- Improper VPD
The healthier the plant, the less work is required from the gardener, so again: prevention is the best way to help a garden thrive. If you notice the spreading of a disease, especially if it’s on flowering plants that are close to harvest, consider chopping them. Implement preventative measures once the space is clean to avoid contamination in the future. And like gold in a safe, it’s always helpful to have quality genetics in seed form just in case.
Plant Diseases
Common illnesses that affect cannabis plants include:
--
Bud Rot
Identification: A regular occurrence in an outdoor cannabis garden is the presence of mold, also known as bud rot or Botrytis cinerea.
Signs mold may be in your garden include:
- Leaf discoloration, contortion, and wilting
- Brown, pink, or white fuzzy sections on flowers
- Usually starts in the biggest, most dense flowers
- Can be found anywhere on a plant, but is most common on flowers and stems
Mold is brought on by excessive moisture, high humidity levels, stagnant air, hot or cold temperatures, and is especially problematic in dense, frosty flowers. It’s difficult to avoid during winter in the tropics if you let your plants fully develop, but can be managed. Mold starts off by causing discoloration, leaf contortion, and wilting. The affected portion then turns discolored and fuzzy. The fuzziness is tiny mold spores - which at any moment, be it wind, water, pests, or some other disruption - can diffuse throughout a garden and colonize a new location. Between 50,000 to hundreds of millions of spores can be released at each event.
Some strains are more prone to mold than others, so selecting a cultivar that is right for your environment is helpful when trying to prevent its presence. Incorporating crab meal in a soil mixture helps prevent a plant from succumbing to bud rot due to increased immunity and helpful fungal development. Especially common in the last couple of weeks before harvest, it is extremely important to monitor and remove as
it can spread quickly. It’s important to remove mold as it cannot be consumed and will continue to spread if not contained. The earlier you catch it the better.
Treatment: Here are some things you can do to prevent mold from spreading:
1.
Turn fans off. It's a good idea to have fans pointing in a different direction or turned off while you remove affected sections.
2.
Remove moldy sections. It can be genuinely upsetting, considering their importance, but mold often shows up at the top of a plant and on the biggest flowers first. For flowers that are showing signs of mold, some basic surgical skills are required. You'll get better with practice, but with clean, sharp scissors, remove the section, making sure to be gentle and move slowly to discourage it from dispersing. Cut
all of the mold out.
Every affected bract.
3.
Be careful and thorough. Try to make as few cuts as possible to lessen the chances of disrupting spores. Sections of a flower are sufficient for removal as long as the mold hasn't made it to the inner stem. If it has, cutting off the entire flower just below the mold line is recommended; otherwise it will keep spreading around the site.
4.
Check the entire plant. Sometimes fuzzy mold can show up on stems and branches; especially common when pests like stem borers are present. To prevent the mold from spreading, simply take a wet paper towel and gently wrap it around the affected area. Carefully wipe the branch until the fuzzy mold is gone.
Immediately discard the paper towel in a trash can far away from your garden. The branch will probably be discolored, but the mold will be better contained. Check the area for additional mold until harvest.
5.
Add more fans and make changes to the environment. If you notice a lot of mold on your plants, consider making changes to the grow space. Increasing the number or size of fans can dramatically reduce the problem. Ensuring your plants are properly spaced and defoliated is also effective. If you notice your plant is wet from rain, gently shake the branches, or tap on the mainstem at the base of the plant,
as long as there is no mold present. This can remove excess moisture and prevent mold from growing.
6.
Check back regularly. When finished, make sure you have enough air circulation, the fans get turned back on, thoroughly clean your scissors, and check on your garden again.
--
- Control: Proper ventilation, air circulation, low humidity levels, comfortable temperatures, plant health, early identification, proper training and pruning; regularly cleaning gardening tools thoroughly
- Preventative: Crab meal
- Estimated Time For Recovery: Immediate, but may reappear, so be constantly vigilant
Back to Plant Diseases
Damping Off
Identification: Damping off is a fungal disease most often caused by fusarium or pythium that affects seedlings and sometimes clones. The fungus thrives when there is too much water or in temperatures that are too cold. Often, the fungus gets carried in by pests, wind, or on tools that have been in contact with plant or dirt debris. If the disease doesn’t kill a young plant, it will produce a plant that lacks vigor.
Signs of damping off include:
- A seedling that doesn’t grow out of the soil
- The first leaves (cotyledons) and stem are discolored, soft, mushy, and thread-like
- Fuzzy white mold grows on soil, roots, or seedling
- Leaves turn brown and wilt
- Root rot
Treatment: Most plants that succumb to damping off are not savable. A recurring theme with cannabis, prevention is the best way to avoid this disease. Make sure to provide plenty of air circulation, proper temperatures, and clean equipment. Do not put seedlings in clone domes or places with moist, stagnant air. Planting seedlings in pots that are suitably filled with soil will expose a plant to better air circulation, eliminating the likelihood of attracting fungus.
--
- Season: Year-round
- Prevention: Air circulation, proper temperatures, clean equipment
- Essential Oil: Melaleuca
Back to Plant Diseases
Downy Mildew (DM)
Identification: Downy mildew occurs when humidity levels are high and temperatures are below 65F. Signs appear quickly and are similar to PM; however, DM penetrates deeper into a leaf. Spores can survive in soil and throughout winter, and are carried by wind, rain, insects, and garden tools.
Signs of downy mildew include:
- Light yellow spotting forms on the tops of leaves
- Older leaves yellow between veins
- Leaves can become brittle and fall off
- Underside of leaves may develop whitish-gray fungi that resembles a cotton-like substance
Downy mildew is commonly seen after a rainy day and can disappear after the sun comes out.
Treatment: Remove affected foliage. Prevent with proper ventilation and air circulation. Be careful to avoid over-watering, and allow the soil to dry out a little between waterings.
--
- Season: Early spring, late fall
- Preventative: Light exposure, air circulation
- Spray: Grow Safe, Organocide (veg only)
- Essential Oil: Melaleuca
- Estimated Time For Recovery: 2-4 weeks
HID Burn/Sunburn
Identification: While not a disease, usually a result of carelessness or accident, burn from a light source appears in plants as white, yellow, or brown papery leaves and flowers. This typically happens when a plant gets too close to a light, but may happen in intense sunlight. The way you identify HID burn is because symptoms will appear
only at the top of the plant, instead of up and down it. Usually leaves are the first to show signs, followed by flowers if change isn’t implemented.
Plants need to be watched closely as they develop and always kept an acceptable distance away from a light source in order to avoid being damaged from the light intensity and heat that comes from them. The stronger the light fixture, the further away the tops of a plant need to be. Burn can also occur when leaves are used to being shaded and then are suddenly exposed to intense light.
Signs of burn include:
- Plants that have bleaching only near or on the tops
- Bleached leaves and flowers
- Leaves that curl up and wilt
- Flowers with no potency or smell
Back to Plant Diseases
--
Treatment: There is no way to fix a leaf that has been burned. If damage is extensive, remove the leaf or flower as it will eventually die and serves little purpose. If it is caught early, the plant may be able to recover if changes are made and conditions improve. Prevent with proper acclimation, shade cloth, adjusting light settings, or by moving plants further away from the light. Keeping acceptable temperatures and air circulation will also help.
Powdery Mildew (PM)
Identification: Powdery mildew, or PM, is a common fungal disease that attacks a variety of plant life, including cannabis. Appearing as a flour-like, white, dusty substance, it can be troublesome even for the most experienced gardener. Able to be carried by the wind, on beneficial predators, on pests, or on
you, it can quickly cover a plant and an entire garden. It commonly appears on young, new leaves, but can develop on any leaf.
Signs of PM include:
- Powdery substance on healthy leaves
- Round white patches
- Decreased vigor
Cause: Besides getting carried into the space, a common way plants get exposed to something like PM is from extreme temperature fluctuations within a 24-hour period; for example, if the day is hot and the night is particularly cold. If that happens several days in a row, PM is likely to show up on leaves. If possible, it's best to try to eliminate temperature differences exceeding 15 degrees.
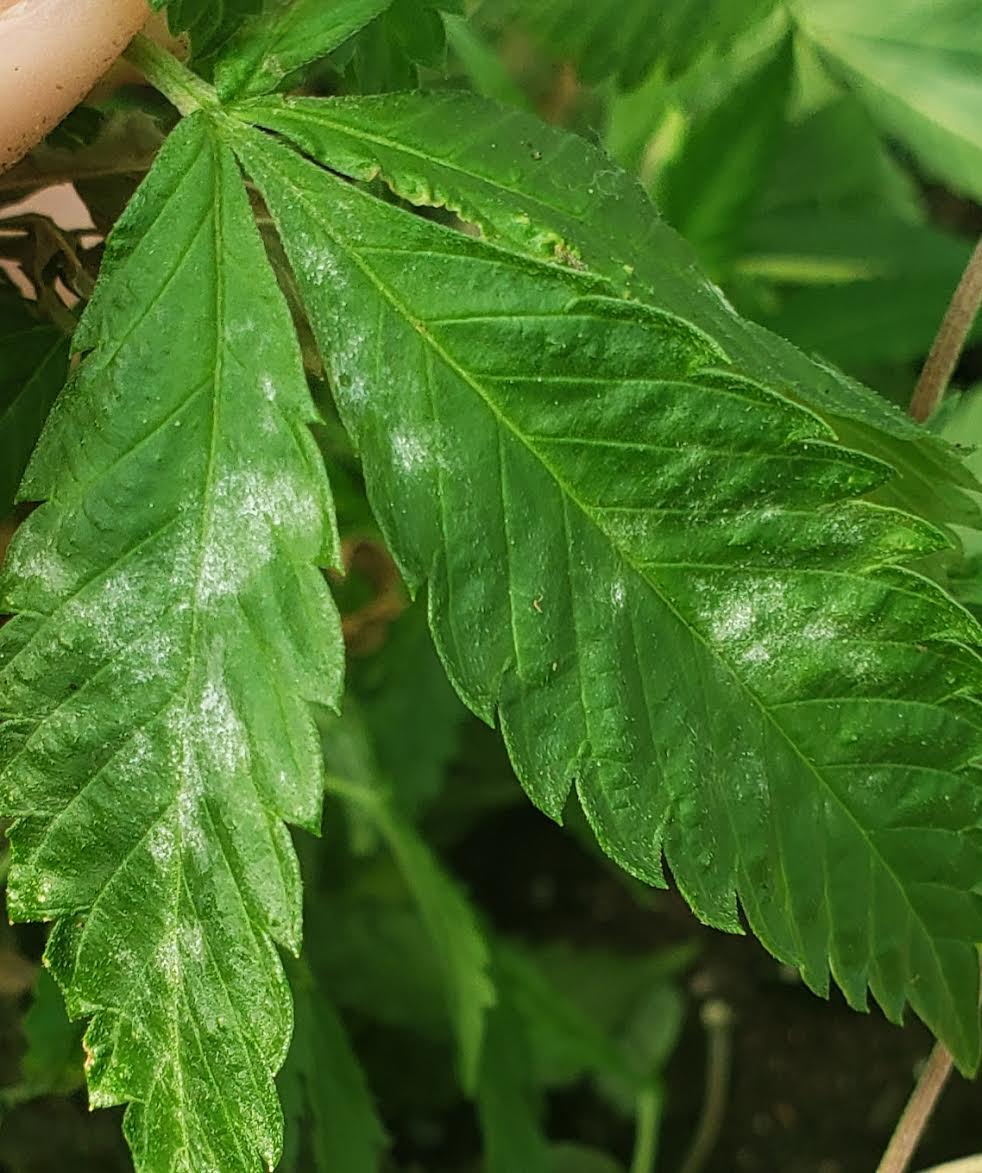 The start of PM; correct quickly for the highest chance of recovery
There is a possibility that it came from the environment, in which case you can try to treat it. Double check the foliage surrounding your greenhouse and in your yard; be sure it's not coming from your property.
Other causes of PM include:
- High humidity
- Stagnant air
- Poor ventilation
- Lack of defoliation
It is likely that you won’t know where it came from.
Treatment: If your cannabis plant does begin to show signs, and you believe treatment is necessary, if possible, carefully remove the plant from the garden to avoid further contamination. Anytime you see the telltale signs of powdery mildew, it needs immediate attention. PM hinders photosynthesis, causing the yield to suffer. However, there are some things you can do to eliminate the likelihood of acquiring it, or at the very least, having it spread and take over your garden.
The earlier you catch and treat PM, the greater chance you’ll have of successfully eliminating it from your garden.
Treatment options include:
1.
Prevention. Prevention is best! Prevent PM by keeping soil moisture balanced, temperatures stable, and humidity low. Also:
- Clean anything that is in your garden after each harvest, including stakes, trellis nets, etc. with a soap like Simple Green and water
- Keep your garden floors dry
- Don't leave any standing water nearby
- Make sure you feed or water your plants early in the day, when they have 5 hours or more of light to absorb liquid in the soil
- Spray Kangen 2.5 Acid Water + Grow Safe or Micronized Sulfer as a preventative 2 times per week
- Avoid spraying when the soil is heavily saturated
- Make sure you don't crowd plants, lollipop and prune, and encourage adequate airflow and ventilation.
- Powdery mildew does not like or thrive in sunlight, so make sure plants don't get too shaded. Shade is another good reason not to have too many plants for the space, or plants that are too close together.
- Keep pests in check. Pests can easily spread disease like powdery mildew from plant to plant. Be sure to keep on top of any bugs that may be in your garden.
2.
Keep your plants healthy. Healthy plants are less likely to acquire diseases and less prone to heavy attack from pests. Giving plants nutrients like silica will encourage proper health and development. Organic soil and the presence of mycorrhizal fungi will also help boost vigor and prevent acquiring diseases.
3.
Spray. For treatment, spray with Kangen 2.5 Acid Water + Q + Grow Safe, Micronized Sulfur, Amazing Doctor Zymes for 2 days in a row; take a break on the third day, and do this for 1-2 weeks, or until it's gone. Try not to disturb the plants or you risk having it spread.
You can also use a germicidal UVC light. Using a UVC light stick or wand, pass over each leaf, top and bottom. Exposure to the light will kill the pathogen, and help with containment. Repeat as needed.
4.
Keep on top of it. If you notice PM spreading quickly, inspect your garden more than usual. Always wear clean clothing each and every time you garden, and never wear the same clothes in both the veg and flower areas. Having a different pair of shoes for each garden space is also encouraged. Shower immediately before and after gardening.
5.
Prune any leaves covered by more than half with white PM. Manually remove leaves that show excessive signs of PM each day. All leaves need to be examined, both large fan leaves and smaller leaves. Move around your garden slowly in order to avoid agitating any spores. Beneficial predators, like lizards, can also spread it, so don't release any if PM is in your garden. Gently place affected leaves in a bucket for removal and
immediately dispose of cut leaves and branches in a trash can far away from your garden when you're done.
6.
If it gets bad enough, don't hesitate to chop the plant. Powdery mildew can be devastating to a garden (a bad problem to have with clones or veg plants, as flowering plants will soon be harvested and won't be passing on any spores). You may have to
completely remove affected plants and clean the area in order to rid your garden of PM.
7.
Stay positive and keep a backup. A positive attitude will encourage thorough job performance, attentiveness, and care. It's always good to have someone you trust, a good gardener friend, perhaps, that can keep a backup of your genetics for you. Worst-case scenario, you can replace your genetics if you have to dispose of them in order to get your garden back to optimum health. Starting from seed is a good way to ensure you don’t start with diseases as well.
It can't be said enough: the cleaner you keep your garden and equipment, the better off you and your plants will be. Powdery mildew can occur in the healthiest gardens, regardless of how much you try to prevent it. Learning how to treat it, and not letting it get out of control, will be your best bet when it comes to eliminating PM completely. Successfully ridding your garden of something like PM is a great way to better understand plants and their world, and will help you in your journey to becoming a great gardener.
--
- Control: Prevention, healthy plants, proper pruning, stable temperatures, manual removal
- Spray: Kangen 2.5 Acid Water, Grow Safe, Micronized Sulfur, Amazing Doctor Zymes, Green Cleaner
- Essential Oil: Melaleuca
- Estimated Time For Recovery: 1-2 weeks
Back to Plant Diseases
Root Rot
Identification: Root rot, a disease caused by pythium, commonly occurs when the soil has been overly saturated and neglected, temperatures are warm, humidity high, and lighting inadequate. The entire root system (or sections of it) turns brown and dies due to a lack of oxygen. Plant performance suffers greatly above ground with symptoms comparable to overwatering.
Signs a plant may be suffering from root rot include:
- Roots turn brown, soft, and slimy
- Roots appear twisted together
- Leaves yellow, the edges turn brown, then wilt
- Stunted growth
- Decreased vigor
- Lower yields
A plant’s root system is vital for the overall health of the plant, and root rot will severely affect how a plant is able to absorb nutrients from the soil. Multiple deficiencies are likely if rot is allowed to progress; in that case, most plants will usually die.
Root rot can also occur from the presence of a fungus or bacteria. Pests like fungus gnats can carry spores on their bodies and infect an area. Spores may also lay dormant in the soil and thrive once the soil becomes overly saturated. This can happen after a single overwatering.
Treatment: To save a plant with root rot, you'll need to catch it early enough; hard to accomplish as they’re in the soil. You'll have to pay close attention to the soil and how much liquid it receives to catch it in time. Avoid watering or giving any liquid until the soil is almost dry.
If the plant is small enough - or you’re desperate to save the strain - take the plant out of the container, rinse the root system with clean water, and trim away brown roots. Transplant the plant to fresh, clean soil and a new container, and avoid feeding it, only giving it water for about 2 weeks to keep stress levels low.
There are also biologicals and enzymes available that will help restore the health of your roots. Having these on hand to treat immediately will be necessary to achieve success.
To keep roots healthy, make sure to only give liquid to a plant when the soil needs it; when the top 4-5” of the soil is dry or the moisture meter reads above 120. Rainfall can cause major damage to a plant's roots and the soil, so keeping outdoor plants covered from the elements is strongly encouraged.
Plants that are weak and lacking vigor are common targets for this disease. Because root rot occurs in the soil, it is hard to detect until a plant has been severely affected. Prevention is the best way to ensure a plant isn’t exposed.
--
- Control: Prevention: avoid over-watering, avoid over-feeding
- Liquid Applications: Trichoderma, biologicals, enzymes
- Estimated Time For Recovery: Varies; severely affected area doesn’t recover
Back to Plant Diseases
Stem Rot
Identification: Stem rot appears as yellow circles that turn brown on the stems of a cannabis plant, reducing yield, and causing the death of a plant if allowed to progress. It is typically the result of high humidity levels, excessive exposure to moisture, exposure to unfiltered water, full canopies, or can even be transported on garden tools. With the stems compromised, a plant’s ability to transport nutrients is extremely limited or completely compromised.
Signs of stem rot include:
- Yellow circles that turn brown on the stems
- Stems become soggy and mushy
- Leaves will discolor, drop, and then die
- Reduced yield
Stem rot is a fungal disease, and spores can lay dormant in the soil for up to 5 years. Stem rot can take a plant out quickly and is more common in clones and young plants, but does occur in mature plants as well.
Treatment: Place the affected plant away from the others. If possible, remove the affected area and spray Amazing Doctor Zymes or Grow Safe on and around the affected area. As soon as a plant shows signs of no recovery, discard it. Try to lower humidity levels and increase air circulation. Prevent by spacing plants further apart, using sterile medium, and by keeping everything in your power clean.
--
- Control: Cleanliness, maintaining an ideal VPD, proper pruning, proper light exposure
- Spray: Amazing Doctor Zymes, Grow Safe
- Essential Oil: Melaleuca
- Estimated Time For Recovery: Varies; severely affected area doesn’t recover
Back to Plant Diseases
Verticillium Wilt
Identification: Verticillium wilt is a type of fungal disease caused by
Verticillium dahliae. It is a disease of the
xylem (water-conducting tissues) of a plant. The fungus can live dormant in ground soil, and once in close proximity to a root system, germinates and infects a plant. It enters through the root system via natural openings where it quickly spreads throughout a plant’s vascular system. Once the xylem is infected, it becomes so clogged with the fungus that it is unable to carry water and nutrients throughout a plant. This fungus can also enter by plant wounds in stems or branches.
Signs of this disease include:
- Growth is stunted
- Lower leaves yellow
- Yellowing can continue up the plant
- Leaves can develop chlorosis, become dry around edges, and often develop a grayish-brown color
- Leaves and stems suddenly droop and wilt
- Main stem starts to brown near the soil line
- Symptoms can appear on one side of a plant while the other side looks normal
Because symptoms resemble other deficiencies and problems, it can be challenging to correctly diagnose. This disease is less likely to occur in raised beds filled with potting soil and is also less likely to infect healthy plants. Extremely rich and overly saturated soil attracts this fungus.
Treatment: Once a plant develops verticillium wilt, it cannot recover. Affected branches and plants should be removed. Tainted soil should be heat treated (cooked by the sun) for 3-5 weeks or discarded. Prevent by using sterile medium; amend by using high temperatures and sun exposure. Verticillium can also be transmitted on gardening tools.
Make sure to sterilize tools after pruning a plant with this disease.
How To Control Problems In Your Garden
Integrated pest management (IPM) is a process involving the prevention and elimination of pests in a garden by natural controls like planting resistant varieties, habitat manipulation, and the use of beneficials. It is a long-term approach that requires some effort and time, but is the most affordable, organic way to approach the situation.
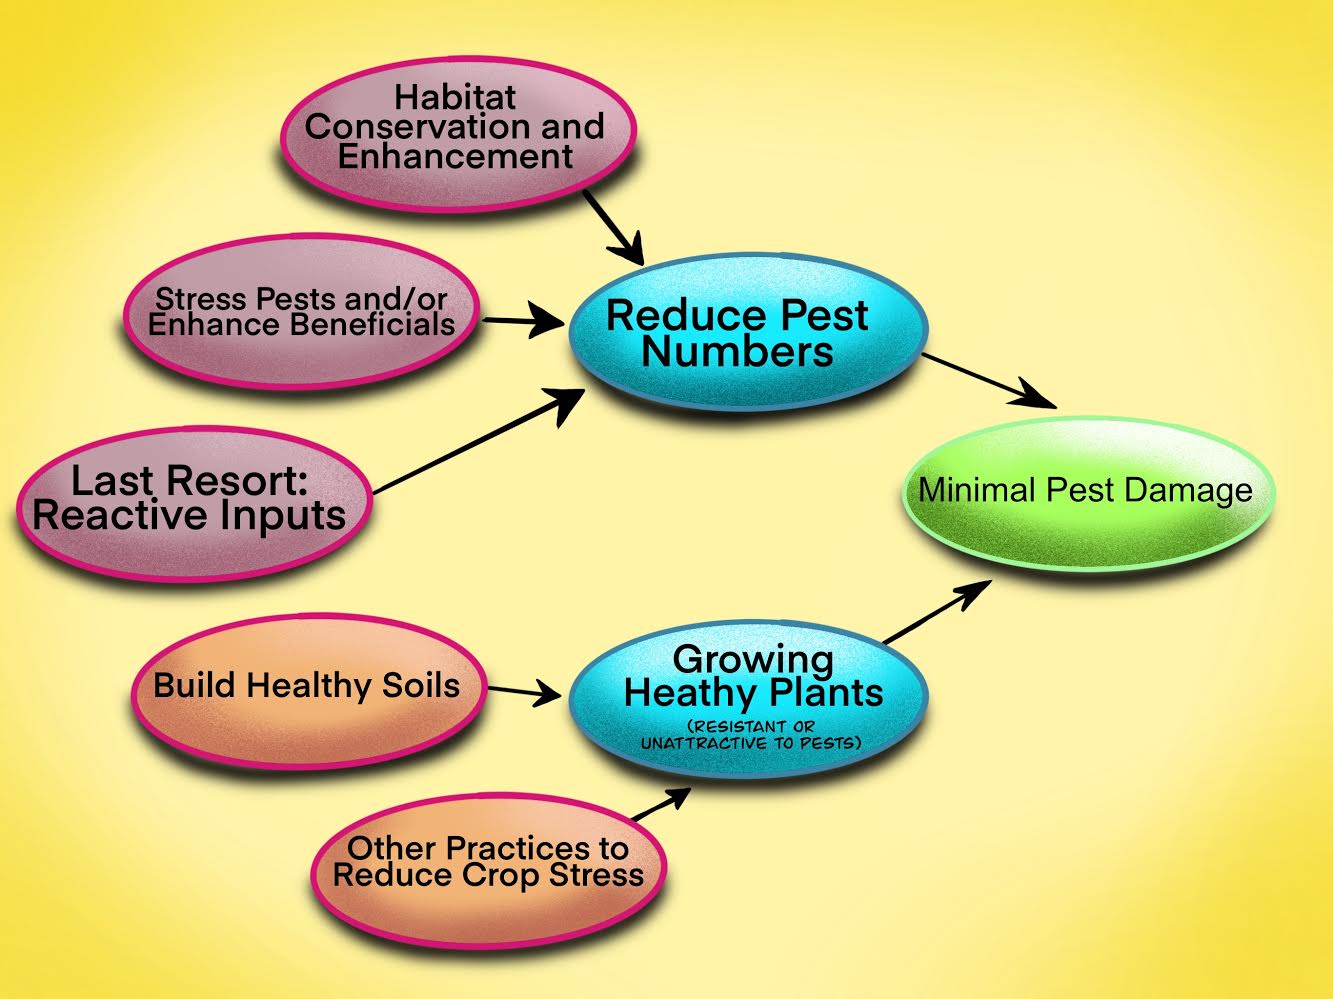 Integrated pest management (IPM) goals, Image Credit: Rylan Kapuy
There are several ways to naturally control pests and disease in an organic cannabis garden. Listed in order of most to least natural, they include:
--
Prevention: #1 Way To Avoid Pests and Diseases
Frequently recommended, however, not always implemented,
prevention is the number one way to avoid outbreaks. Limit leaf loss, long hours, and a sore back by keeping pests and pathogens in check
before they get out of control - which can happen quickly.
There are several ways to do this:
- Prevention, prevention, prevention
- Always wear clean clothes into a garden and shower before and after gardening
- If there is only one gardener, visit vegging plants then flowering plants
- Consider having two gardeners: one to care for vegging plants the other to care for flowering plants
- Do not wear the same shoes between your veg room and bloom area
- Have a different set of gardening tools for each room (don’t bring tools from room to room, or outside to inside)
- Be careful who you let into your garden
- Don’t allow pets near your plants
- Maintain climate control as best as you can
- Use fresh soil when you transplant
- Introduce beneficial predators
- Plant beneficial species that help discourage pests from settling (companion planting)
- Hang sticky traps in highly trafficked areas
- Use organic sprays regularly, nuanced by the season and threats
- Clean, clean, clean. Repeat.
--
Tip: Be sure to check your plants at different times of the day, as some pests and molds are harder to spot in certain lighting. Be sure to increase your garden inspections, as needed, e.g., from once daily to two times per day.
Beneficial Predators
Prevention and proper treatment go a long way in a cannabis garden, but there’s always the concern that a pest outbreak could still be a possibility. A perfect form of defense, natural predators are worth having on duty in your garden; these are insects and animals that help eliminate pests without harming a cannabis plant.
Especially helpful once pests are already in your garden, beneficial predators come in all shapes and sizes. Popular natural predators with the pests they’re effective for in cannabis gardens include:
- Assassin Bugs: lace bugs
- Beneficial Nematodes: fungus gnats, Japanese Beetles, root aphids, russet mites, thrips
- Lacewings: aphids, caterpillars, lace bugs, leafhoppers, mealybugs, root aphids, thrips, whiteflies
- Lady Beetles: aphids, scales, leafhoppers, mites, mealybugs, root aphids, whiteflies
- Lizards: ants, aphids, leafhoppers, moths, stem borers, spiders
- Parasitoid Wasps: aphids, caterpillars, Japanese Beetles, leafminers, mealybugs, scales, thrips, whiteflies
- Pirate Beetles: aphids, lace bugs, leafhoppers, spider mites, thrips
- Praying Mantis: aphids, caterpillar, lace bugs, mosquitoes, moths, stem borers, whiteflies
- Predatory Mites: broad mites, fungus gnats, lace bugs, russet mites, spider mites, spotted mites, thrips
- Spiders: aphids, flies, fungus gnats, mosquitoes, moths, stem borers
Just like sprays, certain predators target certain pests. Some feed on adults while others prefer eggs. Because they are living creatures, as soon as the pests are gone, the predators usually leave as well, so introducing them as breakouts occur is the most effective way to utilize their peregrine services.
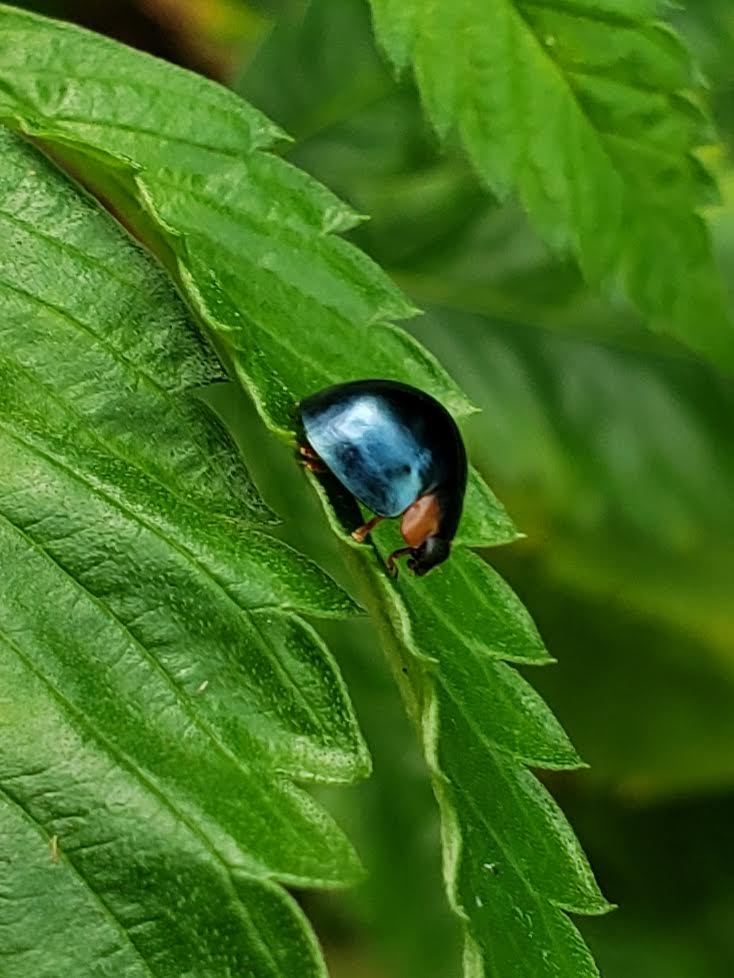 A perfect form of defense, natural predators are worth having on duty in your garden
Some tips for employing beneficial predators:
- Before you introduce predators into your garden, make sure the selected species is already native to your area to prevent contributing to an unbalanced ecosystem.
- Many predatory mites and other predators can be ordered online, or at local gardening stores. If you order them online, be sure not to leave them in the mailbox for too long, or in hot weather, or they will quickly die.
- Release enough predators for the amount of pests to ensure elimination. The more predators that are released, the faster the pests will be gone. Most predators are small and need to be introduced to each plant to ensure a thorough eradication.
- Remember to avoid using sprays and essential oils the week before and after you release predators.
- Remove sticky traps from the garden before releasing predators as many of them will likely get caught and die along with the pests.
- If releasing predators inside, introduce them when the lights go off, as flying ones tend to fly into the lights and die. If releasing predators outside, introduce them to a pre-moistened plant right before dark to encourage them to stay longer.
- Create a desirable environment for predators to increase the likelihood and duration of their stay. A light foliar spray of aloe or kelp before releasing them will provide them with water and encourage them to stay around. Companion plants also encourage ongoing residency from beneficial predators.
- Chill predators like lady beetles in the fridge for 2 hours to discourage them from flying away as soon as they are released. Ongoing refrigeration may also be required for certain species, with most of them having a short shelf-life anyway when it comes to storing them. Keep the refrigerator door closed as much as possible to maintain a consistent temperature; having a dedicated fridge is helpful if you regularly use beneficials.
- Treat the soil, plant, and areas surrounding your garden with beneficial predators. Remember to avoid using sprays and essential oils the week before and after you release predators.
- Do not use beneficial predators in late bloom as they will defecate on the sticky flowers. Almost impossible to remove, it can ruin or dramatically lower the quality of a crop; literally making it shitty weed.
- If a pest infestation is too large, beneficial predators may have a hard time effectively eliminating the entire colony, especially for pests that breed quickly. If this is the case, using an organic spray will be the best option before week 4 of bloom.
It’s helpful to have a notebook or spreadsheet that lists everything you do with your plants and what pests enter your garden on what dates or time of year. With this knowledge, you can seasonally know when to order and what type of beneficial predators you should have in your garden.
Companion planting works well to keep predators around. As soon as pests are eradicated from a cannabis garden, predators will leave to search for food elsewhere. By providing them with plants they're attracted to, you increase the likelihood of them staying around, ready to visit your cannabis plants if their services are needed.
--
Once in a garden infested with pests, beneficial predators are on patrol 24/7 to help keep pest populations in check. They also bring life to your garden, allowing the plants to feel like they’re in a more natural growing environment. If you’re serious about having a clean, pest-free garden, incorporating natural predators is a no-brainer.
Tip: A trusted source to order beneficial predators from is Biotactics. With a knowledgeable staff, they have beneficial insects for every pest, and always supply lively predators that can be delivered quickly.
Companion Planting
Companion plants are plants that grow well with and improve the vitality of another plant. Some plants help deter certain pests. Some, like cover crops, improve soil health, increase nutrient availability, and retain moisture. Other plants can serve as a place for beneficial predators to live, or provide shade. Additionally, the presence of multiple plant species is beneficial because it allows a diverse group of bacteria and fungi to establish themselves in the soil, encouraging balance in the microbial community; it also provides a more realistic and natural atmosphere for cannabis.
Some popular companion plants that repel pests include:
- Buckwheat - attracts specific aphids and beneficials, weed suppressant
- Calendula - deters aphids, thrips, whiteflies, predator host
- Chives - deters ants, aphids
- Cilantro - deters aphids, spider mites, attracts lady beetles
- Clover - improves soil health, retains moisture, increases microbial life
- Dichondra - promotes microbial life, improves soil health
- Garlic - deters aphids, caterpillars, stem borers, rodents, slugs, spider mites, whiteflies
- Geranium - Japanese beetles (plant in a separate pot far from a garden)
- Lavender - deters flies, caterpillars, stem borers, moths, mosquitoes, attracts beneficial predators
- Legumes - help restore nitrogen
- Marigold - deters aphids, beetles, mosquitoes, nematodes, slugs
- Mint - deters ants, aphids, rodents (plant in a separate pot nearby)
- Mugwort - deters caterpillars, moths (plant in a separate pot nearby)
- Mustard - grows quickly, increases organic content as compost, helps restore nitrogen
- Nasturtiums - deters aphids, beetles, whiteflies, fungal disease, attracts moths and slugs
- Onion - deters aphids
- Peppermint - deters aphids, caterpillars, rodents, whiteflies (plant in a separate pot nearby)
- Peppers - deters aphids, leafhoppers, spider mites, whiteflies, predator host
- Rosemary - deters flies, moths, mosquitoes
- Sage - deters caterpillars, moths, snails
There are also plants that attract predators. Most predators will choose to settle in organic, pesticide-free gardens with nearby shrubbery, and
most importantly, near insects they like to eat.
Plants that attract beneficial predators include:
- Assassin bugs - alfalfa, daisy, dandelion, marigold, Queen Anne’s lace, wild carrot
- Lady beetles - caraway, cilantro, cosmos, dill, fennel, haole koa, scented geraniums, yarrow
- Parasitoid wasps - caraway, dill, lavender globe lilly, marigold, yarrow
- Pirate beetles - alfalfa, caraway, cosmos, fennel, goldenrod, marigold, spearmint
- Praying mantis - caraway, dill, fennel, marigold, raspberry family, roses, wild celery, yarrow
- Lacewing - caraway, coriander, dill, yarrow
- Lizards - ferns, rock/woody areas
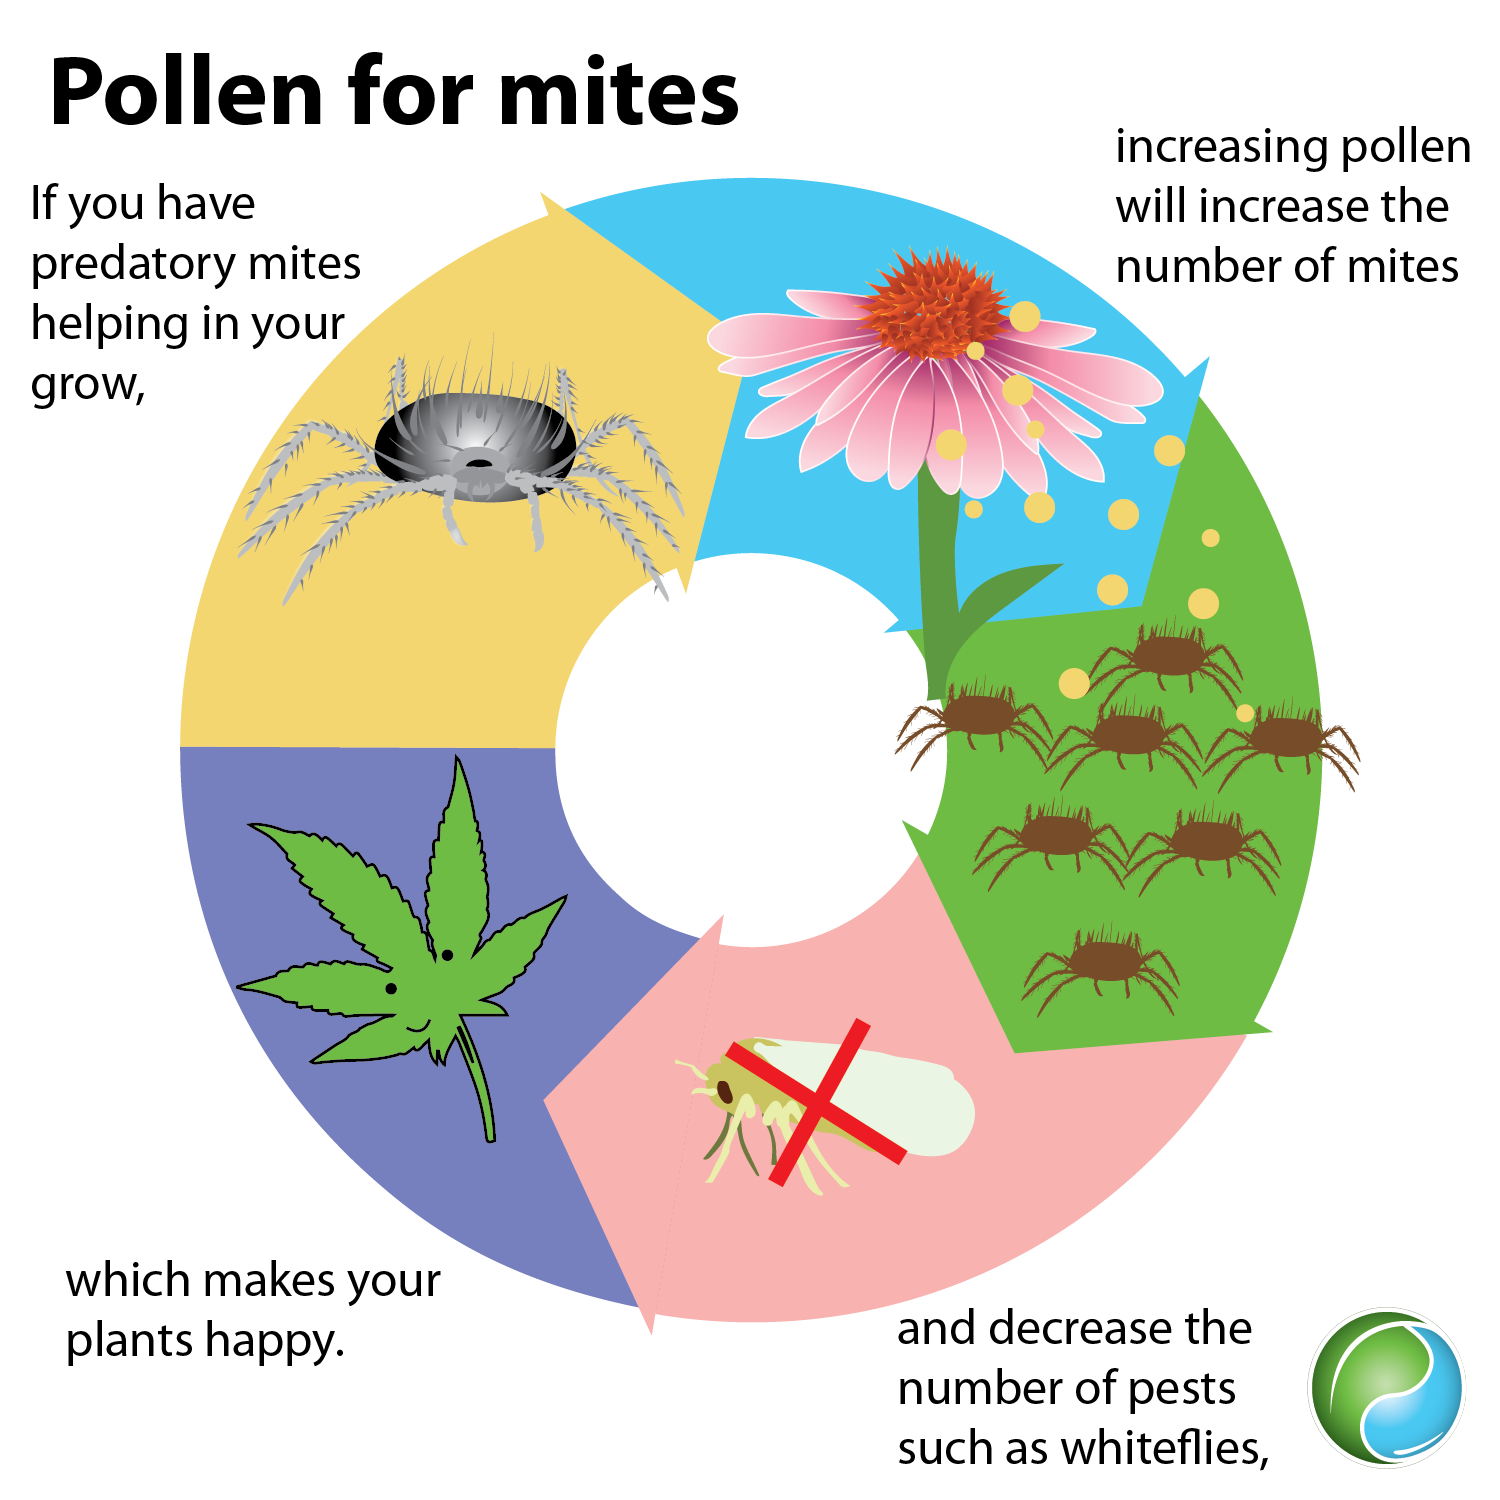 Image credit: Emily Nelson, Sustainable Plant Solutions LLC
It is important to test which plants do well in your particular environment as well as in your garden. Companion plants will need to be taken care of also, and due to their smaller root systems, often dry out faster than cannabis plants. Some need to be planted in the same container as cannabis; for example, lining the perimeter of a flower bed, or planted sporadically between cannabis plants; while others should have their own container. Some like the sun while others like shade. Deciding which companion plants to incorporate will be a personal preference and determined by the greatest needs of your garden.
You can also chop up beneficial leaves and topdress the soil to repel pests; for example, a mixture of sage, peppermint, and lavender; or add those elements to a tea mixture.
--
Generally, a little strategic planning goes a long way. For example, usually, beneficial predators leave a garden after pests have been eliminated due to the lack of food. Certain species of aphid are only attracted to buckwheat and will not be attracted to cannabis plants. Planting a banker plant like buckwheat near your garden could be useful because you can provide a food source for beneficial predators, which will feed on the aphids being hosted by the buckwheat. Predators will then be able to go back and forth to hunt a cannabis garden for other aphid varieties and pests.
Additionally, plants can be used as a
‘trap crop.’ Insects and pests will be attracted to available companion plants, leaving the cannabis plants untouched. Considering all of the above, increasing the right varieties of plant life can significantly improve the success of an outdoor cannabis garden.
 Image credit: Emily Nelson, Sustainable Plant Solutions LLC
Manual Removal
Sometimes, as much as you try to prevent bugs and diseases from entering your garden, it happens. If that possibility becomes a reality, your best option is to manually remove
every leaf that has been significantly damaged. If half the leaf or more is showing signs of attack, remove it. When it comes time to trim damaged leaves off your plants, it makes the job easier if you are equipped with a sharp pair of scissors and a container to discard them in; a 5-gallon bucket works nicely.
When you’re inspecting and maintaining your plants, make sure to completely walk around each one to decrease the likelihood of missing anything.
Leaves usually exhibit the most obvious signs of attack, requiring all parts of the leaf to be inspected: top, bottom, stem, and overall shape and structure. You’re looking for
any sign of a bug’s presence, whether it’s odd discoloration on the leaves, stems, or branches, eggs, or actual bugs. Check all parts of the plant as well: the middle, sides, and in between the branches. Pay just as much attention to the bottom of the plant as you do the top as several pests and deficiencies will first show up at the bottom, but pests can be found pretty much
anywhere.
If you find a leaf with bugs or eggs on it, be sure to look closely at nearby leaves as, in addition to their aerial arrivals, bugs tend to crawl up the main stem and from leaf to leaf. Also, if there is a leaf that has bug damage to only one of its fingers, remove the affected finger and leave the rest intact. Or if you can smash the bug and leave the leaf, do so. Remember, you want to keep as many leaves as you can. Make sure to check the branches for stem borers and caterpillars, and also inspect the soil. Do not
disturb the soil, simply observe it.
Pests and pathogens tend to show up on plants that are deficient, as they are weak, easy targets; however, they also frequently show up on plants that are closest to the door and in areas with poor air circulation, and then, if given the opportunity, will quickly spread to other parts of a garden. So paying attention to what's going on with a plant's leaves, branches, stems, and flowers is
extremely important.
The goal of manually removing the attacked parts of a plant is to catch it when signs are first visible. This way, you do not have to remove too many leaves, which will stress the plant. If you notice a lot of leaves damaged, spraying an organic pest control product is your best option.
If you have a plant that has been overtaken by bugs, to the point where most of the leaves have been removed and you can see that it’s negatively affected the plant, or if you have a plant that has a disease, you may want to consider getting rid of it completely; at the very least, removing it from your garden.
That could end up saving your entire garden. Your time and resources are better off being put into healthy plants.
Essential Oils
Week 2 of clone veg, week 4 of seedling veg, up until week 4 of bloom
Apply right before dark or lights off
Essential oils are concentrated liquids containing chemical compounds and essences from the plants from which they were derived. Typically, essential oils are mixed with water and used as a foliar spray, mainly before week 4 of bloom. How many drops are required of each depends on the oil, but a mixture of 1 drop of oil to 4 ounces of water is usually safe. Be sure to always wear a mask when applying an essential oil foliar spray. Like other sprays, only apply essential oils at sundown or lights off.
The following oils are commonly used in gardens for the following pests:
- Cedarwood - deters aphids, moths, slugs, stem borers
- Cinnamon - deters ants, broad mites, leafhoppers
- Citronella - deters mosquitoes and flies
- Clove - deters ants, aphids, mites, thrips
- Eucalyptus - deters aphids, mites, rodents, whiteflies
- Lavender - deters aphids, moths, leafhoppers, mosquitoes, stem borers, most bugs
- Melaleuca - deters fungus
- Orange or citrus - deters ants, aphids, mites; (gardeners can also apply to hands or feet to relieve stress and keep in a pleasant mood)
- Peppermint - deters aphids, broad mites, moths, rodents, stem borers, whiteflies
- Rosemary - deters ants, aphids, broad mites, caterpillars, flies, leafhoppers, mosquitoes, roaches, whiteflies
- Spearmint - deters ants, aphids, caterpillars, fungus gnats, rodents, stem borers
- Thyme - deters aphids, broad mites, rodents
- Wintergreen - deters Japanese beetles
Tip: Always test a small, lower portion of a plant whenever first using a spray. It is good to alternate essential oils and spray both the plant and the soil (lightly).
Insect Deterrent Spray
- Add 8 drops clove oil, 8 drops peppermint oil, 8 drops lavender oil, and 8 drops rosemary oil to a 1-gallon hand pump sprayer
- Fill with chlorine-free water
- Shake well
- Apply to plants
Supa Cold-Pressed Sesame Oil Spray
- 1-gallon chlorine-free water
- 1 teaspoon sesame oil
- 2 drops clove oil
- 2 drops of Dr. Bronner's peppermint soap (emulsifier)
Directions:
- Mix ingredients together
- Shake well
- Add to the sprayer reservoir
- Use it like a regular foliar spray
- Only use at dark
--
Fungus Deterrent Spray
- Add 20 drops of melaleuca oil to a 24 oz glass spray bottle
- Fill with chlorine-free water
- Shake well
- Apply to the floor for fungal suppressant. Do not use this concentration on plants.
Organic Garden Sprays
Week 2 of clone veg, week 4 of seedling veg, up until week 4 of bloom
Apply right before dark or lights off
It’s recommended that you use organic garden sprays as a bug and disease preventative and to effectively eliminate each pest or pestilence once you notice their presence.
If you do not take care of problems when you first notice them, they could end up killing plants and destroying your garden. Combine that with cleanliness and manually removing infected leaves, and you’ve made it challenging for bugs and disease to settle in.
The best spray to use will depend on what pest or pathogen you're targeting, what stage of the life cycle a pest is in, the strain you are treating, and whether a plant is in veg or flower.
Commonly used organic foliar sprays include:
- Kangen 2.5 Acid Water: PM, mold, soft bodied insects (aphids, caterpillars, flies, fungus gnats, lace bugs, leafhoppers, mites, mosquitos, moths, slugs, thrips, whiteflies)
- Amazing Doctor Zymes (all insect stages): aphids, fungus gnats, leafminer, leafhoppers, mealybugs, scales, thrips, whiteflies, PM
- Essential Oils: ants, aphids, caterpillars, fungus, rodents, snails and slugs, mites, stem borers, thrips, whiteflies
- Green Cleaner: aphids, mealybugs, root aphids, russet mites, scales, spider mites, spotted mites, thrips, whiteflies, PM
- Grow Safe (bee-friendly, all insect stages): aphids, mealybugs, mites, stem borer, whiteflies, PM
- Micronized Sulfur: broad mites, PM, russet mites
- Neem Oil (bee-friendly): aphids, broad mites, fungus gnats, lace bugs, leafminers, mealybugs, moth larvae, root aphids, scales, snails, whiteflies, PM
- Organocide (veg only, all insect stages): aphids, fungus gnats, mealybug, russet mites, scales, spider mites, spotted mites, thrips, whiteflies, DM, PM
- Safer Soap: aphids, lace bugs, leafhoppers, mealybugs, mites, root aphids, soft scales, whiteflies
- Spinosad (adults): caterpillars, leafminers, stem borer, thrips
Note: Do not use sulfur and oils of any type within 7 days of each other. If you use neem oil, it is recommended to wait 1 week before applying any other kind of spray, and discontinue using by week 4 of bloom.
To use a spray as a preventative, it's recommended you spray 2-3x a week indoors and 3x a week outdoors, spacing the applications at least 2 days apart. To know what spray to use, refer to your notebook from previous cycles to learn what pests you are likely to encounter during certain times of the year. Careful observation over time is essential for longterm growing success. You may want to increase spraying in the summer when pests are more likely to be present. Remember not to spray plants past week 4 of bloom or you risk the quality of the crop.
As far as plants go, the less you spray, the more likely you are to have healthier plants; however, spraying as a preventative for smaller pests like mites can be extremely beneficial and could end up saving a crop.
How To Apply Organic Sprays
Here is how to effectively treat cannabis plants with organic sprays:
Step 1: Invest in a sprayer. Buy a quality sprayer to expertly apply organic sprays on cannabis plants. Regardless of the sprayer, both powered and manual sprayers can easily break if not properly maintained. Powered sprayers allow you to spend less time completing the task and also apply a micronized coating of a spray, which is not only more effective at eliminating pests and pathogens, but also less likely to burn plants. The added pressure helps to blast pests off a little better than a pump sprayer. Hand pump sprayers with a wand do work, too, and are more cost effective if you need to replace them often. Make sure plants are staked with branches secured before spraying as the added weight can cause them to break.
Step 2: Concentration. The first time you use a spray on a plant, it’s recommended that you use ½ strength; otherwise, follow the instructions on the product label. Always test a small, lower area of a plant first before spraying the entire plant or garden.
Step 3: Mix well. When you’re mixing a product with water, be sure you stir or shake the solution well, so it gets distributed evenly over a plant. Once the mixture is in a powered sprayer, avoid shaking it as it could create foam and prevent it from working properly. It’s recommended you fill up a sprayer with the water first and then add the product; that way you will avoid having the product bubble out of the container.
Step 4: Time of day matters. It’s best to treat the plants 15 minutes or so before the sun goes down, or right before the lights go off, or you risk burning them, which is likely to cause stress and jeopardize their health, appearance, and the quality achieved.
You do not want light to be directly on the plants when they have any type of spray on them.
A plant will burn if it has a spray coating it and it's exposed to light, or high (80+F/26+C) temperatures, and can sometimes burn if a spray is too concentrated and sits in a puddle somewhere on the plant. Because of this, it's beneficial to sufficiently dilute the solution with water and gently shake the base of a plant or branch to remove any excess liquid once completed.
The most common sign that you sprayed too close to a plant, that the mixture was too concentrated, or that a sprayed plant was exposed to too much light is that the leaves will turn yellow or brown, often occurring the very next day, but can also continue to discolor several days after a spray is applied.
Additional signs of burn from a spray include:
- Leaf edges, tips, or tissue turn yellow or brown
- Stems and leaves become brittle
- Trichomes can turn orange or brown
- Severely burned plants will have hairs that turn orange or brown early in bloom, affecting how it will develop and the quality that can be achieved
- A burned plant will not look happy and will quickly decline in appearance and vigor
Some cannabis varieties are more sensitive to sprays than others and should be sprayed less often, or with a more diluted solution. Always carefully observe each new crop. Take notes too!
Step 5: Distance. If you’re using a powered sprayer, you should stand at least 2-4’ away from a plant when spraying (depending on if it's in veg or bloom), making sure to coat the plant evenly. During the bloom cycle, the tops of the plants will be more sensitive due to the delicate hairs and trichomes. Sometimes it works best to point the sprayer above the plants, missing them entirely, and letting the spray fall onto the tops.
Step 6: Spray your garden. Spray the mixture evenly and coat the plant from top to bottom. Remember to spray the underside of the plant’s leaves, branches, and stems. Your goal is to create a barrier that bugs can’t get through or to clean fungal growth, so make sure you get all surface areas of a plant. You want the sprayer to constantly be in motion, avoiding letting it focus on one spot for too long to help eliminate burn.
Areas of the garden that have less air circulation, especially the middle of flower beds and interior sections of a plant, are usually the places you'll find pests and pathogens, but they can be anywhere. Thorough applications are required for successful elimination. Plants should be dripping wet after being sprayed.
It will take a little practice to learn how to spray plants correctly, but it is one of the most effective ways to prevent and eliminate pests and pathogens.
Step 7: Consistency is key. Spray everyday when your plants are at risk of a takeover, taking a break on the 3rd day. Make sure you avoid spraying past week 4 of flower unless you're only using Kangen water. If you have pest problems after week 4, manual removal and using traps are how you’ll need to deal with the problem.
If you do encounter a problem, like PM, that needs consistent treatment with organic sprays, you will likely see minor to moderate leaf burn on at least some of the leaves. Although aesthetically not as pleasing, your flowers should be okay and it is worth doing to eliminate an ongoing problem.
Check back frequently to determine if further action is required; take the time to manually remove infected leaves and branches for the biggest impact against pests and pathogens. Constant care and prevention are guaranteed ways to ensure a healthy garden, respectable yield, and flowers worthy of being put on that top shelf.
--
It should be stated that, if you are growing outdoors, it is likely that your garden will be exposed to pests and pathogens. Even with the best of care, there’s a high probability that you will lose some of your crop. This is normal and it should be expected to some degree. Knowing this in advance can help you better prepare. Recognizing when to cut a branch or flower to prevent more extensive loss will be key in achieving not only a bigger yield, but higher quality flowers. As you become more experienced with gardening and caring for cannabis, you will be better able to control the damage done by these negative variables. Also, the better you are able to provide a protected environment, the better you will be able to discourage pests and pathogens from settling in your garden in the first place.
Back to top
Chapter 12: Daily Inspection Checklist For Quality Control
To effectively manage your garden, check on your plants at least once or twice daily. You should aim to
keep all gardening areas as clean as possible at all times. Cleanliness is the best prevention against pests and disease, and is the best way to keep your garden flourishing.
 Check your garden everyday to keep your garden flourishing
Remember to shower first (Dr. Bronner's Peppermint Soap recommended), or at least have clean clothes on, and to visit your vegging plants
before your flowering ones to limit the likelihood of carrying bugs into your veg room. (Bugs are more attracted to and commonly found on flowering cannabis plants). Having one pair of shoes for vegging and a different pair for flowering is encouraged. If possible, have one person tend to the vegging plants, and a different person tend to the flowering ones. This is another way to prevent outbreaks from happening.
When you’re doing a walk-through of your garden area, check for bugs, mold, plant deficiencies, improper development, and anything that is out of the ordinary. You must routinely inspect each plant, branch, leaf, flower, pot, flower bed, and garden space.
Regularly inspecting your plants at the same time daily is recommended as it allows you to develop a routine. Morning and afternoon sun make it easier to spot pests underneath the leaves, and is more comfortable for the outdoor gardener as the temperatures are cooler. Sitting under your plants during this time and looking up at the underside of the leaves is an easy way to spot bug-inhabited ones. It’s important to keep tabs on any pests that made their way into your garden and note which plants they’re on.
To get to know your garden and strains, remember to also check it at different times, in different lighting, during different weather conditions, and at different temperatures. Check your garden at night. Does darkness bring any new creatures or conditions that you need to address or be aware of? Nearby lights affecting your plants?
Use a notebook to write down important details, like when you changed the soil, put plants into bloom, how old they are, what pests are in the garden, when you sprayed last, and when you harvest. It’s recommended you carry a five-gallon bucket and a sharp, clean pair of scissors with you on your rounds, and be sure to consider the following during your garden inspection:
General
- Are the plants at a comfortable temperature?
- How’s the humidity level?
- What does the soil look like?
- Do any plants need food or water?
- Do you see any pests on the leaves, branches, or flowers?
- Do you see any deficiencies?
- Do you need to lollipop?
- Do you need to make any teas? Topdress?
- Do you need to spray in the evening?
- Does anything need to be cleaned?
- Do you need to change your sticky traps?
- If you have fans, are they clean and properly working?
- Did you check for possible leaks in your roof or automated systems?
- Is your water reservoir clean, filled, and being aerated for twenty-four hours?
- Is any additional grass or foliage that needs to be removed finding its way into your grow space?
- Have you talked to your plants, or played any music for your garden today?
Vegging
- How are the clones doing? Do they need misting?
- Do any plants need to be transplanted?
- Do you need to take any cuttings?
- Have you lifted up each pot? How’s the weight?
- How does each plant’s soil look? Do you need to add more?
- Do any plants need to be staked or propped up?
Flowering
- Do you need to lollipop?
- Do you need to add trellis netting?
- Do you see any mold?
- Is there any pest damage?
- Do you need to topdress anything?
- Do you need to harvest anything?
When you’re done inspecting the details, step back and view your entire garden as a whole. Does it look clean? Green? Green means your plants are sufficiently photosynthesizing, getting plenty of food, and is an overall sign of excellent health.
The length of time it takes to complete an inspection will vary daily; however, it is one of the best ways to stay on top of pests, know what tasks need to be completed, and how your plants are developing. The more dedicated you are to ensuring your garden is clean and well tended to, the more likely you are to be rewarded at harvest with flowers that are resinous and potent.
Remember, check your garden every day.
Tools To Keep On Hand
- 5-gallon bucket(s) or container of choice
- Clean, sharp scissors
- Razor blade
- Extra stakes, zip ties, clips, and support wire
- Gloves
- Magnifying glass
- Moisture meter
- Notebook
- pH & PPM, EC meters
- Plant tags
- Spray bottle
- Sprayer
- Atomizer
- Step stool
- Sticky traps
- Rooting cubes
- Clone domes
- Paper towels
- Watering cans
--
Tip: Remember to always take your bucket and any cut foliage out of the garden when you’re done with your walk-through. Immediately discard cut leaves directly into a trash can, preferably located far away from your plants.
Back to top
Chapter 13: Harvesting
Morning is best, 5 -10% amber colored trichomes (for hash, all cloudy no amber)
At the end of the 16-20 weeks that it takes before a cannabis plant started from seed will typically be ready to harvest, you’ll want to begin paying close attention to what the flowers look like. When you choose to cut down a cannabis plant will influence the effect, flavor, aroma, and strength of the flowers.
Step 1: Adjust feeding. Carefully watching your flowering plants also allows you to know when you should begin giving a plant a light tea or only water. During the last 2 weeks of bloom, a plant should be given less food, requiring only a light tea, which will improve the flavor and aroma of the flowers. Completely depriving a cannabis plant of liquid 48 hours before harvest allows the plant to use up all of its sugars and prepares the plant for the drying process. The morning after those 48 hours are up is the best time to harvest a plant.
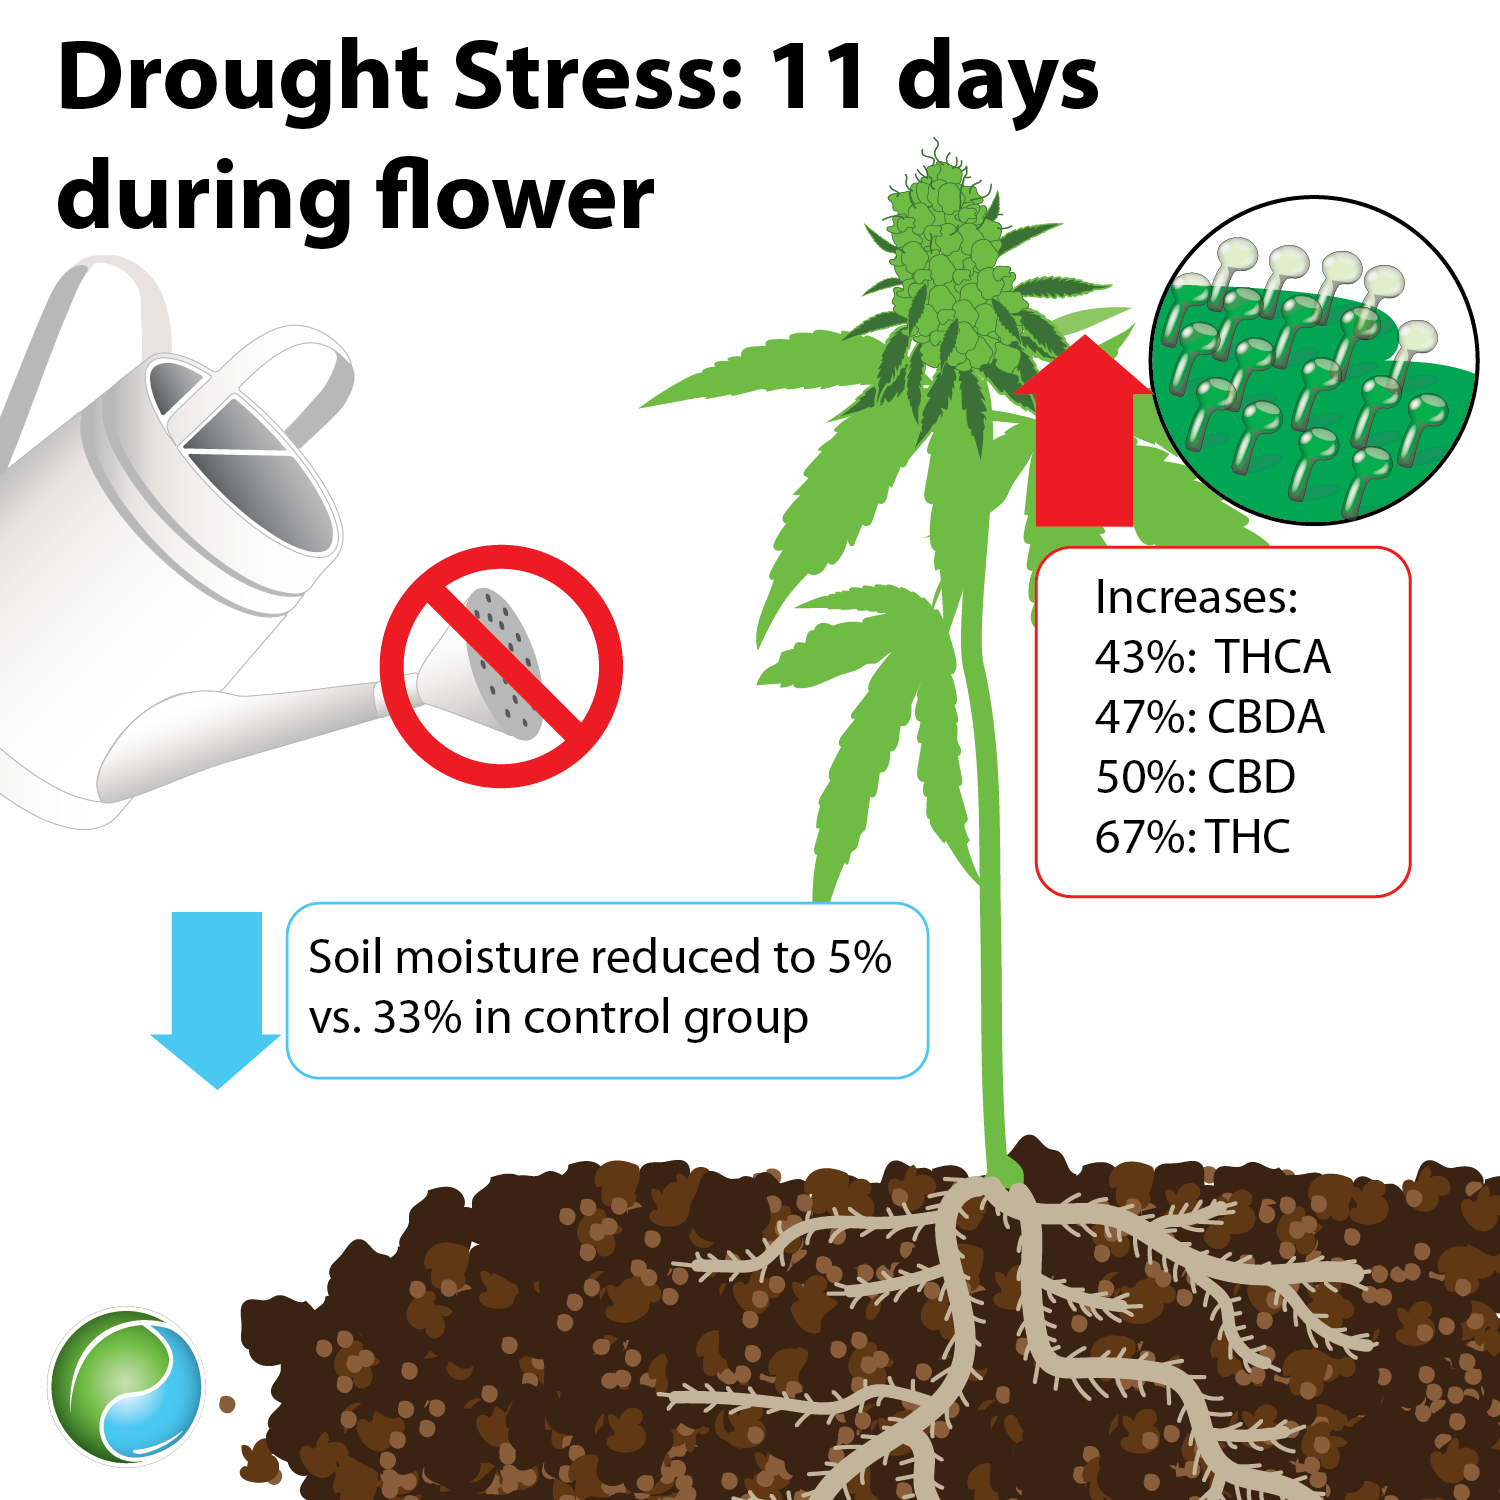 Image credit: Emily Nelson, Sustainable Plant Solutions LLC
Step 2: Determine the best time
Image credit: Emily Nelson, Sustainable Plant Solutions LLC
Step 2: Determine the best time. A quick and easy way to tell if your flowers are ready to be harvested is by examining the trichomes. You’re looking for about 5-10% to be darker-colored and amber. It’s easier to accomplish this by using a scope that allows you to closely inspect a flower.
Another way to know when your plants are done is to write down the date each plant went into flower and count down the exact number of days that particular variety is recommended to go. On average, most flowering cannabis plants take 56-70 days (8-10 weeks) until they’re ready to be harvested; however, depending on your climate, what season you’re growing in, and what strain it is, an outdoor cannabis plant could take longer to finish, possibly many months with certain sativa-dominant varieties.
Outdoor crops may not always get the recommended amount of time to finish. Mother Nature will play a leading role in determining when you will harvest a greenhouse crop. If you notice a lot of pest or mold damage, you will need to harvest early. Another reason to harvest early is if there is bad weather coming your way and your plants are far into bloom. If a bad storm comes through, your plants have a higher chance of molding or being destroyed; in which case, harvesting early to secure the crop would be the best decision.
Sometimes, the tops will finish before the lower branches. If you choose, you can harvest the tops and leave the bottom branches to finish for an additional week or so.
Step 3: Harvest. It’s best to cut a plant down when the sugars are
in the plant, not the roots. At night, sugars move down to the root zone where they are kept until morning. Therefore, harvesting first thing in the morning, before the sun is up or the lights turn on, is recommended.
To make this process easier, make sure you have the following:
- gardening shears or saw
- clean, sharp scissors
- hangers
Staked plants: When the time comes and you’re ready to cut down a plant, if you only have a couple and they are not in a trellis net, take a sharp pair of regular gardening shears (pvc cutters work great too) and cut the plant at the base of the main stalk. For smaller plants, with one cut, you should harvest the entire thing. It’s that simple. For larger plants, you may need a saw, or to harvest the plant in sections. However, be sure you catch the plant, taking extra care that the flowers don’t get smashed or fall to the ground.
To maintain quality, it’s important to never let your plants touch soil or the ground. If they fall into the soil, it will get stuck to the flowers and is almost impossible to get off. Allowing your plants to touch the ground or be weighted down by other branches can crush the delicate trichomes, causing the quality to suffer.
After you’re done harvesting, take the time to remove the pots with harvested stalks or root balls out of flower beds from your garden space; not just for the sake of cleanliness, but to promote a favorable environment and vibe. Remember, you’re aiming to create a space for your plants to thrive. You want a garden that feels alive.
Trellis nets: For plants in a trellis net, harvesting will take more time. Cut one section of a plant off at a time. Try to take as big a section as possible. It’s convenient to have hangers with you when you do this. You’ll want to cut the branch so it can hang over the hanger. This usually requires being thoughtful about where you make the cut. It’s easiest if you can cut a branch below a large node, which will allow it to hang nicely over the hanger. Put only one strain on a hanger and make sure to label it with the correct name. Labeling each branch with painter’s tape and a black Sharpie is ideal in case a branch falls off a hanger.
--
 When harvesting, hang branches from hangers, wire, or rack system labeled with the strain name or cross
To maintain quality, it’s important to never let your plants touch soil or the ground. If they fall into the soil, it will get stuck to the flowers and is almost impossible to get off. Allowing your plants to touch the ground or be weighted down by other branches can crush the delicate trichomes, causing the quality to suffer.
After a plant is harvested, bring it directly to a dry room.
Back to top
Chapter 14: Drying
Takes an average of 14-21 days, 60F/15C, 60% humidity
After you cut down a cannabis plant, you have to dry it. It’s important that you follow through with drying cannabis correctly, or you can lose a lot of the plant’s potential. If you dry it too fast, the flavor and aroma will suffer; drying it too slowly will encourage mold and lower quality.
Here are steps for drying a cannabis plant for a high quality result:
Step 1: Prepare a dry room. It is best to have a room dedicated to drying with nothing else in the room besides necessary items. When preparing your dry room, it is recommended that you add a dehumidifier (not necessary if AC keeps humidity at 60%), an air conditioning unit, and a source of air circulation, like a fan(s), to the room. The room should be pitch black (or as dark as possible), clean, around 60% humidity, and kept at a temperature of 60F, 15C.
Step 2: Trim all of the bigger fan leaves off. It’s recommended that this is completed right after the plant is harvested because the leaves still retain moisture and are much easier to cut off a plant. It also reduces the chance that the flowers will mold. If too many leaves are left on while a plant dries, the chlorophyll will seep into the flowers, decreasing flavor and aroma. Once completed, you can juice the leaves as long as they’re clean, or immediately dispose of them.
If there is any mold on the flowers, it must get cut out and disposed of prior to drying, or it will spread.
Step 3: Hang your plants. It’s best to hang your plants upside-down from a wire, net, or from a hanger rather than drying them on a screen or rack system. This keeps the flowers from becoming squashed and encourages even dry time. Be sure you don’t hang flowers too close to each other to allow airflow around them.
Step 4: Label each plant. Don't forget to write the name of the strain down and label each plant. As plants dry, they begin to lose a lot of their identifiable characteristics, especially true since most of their leaves have been removed. It will be easier to know which strain is which if you’ve grown several by clearly labelling them. It's also wise to group hangers of the same strain together and avoid hanging different strains on the same hanger. Painters tape and black Sharpie markers work well for labeling. Do this for each branch in case one falls off of a hanger.
Step 5: Wait. It usually takes about 10-14 days for a plant to lose all of its moisture. You want low temperatures (60F, 15C) and slow drying. Humidity should be 60% for the 14+ days it takes to dry. If you live in a place that has naturally high humidity, dry your flowers to 50% humidity. (Start at 60% and drop it down to 50% for the last couple of days.) If you live in a place that is naturally dry, stay at 60%.
--
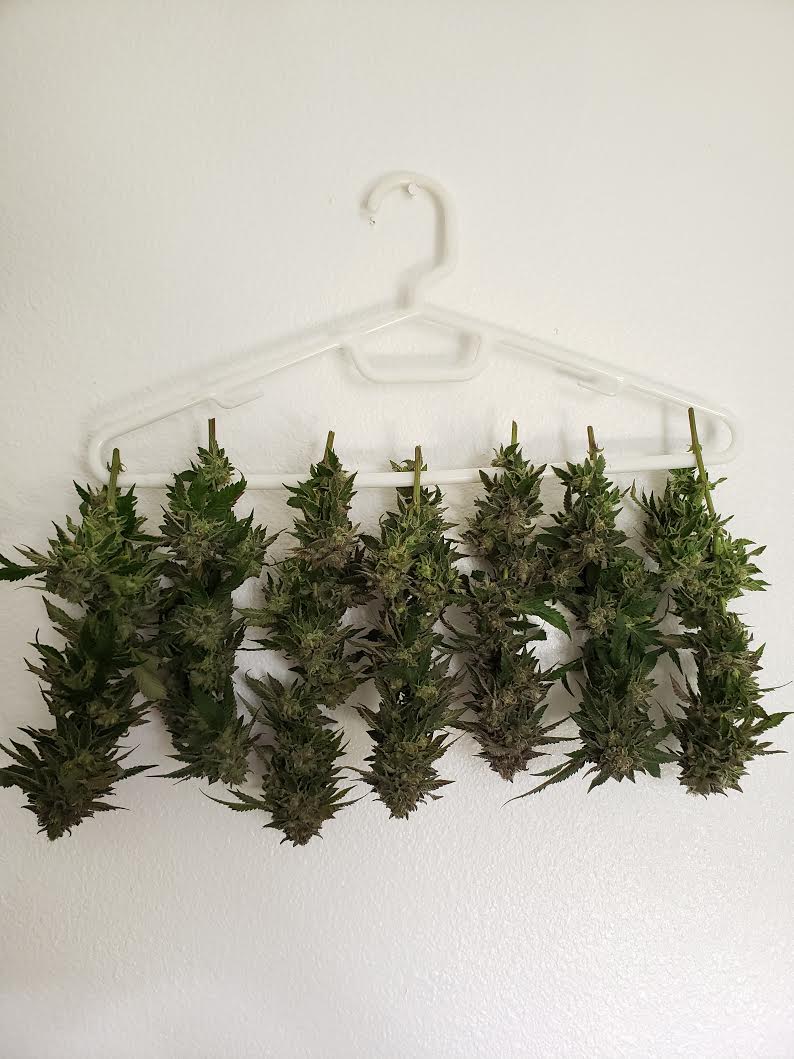 It usually takes about 10-14 days for a plant to lose all of its moisture
The size of the plant, the density of the flowers, the number of plants drying, and the weather will have an influence on how long it takes to dry. Check on your plants as they dry to ensure everything is progressing as it should. Keep your dehumidifier’s water reserve empty and regularly inspect your flowers for any mold. You know a plant is dry when its branches snap when bent. If they simply bend, they are not ready to be trimmed.
Back to top
Chapter 15: Trimming
Don’t skip this step
As soon as a cannabis plant finishes drying, the flowers need to be trimmed to prepare for curing. Although time-consuming, trimming is best done by hand. The goal is to remove any and all of the smaller leaves attached to the flowers. At this point, the only leaves that should still be intact are the sugar leaves, which grow directly out of the flowers and are coated in trichomes. Having a few pairs of clean scissors is wise as it doesn’t take long for scissors to become sticky and gummed up, which can make it hard to trim
and can damage flowers in the process.
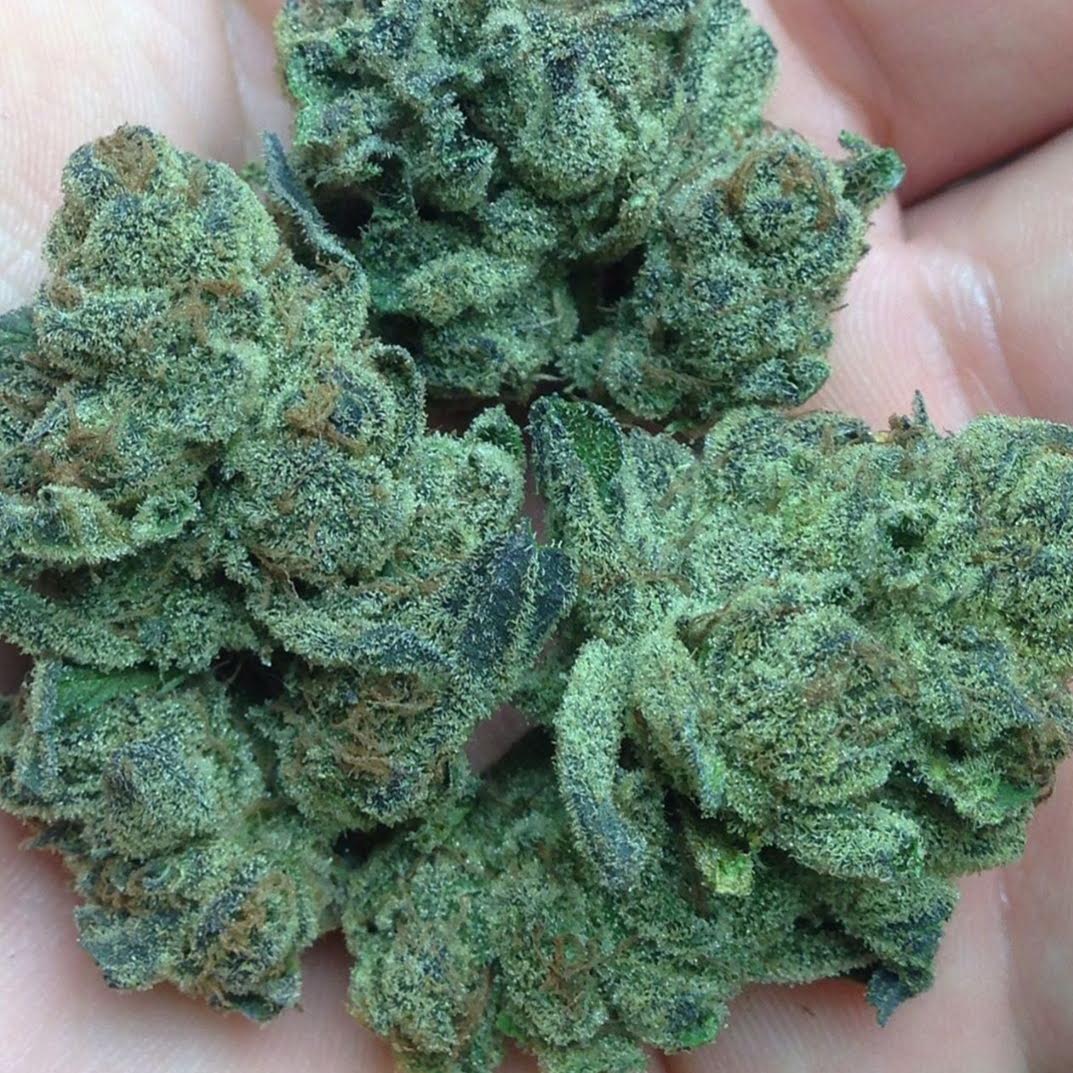 Trimming flowers is time-consuming but essential to maintain quality
Technique is usually based on preference and experience; however, having a few items on hand will make this job easier. They include:
- gloves
- clean, sharp scissors
- trimming tray
- container to hold trimmed flowers
- trash bag or can for branches, stems, and any unwanted sections
--
It’s helpful if you trim directly over a tray (a Trim Bin is recommended to catch the dry sift resin), allowing it to catch the leaves as they fall. Take the time to throw away stems and branches as you are trimming so they do not become mixed in with the sugar leaves, which can be used to press into oils, made into dry sift, used to make edibles, etc., or for other extraction purposes.
If the sugar leaves are not removed as soon as a plant is fully dry, aroma, flavor, and quality will decrease. Trimming is another way to get to know a plant and if you are training, pruning, and growing it efficiently.
Clean-Up Tip: Clean sticky hands with coconut oil and a paper towel, then wash with dish soap. Soak sticky scissors in rubbing alcohol or freeze them first, then wipe clean. Repeat as needed.
Back to top
Chapter 16: Curing
Takes 14-28 days, 60F, 15C
When all the trimming is complete, let your flowers cure in a glass jar for an additional 14-28 days for improved aroma and flavor. For larger amounts, 5-gallon food-grade buckets work well.
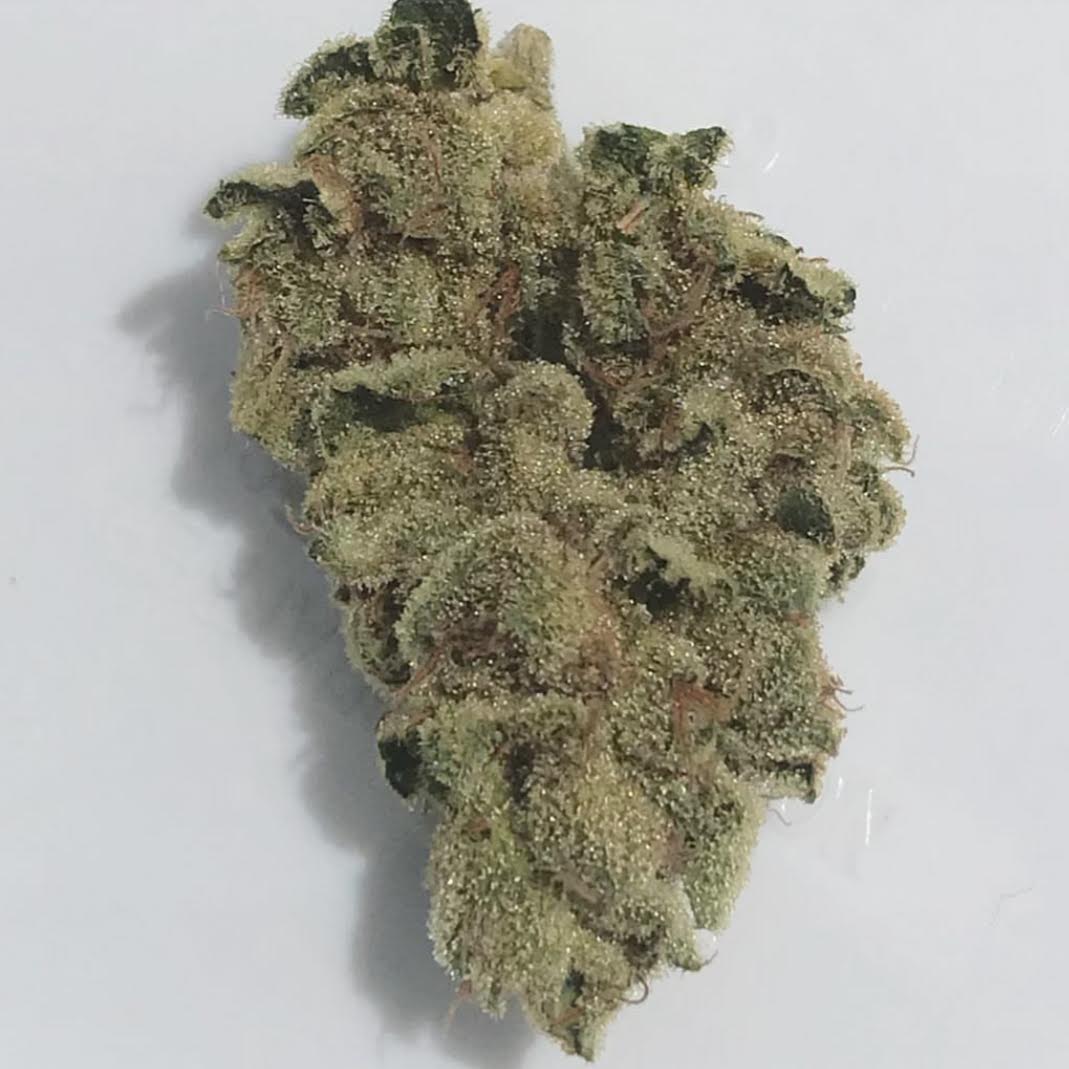 Waiting for flowers to cure can be hard, but is worth it
The following procedures are recommended:
Step 1: Put the flowers in a jar. Start by putting trimmed flowers in a glass jar or container. Flowers can be almost to the top of a container, but shouldn’t be squished. Make sure a lid is tightly secured on top.
Step 2: Let it breathe daily. As the flowers cure, make sure you open the lid of the container and gently reposition the flowers at least 1-2 times a day to let them breathe. This ensures even curing and discourages mold. Temperatures should be around 60F, 15C. You should notice smell increasing in strength as time passes.
Step 3: Wait 14-28 days. After about a month, the flowers are ready to enjoy. Continue to store extra cured flowers in a glass jar or container in a dark, cool, dry place (like a closet or cupboard). It’s best to consume flowers within 6 months of curing.
Step 4: Long-term storage. If you will need to store flowers for an extended period of time, longer than 6 months, freezing them will slow down the degradation of the trichomes. It's best to keep flowers in a Seal Meal bag with most of the oxygen removed. Make sure to remove as much air as possible; however, avoid squishing the flowers. There is a sweet spot that will allow you to do so when using a Seal Meal machine. Practice makes perfect.
The More You Know, The Better You'll Grow
The day finally arrives when your flowers are done, completely dried and cured. Over the past 3-4 months, you’ve spent countless hours in the garden, providing proper care for each and every plant. You’ve watched your garden grow from young baby plants into beautiful and mature flowering plants, witnessing every single stage of their development. You fed them, you fought bugs for them, you trimmed countless leaves from their branches, made them a part of your daily routine; and now all of your hard work is right there in your hands.
Once a good technique is learned and the results are experienced, it's a real motivator for continued accomplishments. Achieving quality organic flowers isn't easy, especially outdoors. It takes practice. It takes patience. Whether it's a complete success or a complete failure, it all depends on the effort and techniques used. It all depends on the gardener’s dedication.
The more consistent you are with watering, feeding, transplanting, protecting, and maintaining each and every plant you grow, the more likely you’ll be able to develop a cannabis plant’s full potential. Time might be one of the most important things you give to your garden. The time you put in will reflect the quality of the harvest and allow you to achieve those A+ results.
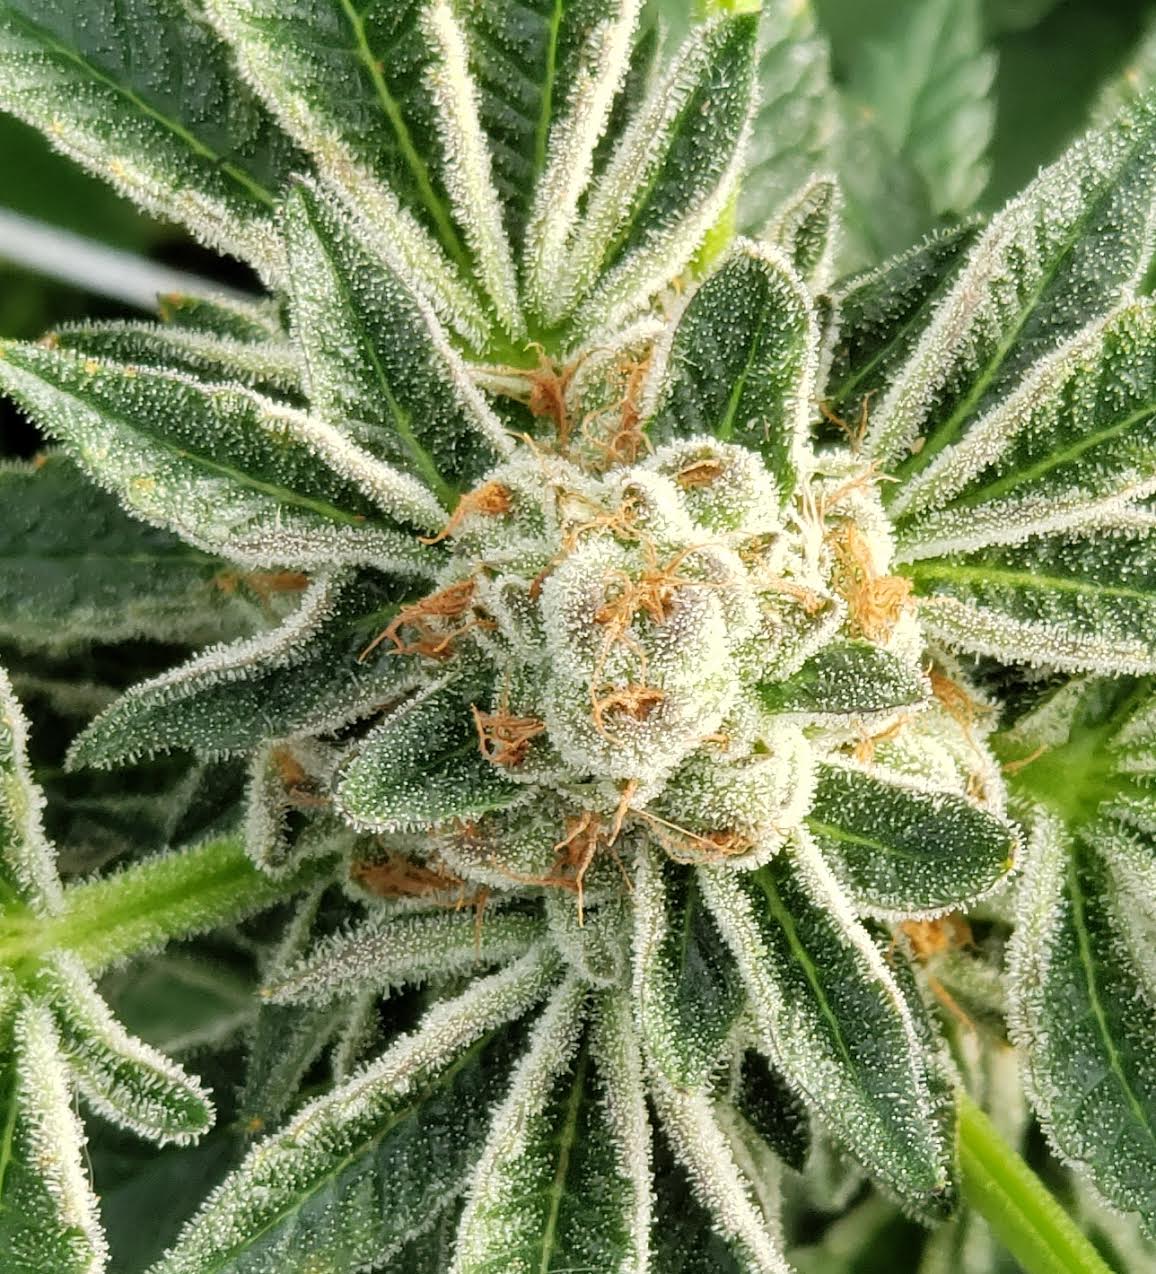 Achieve A+ results by putting in the time and effort
The first couple of attempts at growing cannabis may not be exactly perfect, but gradually, each jar you fill will get better and better, until you reach the day when you close the jar, genuinely satisfied with your work. Growing cannabis is not for everyone, but for those that develop the skills required, it can be life-changing for your health and well-being.
It’s important to emphasize that when it comes to growing cannabis, there is not a one size fits all approach. Growing quality cannabis is largely dependent on genetics, environment, attentiveness, and personal preference. The best way to learn how to grow is through trial and error, putting in the hours. To truly become a good grower, you will need to fine-tune your garden to harmoniously work with your surroundings and lifestyle.
Experience will be your best teacher.
When all is said and done, remember, as much as cannabis plants have a hands-on personality that reflect their owner’s care and attention, they can easily be overwhelmed and take on stress, and should be given time to do their plant-thing and grow. Human interaction should be beneficial to a plant, not interfering with its regular functions, merely playing the caretaker’s role: tending to a plant when it's needed, and when it’s not, standing by to witness the miracle that it is.
Just like most things in life, growing cannabis is a constant learning process. Techniques improve as technology and skill sets improve. The more time you put into not only your garden, but increasing your knowledge about cannabis and different growing techniques, the better off you will be. It is our intention in this book to provide practical, cutting-edge information for the new and experienced grower in the rapidly developing cannabis industry. Now that you have a better understanding of how to properly care for cannabis plants, aren’t you excited to see what you can grow?
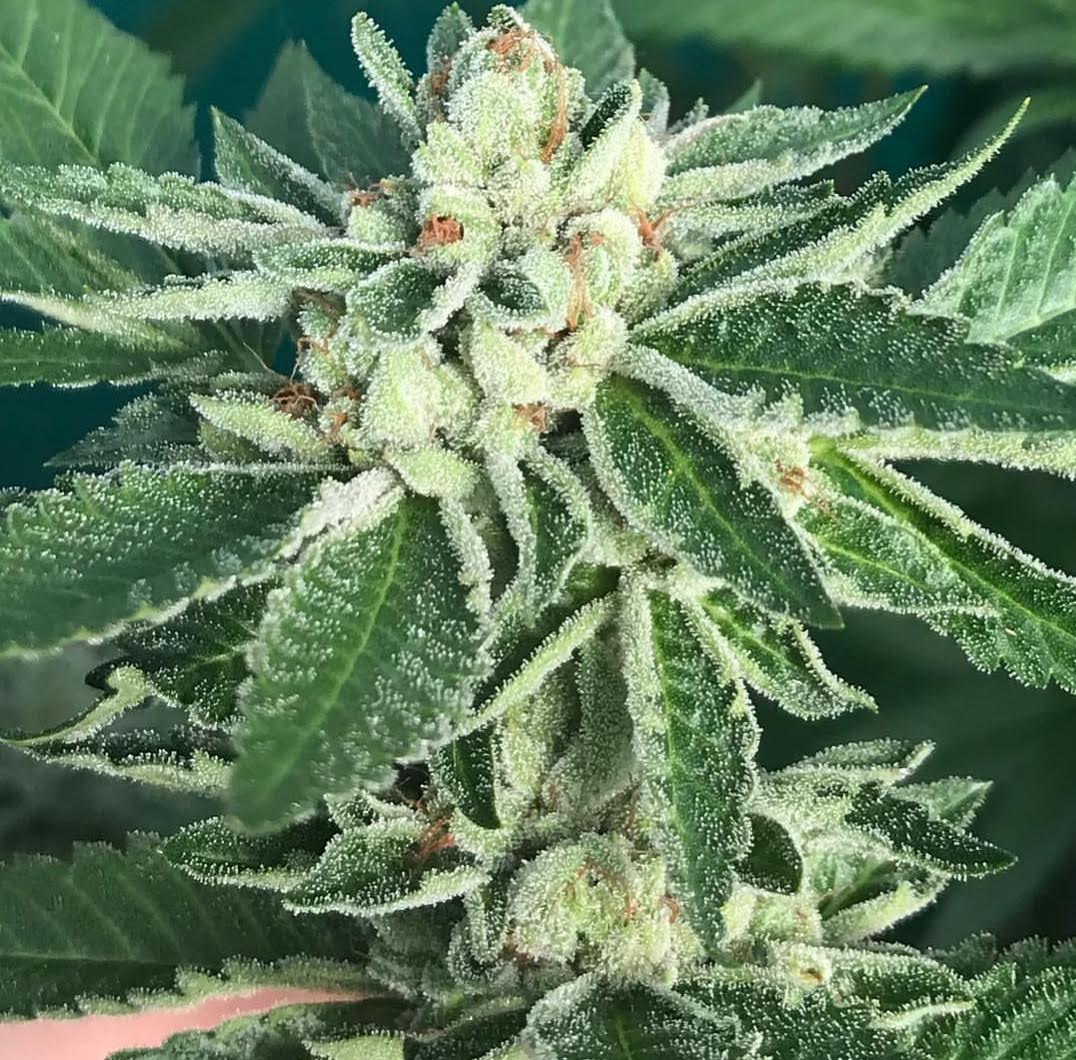 The legendary Crippy