
This is a general guide for plant growth by week. Cannabis strains vary depending on their genetics and may not follow this guide exactly. This is intended for organic cultivation for 8-12 week varieties.
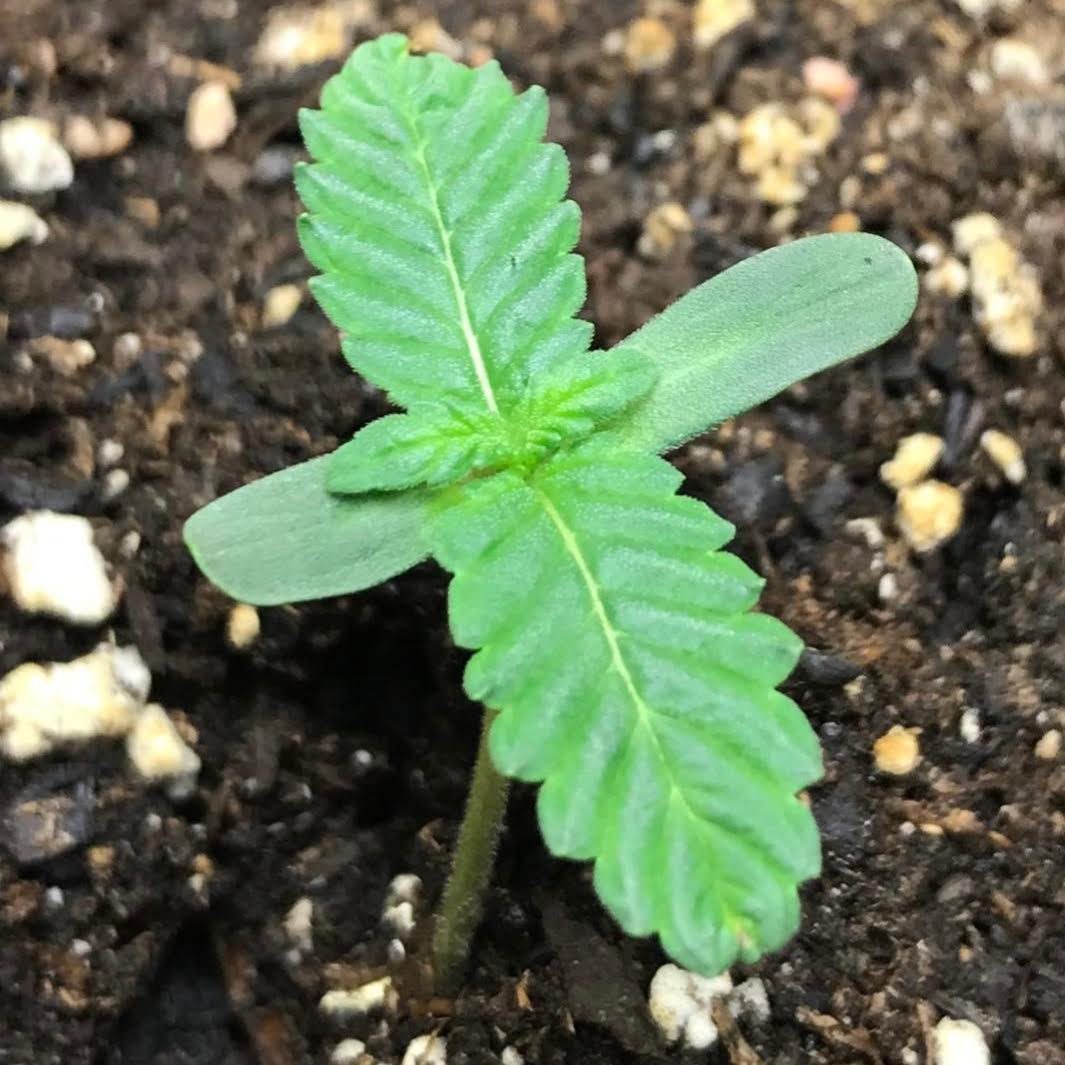
 Seedlings are fragile and need water + microbial inoculant only
What to expect: After a seed germinates and has a taproot 2-3 inches long, it needs to immediately be planted in soil and placed under a light. The first week of a seedling’s life is extremely delicate. Because smaller pots or solo cups are commonly used for seedlings, be careful not to let the soil dry out by providing even moisture. Using a misting spray bottle is recommended (1-2 gallon pump sprayer with URB or Recharge at ½ tsp per gallon). Seedlings’ root systems are small and it is easy to overwater them at this stage, which will cause damping off. Make sure to pick up small pots or solo cups to determine if you need to water. If the seed’s shell is still firmly attached and cannot be removed with a gentle touch, leave it on until the plant gets bigger (3-5 days).
During the first week of veg, most of a seedling’s energy is put into developing a strong root system. There is not much happening with leaf formation, but you may notice new leaves beginning to form. Check on it 1-2 times a day to make sure it is happy and the soil is adequately watered.
With a good soil mixture, you do not need to feed a seedling during the first few weeks.
Seedlings are fragile and need water + microbial inoculant only
What to expect: After a seed germinates and has a taproot 2-3 inches long, it needs to immediately be planted in soil and placed under a light. The first week of a seedling’s life is extremely delicate. Because smaller pots or solo cups are commonly used for seedlings, be careful not to let the soil dry out by providing even moisture. Using a misting spray bottle is recommended (1-2 gallon pump sprayer with URB or Recharge at ½ tsp per gallon). Seedlings’ root systems are small and it is easy to overwater them at this stage, which will cause damping off. Make sure to pick up small pots or solo cups to determine if you need to water. If the seed’s shell is still firmly attached and cannot be removed with a gentle touch, leave it on until the plant gets bigger (3-5 days).
During the first week of veg, most of a seedling’s energy is put into developing a strong root system. There is not much happening with leaf formation, but you may notice new leaves beginning to form. Check on it 1-2 times a day to make sure it is happy and the soil is adequately watered.
With a good soil mixture, you do not need to feed a seedling during the first few weeks.
 Week 2 is when a seedling begins developing a strong root system
What to expect: During the second week of veg, most of a seedling’s energy continues to be put into developing a strong root system. New leaves begin to form and the plant begins to grow in height. It still does not need to be fed, but does need consistent attention to make sure it is properly watered and developing correctly.
Week 2 is when a seedling begins developing a strong root system
What to expect: During the second week of veg, most of a seedling’s energy continues to be put into developing a strong root system. New leaves begin to form and the plant begins to grow in height. It still does not need to be fed, but does need consistent attention to make sure it is properly watered and developing correctly.
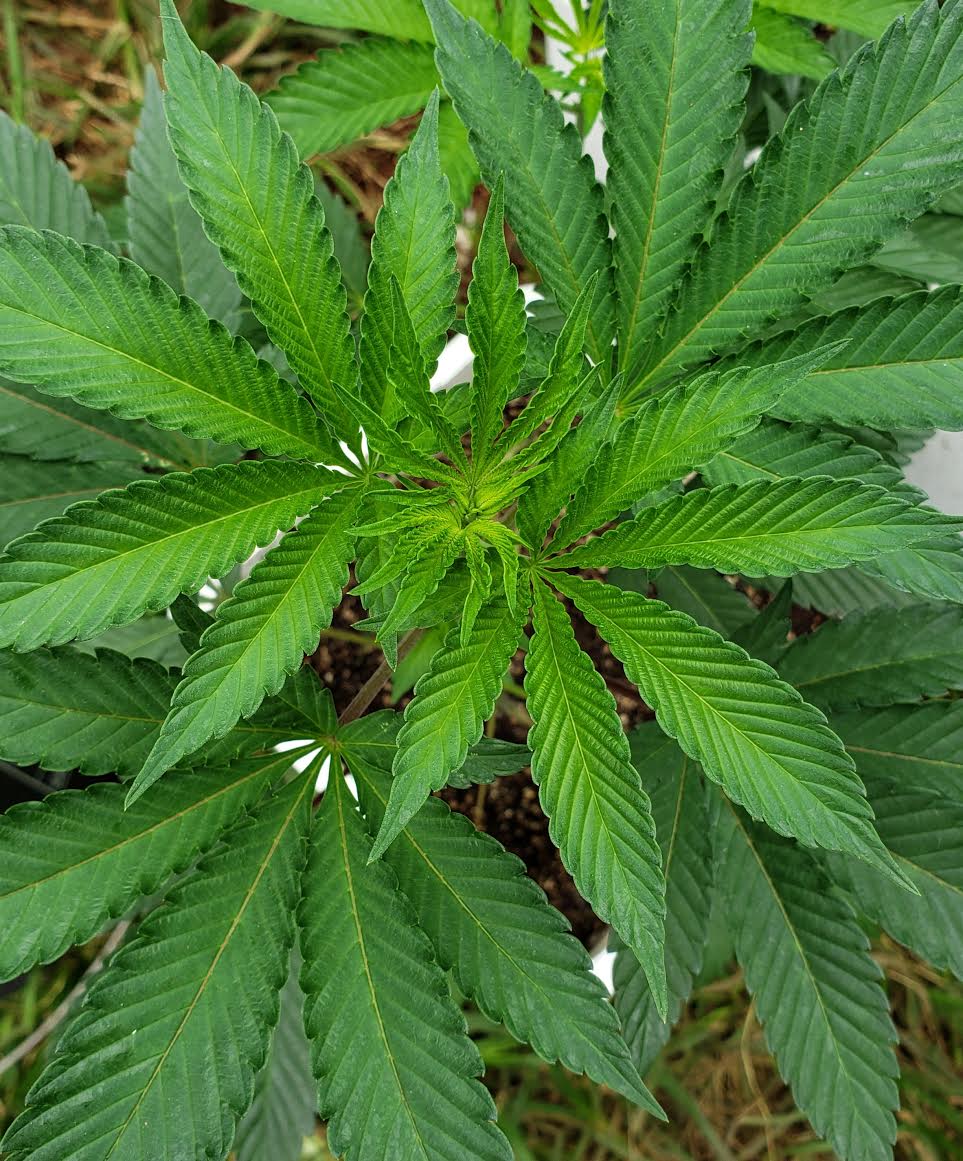
 Week 3; seedlings start out slowly but will soon begin to boost
What to expect: During the third week of veg, the root system has grown and leaves are also increasing in number and size; the plant continues to grow in height. It still does not need to be fed, but needs consistent attention to make sure it is properly watered and developing correctly. Seeds tend to start out slowly in the beginning, but start to boost around week 4.
Week 3; seedlings start out slowly but will soon begin to boost
What to expect: During the third week of veg, the root system has grown and leaves are also increasing in number and size; the plant continues to grow in height. It still does not need to be fed, but needs consistent attention to make sure it is properly watered and developing correctly. Seeds tend to start out slowly in the beginning, but start to boost around week 4.
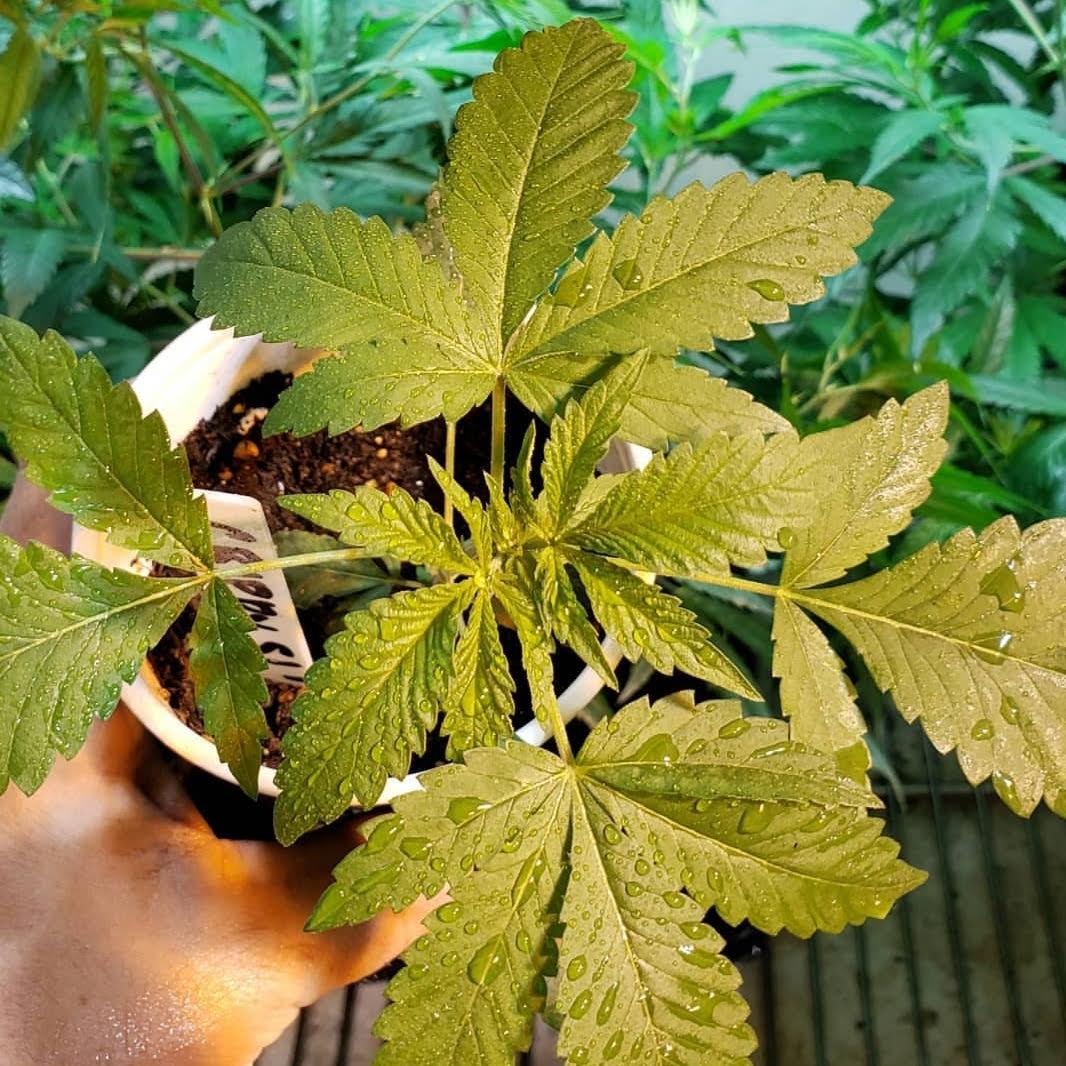
 During week 5, you should notice increased growth after transplanting
What to expect: During the fifth week of veg, you should notice increased growth after transplanting. The plant will increase in height as well as in the number of leaves and branches. Make sure to check soil moisture regularly. If needed, foliar feed or topdress. Continue cleaning and spraying for pests and pathogens as a preventative. If you plan on transitioning to bloom around week 6, take clones.
During week 5, you should notice increased growth after transplanting
What to expect: During the fifth week of veg, you should notice increased growth after transplanting. The plant will increase in height as well as in the number of leaves and branches. Make sure to check soil moisture regularly. If needed, foliar feed or topdress. Continue cleaning and spraying for pests and pathogens as a preventative. If you plan on transitioning to bloom around week 6, take clones.
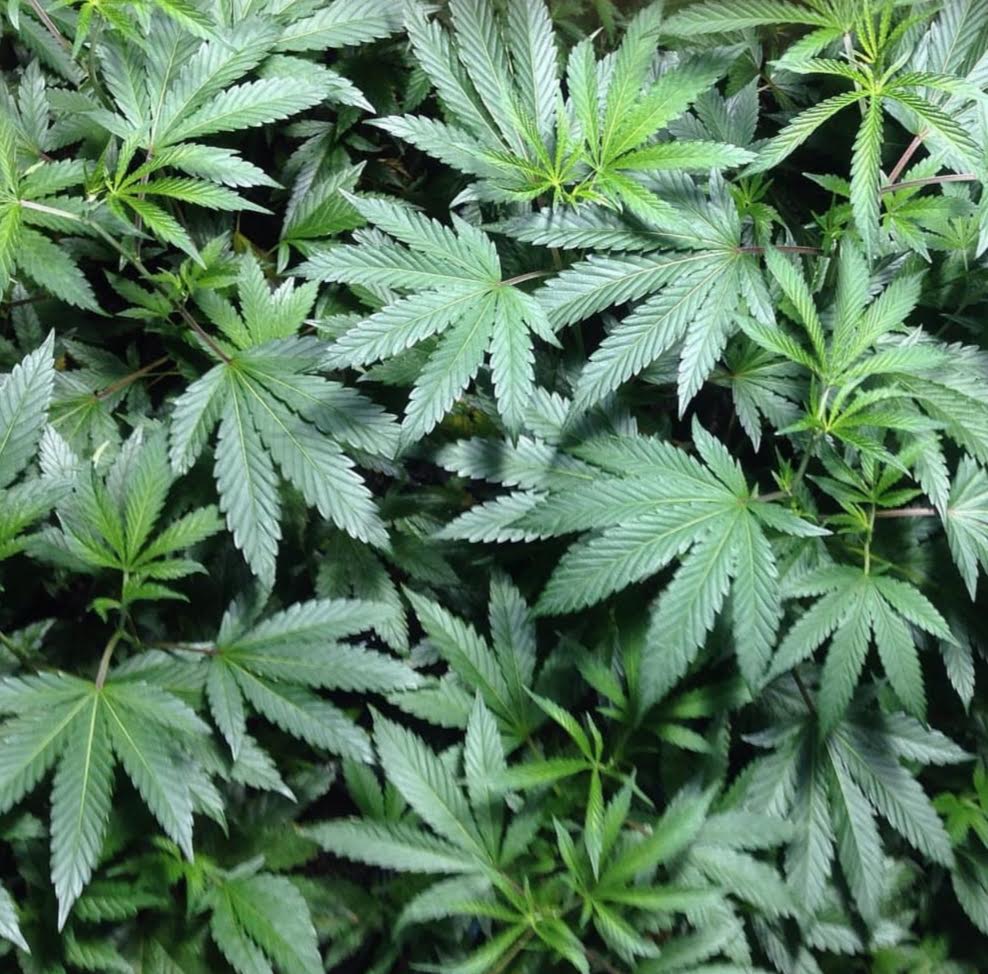
 Several of these strains are the perfect size for bloom
What to expect: During the sixth week of veg, a plant is still focused on producing foliage; it will increase in size as well as in the number of leaves and branches. Make sure to check soil moisture regularly. If you’re planning to transition to bloom, do not foliar feed or clone. Continue cleaning and spraying for pests and pathogens as a preventative. If you will continue to veg to increase the size of a plant, you may need to transplant it to a bigger container (5-7 gallon). Continue to pinch tops every 10-12 days if you see the strain is reacting well to the training. If you are planning on flipping to bloom, prepare the flower bed or container that you will flower in, then transplant.
Several of these strains are the perfect size for bloom
What to expect: During the sixth week of veg, a plant is still focused on producing foliage; it will increase in size as well as in the number of leaves and branches. Make sure to check soil moisture regularly. If you’re planning to transition to bloom, do not foliar feed or clone. Continue cleaning and spraying for pests and pathogens as a preventative. If you will continue to veg to increase the size of a plant, you may need to transplant it to a bigger container (5-7 gallon). Continue to pinch tops every 10-12 days if you see the strain is reacting well to the training. If you are planning on flipping to bloom, prepare the flower bed or container that you will flower in, then transplant.
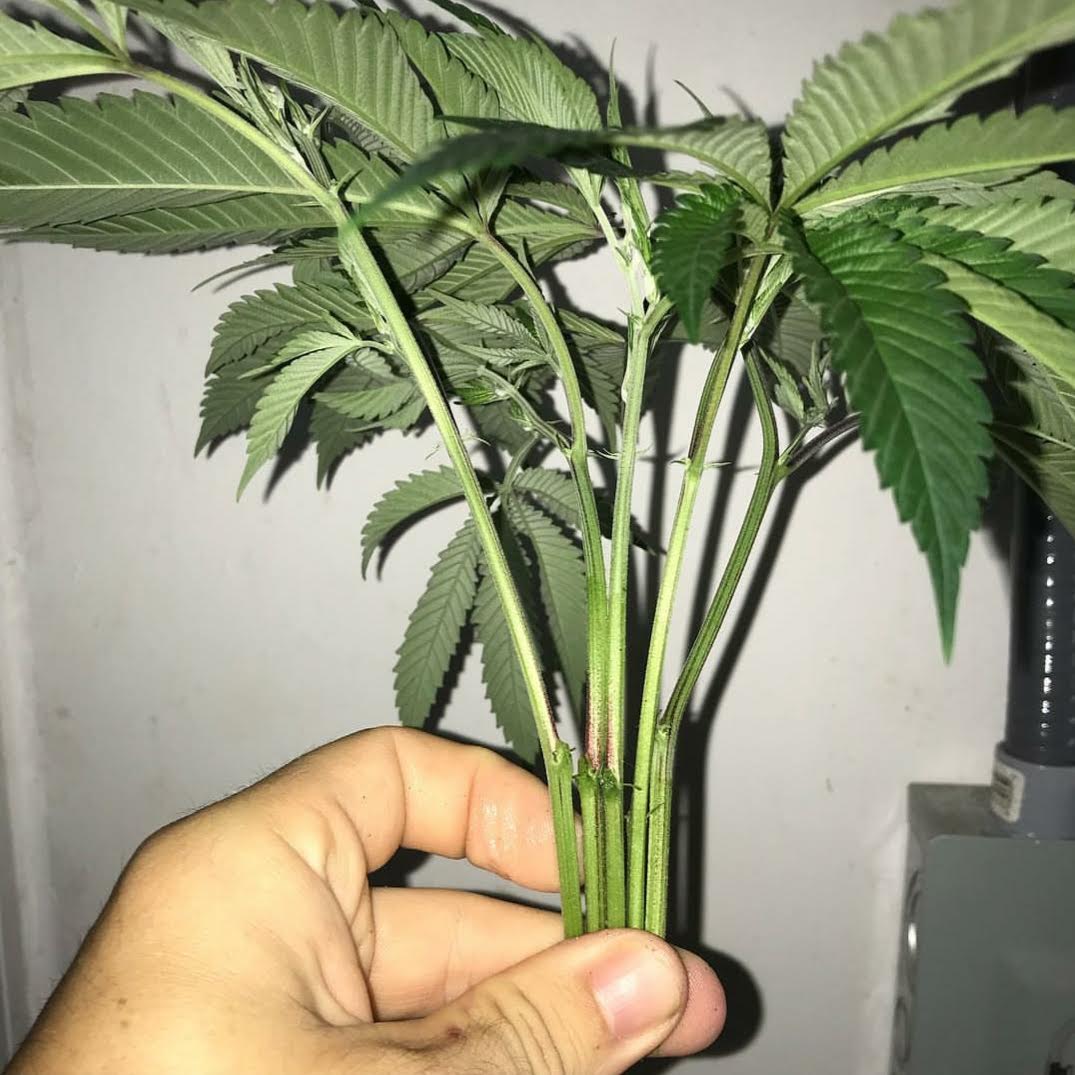 6-8” cuttings from healthy Mothers are best
What to expect: After you take a cutting, place it into a pre-soaked rooting cube and then in a cloning tray under a dome. Space cuttings to give them room and air flow, skipping rows. Mist with water. Keep the dome completely sealed. Check on a cutting once a day to make sure it’s not wilting and it has enough moisture. Sometimes a room will be more humid in certain places or have increased light intensity. Moving the clones to find the perfect spot in a room for rooting is recommended if you’re struggling with getting them to root. Observe for about 1 week to determine if a new location should be tried. Humidity levels should be adequate and clones need to be exposed to proper light levels. A clone should take around 10-14 days to root, but some varieties may take longer.
6-8” cuttings from healthy Mothers are best
What to expect: After you take a cutting, place it into a pre-soaked rooting cube and then in a cloning tray under a dome. Space cuttings to give them room and air flow, skipping rows. Mist with water. Keep the dome completely sealed. Check on a cutting once a day to make sure it’s not wilting and it has enough moisture. Sometimes a room will be more humid in certain places or have increased light intensity. Moving the clones to find the perfect spot in a room for rooting is recommended if you’re struggling with getting them to root. Observe for about 1 week to determine if a new location should be tried. Humidity levels should be adequate and clones need to be exposed to proper light levels. A clone should take around 10-14 days to root, but some varieties may take longer.
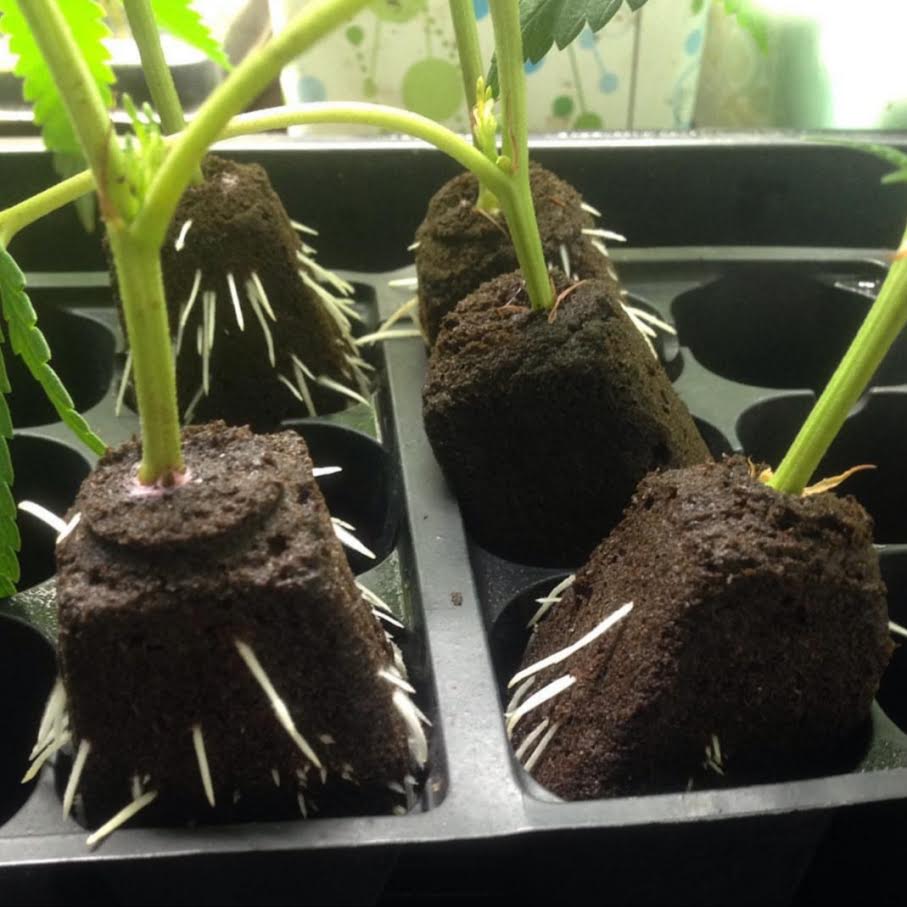 As soon as you notice nice root development, begin to harden off
What to expect: As soon as you notice roots poking out of a rooting cube, begin opening the dome vents. ¼ adjustments work well. It should only take a few days to acclimate a plant to the new humidity level of the room. The healthier the Mother plant was when you took a cutting, the healthier the clone will be.
As soon as you notice nice root development, begin to harden off
What to expect: As soon as you notice roots poking out of a rooting cube, begin opening the dome vents. ¼ adjustments work well. It should only take a few days to acclimate a plant to the new humidity level of the room. The healthier the Mother plant was when you took a cutting, the healthier the clone will be.
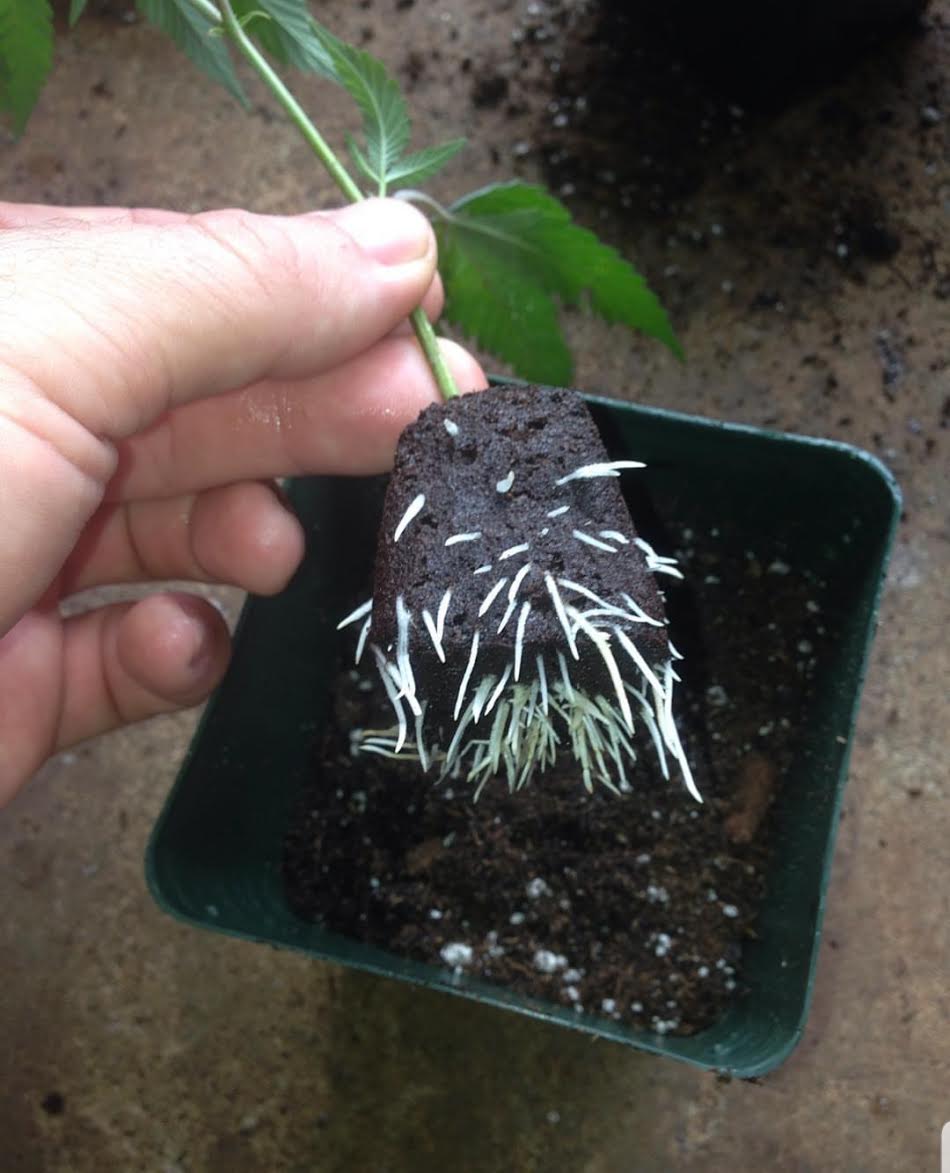 Ready for soil!
If a plant is already rooted and acclimated to the room at this point, you can transplant it into a bigger 3-5 gallon container. After transplanting a clone from a dome into soil, check on it every 4 hours for the first day to make sure it doesn’t wilt. If it wilts, place a dome or plastic container over the plant and wait a few days. It should come back within 1-3 days or it likely won’t come back at all. Foliar feeding and preventative spraying can begin after it’s planted in soil. During this time, a plant will be focusing its energy on developing a strong root system. This may also be the week that requires you to change the light source to a stronger fixture.
Ready for soil!
If a plant is already rooted and acclimated to the room at this point, you can transplant it into a bigger 3-5 gallon container. After transplanting a clone from a dome into soil, check on it every 4 hours for the first day to make sure it doesn’t wilt. If it wilts, place a dome or plastic container over the plant and wait a few days. It should come back within 1-3 days or it likely won’t come back at all. Foliar feeding and preventative spraying can begin after it’s planted in soil. During this time, a plant will be focusing its energy on developing a strong root system. This may also be the week that requires you to change the light source to a stronger fixture.
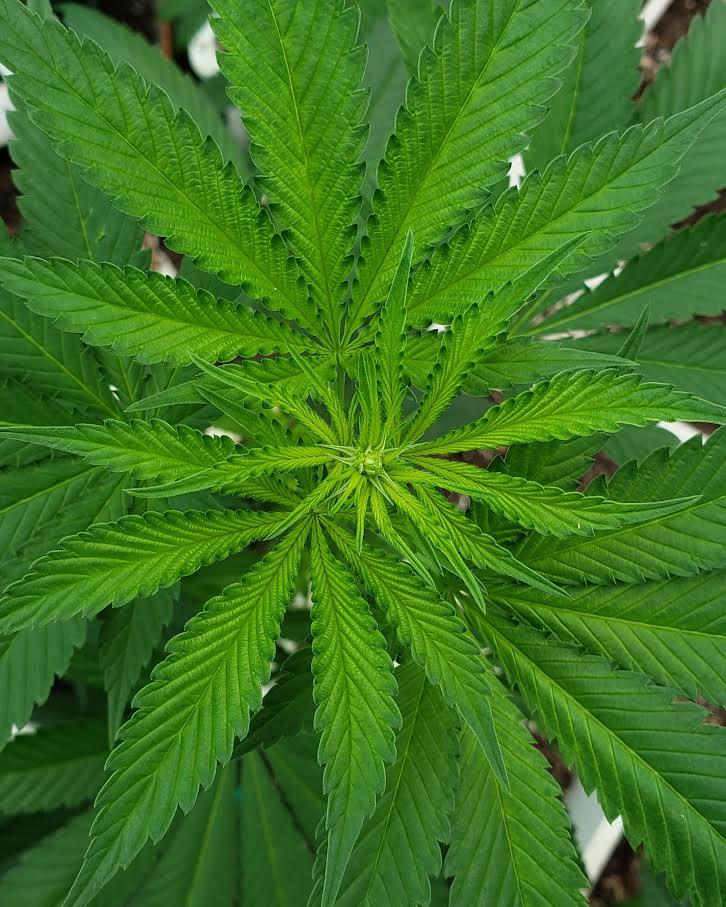
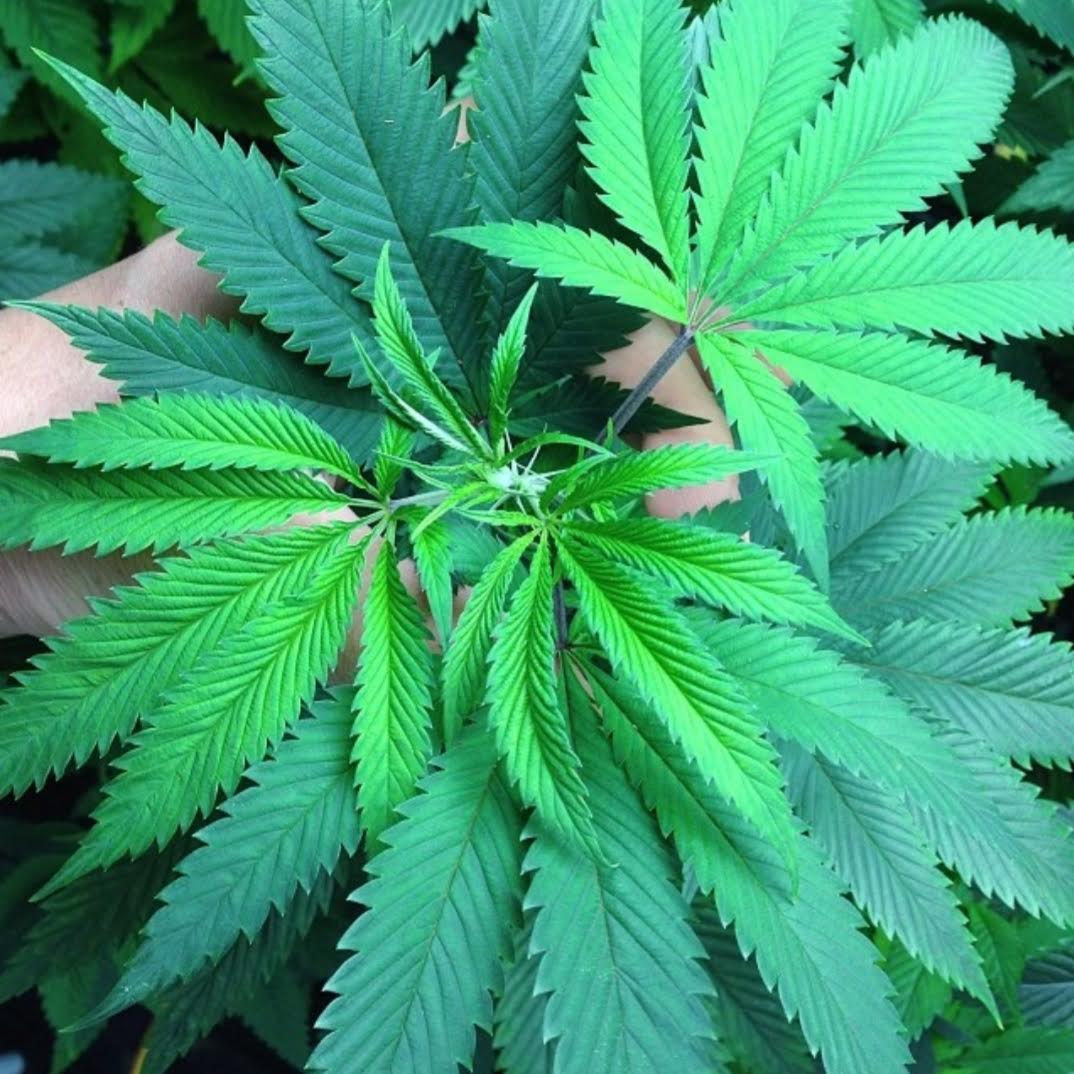 New leaves and branches should begin developing quickly
What to expect: During the third week of veg, a plant is focused on leaf and branch production. Pinch tops every 10-12 days if you see the strain is reacting well to the training. Discontinuing pinching 2-3 weeks before flowering to allow a plant enough time to recover. Make sure to check soil moisture regularly. Continue cleaning and spraying for pests and pathogens as a preventative. Staking may be needed at this point. If desired, and a plant is big enough, take clones.
New leaves and branches should begin developing quickly
What to expect: During the third week of veg, a plant is focused on leaf and branch production. Pinch tops every 10-12 days if you see the strain is reacting well to the training. Discontinuing pinching 2-3 weeks before flowering to allow a plant enough time to recover. Make sure to check soil moisture regularly. Continue cleaning and spraying for pests and pathogens as a preventative. Staking may be needed at this point. If desired, and a plant is big enough, take clones.
 Decide if you want to keep vegging or flower
What to expect: During the fourth week of veg, a plant continues to focus on growth and foliage production. Make sure to check soil moisture regularly. Continue cleaning and spraying for pests and pathogens as a preventative. Discontinue foliar feeding as you prepare for bloom.
Decide if you want to keep vegging or flower
What to expect: During the fourth week of veg, a plant continues to focus on growth and foliage production. Make sure to check soil moisture regularly. Continue cleaning and spraying for pests and pathogens as a preventative. Discontinue foliar feeding as you prepare for bloom.
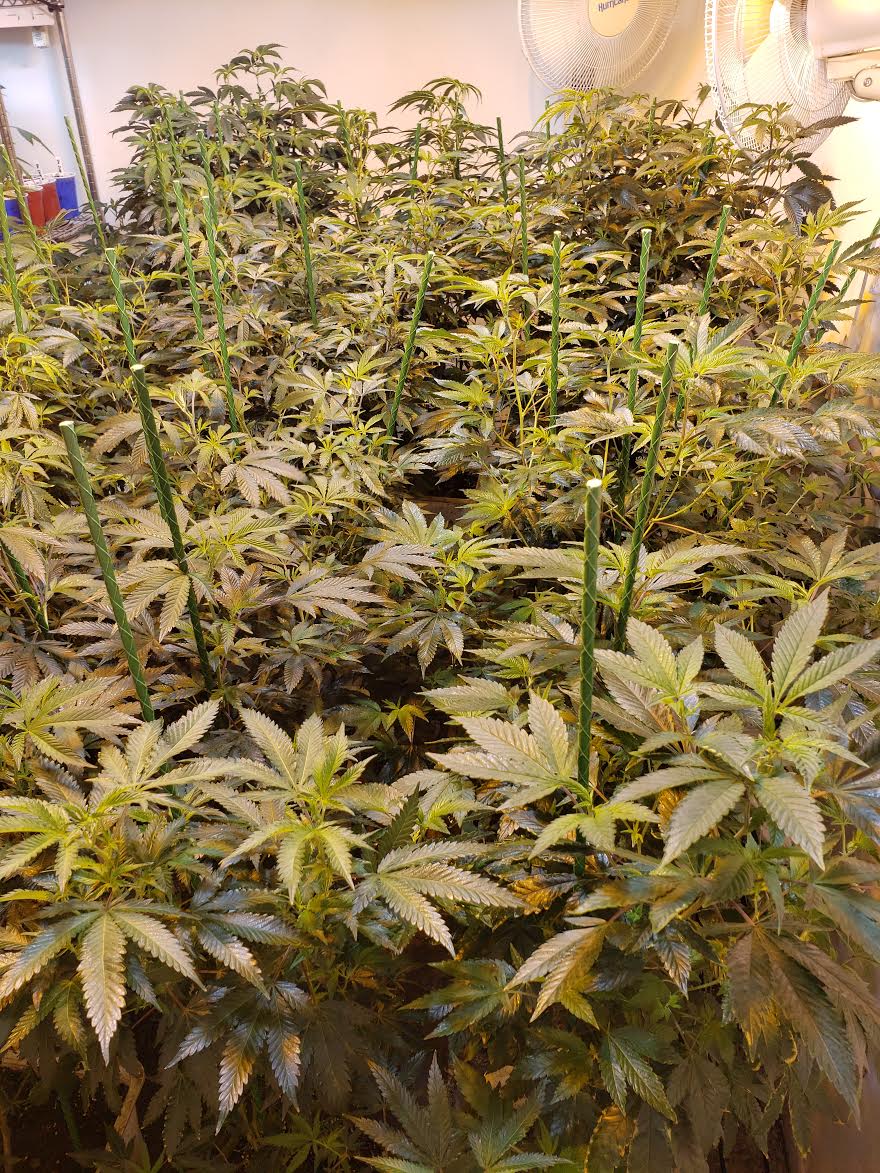
 Week 1 of flower, plants are adjusting to their new light cycle
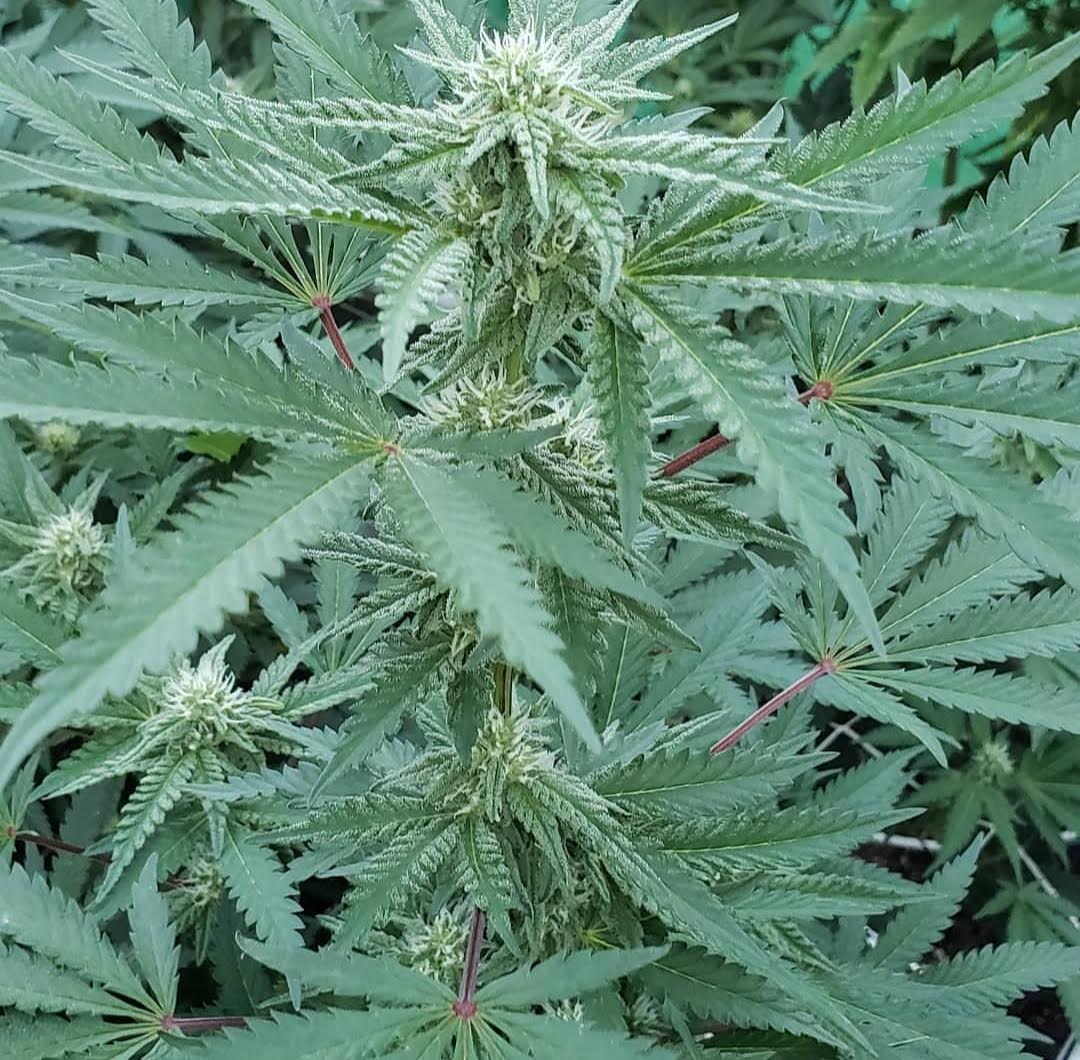
 Week 2 is usually when plants show their gender; pictured is a male
What to expect: During the second week of bloom, hairs will noticeably start developing. Branches and leaves will still be growing and developing. If you haven’t lollipopped at this point, it’s a good time to do so. This will likely be the week that a plant will show if it is a male or female. Determine if topdressing is needed and when to spray. Continue with daily walkthroughs and spraying for pests and pathogens as a preventative.
Week 2 is usually when plants show their gender; pictured is a male
What to expect: During the second week of bloom, hairs will noticeably start developing. Branches and leaves will still be growing and developing. If you haven’t lollipopped at this point, it’s a good time to do so. This will likely be the week that a plant will show if it is a male or female. Determine if topdressing is needed and when to spray. Continue with daily walkthroughs and spraying for pests and pathogens as a preventative.
 Noticeable changes happen around week 3 of flower
What to expect: During the third week of bloom, a plant will go through noticeable changes. Pistils will develop quickly and a plant will be focused on flower production. If you notice any leaves that are blocking or rubbing against major flower sites, adjust or remove them. Determine if topdressing is needed and when to spray. Continue with daily walkthroughs.
Noticeable changes happen around week 3 of flower
What to expect: During the third week of bloom, a plant will go through noticeable changes. Pistils will develop quickly and a plant will be focused on flower production. If you notice any leaves that are blocking or rubbing against major flower sites, adjust or remove them. Determine if topdressing is needed and when to spray. Continue with daily walkthroughs.
 At week 4, discontinue the use of organic sprays for pests and pathogens
What to expect: During the fourth week of bloom, a plant will be focused on flower production. As soon as you notice bract formation, be extra diligent about searching for pests and diseases. Determine if topdressing is needed and continue with daily walkthroughs. Discontinue the use of organic sprays for pests and diseases.
At week 4, discontinue the use of organic sprays for pests and pathogens
What to expect: During the fourth week of bloom, a plant will be focused on flower production. As soon as you notice bract formation, be extra diligent about searching for pests and diseases. Determine if topdressing is needed and continue with daily walkthroughs. Discontinue the use of organic sprays for pests and diseases.
 Week 6 of flower
What to expect: During the sixth week of bloom, hairs will begin to change color to orange. Be extra diligent about searching for pests and pathogens. Determine if topdressing is needed. If a strain has a 10-12 week bloom time, this will be the week to discontinue topdressing to allow full breakdown of nutrients before harvest. Continue with daily walkthroughs.
Week 6 of flower
What to expect: During the sixth week of bloom, hairs will begin to change color to orange. Be extra diligent about searching for pests and pathogens. Determine if topdressing is needed. If a strain has a 10-12 week bloom time, this will be the week to discontinue topdressing to allow full breakdown of nutrients before harvest. Continue with daily walkthroughs.
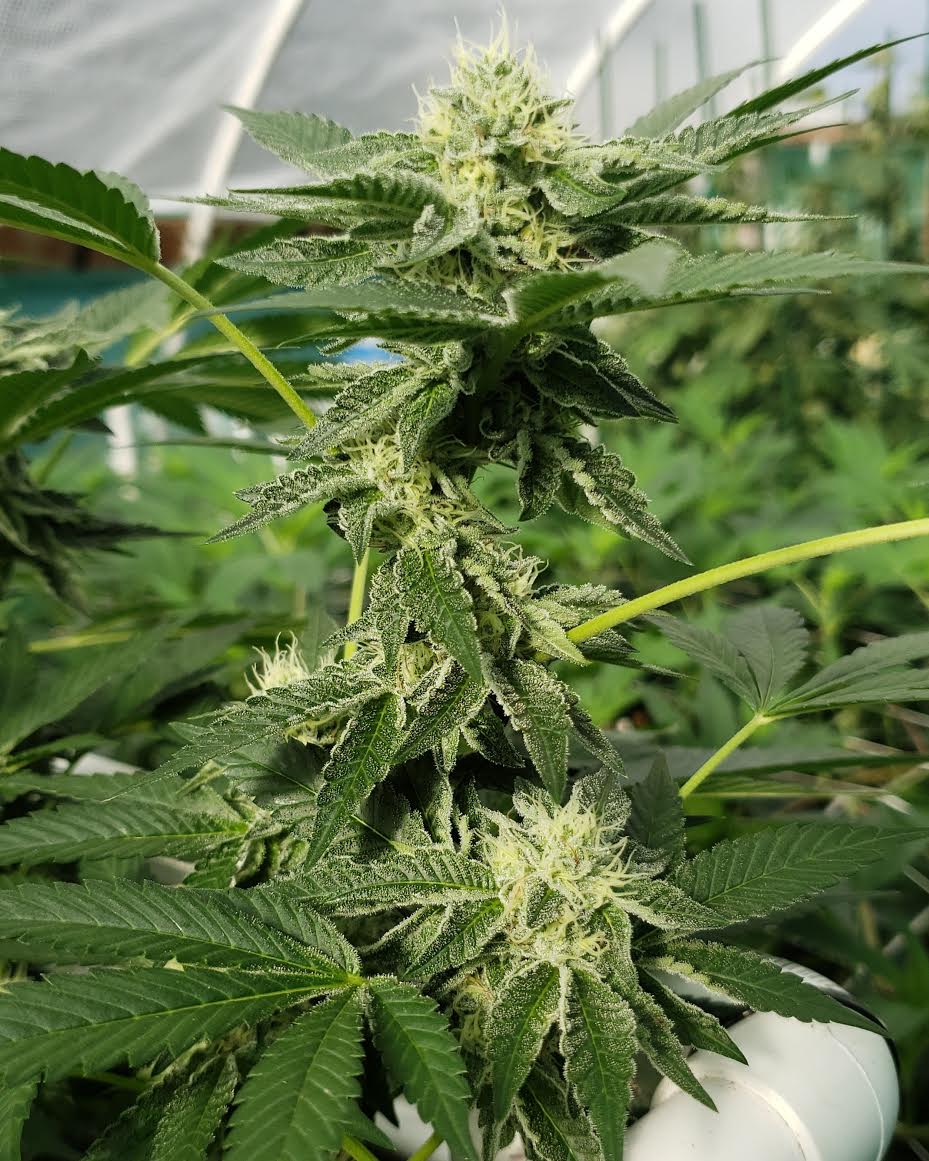
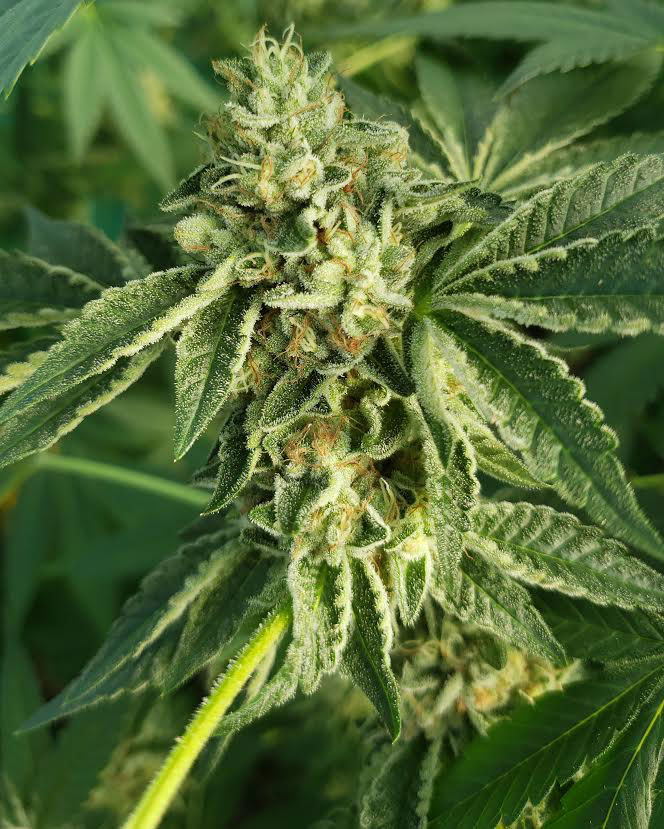
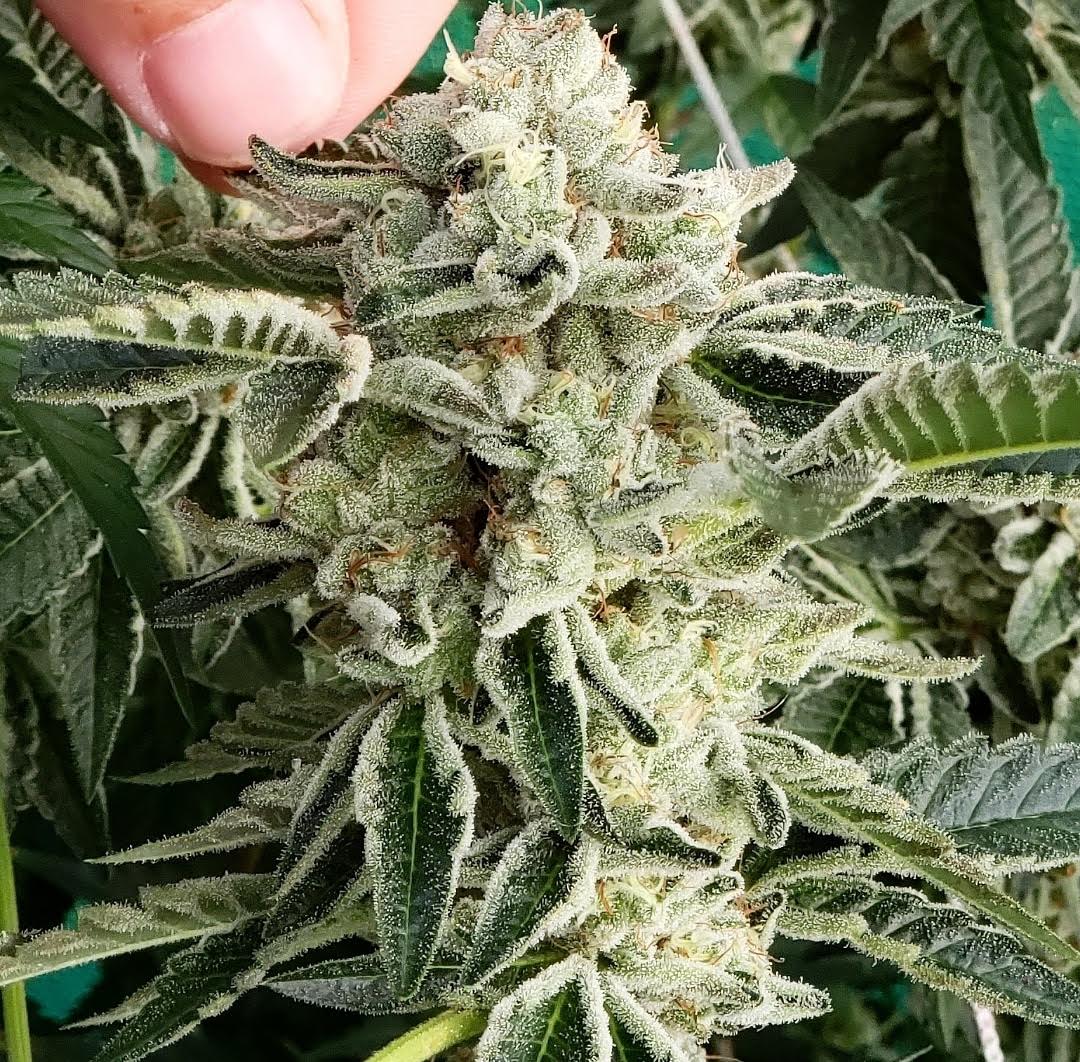
 At week 7, several strains should be only fed a light tea or water
What to expect: During the seventh week of bloom, flowers will be set and filled in nicely. Trichomes should be noticeable all over the flowers, giving a plant great aromatics. Be extra diligent about searching for pests and pathogens. Continue with daily walkthroughs. If you have a short flowering variety that finishes in 8 weeks, feed only a light tea, LAB (EM-1) or enzymes, or water.
At week 7, several strains should be only fed a light tea or water
What to expect: During the seventh week of bloom, flowers will be set and filled in nicely. Trichomes should be noticeable all over the flowers, giving a plant great aromatics. Be extra diligent about searching for pests and pathogens. Continue with daily walkthroughs. If you have a short flowering variety that finishes in 8 weeks, feed only a light tea, LAB (EM-1) or enzymes, or water.
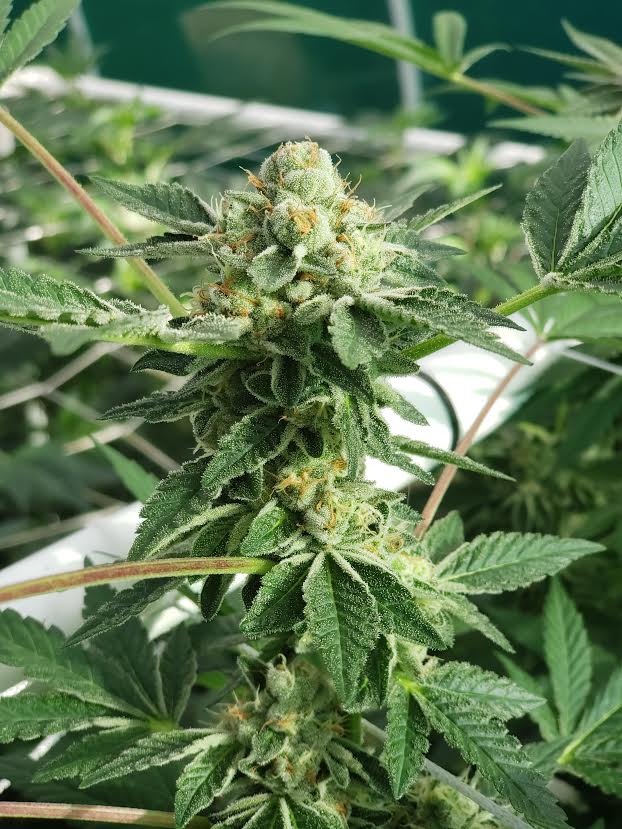
 At week 8 of flower, most strains are either done or require no food
What to expect: During the eighth week of bloom, flowers will be nearing completion for some varieties. Flowers should be dense, frosty, and fragrant. Be extra diligent searching for pests and pathogens. Continue with daily walkthroughs. If you have a short flowering variety that finishes in 8 weeks, feed only a light tea or water. Check every day for signs of being finished, and keep a close eye on the weather. Be prepared to harvest. Discontinue giving liquids 48 hours before harvest.
At week 8 of flower, most strains are either done or require no food
What to expect: During the eighth week of bloom, flowers will be nearing completion for some varieties. Flowers should be dense, frosty, and fragrant. Be extra diligent searching for pests and pathogens. Continue with daily walkthroughs. If you have a short flowering variety that finishes in 8 weeks, feed only a light tea or water. Check every day for signs of being finished, and keep a close eye on the weather. Be prepared to harvest. Discontinue giving liquids 48 hours before harvest.
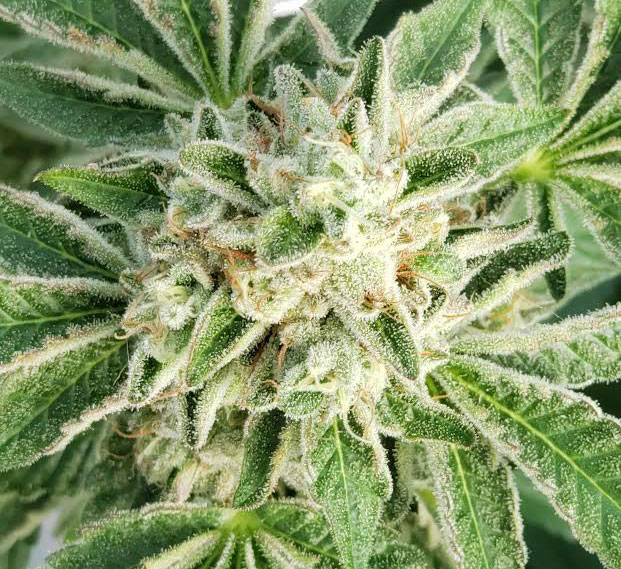
 At week 9 of flower, be extra diligent about searching for pests
What to expect: During the ninth week of bloom, flowers will be nearing completion for some varieties. Flowers should be dense, frosty, and fragrant. Be extra diligent about searching for pests and disease. Continue with daily walkthroughs. If you have a short flowering variety that finishes in 10-11 weeks, give no tea, just water and LAB or enzymes. Check every day for signs of being finished, and keep a close eye on the weather. Be prepared to harvest. Discontinue giving liquids 48 hours before harvest.
At week 9 of flower, be extra diligent about searching for pests
What to expect: During the ninth week of bloom, flowers will be nearing completion for some varieties. Flowers should be dense, frosty, and fragrant. Be extra diligent about searching for pests and disease. Continue with daily walkthroughs. If you have a short flowering variety that finishes in 10-11 weeks, give no tea, just water and LAB or enzymes. Check every day for signs of being finished, and keep a close eye on the weather. Be prepared to harvest. Discontinue giving liquids 48 hours before harvest.
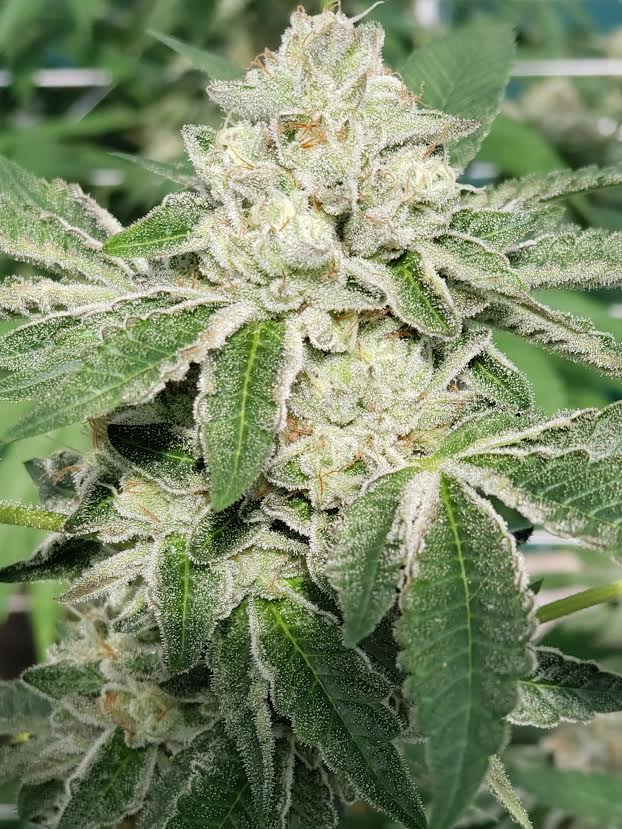
 At week 10, be ready to harvest most Indica-dominant strains
What to expect: During the tenth to twelfth week of bloom, flowers will be nearing completion for several varieties. Flowers should be dense, frosty, and fragrant. Be extra diligent about searching for pests and pathogens. Continue with daily walkthroughs. If you have a short flowering variety that finishes in 10-12 weeks, feed only a light tea or water. Check every day for signs of being finished, and keep a close eye on the weather. Be prepared to harvest. Discontinue giving liquids 48 hours before harvest.
At week 10, be ready to harvest most Indica-dominant strains
What to expect: During the tenth to twelfth week of bloom, flowers will be nearing completion for several varieties. Flowers should be dense, frosty, and fragrant. Be extra diligent about searching for pests and pathogens. Continue with daily walkthroughs. If you have a short flowering variety that finishes in 10-12 weeks, feed only a light tea or water. Check every day for signs of being finished, and keep a close eye on the weather. Be prepared to harvest. Discontinue giving liquids 48 hours before harvest.